
1. Introduction
This user manual provides detailed instructions for the ULTECHNOVO Digital Thermostat Module. This versatile temperature controller is designed for precise temperature management in various applications, including greenhouses, boilers, and hatching systems. It features a dual digital display for real-time temperature monitoring and setting, along with robust control capabilities for both heating and cooling modes.
The module incorporates an embedded Microcontroller Unit (MCU) for intelligent and low-power operation, ensuring stable performance and consistency. It also includes an automatic memory function for power-off settings, retaining your configurations even after power interruptions.

Figure 1: ULTECHNOVO Digital Thermostat Module with connected NTC10K waterproof sensor.
2. Setup and Installation
Before installation, ensure the power supply is disconnected. The module requires a DC 12V input voltage. Proper wiring is crucial for safe and effective operation.
2.1 Component Identification
- Digital Displays: Two 3-digit LED displays for current and set temperatures.
- Control Buttons: Buttons for setting parameters (SET, UP, DOWN).
- Relay Output: Terminal block for connecting the load (max 10A).
- Power Input: Terminal block for DC 12V power supply.
- Sensor Input: Connector for the NTC10K waterproof sensor.
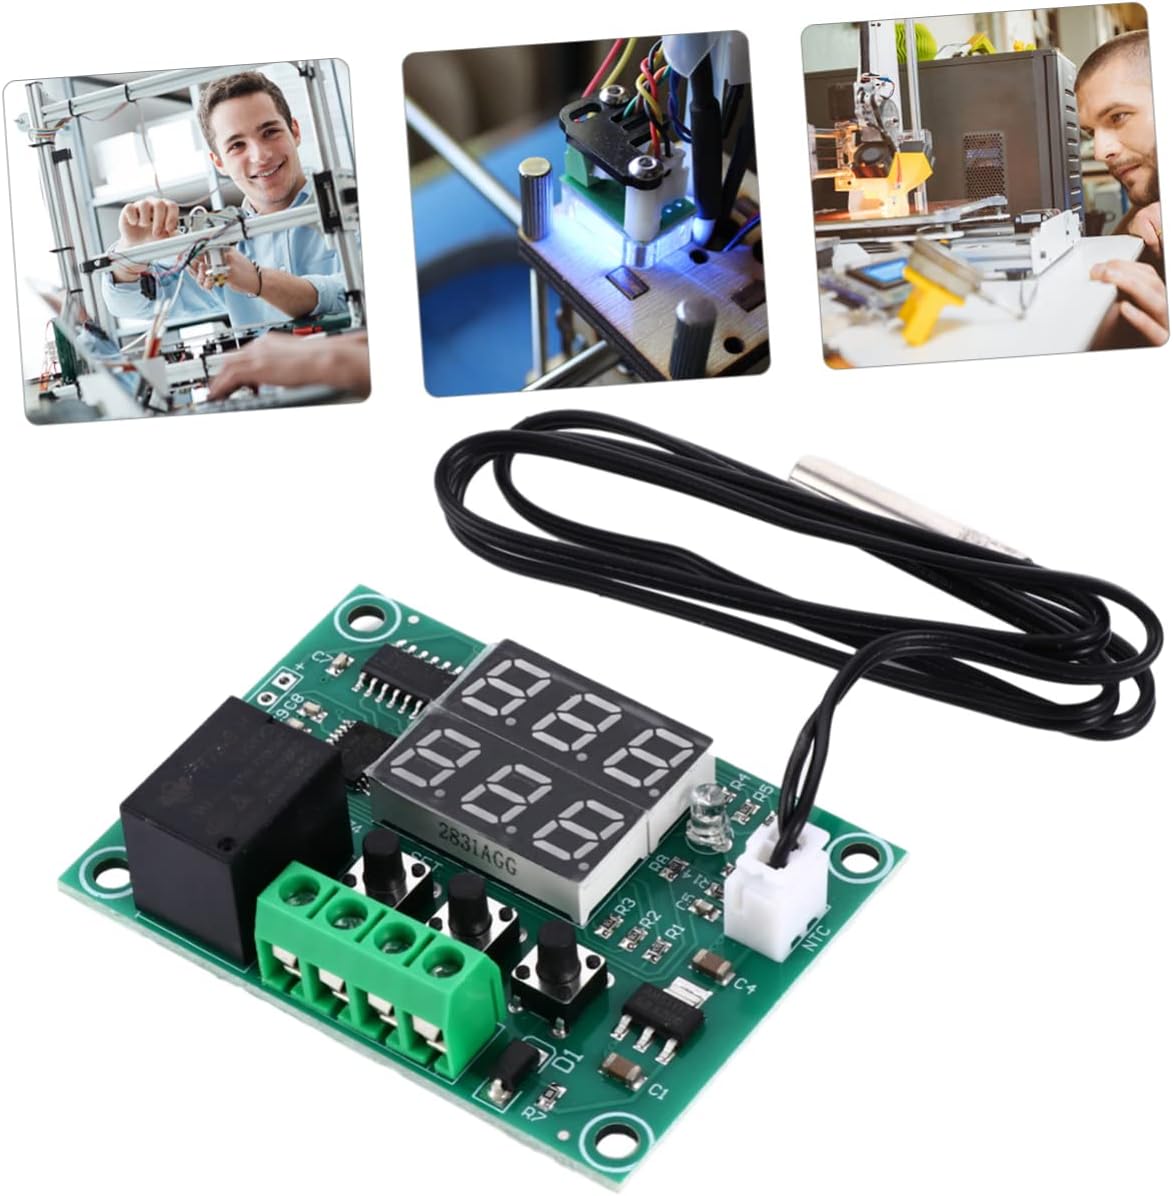
Figure 2: Close-up view of the module's sensor input and power/relay terminals.
2.2 Wiring Instructions
- Power Connection: Connect your DC 12V power supply to the designated power input terminals. Observe polarity.
- Sensor Connection: Plug the NTC10K waterproof sensor into the white 2-pin connector on the module.
- Load Connection: Connect the device you wish to control (e.g., heater, cooler) to the relay output terminals. Ensure the load's current draw does not exceed 10A. The relay acts as a switch; wire it in series with your load and its power source.
After all connections are secure, you may apply power to the module.
3. Operating Instructions
The module features a user-friendly interface for setting and monitoring temperature parameters.

Figure 3: The module's dual digital displays and control buttons.
3.1 Display Overview
- The upper display shows the current measured temperature.
- The lower display shows the set temperature or parameter value during configuration.
3.2 Setting Parameters
Press the SET button to enter parameter setting mode. Use the UP and DOWN buttons to adjust values. Press SET again to confirm and move to the next parameter, or wait a few seconds for automatic exit.
- Control Range: The module can control temperatures within -50°C to 110°C.
- Return Difference (Hysteresis): Set from 0.1°C to 30°C. This value determines the temperature difference between the turn-on and turn-off points of the relay. For example, if set temperature is 25°C and return difference is 2°C, in heating mode, the relay turns on at 23°C and off at 25°C. In cooling mode, it turns on at 27°C and off at 25°C.
- Temperature Correction: Adjusts the measured temperature by -10°C to 10°C to compensate for sensor inaccuracies.
- Relay Startup Delay: Set a delay from 0 to 10 minutes before the relay activates after a temperature condition is met.
- High Temperature Alert: The module can alert if the temperature goes outside the range of -49°C to 110°C.
The module automatically saves all settings to its built-in storage unit, ensuring they are retained even after power loss.
4. Maintenance
The Digital Thermostat Module is designed for durability and stable performance. Minimal maintenance is required.
- Cleaning: Gently wipe the module with a dry, soft cloth to remove dust. Do not use liquid cleaners or immerse the module in water.
- Sensor Care: Ensure the NTC10K waterproof sensor is kept clean and free from physical damage. While waterproof, avoid prolonged submersion in corrosive liquids.
- Connections: Periodically check all wiring connections to ensure they are secure and free from corrosion.
Avoid exposing the module to extreme temperatures, high humidity, or direct sunlight for extended periods, as this may affect its performance and lifespan.
5. Troubleshooting
If you encounter issues with your Digital Thermostat Module, refer to the following common problems and solutions:
| Problem | Possible Cause | Solution |
|---|---|---|
| Display is blank | No power or incorrect voltage. | Check DC 12V power supply connection and ensure correct polarity. |
| Incorrect temperature reading | Sensor not connected, damaged, or needs calibration. | Ensure sensor is securely plugged in. Check sensor for visible damage. Use the Temperature Correction setting to calibrate if necessary. |
| Relay not activating/deactivating | Incorrect temperature settings, relay startup delay, or faulty wiring. | Verify set temperature and return difference. Check relay startup delay setting. Inspect load wiring. |
| Module not responding to button presses | Temporary software glitch. | Disconnect power for 10 seconds, then reconnect. |
If the problem persists after attempting these solutions, please contact customer support.
6. Specifications
Detailed technical specifications for the ULTECHNOVO Digital Thermostat Module:
| Feature | Specification |
|---|---|
| Input Voltage | DC 12V |
| Control Range | -50°C to 110°C |
| Return Difference | 0.1°C to 30°C |
| Accuracy | 0.1°C |
| Output | Relay, 10A max |
| Temperature Correction | -10°C to 10°C |
| Relay Startup Delay | 0-10 minutes |
| High Temperature Alert | -49°C to 110°C |
| Sensor Type | NTC10K waterproof sensor (L=0.5M) |
| Dimensions (L x W x H) | 6.00 x 4.50 x 1.50 cm (2.36 x 1.77 x 0.59 inches) |
| Weight | Approximately 1.76 ounces (0.11 Pounds) |
| Material | Electronic components |

Figure 4: Product dimensions of the Digital Thermostat Module.
7. Warranty and Support
Specific warranty information for this product is not provided in this manual. For details regarding warranty coverage, returns, or technical support, please contact ULTECHNOVO directly or refer to the product's purchase documentation.
You can visit the official ULTECHNOVO store for more information and support: ULTECHNOVO Store


