1. Introduction
This manual provides essential information for the safe and efficient operation of your Parkside Balcony Solar System PBKW 300 A1. This ready-to-use system is designed to generate electricity from sunlight, contributing to your household's energy supply. Please read these instructions thoroughly before installation and use, and retain them for future reference.
The Parkside Balcony Solar System PBKW 300 A1 is intended for private household use to convert solar energy into electrical energy for self-consumption. It is designed for outdoor installation, typically on balconies or similar structures, and connects directly to your household electrical grid via a standard power outlet.
2. Safety Instructions
Always adhere to the following safety guidelines to prevent injury or damage to the product:
- Electrical Safety: Installation and connection must comply with all local electrical codes and regulations. If you are unsure, consult a qualified electrician.
- High Voltage: The solar panel generates high voltage DC current when exposed to light. The micro inverter converts this to AC current. Always treat electrical components with extreme caution.
- Disconnection: Before performing any maintenance or cleaning, ensure the system is disconnected from the main power supply.
- Installation: Ensure the mounting structure is stable and capable of supporting the weight of the solar panel and associated components, especially in windy conditions.
- Handling: Handle the solar panel carefully. Avoid dropping it or subjecting it to strong impacts. Do not step on the panel.
- Environmental Conditions: Do not install the system in areas prone to extreme temperatures, excessive dust, or corrosive substances.
- Children and Pets: Keep children and pets away from the installation area and electrical components.
3. Package Contents
Verify that all components are present and undamaged upon unpacking:
- Solar Panel
- Micro Inverter (PMW 300)
- Connection Cables (AC output cable, DC input cables)
- Mounting Hardware (brackets, screws, nuts, rails)
- User Manual (this document)

Image: Various mounting accessories, connection cables, and a junction box included with the system.
4. Setup and Installation
The Parkside Balcony Solar System PBKW 300 A1 is designed for straightforward installation. However, local regulations regarding grid connection and balcony installations must be observed.
4.1 Component Overview

Image: Front view of the solar panel, showing its photovoltaic cells and integrated cable.
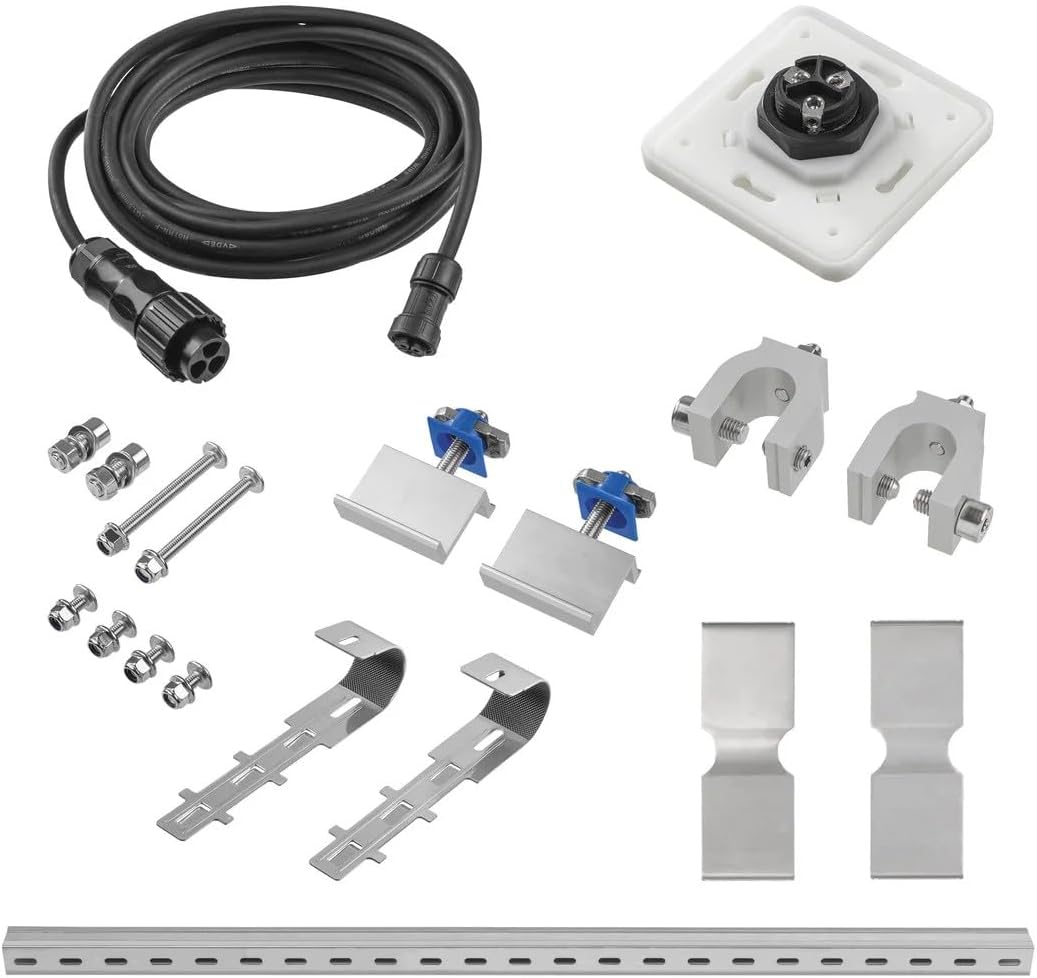
Image: The Parkside Micro Inverter PMW 300, featuring input/output ports and an MPPT LED.
4.2 Mounting the Solar Panel
Select a location on your balcony that receives maximum direct sunlight throughout the day. Use the provided mounting hardware to securely attach the solar panel to the balcony railing. Ensure the panel is angled optimally for solar exposure.
- Attach the mounting brackets to the solar panel frame.
- Securely fasten the panel to the balcony railing using the appropriate clamps and fasteners.
- Verify the panel is stable and cannot be dislodged by wind or accidental impact.

Image: Solar panel installed horizontally on a balcony railing.
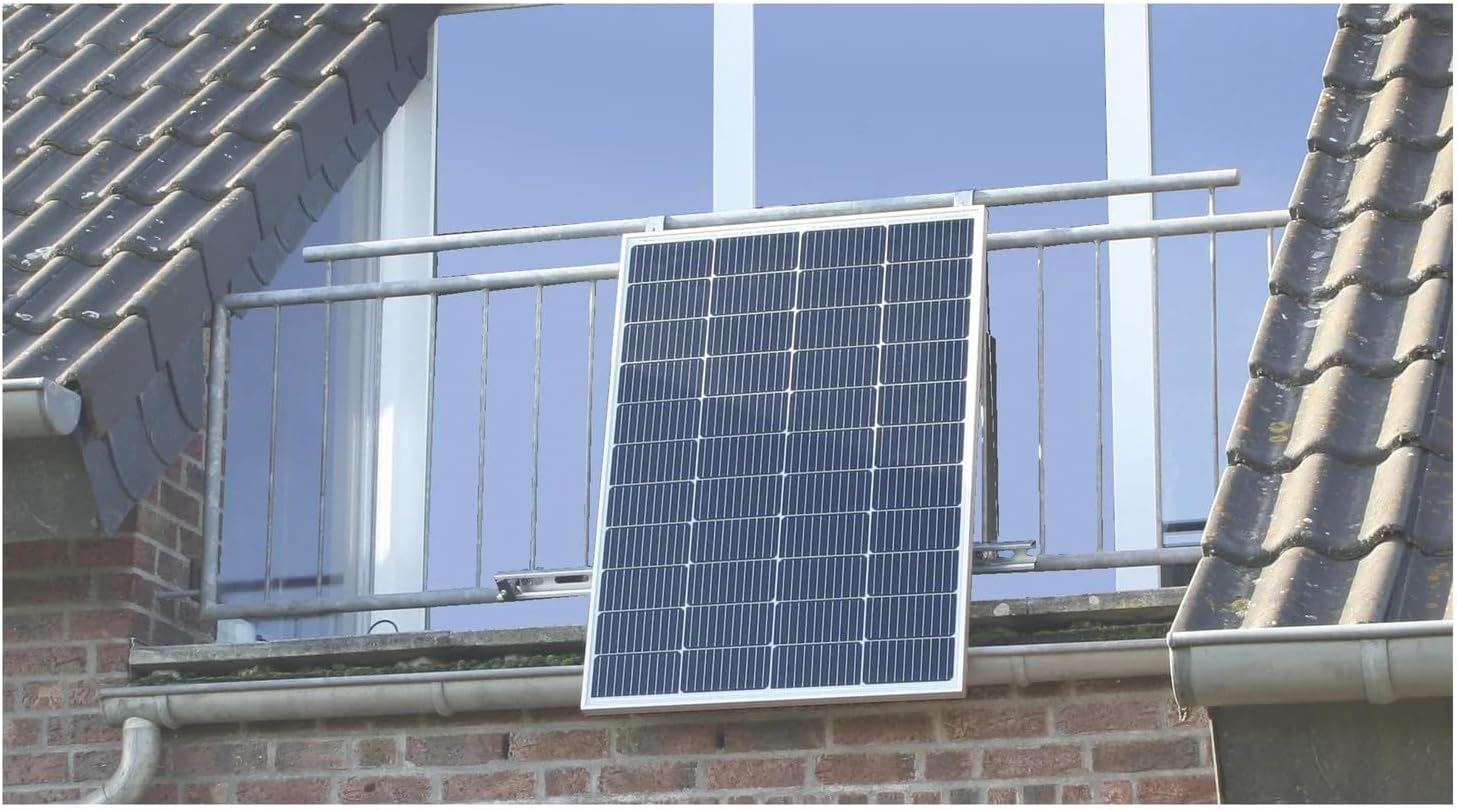
Image: Solar panel installed vertically on a balcony railing.

Image: A solar panel mounted on a balcony, showing its integration with the building structure.

Image: An example of a dual solar panel installation on a balcony.
4.3 Connecting the Micro Inverter
The micro inverter is typically mounted on the rear of the solar panel or an adjacent structure. It converts the DC power generated by the solar panel into AC power compatible with your household grid.
- Connect the DC output cables from the solar panel to the DC input ports on the micro inverter. Ensure correct polarity (+ to + and - to -).
- Connect the AC output cable from the micro inverter to a suitable, grounded electrical outlet in your home.
- Ensure all connections are tight and weatherproof.
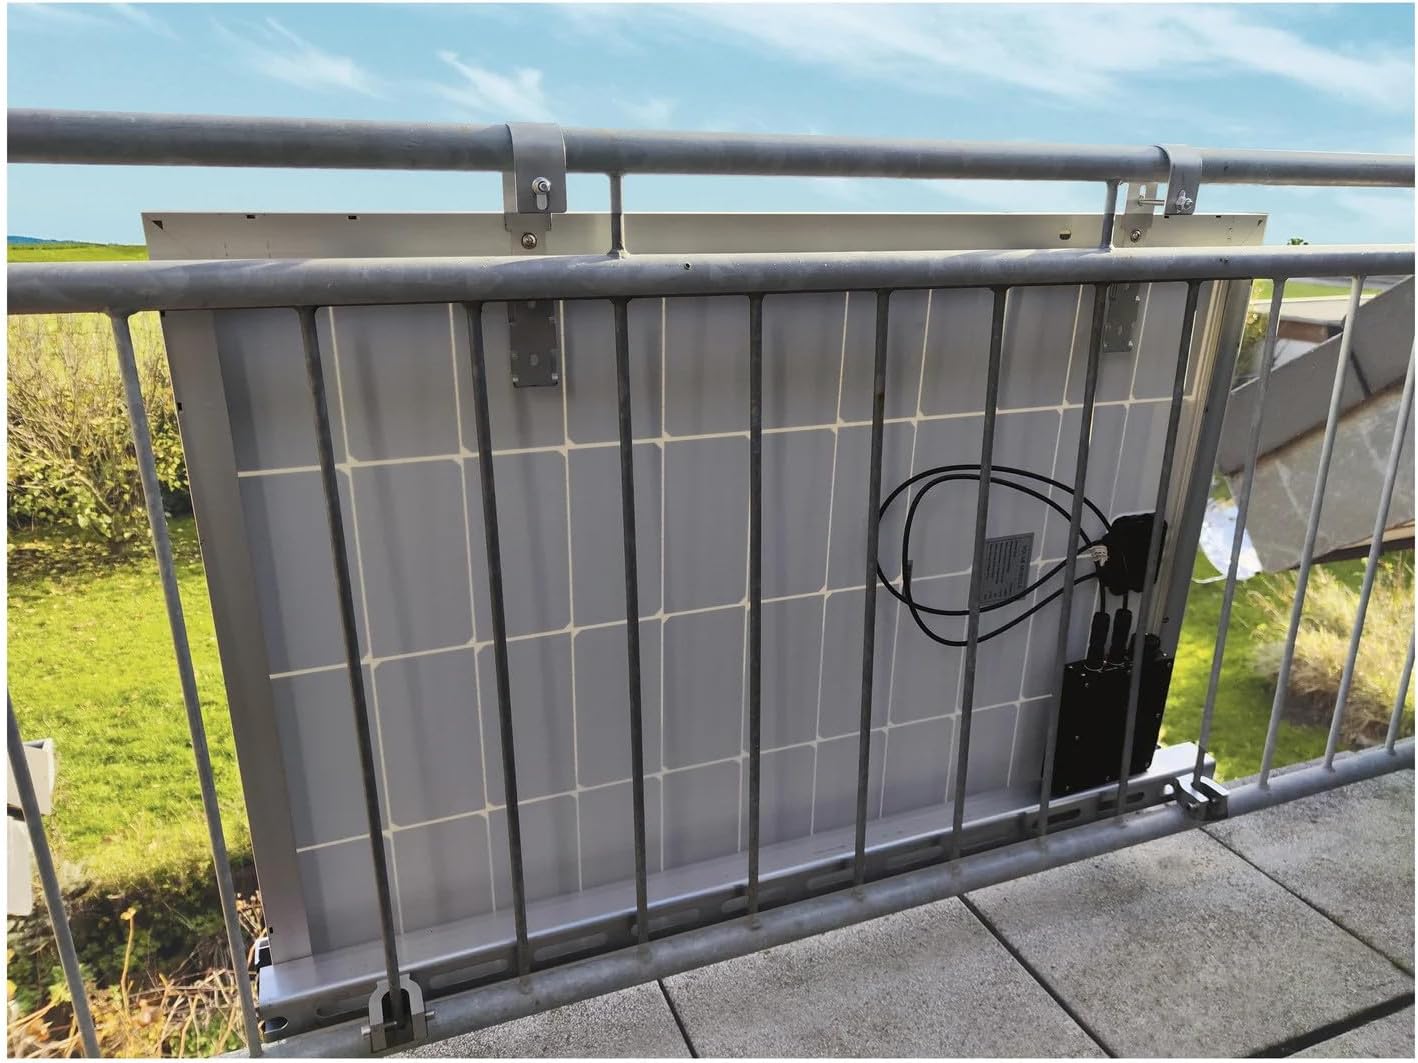
Image: Rear view of the solar panel with the micro inverter and wiring connected, as seen from the balcony.
5. Operating Instructions
Once installed and connected, the Parkside Balcony Solar System PBKW 300 A1 operates automatically when exposed to sufficient sunlight.
5.1 Power Generation
When sunlight hits the solar panel, it generates DC electricity. The micro inverter then converts this DC electricity into AC electricity, which is fed into your home's electrical system. This generated power will offset your household's electricity consumption.
5.2 Status Indicators
The micro inverter typically features an LED indicator (e.g., MPPT LED) to show its operational status. Refer to the inverter's specific documentation for detailed LED behavior (e.g., solid green for normal operation, flashing for faults).
5.3 Monitoring (Optional)
Some systems may offer an optional monitoring application for smartphones or other devices. This app allows you to track the system's performance, including daily energy yield and current power output.

Image: A smartphone displaying a solar energy monitoring app, showing daily yield and power output.
6. Maintenance
Regular maintenance ensures optimal performance and longevity of your solar system.
- Cleaning Solar Panels: Periodically clean the surface of the solar panel with a soft cloth and water to remove dust, dirt, and debris that can reduce efficiency. Avoid abrasive cleaners or harsh chemicals.
- Inspect Connections: Annually check all electrical connections for tightness and signs of corrosion or damage. Ensure cables are not frayed or exposed.
- Structural Integrity: Periodically inspect the mounting hardware and balcony railing for any signs of wear, rust, or loosening. Tighten fasteners as needed.
- Environmental Checks: Ensure no new obstructions (e.g., growing trees, new buildings) are shading the panel.
7. Troubleshooting
If your system is not performing as expected, consider the following common issues:
- No Power Output:
- Check if the sun is shining directly on the panel.
- Ensure all electrical connections are secure and properly plugged in.
- Verify the micro inverter's LED indicator status. Consult the inverter's manual for error codes.
- Check your household circuit breaker.
- Low Power Output:
- Clean the solar panel surface.
- Check for partial shading from nearby objects.
- Ensure the panel is angled optimally towards the sun.
- Inverter Fault: If the micro inverter's LED indicates a fault, disconnect the system from the grid and solar panel, wait a few minutes, then reconnect. If the fault persists, contact customer support.
For issues not resolved by these steps, contact customer support.
8. Specifications
| Feature | Specification |
|---|---|
| Model Number | PBKW 300 A1 |
| Brand | Parkside |
| Micro Inverter Model | PMW 300 |
| ASIN | B0CX8Z2TRD |
| Availability on Amazon.it | August 29, 2025 |
9. Warranty and Support
For warranty information, please refer to the documentation provided at the time of purchase or contact your retailer. In case of technical issues or questions not covered in this manual, please contact Parkside customer support or the seller for assistance.