1. Introduction
This instruction manual provides guidance for the installation and maintenance of your Artraise replacement parts kit for Shark AI Robot Vacuums. Regular replacement of these components ensures optimal performance and extends the lifespan of your robot vacuum.
Package Contents
- 1 x Self-Cleaning Brushroll
- 2 x HEPA Filters
- 4 x Mop Pads
- 6 x Side Brushes
- 1 x Cleaning Tool
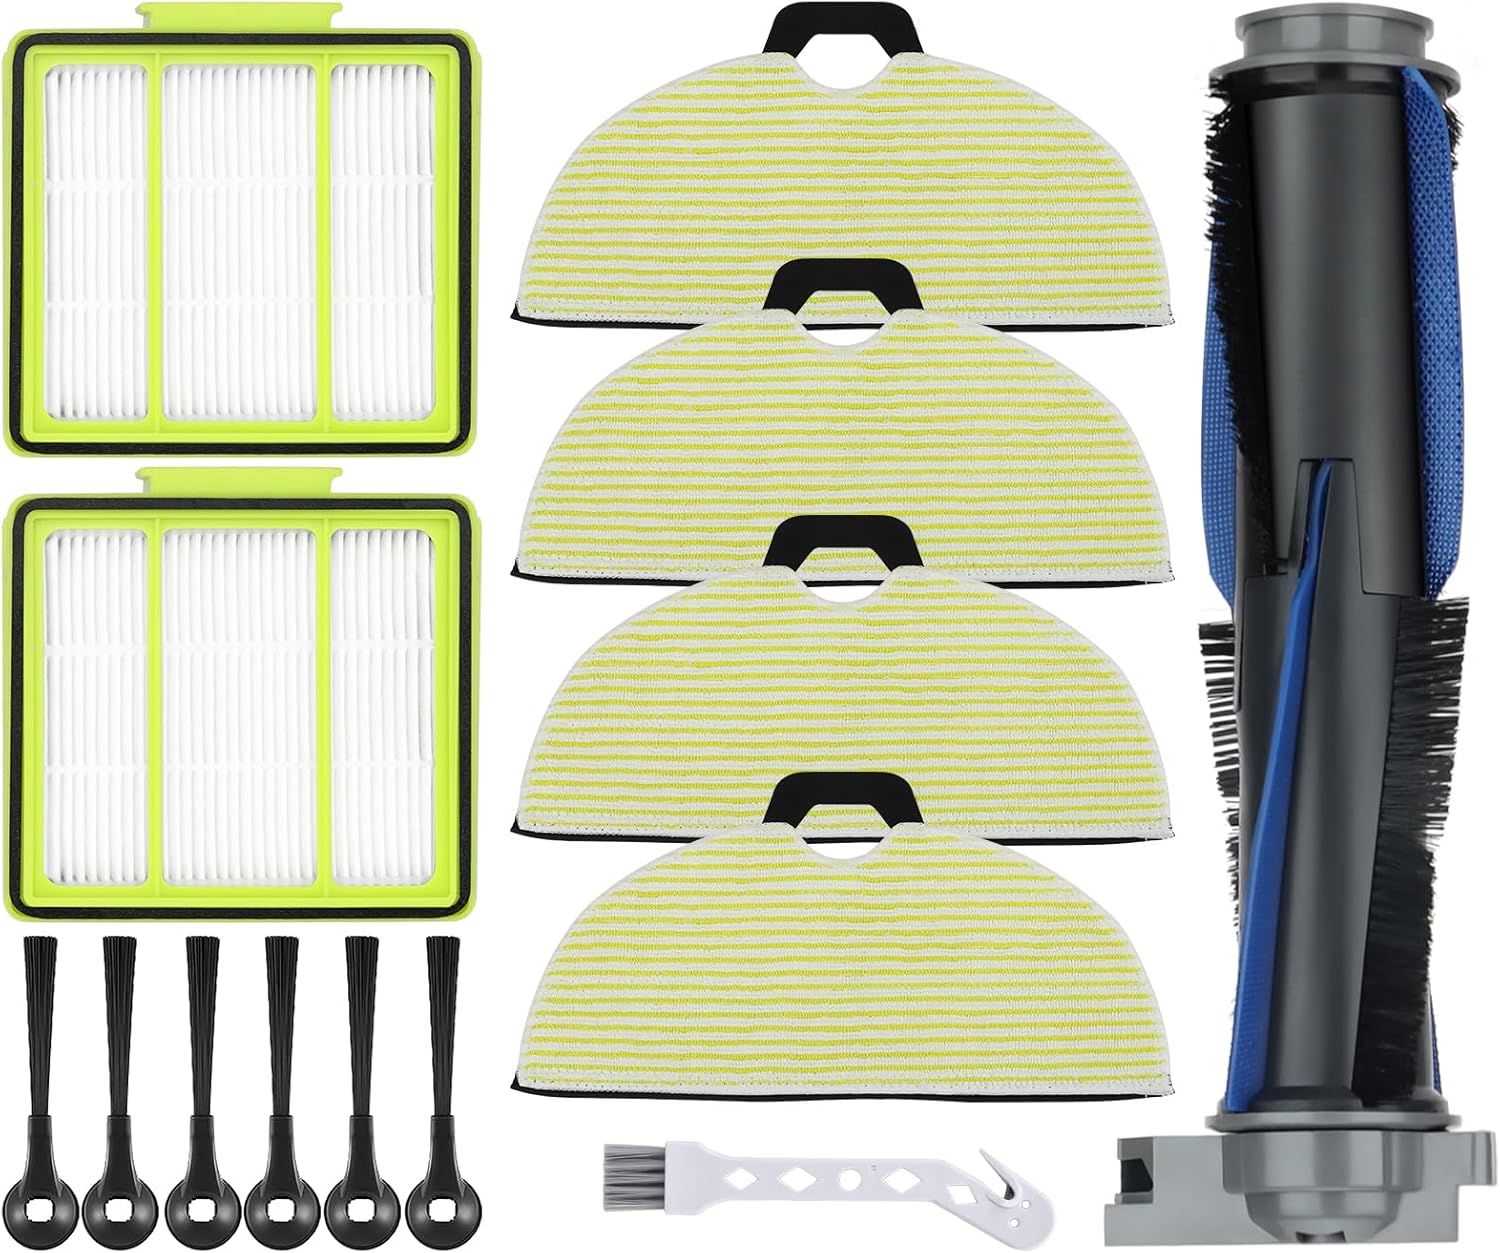
Image: The complete Artraise replacement parts kit, showing all included components: two filters, four mop pads, one brushroll, six side brushes, and a cleaning tool.
Compatibility
This kit is specifically designed for the following Shark AI Robot Vacuums:
- RV2000WD
- RV2002WXUS
- RV2002WD
- RV2001DRUS
- RV2001WD
- AV2001WD
- RV2001WDCA
- RV2001WDNP
- RV2001WRCA
- RV2001WRUS
- RV2000WRUS
- AV2001WRUS
- AV2001WXUS
Important: This kit is not compatible with models such as RV2610WA, RV2620WD, RV2410WD, RV2610WFUS, or AV2610WA AI Ultra 2-in-1 Robot Vacuums. Please verify your robot vacuum's model number before installation.

Image: Visual guide indicating compatibility with Shark RV2001WD, RV2002WD, AV2001WD, and RV2000WD robot vacuums.

Image: A comparison illustrating the size difference between mop pads for compatible RV2001WD series (11.0 inches) and incompatible RV2610WA series (11.9 inches), along with visual cues for different robot vacuum bases.
2. Installation Guide
Follow these steps to replace the components of your Shark AI Robot Vacuum.

Image: An exploded view diagram demonstrating how to easily replace the filter, mop pad, brushroll, and side brushes on the robot vacuum.
Replacing the Brushroll
- Turn off your robot vacuum and place it upside down on a flat surface.
- Locate the brushroll cover, usually secured by tabs or screws. Open or remove the cover.
- Carefully lift out the old brushroll.
- Clean any debris from the brushroll compartment.
- Insert the new self-cleaning brushroll, ensuring it clicks into place correctly.
- Replace the brushroll cover.
Replacing the Filters
- Open the dust bin compartment on your robot vacuum.
- Remove the dust bin.
- Locate the filter assembly within the dust bin.
- Remove the old HEPA filter(s) and discard them.
- Insert the new HEPA filter(s) into the designated slot, ensuring a snug fit.
- Reinstall the dust bin into the robot vacuum.
Replacing the Side Brushes
- Turn off your robot vacuum and place it upside down.
- Gently pull the old side brushes upwards to remove them from their posts.
- Align the new side brushes with the posts and press down firmly until they snap into place.
Attaching Mop Pads
- Ensure the robot vacuum is turned off.
- Locate the mop pad attachment area on the underside of the vacuum.
- Align the mop pad with the attachment points (usually Velcro or clips) and press firmly to secure it.
3. Maintenance
Cleaning Instructions
- Mop Pads: The mop pads can be washed by hand or in a washing machine. Air dry completely before reattaching.
- Brushroll, Filters, and Side Brushes: These components should only be hand washed with clean water. Allow them to air dry completely before reinstalling to prevent damage and maintain performance.

Image: A visual representation of cleaning the filter and mop pad under running water, emphasizing their washable and reusable design.
Recommended Replacement Schedule
To maintain optimal cleaning performance, adhere to the following replacement schedule. Actual frequency may vary based on usage and environment.
| Component | Recommended Replacement |
|---|---|
| HEPA Filters | Every 2-3 months |
| Self-Cleaning Brushroll | Every 6 months |
| Side Brushes | Every 3-6 months (or when visibly worn) |
| Mop Pads | As needed, based on wear and tear |
4. Troubleshooting
Common Issues
- Part Does Not Fit: Double-check your robot vacuum's model number against the compatibility list in Section 1. Ensure the part is oriented correctly during installation. Refer to the images for visual guidance.
- Reduced Cleaning Performance: This often indicates that filters are clogged, the brushroll is tangled, or side brushes are worn. Clean or replace the relevant components according to the maintenance schedule.
- Unusual Noises: Inspect the brushroll for hair or debris entanglement. Ensure all parts are securely installed and not loose.
5. Specifications
| Feature | Detail |
|---|---|
| Product Dimensions | 2.7 x 1 x 1.5 inches (packaging) |
| Item Weight | 9.1 ounces |
| Material | Plastic, Microfiber |
| Number of Pieces | 14 (1 brushroll, 2 filters, 4 mop pads, 6 side brushes, 1 cleaning tool) |
| Reusability | Mop pads are reusable; filters, brushroll, and side brushes are hand washable. |
6. Warranty and Support
For any questions regarding the installation, maintenance, or performance of your Artraise replacement parts, please refer to the product listing or contact the manufacturer directly through the retailer's platform. Keep your purchase receipt for any warranty claims.