1. Introduction
Thank you for purchasing the Guune Wireless WiFi Electronic Eyepiece Camera. This device transforms your optical telescope or microscope into a powerful digital imaging system, allowing you to capture high-resolution photos and videos directly to your smartphone or tablet via a WiFi connection. Its compact design and versatile compatibility make it an ideal accessory for astronomy, microscopy, and various observation needs.
This manual provides detailed instructions for setup, operation, and maintenance to ensure optimal performance and longevity of your device.
2. Package Contents
- Digital Eyepiece Camera
- User Manual
- Type-C USB Cable
- 32GB TF Card (pre-installed or included)
3. Product Features
- Wide Compatibility: Fits optical telescopes and microscopes with an eyepiece outer diameter of 24mm-50mm (0.94" to 1.97").
- High-Resolution Imaging: Equipped with a 4MP sensor, supporting up to 16MP static photos and 2.5K (2304x1728 at 30fps) high-definition video recording.
- Wireless Connectivity: Built-in WiFi for seamless connection to smartphones and tablets via the "Lercenker" app.
- Extended Recording: Built-in 1500mAh lithium battery provides up to 4 hours of video recording.
- Ample Storage: Supports TF cards up to 128GB (32GB card included).
- Convenient Charging: TYPE-C interface allows charging with any mobile phone charger and supports external power banks for prolonged use.
- Advanced Functions: Features include time-lapse video recording and interval photo capture.
4. Specifications
| Feature | Detail |
|---|---|
| Model Name | SV-EP01 |
| Sensor | 4 Megapixel |
| Still Photo Resolution | Up to 16MP |
| Video Resolution | 2.5K (2304x1728) @ 30fps |
| Eyepiece Diameter Compatibility | 24mm-50mm (0.94" - 1.97") |
| Battery | 1500mAh Lithium Ion (approx. 4 hours video recording) |
| Storage | Supports up to 128GB TF card (32GB included) |
| Charging Interface | TYPE-C USB |
| Product Dimensions | 2 x 2.5 x 2 inches |
| Item Weight | 5.3 ounces |
| Supported OS (App) | Android 4.4 or later, iOS 7 or later |
5. Setup
5.1 Charging the Device
Before first use, fully charge the electronic eyepiece camera. Connect the provided Type-C USB cable to the device's charging port and the other end to a standard USB power adapter (not included) or a computer USB port. The charging indicator light will show the charging status.
5.2 Inserting the TF Card
A 32GB TF card is typically included. Locate the TF card slot on the device. Gently insert the TF card with the gold contacts facing down until it clicks into place. To remove, push the card in again until it springs out.
5.3 Attaching to Telescope/Microscope
The electronic eyepiece is designed for easy installation. It fits eyepieces with an outer diameter between 24mm and 50mm. Simply rotate the electronic eyepiece onto your telescope or microscope's eyepiece until it is securely attached. Ensure a snug fit to prevent light leakage and ensure stable imaging.

Image: The electronic eyepiece camera securely attached to a telescope, demonstrating its integration. A smartphone screen in the foreground shows a live view of a bird, illustrating the device's capability to transmit images wirelessly.

Image: An illustration demonstrating the versatility of the electronic eyepiece, showing it can be fitted to various optical instruments including microscopes, standard telescopes, and astronomical telescopes. The diagram highlights its compatibility with eyepiece outer diameters from 24mm to 50mm.

Image: A visual guide detailing the simple installation process of the electronic eyepiece, showing the rotation and alignment steps required to securely attach the device to an optical instrument's eyepiece.

Image: A diagram illustrating the dimensions of the electronic eyepiece and highlighting its flexible installation feature, which allows for the use of soft materials to adapt to smaller diameter eyepieces for a secure fit.
6. Operating Instructions
6.1 App Installation and Connection
- Download the App: Search for "Lercenker" in your device's app store (Google Play Store for Android, Apple App Store for iOS) or scan the QR code provided on the product packaging or in the quick start guide.
- Install the App: Follow the on-screen instructions to install the "Lercenker" app.
- Power On the Eyepiece: Press and hold the power button on the electronic eyepiece until the indicator light turns on.
- Connect via WiFi:
- On your smartphone/tablet, go to WiFi settings.
- Locate the WiFi network named "SV-EP01_XXXXX" (where XXXXX is a unique identifier).
- Connect to this network. The default password is "12345678".
- Launch the App: Open the "Lercenker" app. The app should automatically detect and connect to the electronic eyepiece, displaying a live view from the camera.
For app download and connection, you can also visit: https://app.adse.cc/app/distribution/lercenker/index
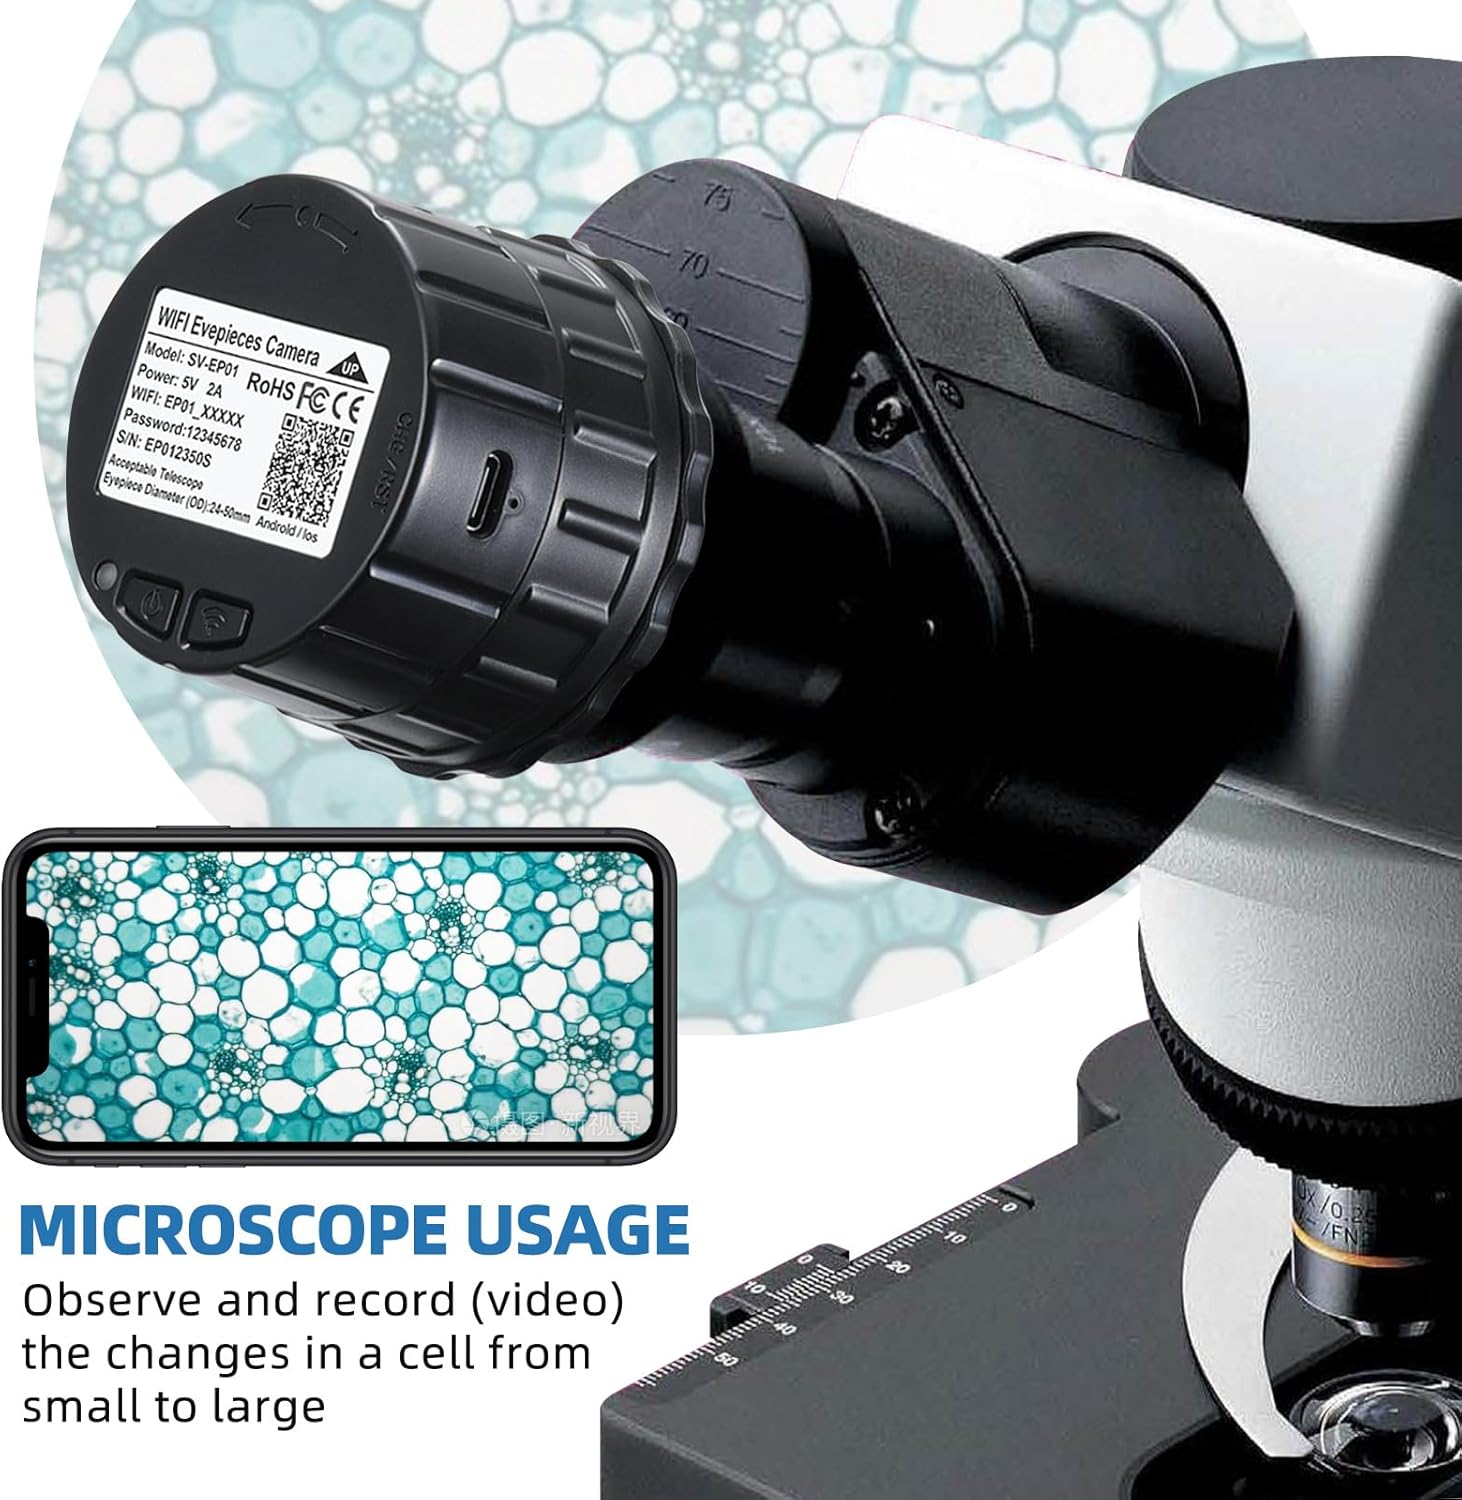
Image: The electronic eyepiece broadcasting a WiFi signal, demonstrating its ability to connect to multiple devices simultaneously, including smartphones, monitors, and laptops, for real-time viewing and control.

Image: Screenshots illustrating the user interface of the "Lercenker" mobile application, showcasing its various modes for video recording, photo capture, and device settings.
6.2 Photo and Video Recording
Once connected to the app, you can control the camera's functions directly from your smartphone or tablet:
- Live View: The app will display a real-time feed from the eyepiece camera.
- Capture Photos: Tap the camera icon within the app to take a still photograph. Photos are saved to the inserted TF card and can be viewed or downloaded via the app.
- Record Videos: Tap the video icon to start recording. Tap again to stop. Videos are saved to the TF card.
- Settings: Access the settings menu in the app to adjust resolution, image quality, exposure compensation, and other parameters.
- Time-Lapse: The device supports time-lapse video recording. Refer to the app's specific settings for configuring interval shooting.
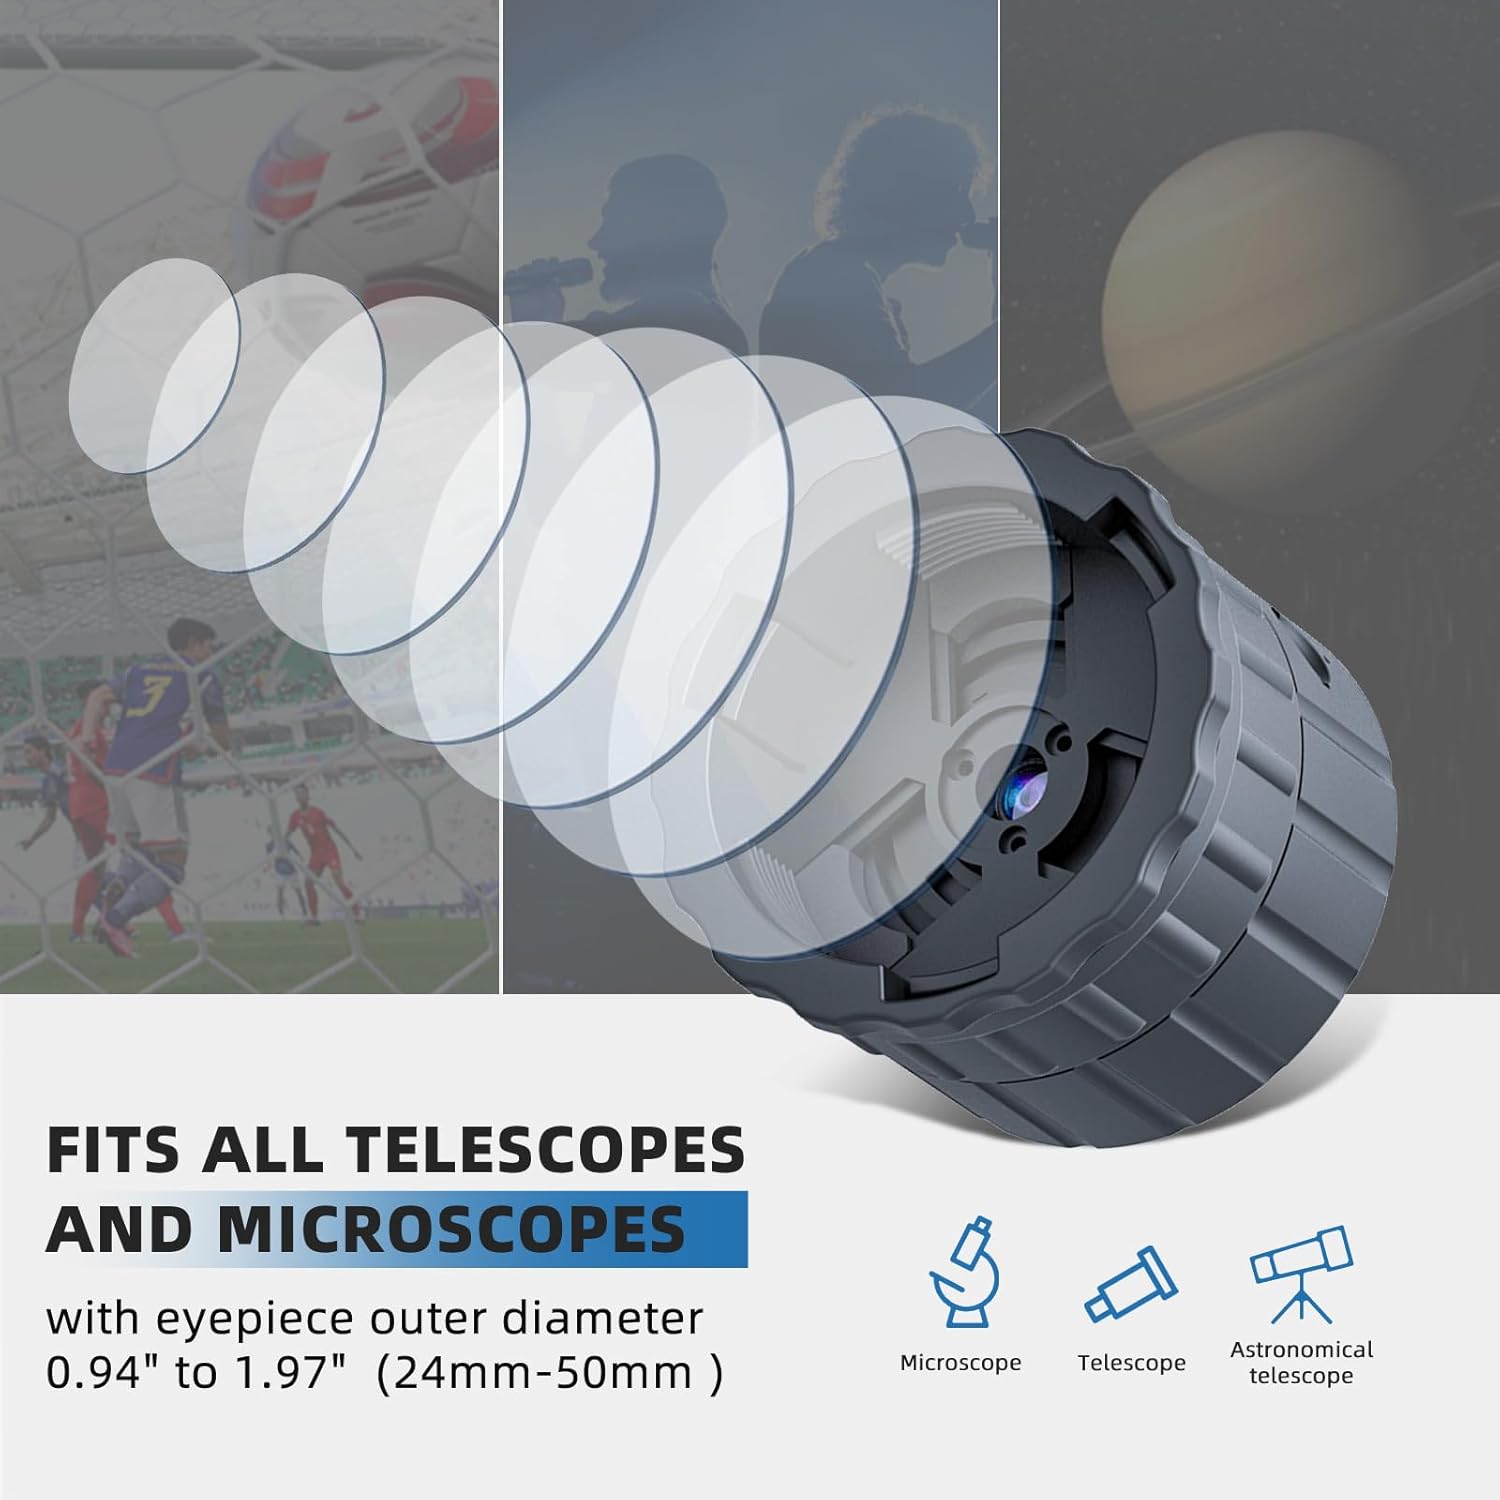
Image: The electronic eyepiece connected to a telescope, with a smartphone showing a clear, live image of a toucan, highlighting the device's capability for real-time observation and digital capture.

Image: The electronic eyepiece mounted on a microscope, with a smartphone displaying a highly magnified view of cellular structures, demonstrating its application in detailed microscopic observation and recording.

Image: The electronic eyepiece mounted on a spotting scope, positioned on a tripod. The image highlights the device's ability to produce high-quality video, with a split view showing a surfer and the clear, stable video output from the eyepiece.

Image: A smartphone screen displaying options for Ultra HD 2.5K and HD video recording, positioned next to the electronic eyepiece attached to a spotting scope. This image emphasizes the device's capability for high-definition real-time recording and capturing detailed moments.
7. Maintenance
- Cleaning: Use a soft, dry cloth to clean the exterior of the device. For the lens, use a lens cleaning cloth and specialized lens cleaning solution. Avoid abrasive materials or harsh chemicals.
- Storage: Store the device in a cool, dry place away from direct sunlight and extreme temperatures. When not in use for extended periods, ensure the battery is partially charged (around 50%) to prolong its lifespan.
- Battery Care: Avoid fully discharging the battery frequently. Recharge the device regularly, even if not in active use, to maintain battery health.
- Firmware Updates: Check the "Lercenker" app or the manufacturer's website periodically for any available firmware updates to ensure optimal performance and new features.
8. Troubleshooting
| Problem | Possible Cause | Solution |
|---|---|---|
| Device does not power on. | Battery is depleted. | Charge the device using the Type-C USB cable. |
| Cannot connect to WiFi. | Incorrect WiFi password; Device is too far from smartphone; WiFi module error. | Ensure correct password ("12345678"). Move closer to the device (within 15-20 meters). Restart both the eyepiece and your smartphone. |
| No image in the app. | Eyepiece not properly attached; Lens cap on; App not launched or connected. | Ensure the eyepiece is securely attached and the lens cap is removed. Verify the app is open and connected to the device's WiFi. |
| Poor image quality. | Dirty lens; Improper focus on telescope/microscope; Low light conditions. | Clean the eyepiece lens. Adjust the focus of your telescope or microscope. Ensure adequate lighting for observation. |
| Cannot record/save files. | TF card full or corrupted; TF card not inserted correctly. | Check TF card insertion. Delete old files or format the TF card (this will erase all data). Try a different TF card. |
9. Warranty and Support
Guune products are manufactured with high standards of quality and craftsmanship. For warranty information, please refer to the warranty card included with your purchase or visit the official Guune website. If you encounter any issues not covered in this manual or require further assistance, please contact Guune customer support through the contact information provided on our website or your purchase platform.
Please retain your proof of purchase for warranty claims.