1. Introduction
Thank you for choosing the E-YEEGER V100 Dash Cam. This manual provides essential information for the proper installation, operation, and maintenance of your device. Please read it thoroughly before use to ensure optimal performance and safety.
Important Safety Information:
- Do not operate the device while driving.
- Ensure the dash cam is securely mounted and does not obstruct your view.
- Use only the provided power cable and accessories.
- Avoid exposing the device to extreme temperatures outside the specified operating range.
2. Product Overview
The E-YEEGER V100 is an ultra-compact dash cam designed for discreet installation and high-quality recording. Its small footprint ensures minimal obstruction to your driving view.

Figure 2.1: E-YEEGER V100 Dash Cam showing compact dimensions (3.4cm x 9.3cm x 3.4cm).
The device features a 160° rotatable lens, allowing you to adjust the recording angle as needed. Its minimalist design integrates seamlessly into your vehicle's interior.
3. Key Features
3.1. 2.5K QHD High-Resolution Recording
The V100 records in 2.5K (2560x1440p) Quad HD resolution with 3.7 million pixels, providing significantly clearer footage than standard 1080P dash cams. Equipped with a SONY sensor and a 6-layer glass lens, it captures sharp, detailed video both day and night.
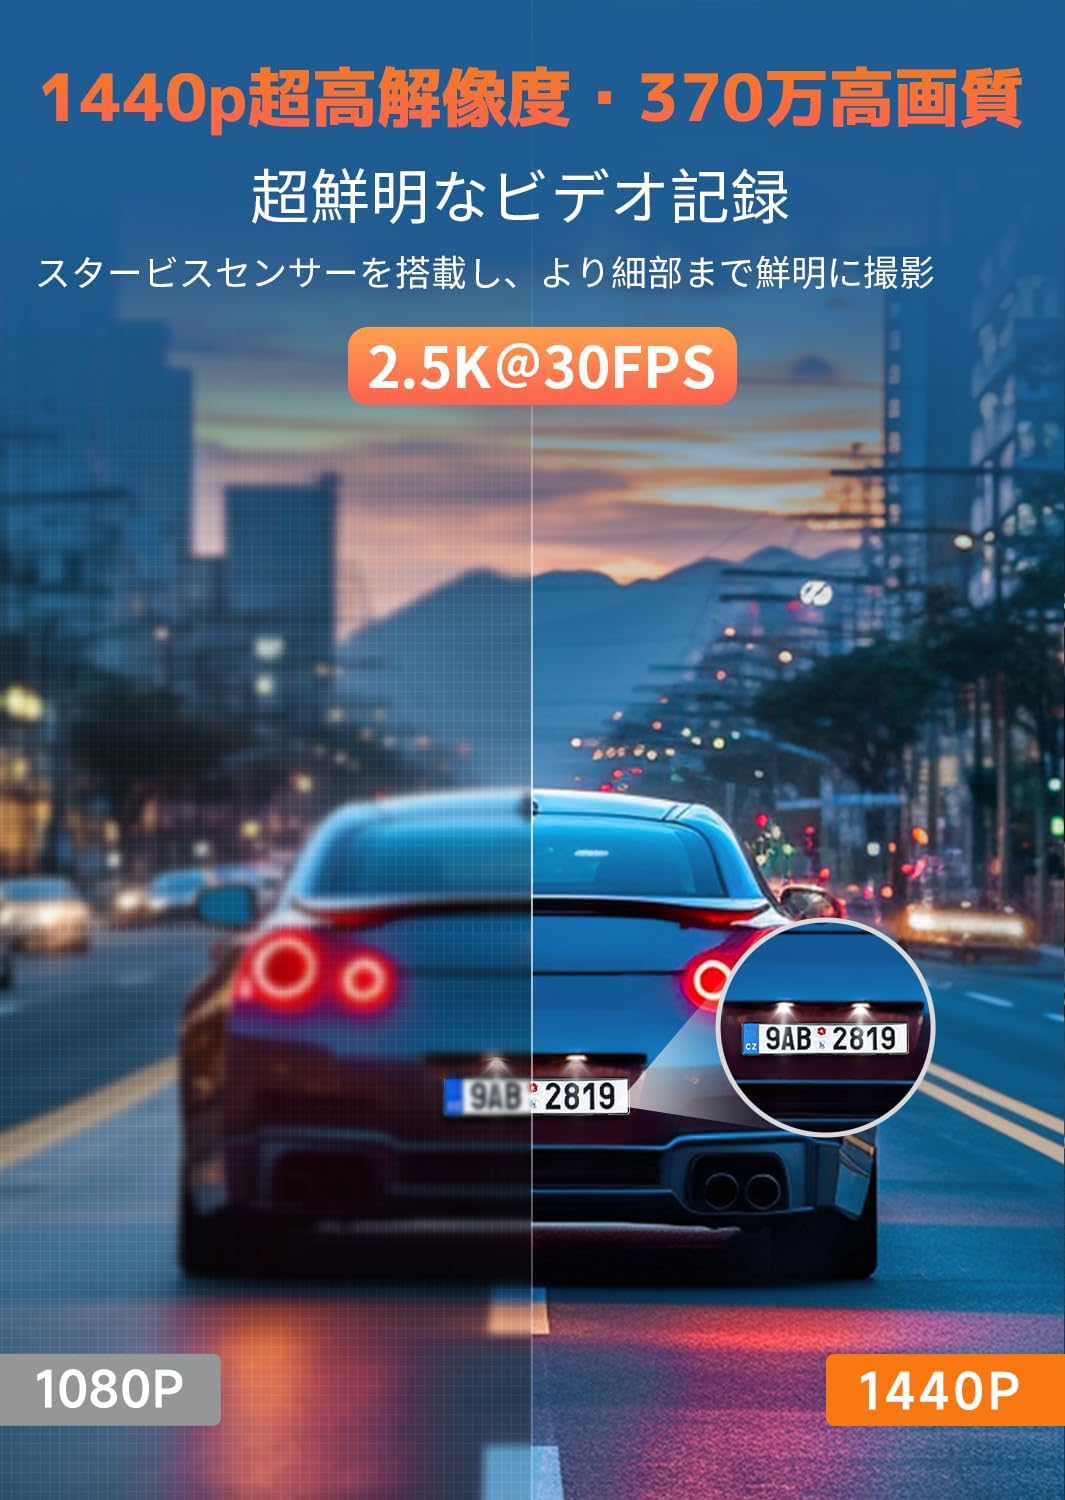
Figure 3.1: Comparison of 1440p and 1080p video resolution, highlighting the clarity of 2.5K QHD.
3.2. 160° Wide-Angle Lens & 160° Rotation
The 160° wide-angle lens captures a broad view of the road, minimizing blind spots. Additionally, the camera body can be rotated 160°, allowing for flexible adjustment of the recording direction to cover various angles.

Figure 3.2: The dash cam mounted, illustrating its 160° rotational capability and Japanese voice notification feature.
3.3. 2.4G Wi-Fi & App Control
Connect the V100 to your smartphone via 2.4G Wi-Fi using the dedicated 'Veecar' app (compatible with Android and iOS). This enables real-time video preview, playback, download, and sharing of recorded footage directly from your phone within a 5-meter range.

Figure 3.3: Smartphone screen showing the Veecar app interface for controlling the dash cam and viewing footage.
3.4. G-Sensor Emergency Recording
The built-in G-sensor automatically detects sudden impacts or vibrations, such as during a collision. When an event is detected, the dash cam automatically initiates emergency recording, and the footage is locked to prevent overwriting, serving as crucial evidence.
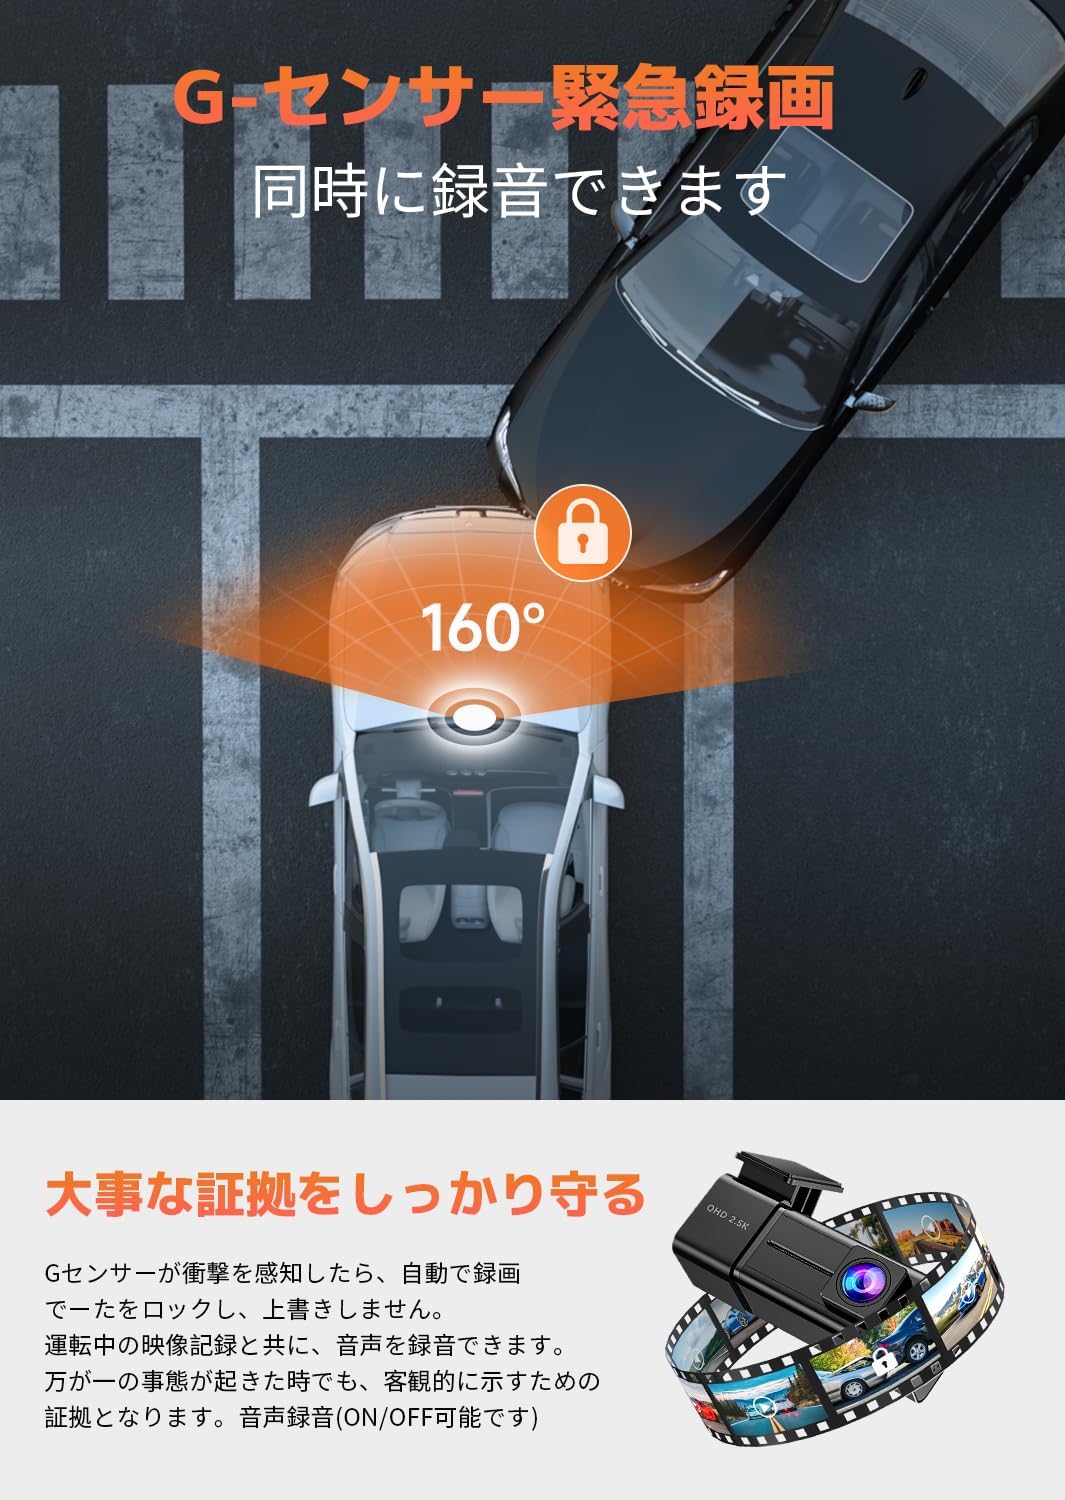
Figure 3.4: Illustration of G-sensor activation during an impact, showing the protected recording area.
3.5. 24-Hour Parking Monitoring
When the engine is off, the 24-hour parking monitoring mode records time-lapse videos at specified intervals, compressing long periods into short, reviewable clips. This feature requires a separately purchased 3-wire hardwire kit (model B0CCJ897TV) for continuous power.

Figure 3.5: Visual representation of 24-hour parking monitoring and the dash cam's night vision feature.
3.6. Supercapacitor Power Supply
The V100 utilizes a supercapacitor instead of a traditional lithium battery. This provides superior durability and stable operation in a wide temperature range (-10°C to 70°C), eliminating concerns about battery leakage or explosion, especially in hot climates.

Figure 3.6: Close-up of the dash cam's internal components, showing the supercapacitor for enhanced reliability.
3.7. LED Signal Light Compatibility & Noise Reduction
The dash cam is designed to accurately record LED traffic signals in both Eastern and Western Japan. Its advanced noise reduction design, with high-quality shielding in the main unit, lens, and power cable, minimizes interference with digital terrestrial television and car navigation systems.
3.8. Loop Recording & File Protection
The V100 employs real-time streaming (TS) storage technology for improved recording speed. It supports loop recording, automatically overwriting the oldest unlocked files when the microSD card is full. Emergency recorded files are locked and will not be overwritten. In case of sudden power loss, the supercapacitor ensures that the currently recording file is saved and protected.
3.9. Japanese Voice Prompts & Included MicroSD Card
The device provides operational status notifications through Japanese voice prompts for user convenience. A C10 32GB microSD card is included in the package. For optimal performance and longevity, it is recommended to manually format the microSD card every two months.

Figure 3.7: A 32GB microSD card, included with the dash cam for immediate use.
4. Setup Instructions
4.1. Installation
- Choose a Mounting Location: Select a position on your front windshield that does not obstruct your driving view, typically the front center area behind the rearview mirror.
- Clean the Windshield: Ensure the chosen area is clean and dry before applying the adhesive mount.
- Attach the Mount: Peel off the protective film from the adhesive mount and firmly press it onto the windshield for at least 30 seconds.
- Mount the Dash Cam: Slide the V100 dash cam onto the mounted bracket until it clicks into place.
- Adjust Lens Angle: Rotate the lens to ensure it captures the desired view of the road ahead.
- Insert MicroSD Card: Insert the provided 32GB microSD card into the card slot until it clicks. Ensure the card is inserted correctly.
- Connect Power: Plug the included Type-C car charger into the dash cam's Type-C port and then into your vehicle's cigarette lighter socket. Route the cable neatly to avoid interference with driving controls.

Figure 4.1: The Type-C power port on the dash cam, designed for reliable power connection.
4.2. App Connection (Veecar App)
- Download the App: Search for 'Veecar' in the App Store (iOS) or Google Play Store (Android) and install it on your smartphone.
- Power On Dash Cam: Start your vehicle's engine to power on the dash cam.
- Enable Wi-Fi: On your smartphone, go to Wi-Fi settings and connect to the dash cam's Wi-Fi network. The network name (SSID) and password can typically be found in the dash cam's settings or initial voice prompt.
- Open Veecar App: Launch the 'Veecar' app. The app should automatically detect and connect to your dash cam.
- Initial Setup: Follow any on-screen prompts within the app for initial setup, such as setting date/time or preferred recording options.
5. Operating Instructions
5.1. Basic Recording
The V100 dash cam automatically starts recording when your vehicle's engine is turned on and stops recording when the engine is turned off. Footage is saved in continuous loops on the microSD card.
5.2. G-Sensor Emergency Recording
In the event of a sudden impact or collision, the G-sensor will automatically trigger emergency recording. These files are stored in a separate, protected folder on the microSD card and will not be overwritten by regular loop recording.
5.3. Parking Monitoring
If the optional 3-wire hardwire kit is installed, the dash cam will enter parking monitoring mode when the engine is off. It will record time-lapse videos to conserve storage space and power, providing surveillance for your parked vehicle.
5.4. Viewing and Sharing Footage
All recorded videos can be accessed, played back, downloaded, and shared through the 'Veecar' smartphone app. Connect to the dash cam's Wi-Fi network as described in Section 4.2 to manage your footage.
5.5. MicroSD Card Management
The dash cam supports loop recording, meaning it will continuously record by overwriting the oldest unlocked files when the microSD card is full. Emergency recordings are locked and protected from being overwritten. To maintain optimal performance, regularly format the microSD card.
6. Maintenance
6.1. MicroSD Card Formatting
It is highly recommended to format the microSD card every two months to prevent data corruption and ensure smooth recording. This can typically be done through the 'Veecar' app or by removing the card and formatting it on a computer.
6.2. Cleaning
Gently wipe the dash cam lens with a soft, lint-free cloth to remove dust or smudges. For the main body, use a dry or slightly damp cloth. Avoid using harsh chemicals or abrasive materials.
7. Troubleshooting
- Dash Cam Not Powering On:
- Check if the car charger is properly connected to both the dash cam and the vehicle's power outlet.
- Ensure the vehicle's ignition is on.
- Test the car charger with another device or try a different power outlet if available.
- Recording Not Starting:
- Verify that a microSD card is inserted correctly.
- Format the microSD card (refer to Section 6.1).
- Check if the card is full; if so, old files should be overwritten, but ensure no critical files are locked.
- Wi-Fi Connection Issues:
- Ensure the dash cam is powered on.
- Restart both the dash cam and your smartphone.
- Make sure you are within the 5-meter Wi-Fi range of the dash cam.
- Re-enter the Wi-Fi password if prompted.
- Poor Image Quality:
- Clean the dash cam lens.
- Ensure the protective film has been removed from the lens.
- Check app settings to confirm recording resolution is set to 2.5K (1440p).
- Parking Monitoring Not Working:
- Confirm that the optional 3-wire hardwire kit (B0CCJ897TV) is correctly installed and connected.
- Check parking monitoring settings in the Veecar app.
If you encounter issues not covered here, please refer to the detailed Japanese instruction manual included with your product or contact customer support.
8. Specifications
| Feature | Description |
|---|---|
| Brand | E-YEEGER |
| Model | V100-1 |
| Video Resolution | 2560x1440P (2.5K QHD) |
| Lens Angle | 160° |
| Sensor | SONY Sensor |
| Lens Type | 6-layer Glass Lens |
| Connectivity | 2.4G Wi-Fi |
| App Compatibility | Veecar (Android/iOS) |
| Storage | MicroSD card (C10 32GB included) |
| Power Supply | Supercapacitor, Type-C |
| Operating Temperature | -10°C to 70°C |
| Dimensions (D x W x H) | 2.4 x 5.7 x 5.2 cm |
| Mounting Type | Adhesive |
| Special Features | G-Sensor, 24H Parking Monitor (requires hardwire kit), Loop Recording, Japanese Voice Prompts, LED Signal Light Compatible, Noise Reduction |
| Included Components | Dash Cam unit, Car charger, 32GB MicroSD card, User Manual |
9. Warranty and Support
The E-YEEGER V100 Dash Cam comes with a 12-month warranty from the date of purchase. This warranty covers manufacturing defects and malfunctions under normal use.
For any questions, technical assistance, or warranty claims, please contact our customer support. Our professional team is available to assist you in Japanese. Please refer to the contact information provided in the packaging or on our official website.
In case of damage, malfunction, or missing accessories, please do not hesitate to reach out to us.