1. Introduction
This manual provides detailed instructions for the setup, operation, and maintenance of your HOWENS 7-inch 1080P IPS Portable Touchscreen Monitor. Please read this guide thoroughly before using the product to ensure optimal performance and longevity. This monitor is designed for versatility, offering high-definition visuals and responsive touch control for various applications, including Raspberry Pi projects and extended display for Windows systems.
2. Package Contents
Verify that all items listed below are included in your package:
- 1 x 7-inch Touchscreen Monitor
- 1 x DC Power Adapter
- 1 x USB-A to USB-C cable
- 1 x HDMI cable
- 1 x Power cable (black/red)
- 1 x Screwdriver
- Screws (various sizes)
- 1 x PI3 side panel
- 1 x PI4/PI5 side panel
- 1 x HDMI ribbon cable
- 1 x Micro HDMI ribbon cable

3. Product Overview
3.1. Monitor Features
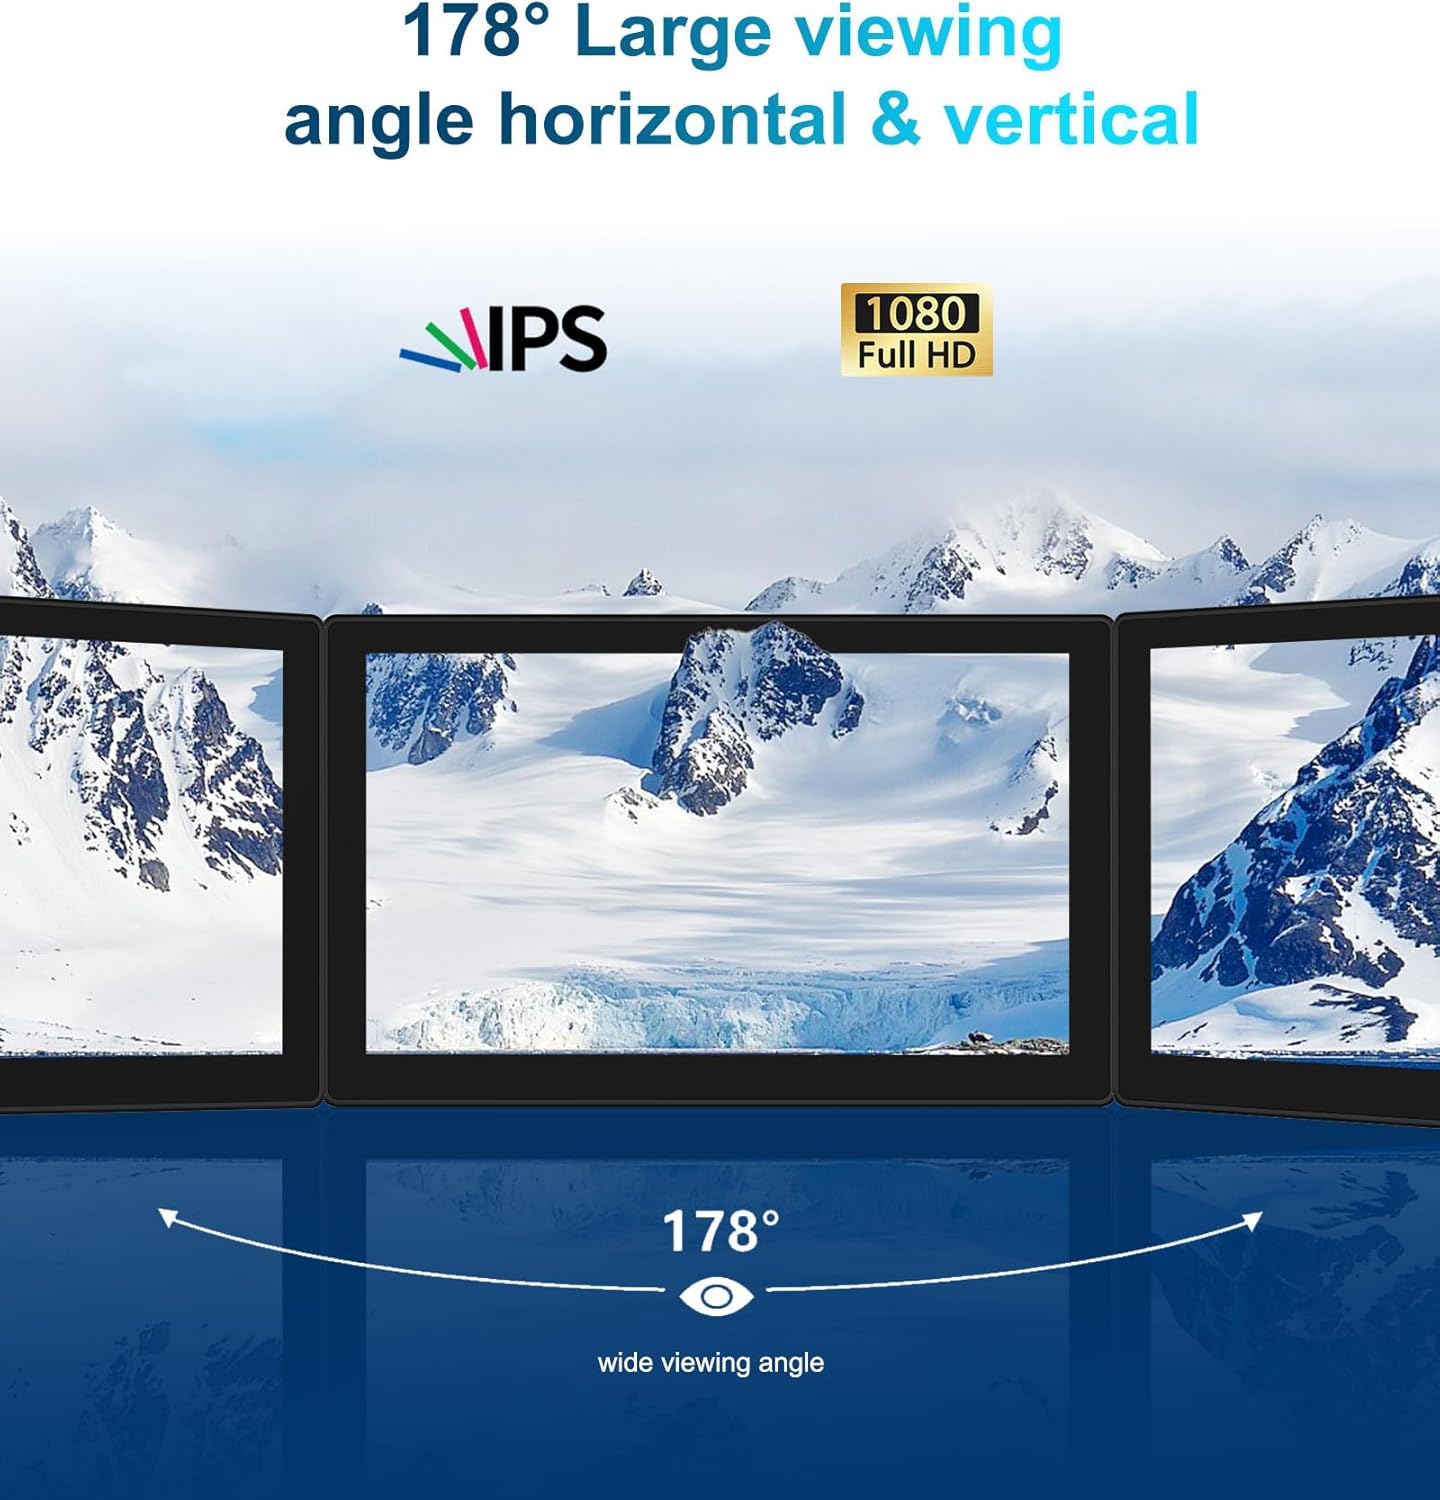
- FHD 1080P Display: 7-inch IPS LCD touchscreen with 1920×1080 resolution, 60Hz refresh rate, 72% NTSC color gamut, and 450cd/㎡ brightness for clear and vibrant visuals.
- Five-Point Capacitive Touch: Responsive touch functionality (2-4 seconds response time) for intuitive interaction. Requires USB connection for touch.
- Multiple Display Modes: Supports expansion mode, mirror mode, and second-screen-only display mode for enhanced productivity.
- Wide Compatibility: Compatible with Raspberry Pi 4/3/2, Windows 10/8/7, TVs, game consoles (PS5/4), and other devices.
- Active Cooling Mini Fan: Integrated cooling solution to manage heat for connected single-board computers.
- VESA Compatible: Features VESA mounting holes for flexible installation in DIY projects.
3.2. Ports and Buttons

- Audio: 3.5mm audio output jack.
- HDMI Input: For video signal input.
- Type-C Input: For power and touch data (depending on device).
- DC12V: Power input port.
- Control Buttons: Exit, Down, Up, Menu, and Power buttons for navigating the OSD (On-Screen Display) menu.
- Speakers: Integrated speakers for audio output.
3.3. Dimensions
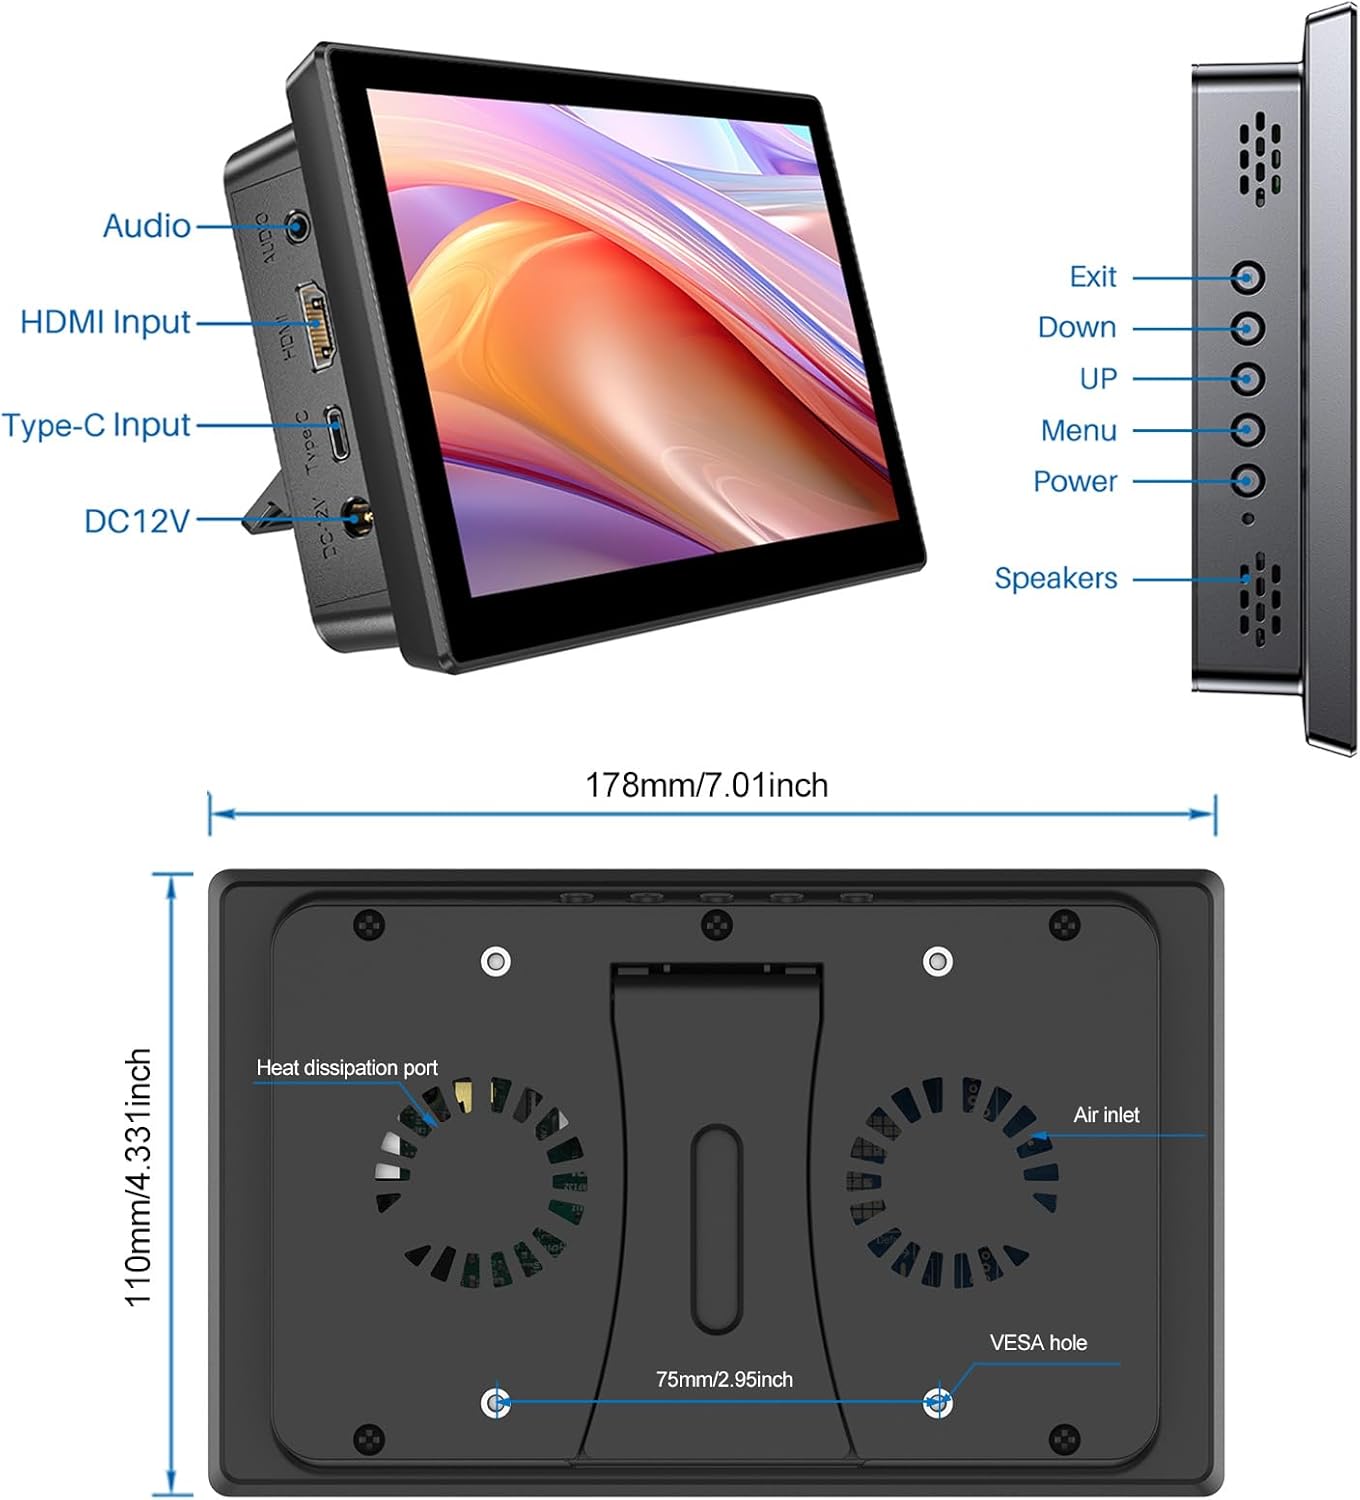
- Product Dimensions: 10.24 x 6.89 x 3.54 inches (with stand)
- Item Weight: 13.8 ounces
4. Setup Instructions
4.1. Raspberry Pi 3B Installation
Follow these steps to integrate your Raspberry Pi 3B with the HOWENS 7-inch monitor. Ensure the Raspberry Pi 3B is powered off and any SD card is inserted before beginning installation.
- Carefully open the monitor's rear lid by unscrewing the retaining screws.
- Insert the SD card into your Raspberry Pi 3B.
- Connect the HDMI ribbon cable to the HDMI port on the Raspberry Pi 3B and the corresponding port on the monitor's internal board.
- Connect the power black/red cable to the Raspberry Pi's GPIO pins (5V and GND) and the monitor's internal power connector.
- Connect the 3-pin touch cable from the Raspberry Pi's USB port to the monitor's internal touch connector.
- Align the Raspberry Pi 3B with the PI3 side panel and carefully place it into the monitor casing, ensuring all connections are secure and cables are not pinched.
- Secure the Raspberry Pi 3B using the provided screws.
- Close the monitor's rear lid and fasten the screws.
4.2. Raspberry Pi 4B Installation
Follow these steps to integrate your Raspberry Pi 4B with the HOWENS 7-inch monitor. Ensure the Raspberry Pi 4B is powered off and any SD card is inserted before beginning installation.
- Carefully open the monitor's rear lid by unscrewing the retaining screws.
- Insert the SD card into your Raspberry Pi 4B.
- Connect the micro HDMI ribbon cable to the micro HDMI port on the Raspberry Pi 4B and the corresponding port on the monitor's internal board.
- Connect the power black/red cable to the Raspberry Pi's GPIO pins (5V and GND) and the monitor's internal power connector.
- Connect the 3-pin touch cable from the Raspberry Pi's USB port to the monitor's internal touch connector.
- Align the Raspberry Pi 4B with the PI4/PI5 side panel and carefully place it into the monitor casing, ensuring all connections are secure and cables are not pinched.
- Secure the Raspberry Pi 4B using the provided screws.
- Close the monitor's rear lid and fasten the screws.
4.3. Connecting to a Computer (Windows)
To use the HOWENS 7-inch monitor as an external display for your computer, follow these steps:
- Connect one end of the HDMI cable to the HDMI input port on the monitor and the other end to the HDMI output port on your computer.
- For touch functionality, connect the USB-A to USB-C cable from a USB port on your computer to the Type-C input port on the monitor.
- Connect the DC power adapter to the monitor's DC12V port and plug it into a power outlet.
- Power on the monitor and your computer. The computer should automatically detect the external display. You may need to adjust display settings in your operating system (e.g., Extend, Duplicate, or Second screen only).
5. Operating Instructions
5.1. Power On/Off
Press the Power button on the side of the monitor to turn it on or off. A short press typically turns it on, while a long press (2-3 seconds) will turn it off.
5.2. On-Screen Display (OSD) Menu
Use the Menu button to access the OSD settings. The Up and Down buttons navigate through options, and the Exit button returns to the previous menu or exits the OSD.
- Brightness/Contrast: Adjust display brightness and contrast levels.
- Color Settings: Modify color temperature, hue, and saturation.
- Aspect Ratio: Change the display aspect ratio.
- Input Source: Manually select the video input source (e.g., HDMI).
- Fan Control: The active cooling fan is in the default off state and needs to be turned on in the menu settings for optimal heat dissipation when using a Raspberry Pi.
5.3. Touch Functionality
The monitor supports five-point capacitive touch. Ensure the USB touch cable is connected to both the monitor and your device (Raspberry Pi or PC) for touch input to function. No additional drivers are typically required for Windows or most Raspberry Pi distributions.

5.4. Display Modes
When connected to a computer, the monitor supports various display modes:
- Duplicate Mode: Mirrors the content of your primary display.
- Extend Mode: Extends your desktop across both displays, providing more screen real estate.
- Second Screen Only Mode: Displays content only on the HOWENS monitor, turning off the primary display.
6. Maintenance
To ensure the longevity and optimal performance of your HOWENS 7-inch Touchscreen Monitor, follow these maintenance guidelines:
- Cleaning the Screen: Use a soft, lint-free cloth slightly dampened with water or a screen-cleaning solution. Avoid harsh chemicals, abrasive materials, or direct spraying onto the screen.
- Cleaning the Casing: Wipe the monitor casing with a soft, dry cloth. Do not use liquid cleaners directly on the casing.
- Ventilation: Ensure the heat dissipation ports and fans (if activated) are free from dust and obstructions to prevent overheating. Regularly clean dust from the fan grilles.
- Storage: When not in use for extended periods, store the monitor in a cool, dry place away from direct sunlight and extreme temperatures.
- Handling: Avoid dropping or subjecting the monitor to strong impacts. Handle with care, especially the screen surface.
7. Troubleshooting
If you encounter issues with your HOWENS 7-inch Touchscreen Monitor, refer to the following common problems and solutions:
| Problem | Possible Cause | Solution |
|---|---|---|
| No display/"No Signal" message |
|
|
| Touch function not working |
|
|
| Screen flickering or distorted image |
|
|
| Monitor overheating (Raspberry Pi) |
|
|
8. Specifications
| Feature | Specification |
|---|---|
| Screen Size | 7 Inches |
| Resolution | 1920 x 1080 (FHD 1080p) |
| Panel Type | IPS LCD |
| Refresh Rate | 60Hz |
| Color Gamut | 72% NTSC |
| Brightness | 450 Candela (cd/㎡) |
| Aspect Ratio | 16:9 |
| Touch Type | Five-point Capacitive Touch |
| Connectivity | HDMI Input, Type-C Input, DC12V Power, Audio Output |
| USB Ports | 1 (for touch functionality) |
| Mounting | VESA Compatible |
| Compatibility | Raspberry Pi 4/3/2, Windows 10/8/7, TVs, Game Consoles (PS5/4) |
| Item Model Number | XSUS-CX070PI-C |
| Product Dimensions | 10.24 x 6.89 x 3.54 inches |
| Item Weight | 13.8 ounces |
9. Warranty and Support
HOWENS products are designed and manufactured to the highest quality standards. This product is covered by a limited warranty against defects in materials and workmanship. For specific warranty terms and conditions, please refer to the warranty card included in your package or contact HOWENS customer support.
If you require technical assistance or have questions about your product, please contact HOWENS customer support through the retailer where you purchased the item or visit the official HOWENS website for contact information.


