1. Introduction
The EBTOOLS DY-60A Leveling Base is a precision accessory designed to provide stable and accurate camera leveling for various photography setups. Constructed from durable CNC-machined aluminum alloy, it offers smooth 15-degree tilt adjustment in any direction and features an integrated bubble level for precise positioning. This manual will guide you through the setup, operation, and maintenance of your leveling base.
2. Product Overview
Familiarize yourself with the main components of your EBTOOLS DY-60A Leveling Base.
- Top Plate with 1/4-inch Screw: For attaching your camera or other photographic equipment.
- Leveling Mechanism: Allows for up to 15 degrees of tilt in any direction.
- Locking Knob: Secures the leveling mechanism in place after adjustment.
- Integrated Bubble Level: Provides visual confirmation of a perfectly level setup.
- Base Thread: For mounting the leveling base onto a tripod or other support system.

Figure 1: Top view of the EBTOOLS DY-60A Leveling Base, showing the 1/4-inch camera screw and integrated bubble level.
3. Setup Instructions
Follow these steps to properly set up your leveling base.
- Attach to Tripod: Locate the mounting thread on the bottom of the leveling base. Screw the leveling base onto your tripod's head or center column until it is securely fastened. Ensure it is tight to prevent wobbling.
- Attach Camera/Equipment: Screw your camera or other photographic equipment onto the 1/4-inch screw located on the top plate of the leveling base. Rotate your equipment clockwise until it is firmly attached.

Figure 2: Bottom view of the leveling base, illustrating the tripod mounting thread.

Figure 3: The leveling base securely mounted on a tripod, ready for camera attachment.
4. Operating Instructions
The EBTOOLS DY-60A is designed for quick and precise leveling.
- Unlock the Leveling Mechanism: Loosen the locking knob on the side of the leveling base. This will allow the top plate to tilt freely.
- Adjust Level: Observe the integrated bubble level. Gently tilt the camera and leveling base until the bubble is centered within the circle, indicating a perfectly level surface. The base allows for up to 15 degrees of tilt in any direction.
- Lock Position: Once the bubble is centered and your camera is level, tighten the locking knob firmly to secure the position. Ensure it is tight enough to prevent any movement during use.
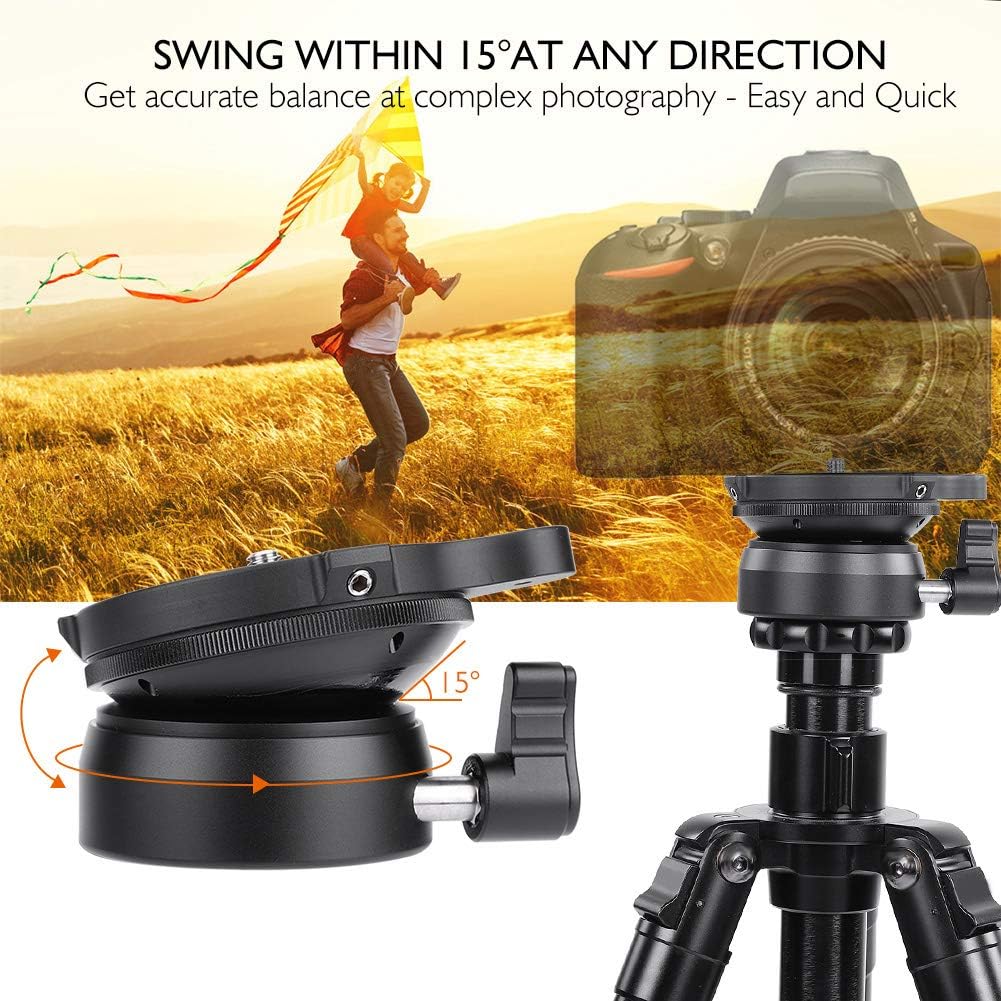
Figure 4: The leveling base can tilt up to 15 degrees in any direction for precise adjustments.

Figure 5: The integrated bubble level assists in achieving accurate horizontal alignment.

Figure 6: Side view demonstrating the locking knob used to secure the tilt position.
5. Maintenance
Proper care will extend the lifespan of your leveling base.
- Cleaning: Use a soft, dry cloth to wipe down the leveling base after each use. For stubborn dirt, a slightly damp cloth can be used, followed by immediate drying. Avoid abrasive cleaners or solvents.
- Storage: Store the leveling base in a dry, dust-free environment. The included carrying bag is ideal for protection during transport and storage.
- Inspection: Periodically check all screws and moving parts for tightness. Do not attempt to disassemble the unit beyond what is necessary for normal operation.
6. Troubleshooting
If you encounter issues, refer to the following common problems and solutions.
- Problem: The camera is not level even after adjustment.
Solution: Ensure the locking knob is fully loosened before attempting to level. Verify that the tripod itself is stable and on a firm surface. Check the bubble level for accuracy. - Problem: The leveling mechanism feels stiff or difficult to adjust.
Solution: Ensure the locking knob is completely loosened. If the issue persists, clean any visible debris from the moving parts. Do not force the mechanism. - Problem: The leveling base wobbles on the tripod.
Solution: Tighten the leveling base securely onto the tripod's mounting screw. Ensure the tripod's legs are fully extended and locked.
7. Specifications
| Feature | Specification |
|---|---|
| Model | DY-60A |
| Material | CNC Aluminum Alloy |
| Max Load Capacity | 10 KG |
| Tilt Angle | Up to 15° in any direction |
| Top Screw Mount | 1/4-inch |
| Color | Black |
| Dimensions (Approx.) | 13 x 10 x 9 cm |
| Weight (Approx.) | 369 g |
8. Warranty and Support
For warranty information or technical support, please refer to the documentation provided with your purchase or contact your retailer. Specific warranty terms may vary by region and seller.