1. Introduction
This manual provides comprehensive instructions for the installation, operation, and maintenance of your Oppo Zain 5G-T1A Ultra Fast Router (Model CTC03). Please read this manual thoroughly before using the device to ensure proper setup and optimal performance. Keep this manual for future reference.
2. Package Contents
Verify that all items are present in your product package. If any item is missing or damaged, please contact your retailer.
- Oppo Zain 5G-T1A Ultra Fast Router
- Power Adapter
- Ethernet Cable
- Quick Start Guide
3. Product Overview
Familiarize yourself with the physical features and indicators of your router.
3.1 Front Panel
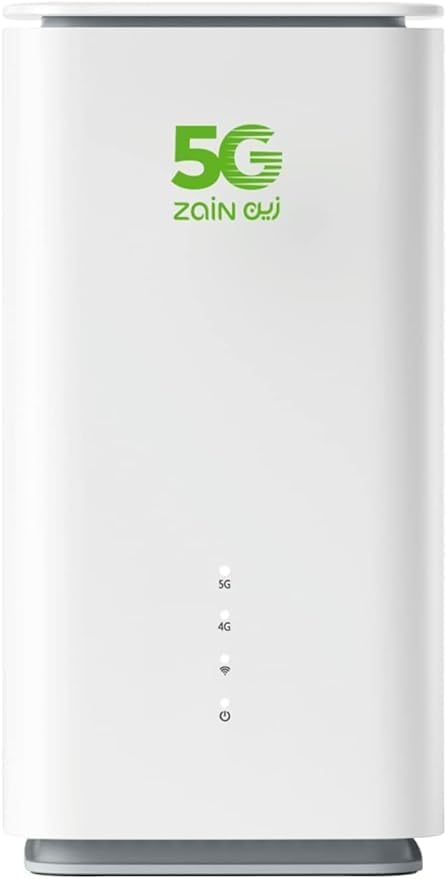
Figure 1: Front view of the Oppo Zain 5G-T1A Router.
- 5G LED: Indicates 5G network status.
- 4G LED: Indicates 4G network status.
- Signal Strength LEDs: Indicate the strength of the cellular signal.
- Power LED: Indicates the power status of the device.
3.2 Rear Panel
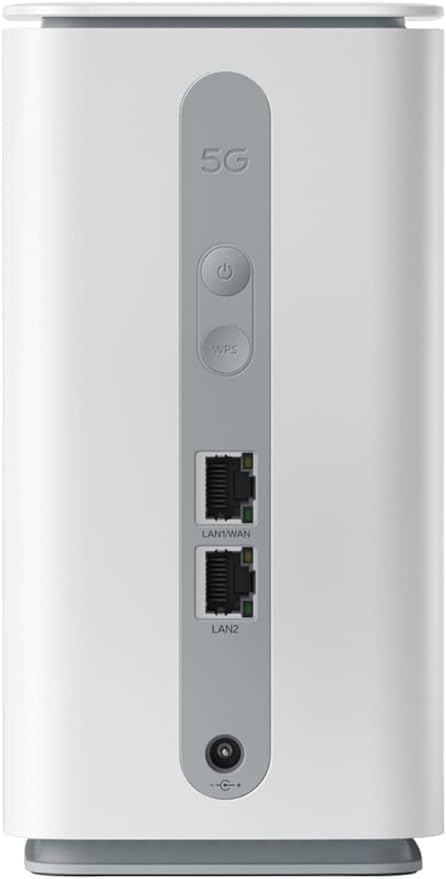
Figure 2: Rear view of the Oppo Zain 5G-T1A Router.
- Power Button: Press to turn the router on or off.
- WPS Button: Press to initiate Wi-Fi Protected Setup for easy device connection.
- LAN1/WAN Port: Connects to a computer or acts as a WAN port for an external internet source.
- LAN2 Port: Connects to a computer or other network devices.
- Power Input: Connect the provided power adapter here.
- Reset Button: (Typically a small pinhole) Press and hold for 5-10 seconds to restore factory settings.
4. Setup Instructions
Follow these steps to set up your Oppo Zain 5G-T1A Router.
- Insert SIM Card: Locate the SIM card slot (usually at the bottom or side). Insert your 5G-enabled SIM card into the slot with the gold contacts facing down and the notched corner aligned correctly. Ensure it clicks into place.
- Connect Power: Connect the power adapter to the router's power input port and then plug the adapter into a power outlet. The Power LED will illuminate.
- Power On: Press the Power button on the rear panel. Wait for the router to boot up. The 5G or 4G LED will light up, indicating network connectivity.
- Connect Devices:
- Wi-Fi Connection: On your computer, smartphone, or tablet, search for available Wi-Fi networks. Select the network name (SSID) printed on the label at the bottom of your router. Enter the Wi-Fi password (also on the label) to connect.
- Ethernet Connection: Connect one end of the Ethernet cable to a LAN port on the router (LAN1/WAN or LAN2) and the other end to your computer's Ethernet port.
- Access Web Interface: Open a web browser and enter the default IP address (e.g.,
192.168.1.1or192.168.0.1) found on the router's label. Log in using the default username and password provided on the label. You may be prompted to change the default password for security.
5. Operating Instructions
This section covers basic operation and common features of your router.
5.1 LED Indicators
Monitor the LEDs on the front panel to understand the router's status:
- Power LED: Solid green indicates power on. Blinking indicates booting or firmware upgrade. Off indicates no power.
- 5G/4G LED: Solid green indicates successful connection to the 5G/4G network. Blinking indicates searching for network. Red indicates no SIM card or network error.
- Signal Strength LEDs: More LEDs lit indicate stronger cellular signal.
5.2 Wi-Fi Network Configuration
You can customize your Wi-Fi network settings through the web interface:
- Log in to the router's web interface.
- Navigate to the Wi-Fi Settings or Wireless section.
- Change the Wi-Fi Network Name (SSID) and Password as desired.
- Save your changes. Connected devices will need to reconnect using the new credentials.
5.3 Access Point Mode
The router supports Access Point (AP) Mode. In this mode, the router extends an existing wired network wirelessly. To configure AP Mode, access the web interface and navigate to the operating mode settings. Connect the router's LAN1/WAN port to your existing network's router or switch.
5.4 USB Print Server
The router may feature a USB port that supports print server functionality. Connect a compatible USB printer to the router's USB port. Refer to the router's web interface or advanced settings for specific instructions on configuring the print server and installing necessary drivers on your network devices.
6. Maintenance
Regular maintenance ensures the longevity and optimal performance of your router.
- Placement: Place the router in an open area, away from obstructions, large metal objects, and other electronic devices that may cause interference. Ensure good ventilation.
- Cleaning: Use a soft, dry cloth to clean the router's exterior. Do not use liquid cleaners or aerosols.
- Firmware Updates: Periodically check the manufacturer's website for firmware updates. Firmware updates can improve performance, add new features, and fix security vulnerabilities. Follow the instructions provided by the manufacturer carefully when performing updates.
- Restarting: If you experience network issues, try restarting the router by unplugging the power adapter for 10 seconds and then plugging it back in.
7. Troubleshooting
This section addresses common issues you might encounter.
- No Internet Connection:
- Check if the 5G/4G LED is solid green. If not, ensure the SIM card is correctly inserted and active.
- Verify your SIM card has an active data plan.
- Restart the router.
- Check the signal strength LEDs. If the signal is weak, try relocating the router.
- Wi-Fi Not Connecting:
- Ensure you are entering the correct Wi-Fi password.
- Check if the Wi-Fi function is enabled in the router's web interface.
- Try restarting both the router and your device.
- Slow Internet Speed:
- Check the signal strength LEDs; a weak signal will result in slower speeds.
- Ensure there are no too many devices connected or heavy bandwidth usage.
- Try moving the router to a more central location.
- Restart the router.
- Cannot Access Web Interface:
- Ensure your device is connected to the router via Wi-Fi or Ethernet.
- Verify you are entering the correct IP address (e.g.,
192.168.1.1). - Clear your browser's cache or try a different browser.
- Factory Reset: If issues persist, you can perform a factory reset. With the router powered on, use a pin to press and hold the Reset button on the rear panel for approximately 5-10 seconds until the LEDs flash. The router will restart with factory default settings. Warning: This will erase all custom configurations.
8. Specifications
| Feature | Description |
|---|---|
| Model Name | CTC03 |
| Connectivity Technology | 5G, Wi-Fi |
| Wireless Communication Standard | 802.11ax |
| Frequency Band Class | Single-Band |
| Special Features | Access Point Mode, USB Print Server, Weatherproof |
| Compatible Devices | Laptop, Personal Computer, Smartphone, Tablet |
| Recommended Uses | Home, Small Office |
| Package Dimensions | 28.4 x 12.6 x 10.6 cm |
| Item Weight | 1.48 kg |
9. Safety Information
Please observe the following safety guidelines:
- Use only the power adapter supplied with the device.
- Do not expose the device to water, moisture, or extreme temperatures.
- Avoid placing the device near heat sources or in direct sunlight.
- Do not attempt to open or repair the device yourself. Refer all servicing to qualified personnel.
- Keep the device away from children.
10. Warranty and Support
Warranty information for your Oppo Zain 5G-T1A Ultra Fast Router is typically provided with your purchase documentation. Please refer to the warranty card or contact your retailer for details regarding warranty coverage and terms.
For technical support, troubleshooting assistance beyond this manual, or to inquire about firmware updates, please visit the official Oppo or Zain support website or contact their customer service directly. Ensure you have your product model number (CTC03) and serial number ready when seeking support.


