Introduction
This instruction manual provides guidance for the setup, operation, and maintenance of your Remotes Remade Replacement AC Remote Control. This remote is designed to be a universal replacement for various Mitsubishi Electric Mr. Slim Air Conditioner models, offering a convenient solution when your original remote is lost or damaged.
The remote features a backlit screen for easy visibility and supports both Fahrenheit and Celsius temperature displays.
Compatibility
This replacement remote control is compatible with a wide range of Mitsubishi Electric Mr. Slim Air Conditioner models. Some of the compatible series and models include, but are not limited to:
- MSZ-FH Series: MSZ-FH06NA, MSZ-FH09NA, MSZ-FH12NA, MSZ-FH15NA, MSZ-FH18NA, MSZ-FH18NA2
- SUZ-M Series: SUZ-M71VAD-A, SUZ-M60VAD-A, SUZ-M50VAD-A, SUZ-M35VAD-A, SUZ-M25VAD-A
- SLZ-M Series: SLZ-M60FA-A, SLZ-M50FA-A, SLZ-M35FA-A, SLZ-M25FA-A
- SEZ-M Series: SEZ-M71DA(L), SEZ-M60DA(L), SEZ-M50DA(L), SEZ-M35DA(L), SEZ-M25DA(L)
- PUZ-ZM Series: PUZ-ZM71VHA-A, PUZ-ZM140YKA-A, PUZ-ZM125YKA-A, PUZ-ZM100YKA-A
- PUZ-RP Series: PUZ-RP200YKA-A, PUZ-RP170YKA-A, PUZ-RP170VKA-A
- PUMY-SP Series: PUMY-SP80V(Y)KMD, PUMY-SP140V(Y)KMD, PUMY-SP125V(Y)KMD, PUMY-SP112V(Y)KMD
- MUZ-LN Series: MUZ-LN60VG, MUZ-LN50VG2, MUZ-LN50VG, MUZ-LN35VG2, MUZ-LN25VG2
- MUZ-EF Series: MUZ-EF50VG-A1, MUZ-EF42VG-A1, MUZ-EF35VG-A1, MUZ-EF25VG-A1
- And many other Mitsubishi Electric Mr. Slim models. If your specific model is not listed, the remote is designed to be compatible through its programming function.
Setup
1. Battery Installation
The remote control requires two AAA batteries (not included). Follow these steps to install them:
- Locate the battery compartment cover on the back of the remote control.
- Slide the cover downwards or press the latch and lift to open.
- Insert two AAA batteries, ensuring the positive (+) and negative (-) terminals align correctly with the markings inside the compartment.
- Replace the battery compartment cover by sliding it back into place until it clicks securely.
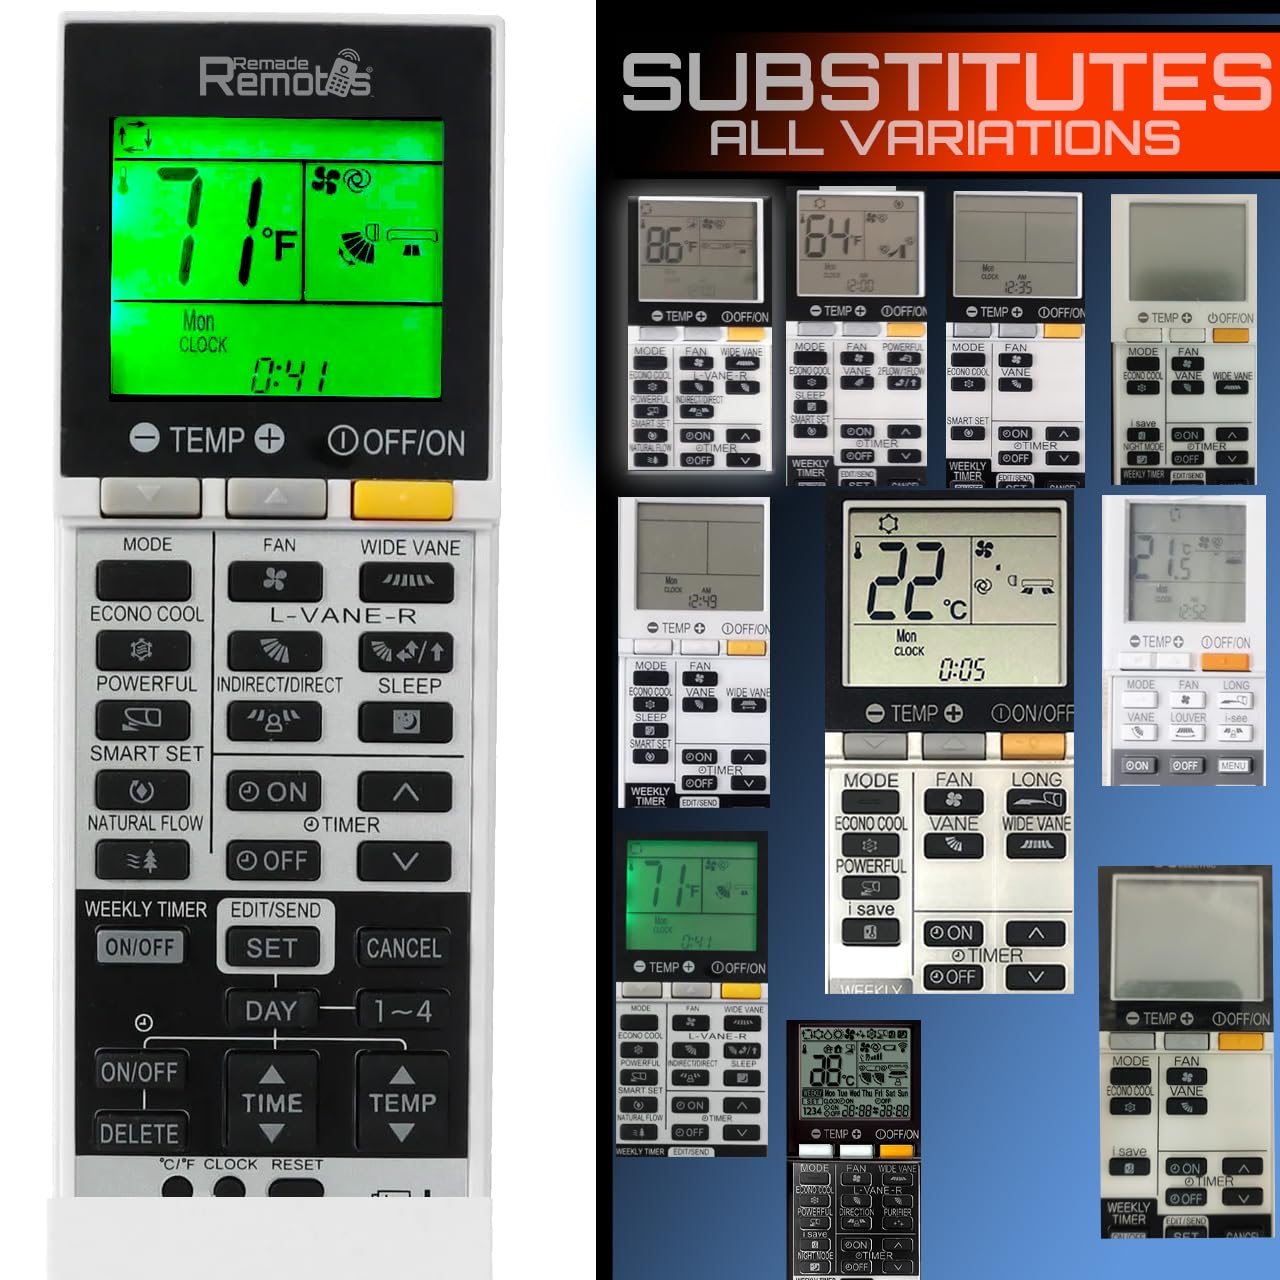
Image: The Remotes Remade Replacement AC Remote Control, showing its front face with buttons and backlit screen.
2. Initial Programming (If Needed)
In most cases, the remote control will work immediately upon battery installation. If it does not operate your AC unit, follow these programming steps:
- Point the remote control towards your Mitsubishi Electric Mr. Slim Air Conditioner unit.
- Press and hold the Power button on the remote for approximately 5 seconds. The remote's screen should display a channel number or a flashing indicator.
- While still pointing the remote at the AC unit, use the Up and Down arrow buttons (usually for temperature adjustment) to cycle through the available channels. There are 21 channels, each corresponding to a different compatibility code.
- Stop cycling when your AC unit responds (e.g., turns on, off, or makes a sound).
- Once the AC unit responds, press any other function button (e.g., Mode or Fan) to confirm the selection and exit programming mode.
- Test all primary functions to ensure proper operation. If the unit does not respond correctly, repeat the programming steps.
Operating Instructions
This section describes the general functions of the remote control buttons. Button layouts may vary slightly, but core functions remain consistent.
- Power Button: Turns the AC unit on or off.
- Mode Button: Cycles through operating modes such as Cool, Heat, Fan, Dry, and Auto.
- Temperature Up/Down Arrows: Adjusts the desired temperature setting.
- Fan Speed Button: Changes the fan speed (e.g., Low, Medium, High, Auto).
- Swing/Vane Button: Controls the direction of the airflow or activates the swing function of the air conditioner's louvers.
- Timer Button: Sets a timer for the AC unit to turn on or off automatically. Refer to your AC unit's manual for specific timer settings.
- Sleep Button: Activates the sleep mode, which often adjusts temperature and fan speed for comfortable sleep.
- Backlight: The remote features a backlit screen for improved visibility in low-light conditions. This typically activates automatically when a button is pressed.
- Temperature Display: The remote displays temperature in Fahrenheit by default. To switch to Celsius, consult the remote's specific instructions or look for a small button inside the battery compartment or a combination of main buttons.
Maintenance
1. Cleaning the Remote
To maintain the remote control's appearance and functionality:
- Wipe the surface with a soft, dry cloth.
- For stubborn dirt, lightly dampen the cloth with water or a mild, non-abrasive cleaner.
- Avoid using harsh chemicals, solvents, or abrasive materials, as these can damage the remote's finish or internal components.
2. Battery Replacement
Replace batteries when the remote's display becomes dim, or its response becomes inconsistent. Refer to the "Battery Installation" section under Setup for detailed steps. Always replace both batteries at the same time with new ones of the same type (AAA).
Troubleshooting
- Remote not responding:
- Check battery orientation and ensure they are fresh.
- Ensure there are no obstructions between the remote and the AC unit's receiver.
- Verify the remote is programmed correctly for your AC unit (refer to "Initial Programming" section).
- AC unit not responding to all commands:
- The remote might be partially programmed or on an incorrect channel. Repeat the "Initial Programming" steps to find the correct channel.
- Some advanced functions might be specific to the original remote or AC unit model.
- Display issues:
- If the screen is dim or blank, replace the batteries.
- If segments are missing, the remote may be damaged.
Specifications
| Brand | Remotes Remade |
| Model Number | forMitsBacklit |
| Compatible Devices | Mitsubishi Electric Mr. Slim Air Conditioners |
| Max Number of Supported Devices | 1 (Air Conditioner) |
| Color | White |
| Special Feature | Backlit Screen, Works on arrival in almost all cases, Fahrenheit/Celsius display |
| Product Dimensions | 2.4 x 1 x 7.5 inches |
| Item Weight | 3.84 ounces |
| Power Source | 2 x AAA Batteries (not included) |
Warranty and Support
For any questions, troubleshooting assistance, or support regarding your Remotes Remade Replacement AC Remote Control, please contact the manufacturer, Remotes Remade. Refer to the product packaging or the retailer's website for specific contact information.
While specific warranty details are not provided in this manual, it is recommended to retain your purchase receipt for any potential warranty claims.