Topyond 180584A1
12V Excavator Solenoid Valve 180584A1 User Manual
Model: 180584A1 (Topyondo10f8hwbur) | Brand: Topyond
1. Introduction
This manual provides essential information for the proper installation, operation, and maintenance of the Topyond 12V Excavator Solenoid Valve, model 180584A1. Designed as a precise replacement part, this solenoid valve ensures optimal performance and compatibility with various CASE MX Series excavators.
Key features of this solenoid valve include its high quality and reliability, rapid switching capability for high performance, energy-efficient operation with minimal power consumption, and a design that facilitates easy installation and maintenance, contributing to a long service life and low operating costs. It is widely applicable across a range of compatible excavator models.
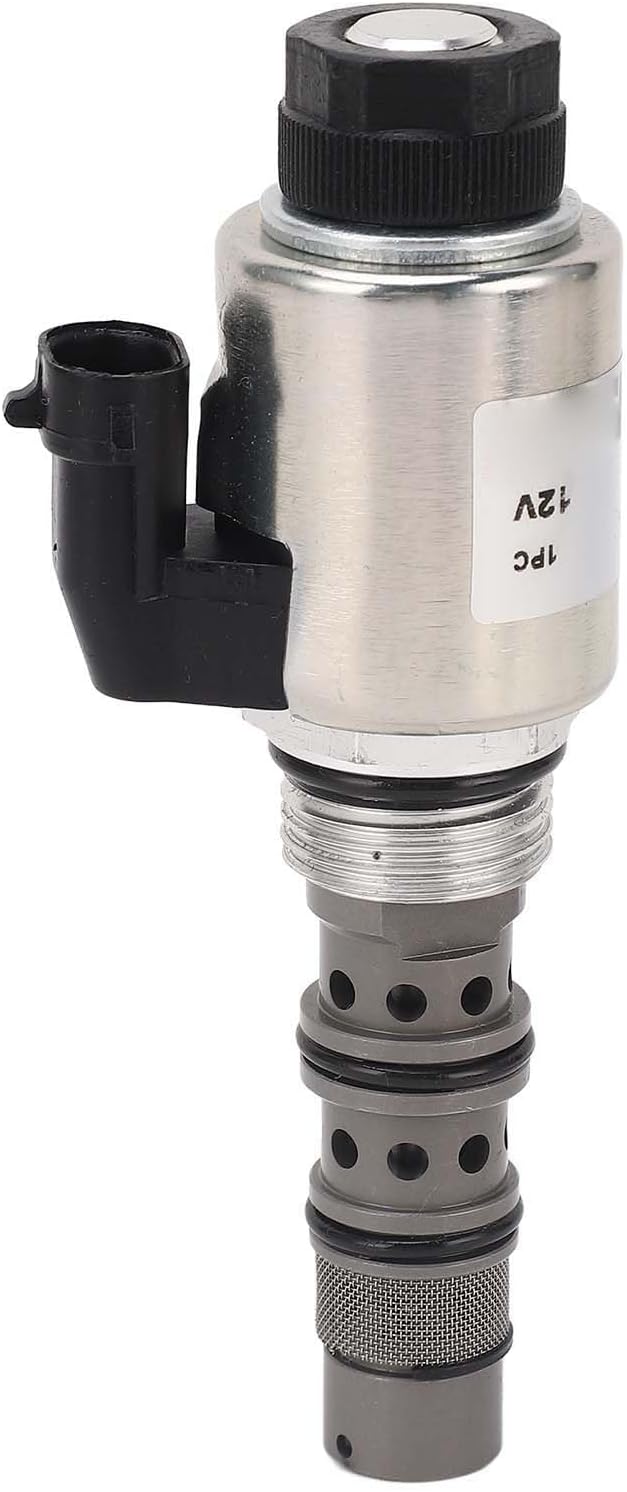
Front view of the 12V Excavator Solenoid Valve 180584A1, showing its cylindrical body, electrical connector, and the valve stem with filtration mesh.
2. Setup and Installation
Installation of the 12V Excavator Solenoid Valve 180584A1 should be performed by qualified personnel to ensure safety and proper function. Always refer to your excavator's specific service manual for detailed instructions.
2.1 Safety Precautions
- Ensure the excavator is turned off and the ignition key is removed.
- Disconnect the battery to prevent accidental electrical discharge.
- Relieve any hydraulic pressure in the system before disconnecting hydraulic lines.
- Wear appropriate personal protective equipment (PPE), including gloves and eye protection.
2.2 Installation Steps
- Identify and Remove Old Valve: Locate the existing solenoid valve on your CASE MX Series excavator. Carefully disconnect any electrical wiring and hydraulic lines attached to it. Use appropriate tools to remove the old valve from its housing.
- Inspect Mounting Area: Clean the mounting area thoroughly, ensuring it is free of dirt, debris, and old gasket material.
- Install New Valve: Carefully insert the new Topyond 180584A1 solenoid valve into its designated housing. Ensure proper seating and alignment.
- Connect Electrical Wiring: Securely attach the 12V electrical connector to the new solenoid valve. Ensure a tight and corrosion-free connection.
- Reconnect Hydraulic Lines (if applicable): If hydraulic lines were disconnected, reattach them securely. Ensure all connections are tight to prevent leaks.
- Test System: After installation, reconnect the battery. Slowly re-pressurize the hydraulic system and test the valve's operation. Check for any leaks, unusual noises, or abnormal behavior.
2.3 Compatibility
This solenoid valve is a precise replacement for the original part and is suitable for the following CASE MX Series excavators:
- CASE MX80C
- CASE MX90C
- CASE MX100C
- CASE MX100
- CASE MX110
- CASE MX120
- CASE MX135

The 12V Excavator Solenoid Valve 180584A1 positioned alongside a large yellow excavator, illustrating its intended application in heavy machinery.
3. Operating Principles
The 12V Excavator Solenoid Valve 180584A1 is an electro-hydraulic device that controls the flow of hydraulic fluid within the excavator's system. When electrical current is applied to the solenoid coil, it generates a magnetic field, which in turn moves a plunger or spool inside the valve. This movement opens or closes internal passages, directing hydraulic fluid to specific components (e.g., cylinders, motors) to perform various functions like boom movement, bucket operation, or track control. Its rapid switching capability ensures precise and efficient control over hydraulic functions.

A close-up view of the lower section of the 12V Excavator Solenoid Valve 180584A1, highlighting the intricate valve components, O-rings, and the fine mesh filter at the tip.
4. Maintenance
Regular maintenance is crucial for extending the lifespan and ensuring the reliable operation of your solenoid valve. Adhering to these guidelines will help prevent premature wear and ensure optimal performance.
- Visual Inspection: Periodically check the valve for signs of external damage, corrosion, or hydraulic fluid leaks. Any visible damage should be addressed promptly.
- Electrical Connections: Ensure the electrical connector is clean, secure, and free from corrosion. Loose or corroded connections can lead to intermittent operation or complete failure.
- Cleanliness: Keep the valve and its surrounding area free from dirt, dust, and hydraulic fluid contamination. A clean environment helps prevent debris from entering the hydraulic system.
- Filter Check: While the valve features an internal filter mesh, it is not typically user-serviceable. Ensure the excavator's main hydraulic system filters are regularly inspected and changed according to the manufacturer's recommendations to prevent debris from reaching sensitive components like the solenoid valve.
- Leak Detection: Promptly address any signs of hydraulic fluid leakage around the valve. Leaks can indicate damaged seals or loose connections, which can lead to system inefficiency and potential damage.

A detailed shot of the electrical connector on the 12V Excavator Solenoid Valve 180584A1, showing the two pins for power connection.
5. Troubleshooting
This section provides guidance for common issues you might encounter with the solenoid valve. For complex problems or if you are unsure about any step, consult a qualified technician or your excavator's service manual.
| Problem | Possible Cause | Solution |
|---|---|---|
| Valve not actuating / No response |
|
|
| Valve actuates but hydraulic function is weak/slow |
|
|
| Hydraulic fluid leakage around valve |
|
|
6. Specifications
The following are the technical specifications for the Topyond 12V Excavator Solenoid Valve 180584A1:
| Attribute | Value |
|---|---|
| Item Type | Solenoid Valve |
| Model | 180584A1 |
| Material | Alloy Steel |
| Voltage | 12V |
| Item Weight | Approximately 11.6 ounces (0.33 kg) |
| Manufacturer | Topyond |
| Manufacturer Part Number | Topyondo10f8hwbur |
| Compatible Excavators | CASE MX80C, MX90C, MX100C, MX100, MX110, MX120, MX135 |
7. Warranty and Support
For warranty information or technical support regarding your Topyond 12V Excavator Solenoid Valve 180584A1, please contact Topyond customer service through their official channels or the retailer from whom the product was purchased. Keep your purchase receipt and product model number handy for faster service.
Topyond is committed to providing high-quality products and reliable customer support. Please refer to the product packaging or the official Topyond website for the most current contact information and warranty details.
Ask a question about this manual
Ask about setup, troubleshooting, compatibility, parts, safety, or missing instructions. Manuals+ will review the question and use this page’s manual context to help answer it.