1. Introduction
This manual provides detailed instructions for the installation, operation, and maintenance of your Heagstat H701W Non-Programmable Single-Stage Thermostat. This device is designed for simple and reliable temperature control in residential environments. Please read this manual thoroughly before installation and use to ensure proper function and safety.
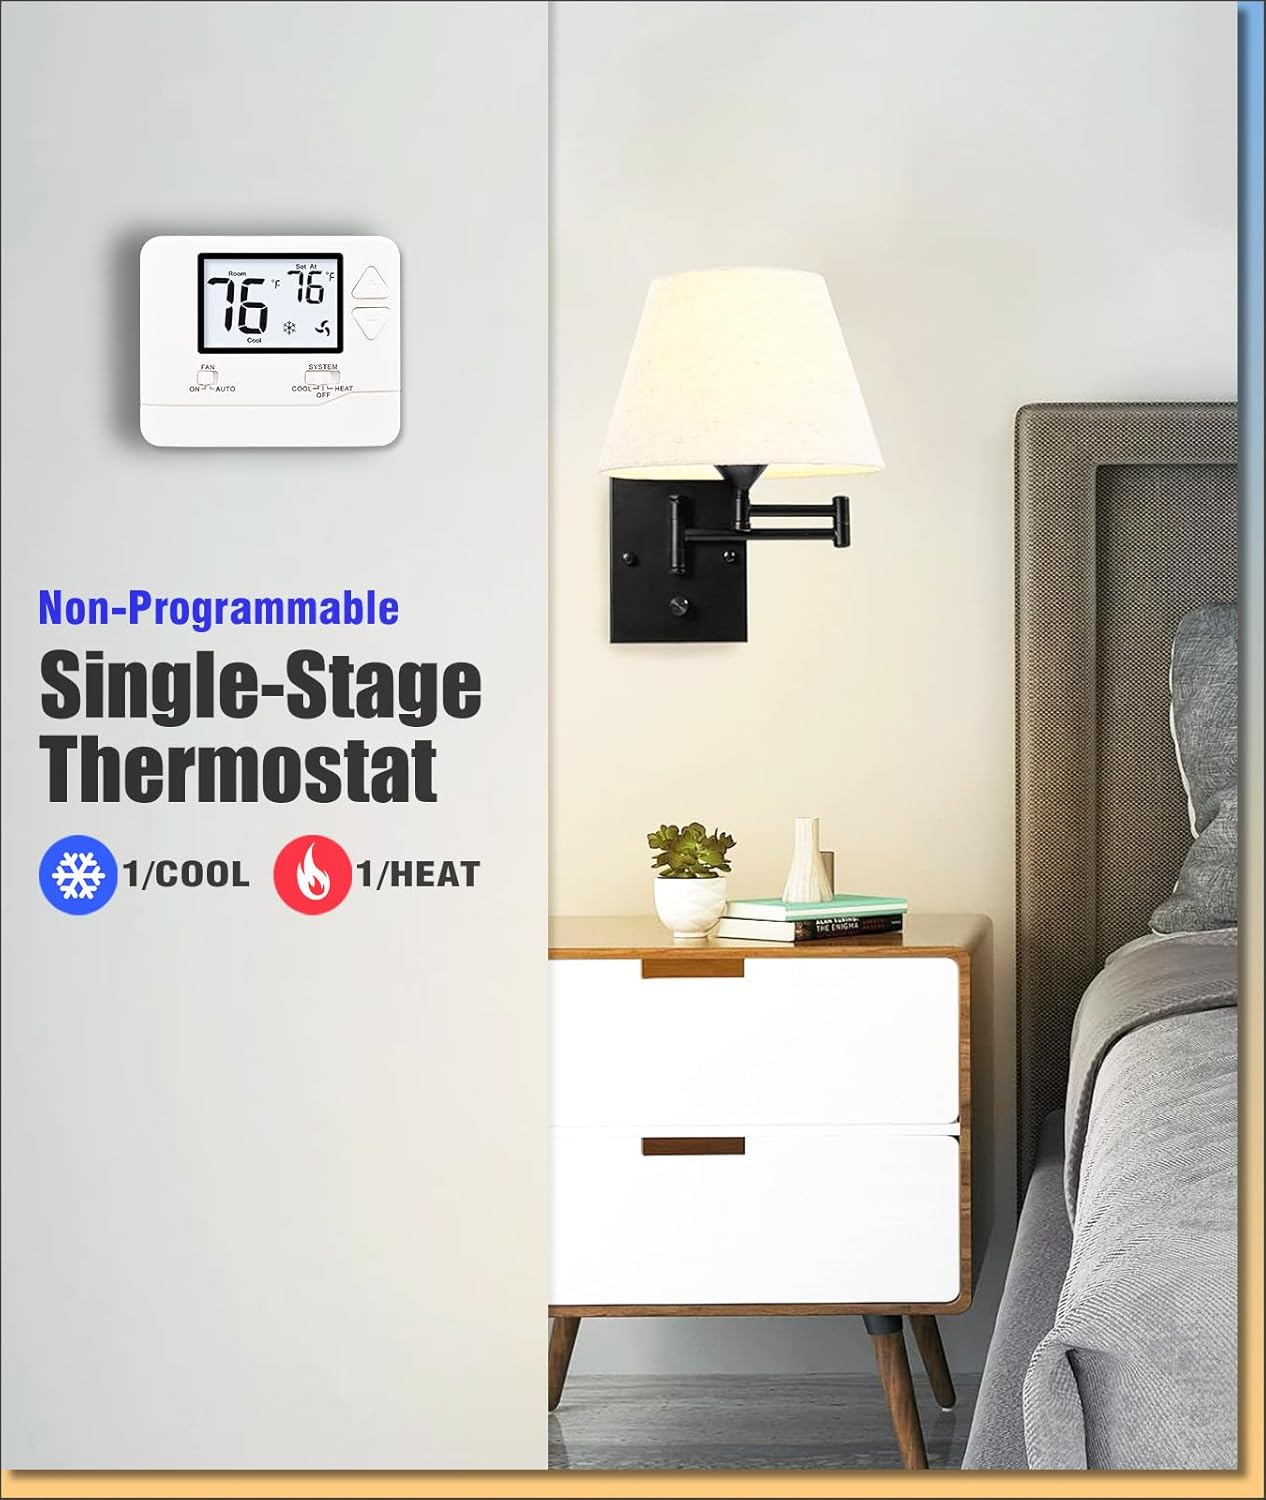
Image 1.1: Heagstat H701W Thermostat installed on a wall.
2. Product Features
- Large LCD Screen: Features a clear 4.5 square inch LCD with white backlight for easy readability in various lighting conditions.
- Temperature Display: Shows room temperatures from 41°F to 95°F.
- Adjustable Temperature Range: Allows setting temperatures from 44°F to 90°F.
- Separate Swing Settings: Independent adjustable swing (cycle rate) for heating and cooling to optimize comfort and system efficiency.
- Dual Power Options: Operates on 24VAC (hardwired) or 2 AAA batteries (not included), offering flexible installation.
- Compressor Delay Protection: A built-in 5-minute delay prevents short cycling of the compressor, extending HVAC system lifespan. This feature can be enabled or disabled.
- Temperature Calibration: Allows for precise temperature display adjustment from -4°F to +4°F.
- Fahrenheit/Celsius Units: User-selectable temperature display units.

Image 2.1: Key features of the Heagstat H701W Thermostat, including display and battery access.
Product Dimensions
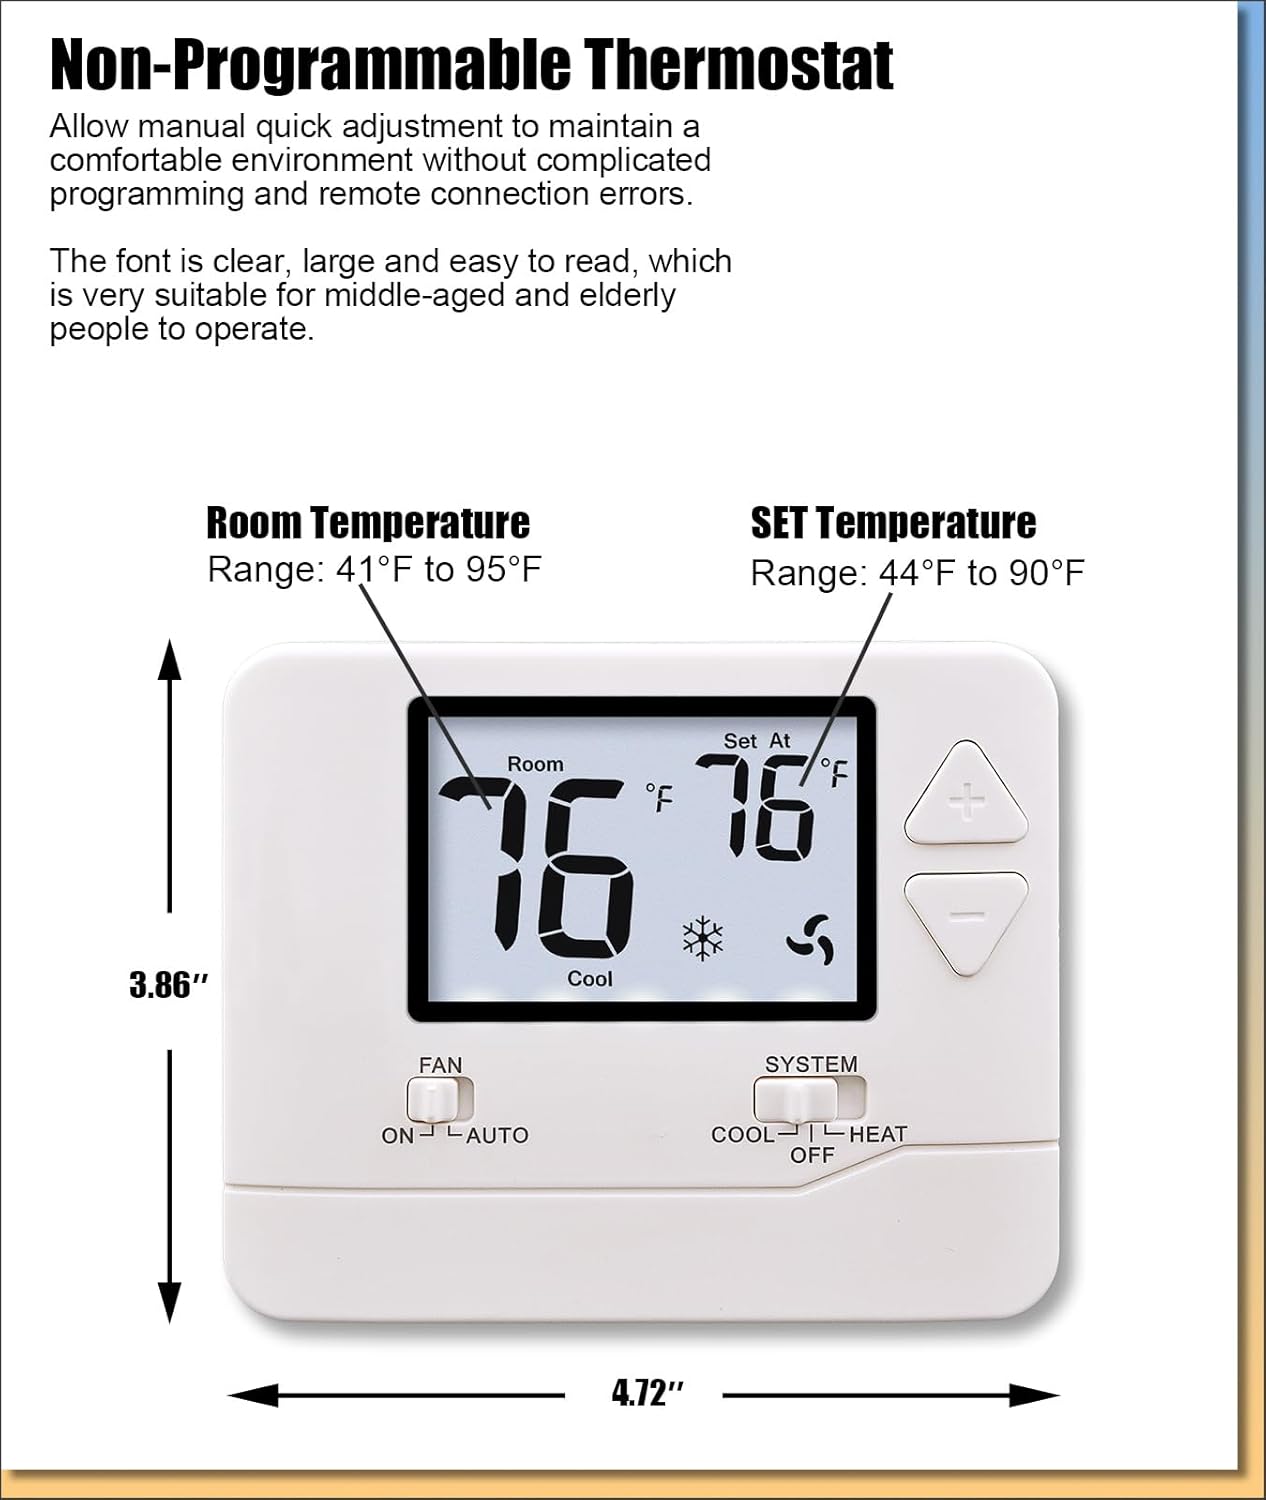
Image 2.2: Dimensions of the Heagstat H701W Thermostat.
The thermostat measures approximately 3.86 inches (H) x 4.72 inches (W) x 0.98 inches (D).
3. Package Contents
Upon opening the package, please verify that all the following items are included:
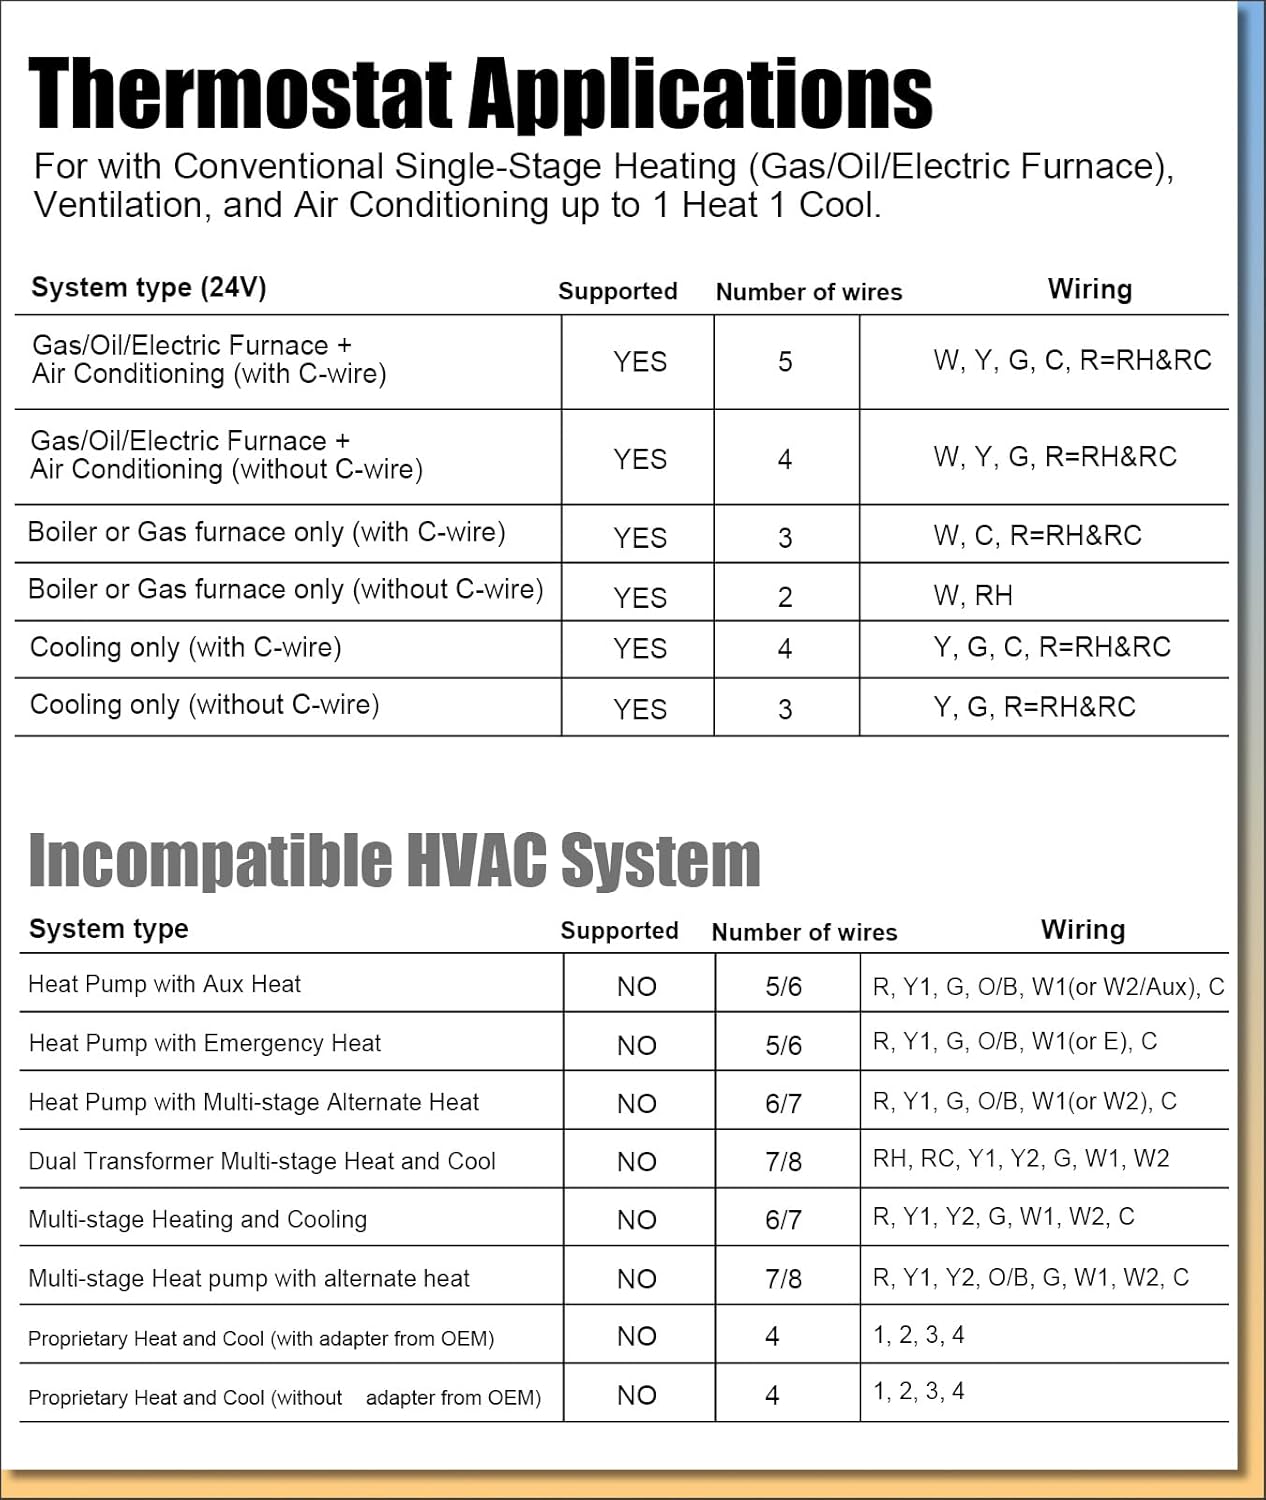
Image 3.1: Contents included in the Heagstat H701W Thermostat package.
- Heagstat H701W Thermostat Unit
- Universal Subbase
- Installation Manual
- Wire Label
- 2 x Mounting Screws
- 2 x Wall Anchors
4. Compatibility
The Heagstat H701W thermostat is designed for use with conventional single-stage HVAC systems. It supports systems with up to 1 Heat and 1 Cool (1H/1C) functionality.

Image 4.1: Compatible HVAC System Types and Wiring Requirements.
Compatible Systems Include:
- Standard single-stage HVAC systems (up to 1 Heat/1 Cool)
- Gas, oil, or electric furnaces
- Central air conditioners
- 1H/1C heat pumps (without auxiliary heat)
Incompatible Systems:
This thermostat is not compatible with the following systems:
- Multi-stage systems (e.g., 1H/2C, 2H/2C, 3H/2C)
- HVAC heat pump systems with auxiliary heat (e.g., 2H/1C, 2H/2C, 4H/2C)
- PTAC units
- 3-wire hydronic (hot water) systems
- Dual-fuel/hybrid heating systems
- Line-voltage systems (120-240V electric baseboard heat)
- Mini-split heat pump AC units
- RV air conditioners (Mach & Roughneck series)
5. Installation
Important: If you are inexperienced in wiring and installation, it is recommended to consult a qualified HVAC technician. Always turn off power to your HVAC system at the circuit breaker before beginning installation.
5.1 Wiring
The Heagstat H701W requires a 2-5 wire setup. Refer to the diagram below for typical wiring connections. Ensure that the power to your HVAC system is OFF before connecting any wires.
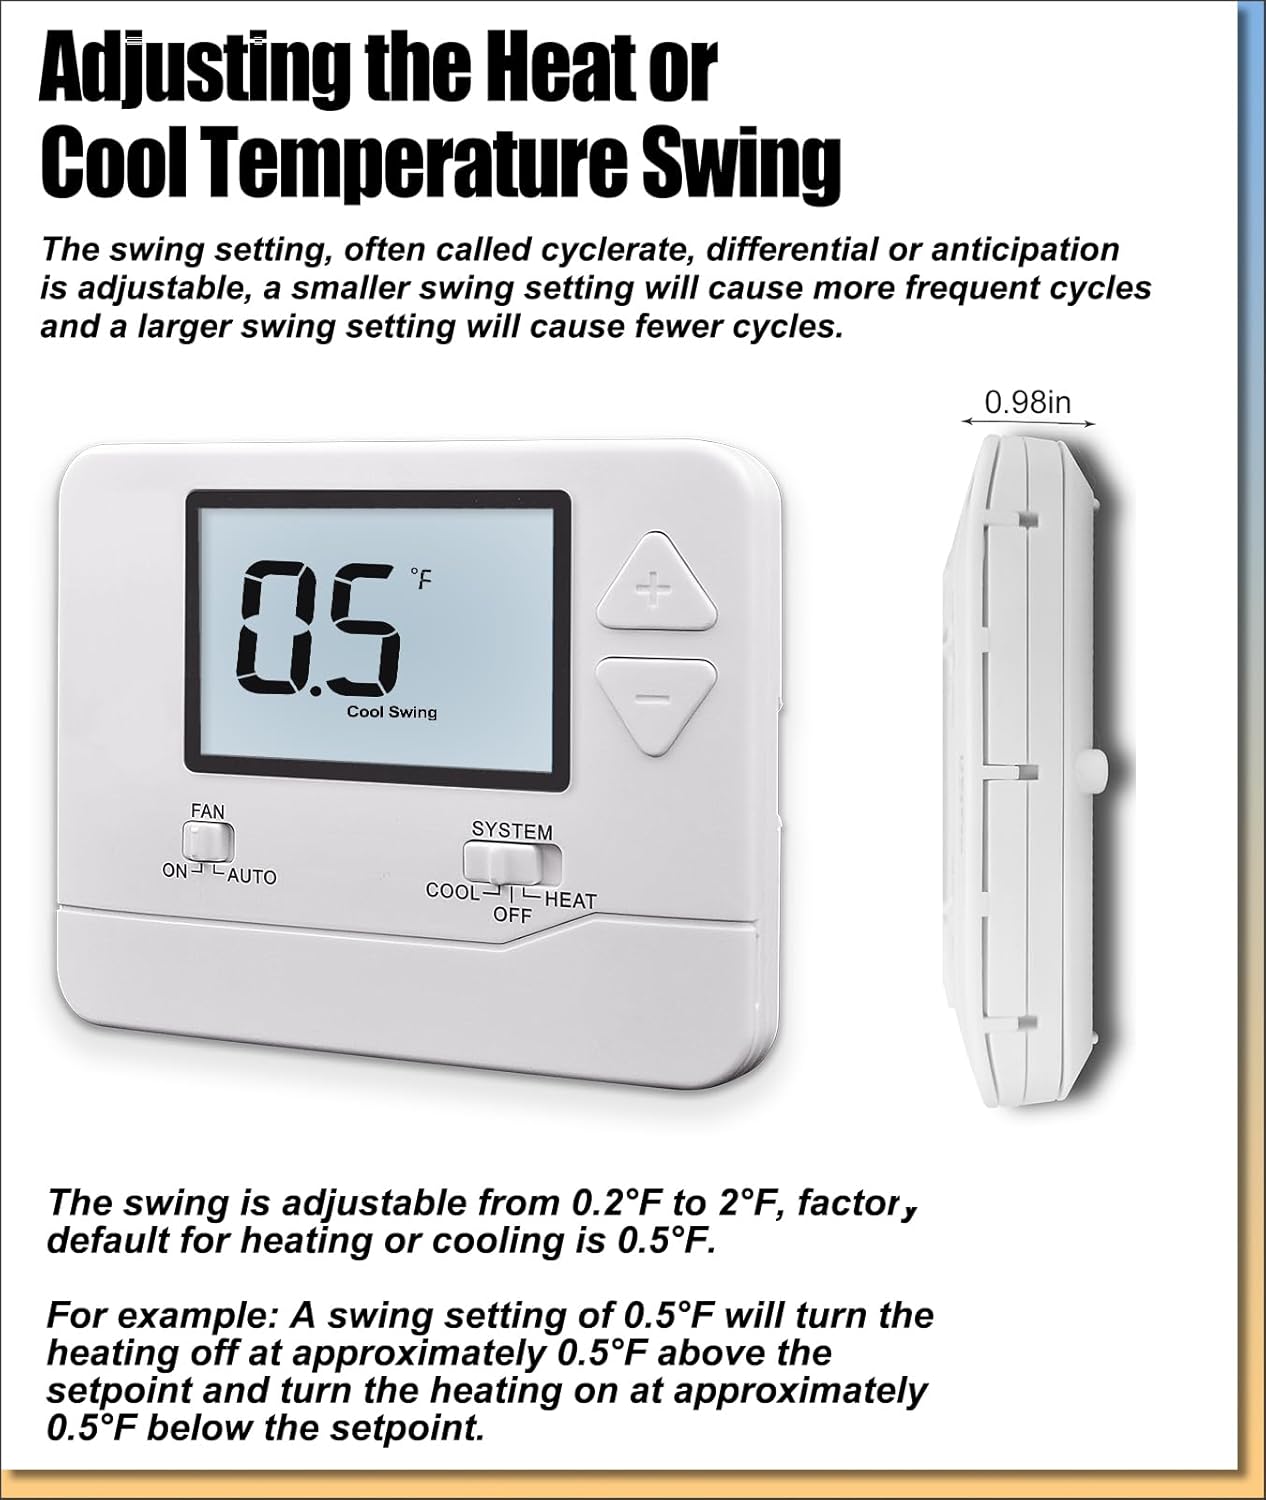
Image 5.1: Wiring diagram for the Heagstat H701W Thermostat.
- R/RH: 24VAC Power (Heating)
- RC: 24VAC Power (Cooling) - A jumper connection is typically used between RH and RC for single-transformer systems.
- G: Indoor Blower (Fan)
- Y1: 1st-Stage Cool
- W1: 1st-Stage Heat
- C: Common Wire (provides continuous 24VAC power, not required on all systems but recommended for consistent backlight operation)
5.2 Setting the System Switch (GAS/ELEC)
On the back of the thermostat unit, locate the small switch labeled 'ELEC' and 'GAS'.

Image 5.2: Location of the GAS/ELEC system switch.
- If you have an electric furnace, set the switch to ELEC.
- If you have a gas or oil furnace, set the switch to GAS.
6. Operation
6.1 Basic Temperature Adjustment
The large LCD displays both the current room temperature ('Room') and the set temperature ('Set At').

Image 6.1: Main display and controls of the Heagstat H701W Thermostat.
To adjust the set temperature, use the '+' (up) and '-' (down) buttons located on the right side of the thermostat. Each press will adjust the temperature by 1 degree Fahrenheit or Celsius, depending on your selected unit.
6.2 Fan Operation
The 'FAN' switch has two settings:
- ON: The fan will run continuously, regardless of whether the heating or cooling system is active.
- AUTO: The fan will only run when the heating or cooling system is actively operating.
6.3 System Mode Selection
The 'SYSTEM' switch allows you to select the operating mode for your HVAC system:
- COOL: Activates the cooling system.
- OFF: Turns off both heating and cooling systems.
- HEAT: Activates the heating system.
6.4 Adjusting Temperature Swing (Cycle Rate)
The temperature swing, also known as cycle rate or differential, determines how frequently your heating or cooling system cycles on and off. A smaller swing setting results in more frequent, shorter cycles, while a larger swing setting results in fewer, longer cycles.

Image 6.2: Display showing the temperature swing setting.
The swing is adjustable from 0.2°F to 2°F. The default setting for both heating and cooling is 0.5°F.
For example, with a heating swing of 0.5°F, the heating system will turn off when the room temperature reaches approximately 0.5°F above the setpoint and turn on when the room temperature falls approximately 0.5°F below the setpoint.
6.5 Compressor Delay Protection
The thermostat includes a 5-minute compressor delay protection feature. When enabled, if 'Com Delay' appears on the display, it indicates that the air conditioning system is preventing short cycling. This delay protects the compressor and can be turned on or off through advanced settings (refer to the full operation manual for detailed instructions on accessing advanced settings).
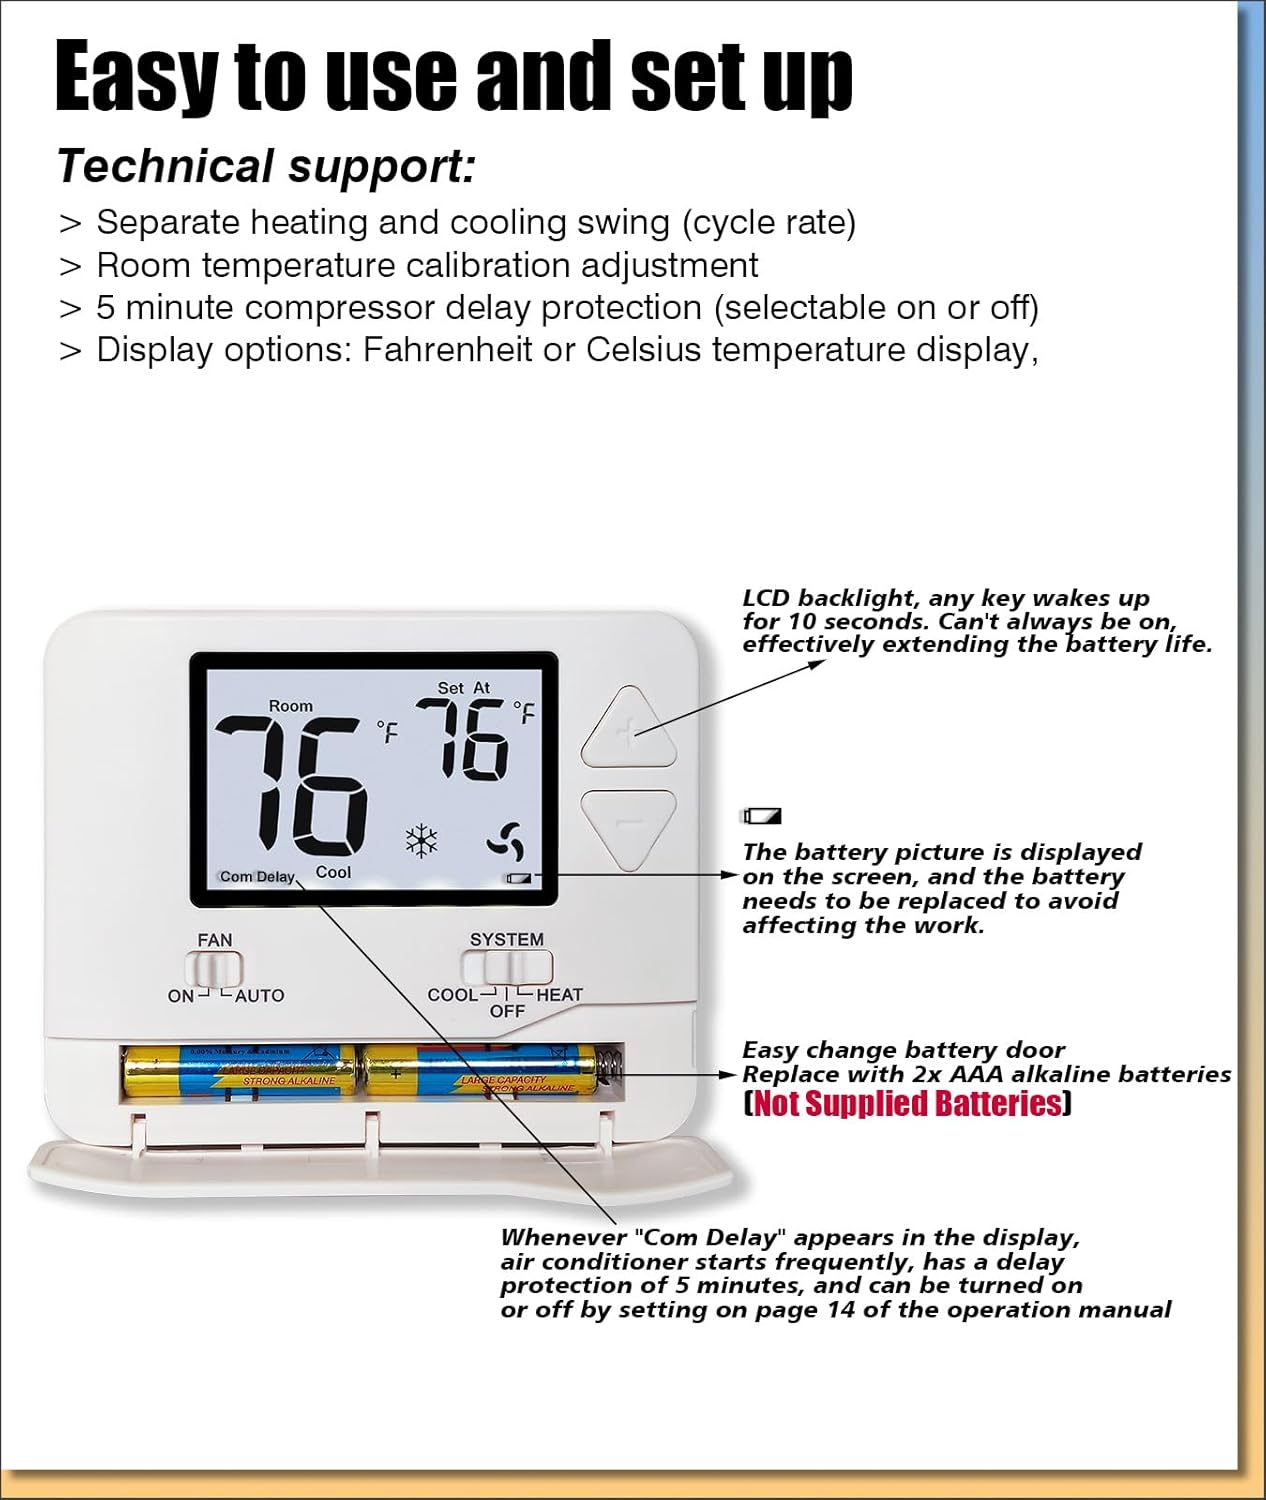
Image 6.3: Thermostat display indicating 'Com Delay' and battery compartment.
7. Maintenance
7.1 Battery Replacement
If the thermostat is powered by batteries, a low battery indicator will appear on the display when replacement is needed. To replace the batteries:
- Gently pull the front cover of the thermostat forward to detach it from the subbase.
- Locate the battery compartment on the back of the front cover.
- Remove the old AAA batteries.
- Insert two new AAA alkaline batteries, ensuring correct polarity.
- Align the front cover with the subbase and gently push until it clicks into place.
Note: Batteries are not supplied with the thermostat.
7.2 Cleaning
To clean the thermostat, gently wipe the exterior with a soft, damp cloth. Do not use abrasive cleaners or solvents, as these can damage the finish or internal components. Ensure no moisture enters the thermostat's internal parts.
8. Troubleshooting
If you encounter issues with your Heagstat H701W thermostat, please review the following common problems and solutions:
- No Display/Blank Screen:
- Check if the batteries are installed correctly and are not depleted. Replace if necessary.
- Ensure the HVAC system's power at the circuit breaker is ON.
- Verify that the common wire (C-wire) is properly connected if using 24VAC power.
- System Not Responding (No Heating/Cooling):
- Confirm the 'SYSTEM' switch is set to 'HEAT' or 'COOL' as desired.
- Check the set temperature. Ensure it is above the room temperature for heating or below for cooling.
- Verify all wiring connections are secure at both the thermostat and the HVAC unit.
- If 'Com Delay' is displayed, wait 5 minutes for the compressor protection to reset.
- Ensure the 'FAN' switch is set to 'AUTO' or 'ON'.
- Inaccurate Temperature Reading:
- Ensure the thermostat is not exposed to direct sunlight, drafts, or heat sources that could affect its sensor.
- Use the temperature calibration feature to fine-tune the display if needed (refer to advanced settings in the full manual).
- Fan Runs Continuously:
- Check if the 'FAN' switch is set to 'ON'. If you prefer the fan to run only with heating/cooling, set it to 'AUTO'.
If these steps do not resolve the issue, please contact Heagstat customer support for further assistance.
9. Specifications
| Feature | Specification |
|---|---|
| Brand | Heagstat |
| Model Name | Single-Stage Thermostat (H701W) |
| Product Dimensions | 0.98"D x 4.72"W x 3.86"H |
| Controller Type | Conventional single-stage systems (1H/1C) |
| Room Temperature Range | 41°F to 95°F |
| Set Temperature Range | 44°F to 90°F |
| Special Features | Separate Heating/Cooling Swing, Temperature display calibration (-4°F to +4°F), Fahrenheit/Celsius units, 5-minute Compressor Delay Protection |
| Color | Off-white |
| Specific Uses | Single-Stage Heating and Air Conditioning (up to 1H/1C) |
| Temperature Control Type | Cooling and Heating |
| Power Source | 24 Volts AC (hardwired), 2 x AAA Batteries (not included) |
| Item Weight | 4.8 ounces |
| Material | Plastic |
| Display Type | LCD |
| Control Type | Button Control |
| Mounting Type | Wall Mount |
| Backlight | Yes |
10. Warranty and Support
For specific warranty information regarding your Heagstat H701W Thermostat, please refer to the warranty card included in your product packaging or visit the official Heagstat website. If you require technical support, have questions about installation, or need assistance with troubleshooting, please contact Heagstat customer service. Contact details can typically be found on the product packaging, the official website, or within the full installation manual.