1. Introduction
This manual provides essential information for the proper installation, maintenance, and care of your new CHROX Headlight Cover. Please read this manual thoroughly before proceeding with installation to ensure correct fitment and optimal performance. This product is designed as a direct replacement for the original left-side headlight cover on specified Haval H6 Sport Blue Label models.
Safety Precautions
- Always ensure the vehicle is turned off and the battery is disconnected before performing any work on electrical components.
- Wear appropriate personal protective equipment, such as gloves and eye protection, during installation.
- If you are unsure about any step of the installation process, it is recommended to seek professional assistance.
2. Product Overview
The CHROX Headlight Cover is a high-quality replacement component designed to protect your vehicle's headlight assembly. Made from durable polycarbonate material, it offers excellent clarity and resistance to yellowing or fading over time, ensuring your headlights remain clear and effective.

Figure 2.1: The clear polycarbonate headlight cover, designed for the left side of the vehicle.

Figure 2.2: A Haval H6 Sport Blue Label vehicle, indicating the positions for the left and right headlight covers. This product is for the 'Left' side.
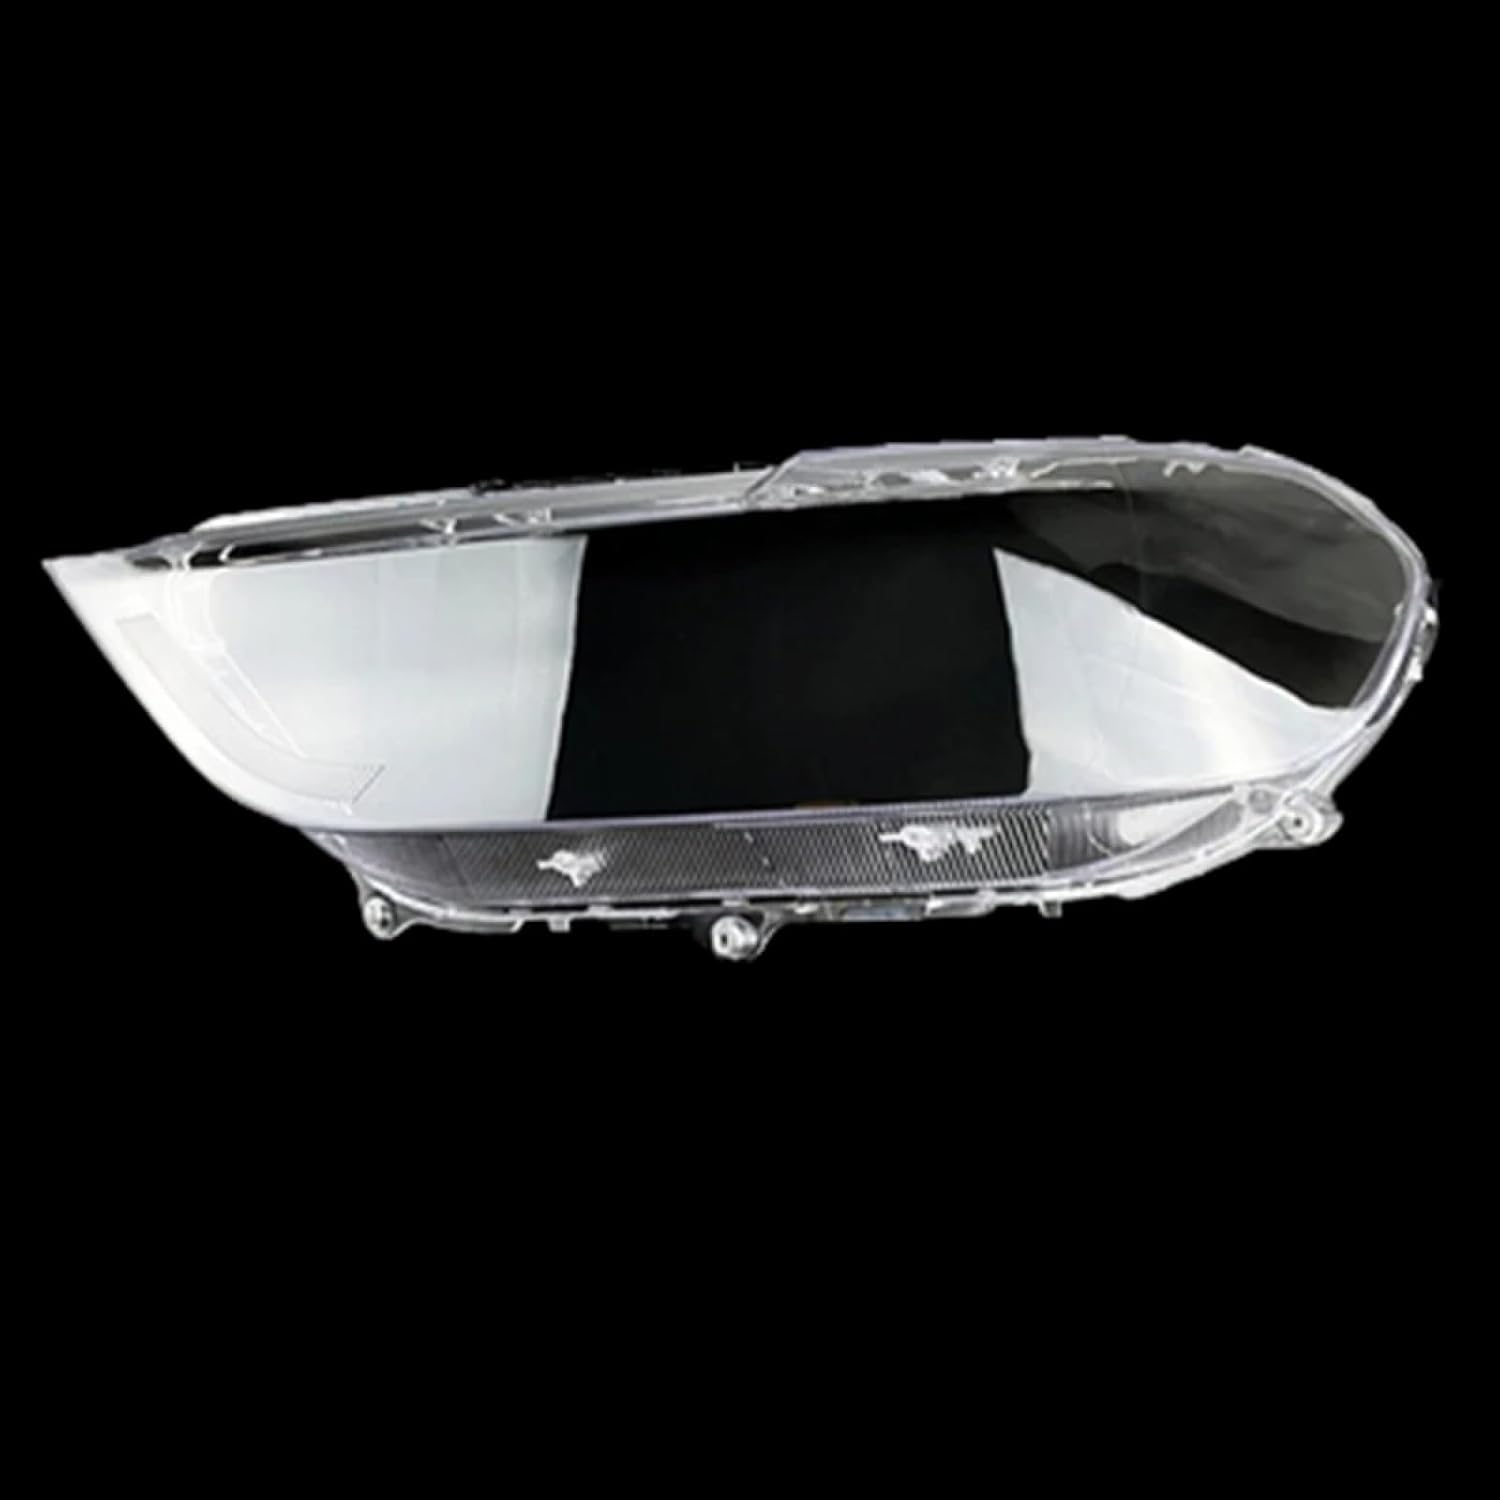
Figure 2.3: Side profile view of the headlight cover, showcasing its precise contours and clear material.
3. Specifications
| Attribute | Detail |
|---|---|
| Item Name | Headlight Cover |
| Brand | CHROX |
| Placement on Vehicle | Front, Left |
| Color | Clear |
| Material | Plastic, Polycarbonate (PC) |
| Compatibility | For Haval H6 Sport Blue Label 2017, 2018, 2019 |
| Manufacturer | CHROX |
| ASIN | B0CWLDH5F3 |
4. Installation Guidelines
This headlight cover is a replacement part and requires the removal of the original headlight cover before installation. The headlight assembly itself is not included with this product. Professional installation is highly recommended to ensure proper fitment and sealing.
Pre-Installation Check
- Verify Compatibility: Before beginning, carefully compare the shape of your vehicle's original headlight cover with the images provided in this manual and on the product page. Ensure the vehicle's model year (2017-2019) and specific model (Haval H6 Sport Blue Label) match. If uncertain, contact the seller with images of your car's headlight for confirmation.
- Inspect Product: Unpack the new headlight cover and inspect it for any signs of damage during transit.
Installation Steps (General)
- Prepare Vehicle: Park the vehicle on a level surface, engage the parking brake, and turn off the engine. Disconnect the negative terminal of the car battery for safety.
- Access Headlight Assembly: Depending on your vehicle's design, you may need to remove the front bumper or other surrounding components to gain full access to the headlight assembly. Refer to your vehicle's service manual for specific instructions.
- Remove Original Cover: Carefully detach the existing headlight cover from the headlight assembly. This may involve releasing clips, screws, or adhesive seals. Exercise caution to avoid damaging the headlight housing.
- Clean Housing: Thoroughly clean the mating surfaces of the headlight housing to ensure a clean and secure seal for the new cover. Remove any old adhesive residue.
- Install New Cover: Align the new CHROX headlight cover with the headlight housing. Secure it in place using the appropriate clips, screws, or automotive-grade sealant as required. Ensure a tight and waterproof seal to prevent moisture ingress.
- Reassemble: Reinstall any components that were removed to access the headlight assembly (e.g., bumper).
- Test Functionality: Reconnect the car battery and test the headlight functionality to ensure everything is working correctly.

Figure 4.1: A detailed view of the headlight cover, showing the various contours and potential mounting points that need to align with the headlight assembly.

Figure 4.2: Close-up of the cover's edge, highlighting the area where it seals against the headlight housing. A proper seal is crucial for preventing water and dust ingress.
5. Maintenance
To ensure the longevity and clarity of your CHROX Headlight Cover, follow these simple maintenance guidelines:
- Regular Cleaning: Clean the headlight cover regularly using a soft cloth and mild automotive soap or a dedicated plastic cleaner. Avoid abrasive cleaners or harsh chemicals, as these can scratch or damage the polycarbonate surface.
- Rinse Thoroughly: After cleaning, rinse the cover thoroughly with clean water to remove all soap residue.
- Drying: Dry the cover with a clean, soft microfiber towel to prevent water spots.
- Avoid Scratches: Be mindful of sharp objects or rough materials that could scratch the cover during cleaning or general use.
- Inspection: Periodically inspect the cover for any signs of damage, cracks, or compromised seals. Address any issues promptly to maintain protection for your headlight assembly.
6. Troubleshooting
If you encounter any issues with your CHROX Headlight Cover, consider the following common problems and solutions:
Fitment Issues
Problem: The headlight cover does not fit perfectly or there are gaps after installation.
Solution:
- Re-verify the compatibility of the product with your specific vehicle model and year (Haval H6 Sport Blue Label 2017-2019, Left side).
- Ensure that the original headlight cover was completely and cleanly removed, and that no debris or old adhesive is obstructing the new cover's seating.
- Confirm that the new cover is correctly aligned with all mounting points and edges of the headlight housing.
- If the issue persists, it is highly recommended to consult with a professional automotive technician for assistance.
Moisture or Condensation Inside Headlight
Problem: Moisture or condensation appears inside the headlight assembly after installation.
Solution:
- This indicates an incomplete or compromised seal between the headlight cover and the headlight housing.
- Carefully remove the headlight cover and re-apply a suitable automotive-grade sealant around the edges, ensuring a continuous and watertight barrier.
- Allow adequate curing time for the sealant before exposing the vehicle to moisture.
7. Warranty and Support
CHROX is committed to providing a high-quality shopping experience and attentive after-sales service. If you have any questions or concerns regarding your product, please do not hesitate to contact the seller directly.
- Customer Support: All product-related inquiries will be addressed within 24 hours.
- Returns: This product is eligible for returns within 30 days of receipt, subject to the seller's return policy.
For direct assistance, please reach out to the seller, XiMuShangMao007, through the Amazon platform where the purchase was made.