1. Introduction
Thank you for choosing the AUTO-VOX Wireless Backup Camera System. This system is designed to enhance your driving safety by providing a clear view of the area behind your vehicle, especially during reversing and parking maneuvers. Featuring a 5-inch monitor and a battery-powered camera, it offers a convenient and easy-to-install solution for various vehicles including cars, trucks, SUVs, vans, and trailers.

Image: The AUTO-VOX wireless backup camera system, showing the 5-inch monitor and the license plate mounted camera, highlighting its wireless and battery-powered features.
2. Safety Information
- Always ensure the camera lens is clean and unobstructed for optimal performance.
- The backup camera system is an aid and should not replace careful driving and direct observation. Always check your surroundings manually before reversing.
- Do not attempt to disassemble or modify the device. This may void the warranty and cause damage.
- Keep the monitor and camera away from extreme temperatures and direct sunlight for prolonged periods to prevent damage.
- Ensure all connections are secure before operating the vehicle.
3. Package Contents
Please check the package for the following items:
- 5-inch Wireless Monitor
- Wireless Backup Camera (License Plate Mount)
- USB Charging Cable
- Car Charger
- Mounting Bracket for Monitor
- User Manual
- Installation Screws/Tools
4. Product Overview
4.1. Wireless Camera
The camera is designed for easy installation, typically mounting to your vehicle's license plate. It features a built-in rechargeable battery and transmits video wirelessly to the monitor. It is IP69 weatherproof for durability in various conditions.
4.2. 5-inch Monitor
The monitor displays the camera's feed. It can be mounted on your dashboard or windshield. It features controls for adjusting brightness, contrast, saturation, and image flip (mirror/normal view, horizontal/vertical flip). It also supports adjustable parking guidelines.
5. Setup and Installation
The AUTO-VOX Wireless Backup Camera System is designed for quick and easy DIY installation, typically within 3 minutes, requiring no complex wiring to your vehicle's reverse lights.
5.1. Charging the Camera
Before installation, ensure the camera's internal battery is fully charged using the provided USB charging cable. Connect the USB cable to the camera and a standard USB power adapter (not included) or a power bank. A full charge typically takes a few hours.

Image: Illustration showing two charging methods for the camera: via a USB power bank and an optional solar panel (sold separately).
5.2. Installing the Camera
- Locate your vehicle's rear license plate.
- Unscrew the top two screws holding your license plate in place.
- Position the wireless backup camera unit behind the license plate, aligning its mounting holes with the license plate holes. The camera is designed to snap into the top or bottom of any standard U.S. license plate frame.
- Re-insert and tighten the screws through the camera's mounting bracket and the license plate into the vehicle. Ensure the camera is securely fastened.
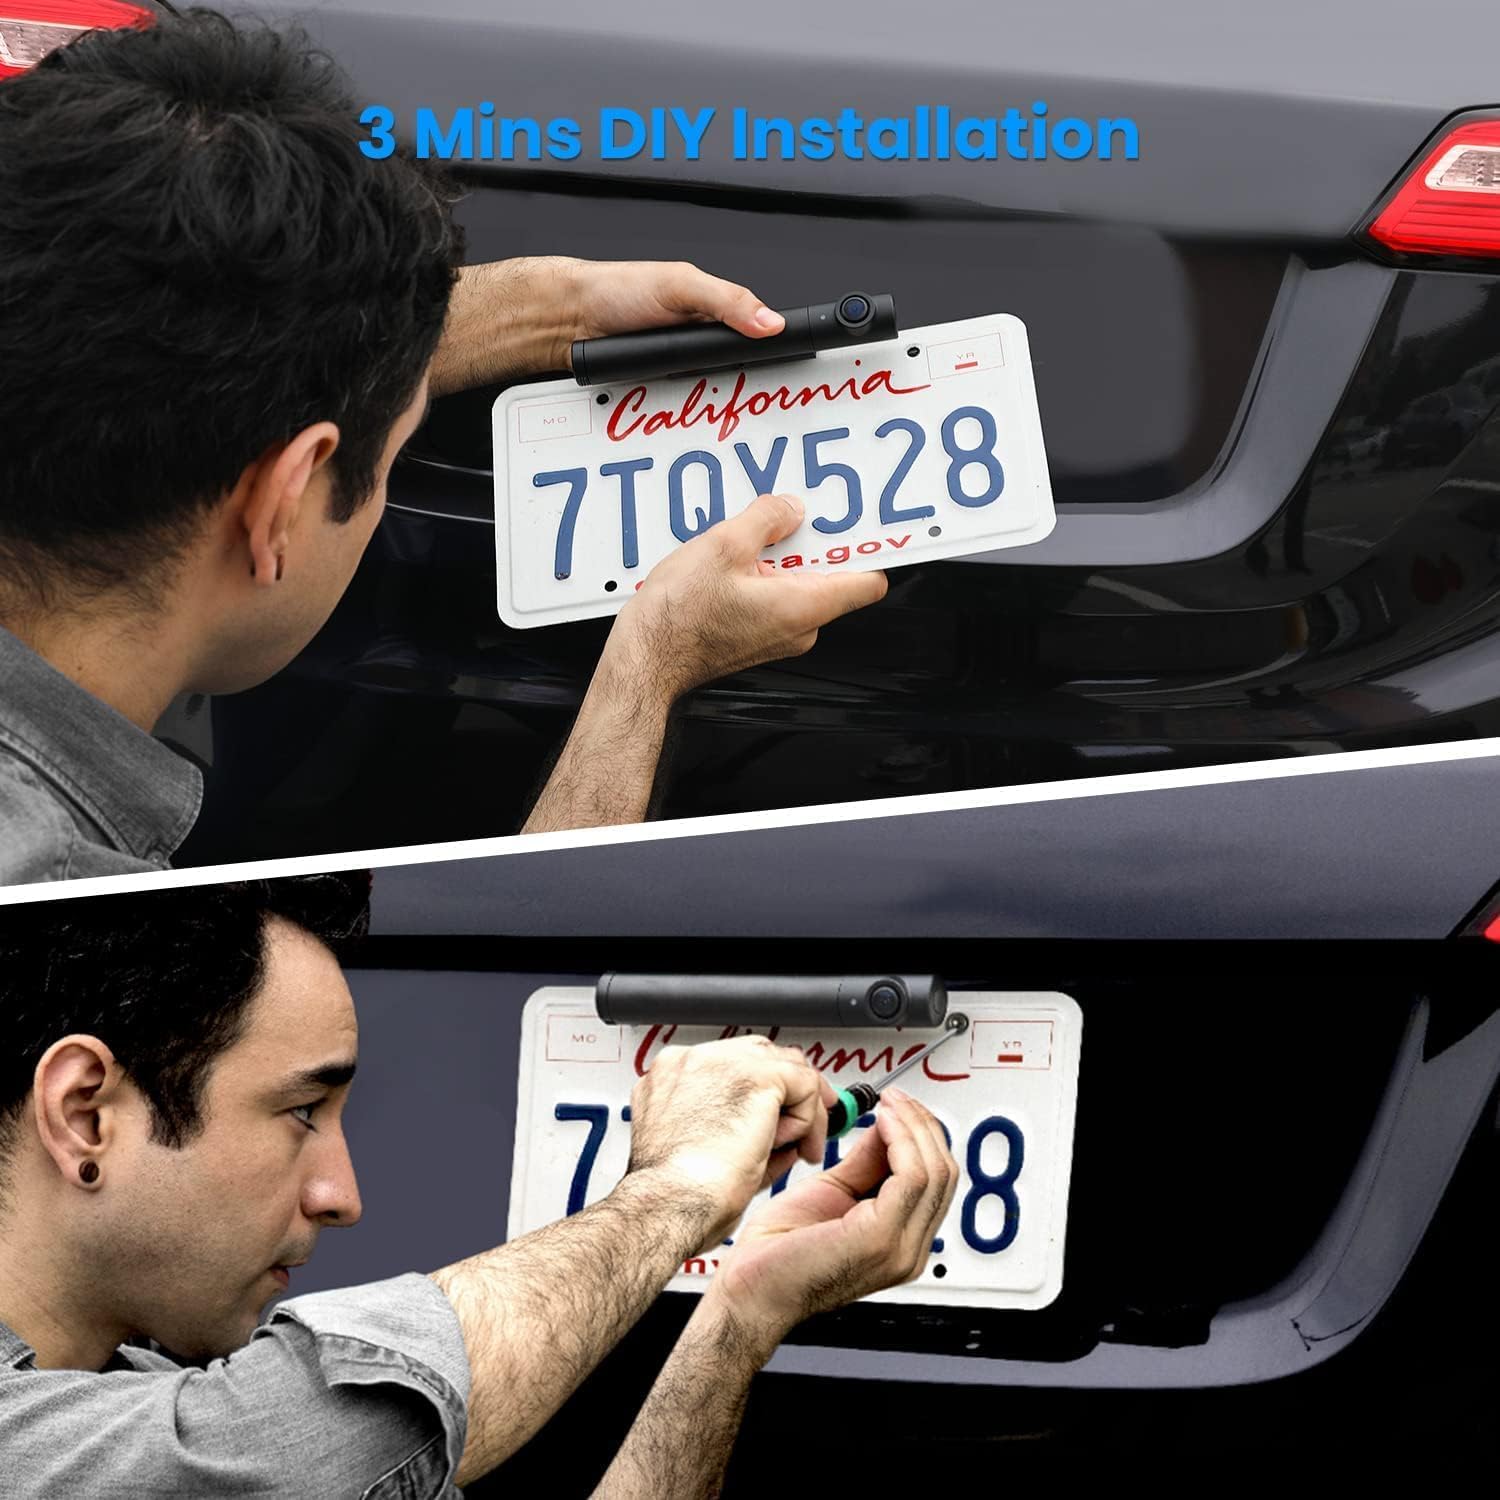
Image: A person demonstrating the simple DIY installation of the camera by attaching it to the license plate frame.

Image: A close-up view of the camera being screwed into place on the license plate, emphasizing the ease of installation.
5.3. Installing the Monitor
- Choose a suitable location on your dashboard or windshield that does not obstruct your view or interfere with airbags.
- Attach the monitor to its mounting bracket.
- Secure the mounting bracket to the chosen surface. Ensure it is stable and will not fall during driving.
- Connect the monitor to your vehicle's 12V power outlet (cigarette lighter) using the provided car charger.

Image: A composite image showing the monitor installed on a car dashboard and the camera being mounted on the license plate, illustrating the complete installation process.
6. Operating Instructions
6.1. Powering On/Off
The monitor will automatically power on when connected to the car charger and the vehicle's ignition is on. The camera will activate when the vehicle is put into reverse or when the monitor is manually turned on.
6.2. Viewing the Camera Feed
Once powered on, the monitor will display the live feed from the wireless camera. The 5-inch screen provides a clear view, assisting with parking and reversing.

Image: A driver's perspective showing the 5-inch monitor mounted on the dashboard, displaying the backup camera feed with dynamic parking guidelines, indicating ease of parking.

Image: An aerial view demonstrating how the wide 110-degree angle of the backup camera and its parking guidelines assist in safely maneuvering a vehicle into a parking spot.
6.3. Night Vision
The camera features superior low-light vision, providing clear images up to 33 feet in complete darkness, enhancing safety during nighttime operations.

Image: A side-by-side comparison illustrating the clear night vision capabilities of the camera versus daytime vision, highlighting its performance in low-light conditions.
6.4. Adjusting Settings
Use the buttons on the monitor to access the menu and adjust settings such as:
- Brightness/Contrast/Saturation: Optimize image quality.
- Mirror/Normal Image: Flip the image horizontally or vertically to suit different mounting positions (front, side, upside down).
- Parking Guidelines: Enable/disable and adjust the width of the 6 adjustable guidelines.
6.5. Two-Channel Support
The system supports adding a second camera (sold separately), allowing you to monitor multiple directions or use it for trailer hitching.
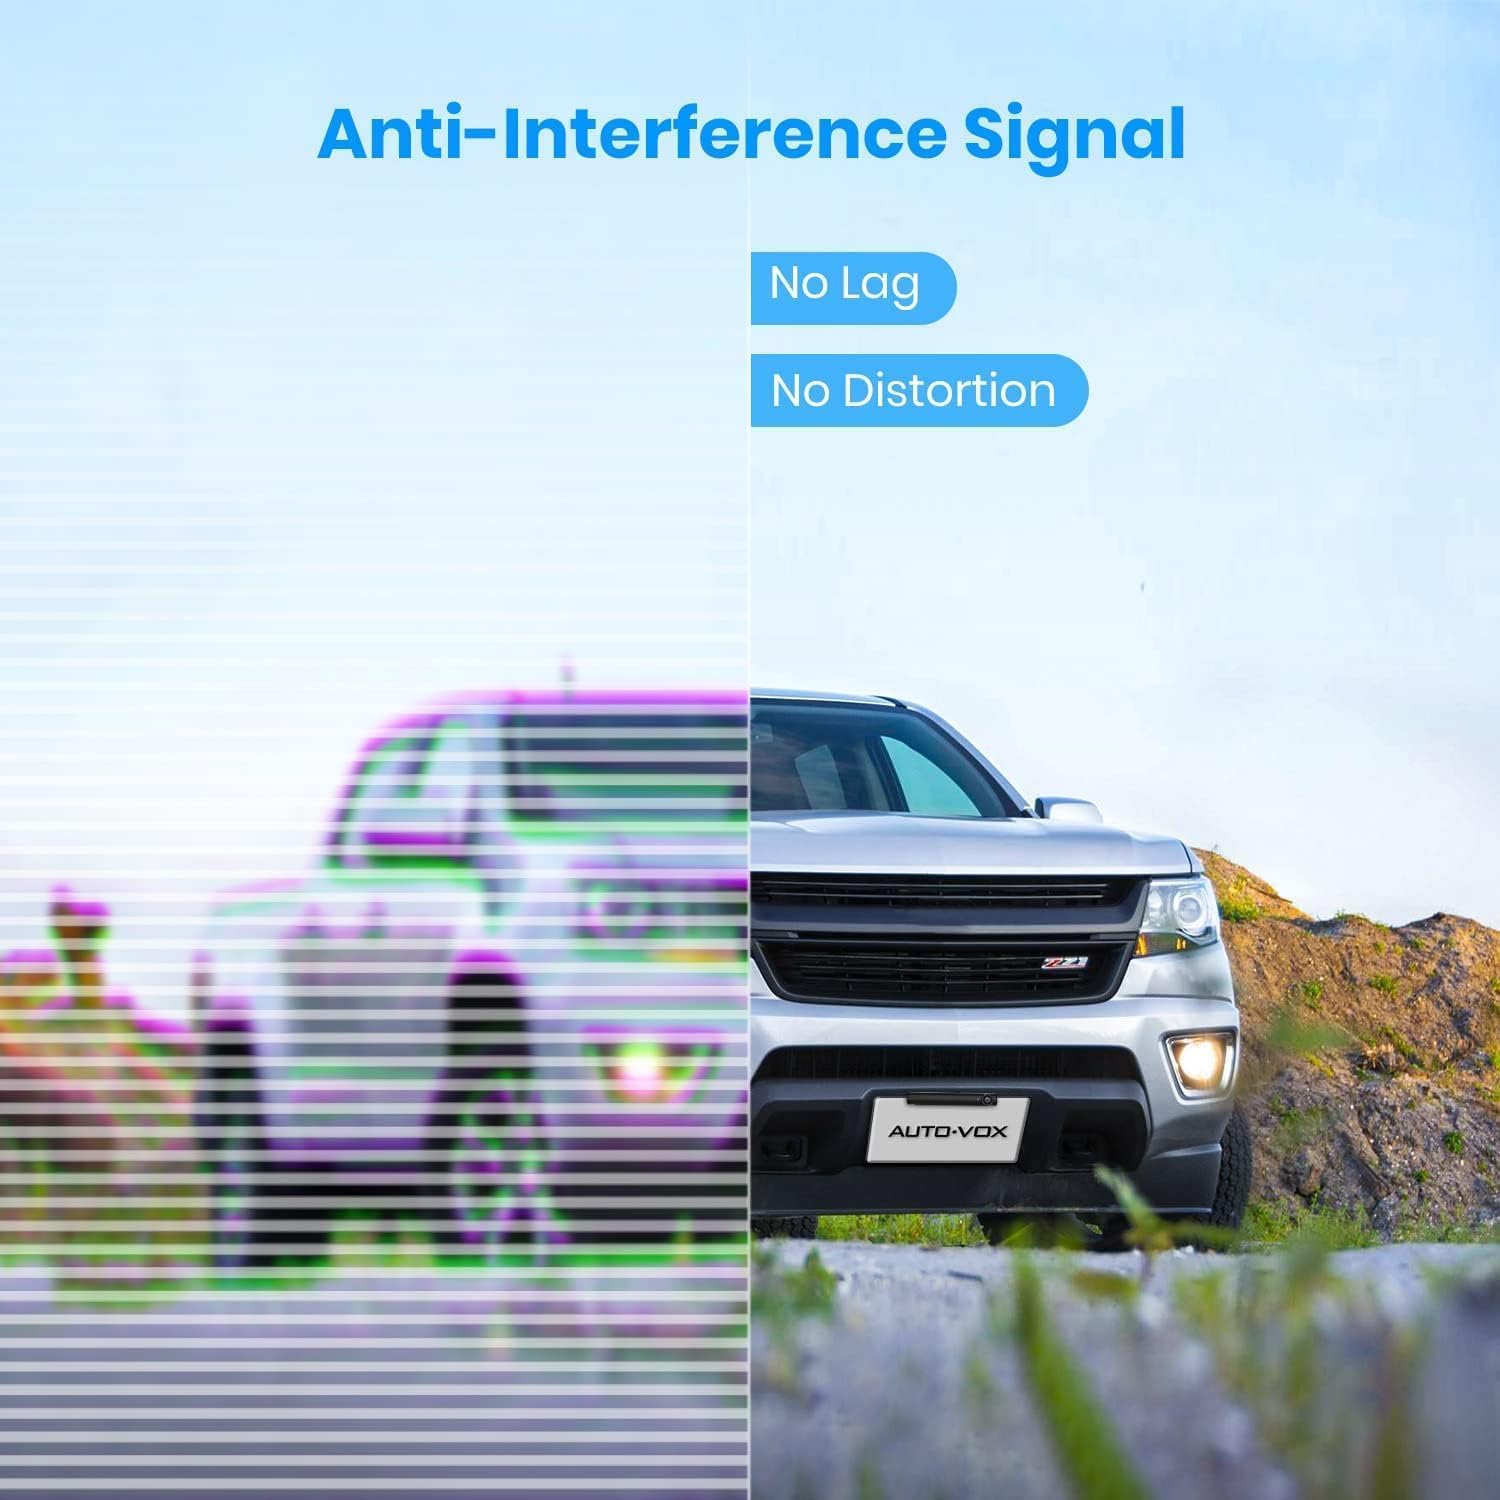
Image: A diagram illustrating the flexible installation locations for the camera on different vehicle types, including trucks, vans, and trailers, indicating its versatility.

Image: An overhead view depicting two vehicles, each equipped with an AUTO-VOX camera, illustrating the system's capability to support dual cameras for expanded monitoring.

Image: A truck towing a boat, with the AUTO-VOX monitor displaying real-time footage, demonstrating its utility for hitching trailers and ensuring safe towing.
7. Maintenance
- Cleaning: Use a soft, damp cloth to clean the camera lens and monitor screen. Avoid abrasive cleaners or solvents.
- Weather Protection: The camera is IP69 weatherproof, designed to withstand rain, snow, and heat. However, avoid submerging the camera in water.
- Battery Care: For optimal battery life, avoid fully discharging the camera's battery frequently. Recharge it regularly, especially if not used for extended periods.
8. Troubleshooting
| Problem | Possible Cause | Solution |
|---|---|---|
| No image on monitor | Monitor not powered on; Camera battery low/off; Signal interference; Camera/monitor not paired. | Ensure monitor is plugged in and vehicle ignition is on. Charge camera battery. Move away from strong signal sources. Re-pair camera and monitor (refer to full manual for pairing steps). |
| Image flickering or distorted | Weak signal; Interference from other wireless devices; Obstructions between camera and monitor. | Ensure camera and monitor are within effective range (up to 33ft). Minimize obstructions. Check for strong electromagnetic interference sources. |
| Camera not charging | Faulty USB cable/adapter; Charging port dirty. | Try a different USB cable and power adapter. Clean the charging port gently. |
| Parking guidelines incorrect | Incorrect camera mounting angle; Settings need adjustment. | Adjust camera angle if possible. Access monitor settings to recalibrate or adjust guideline width. |
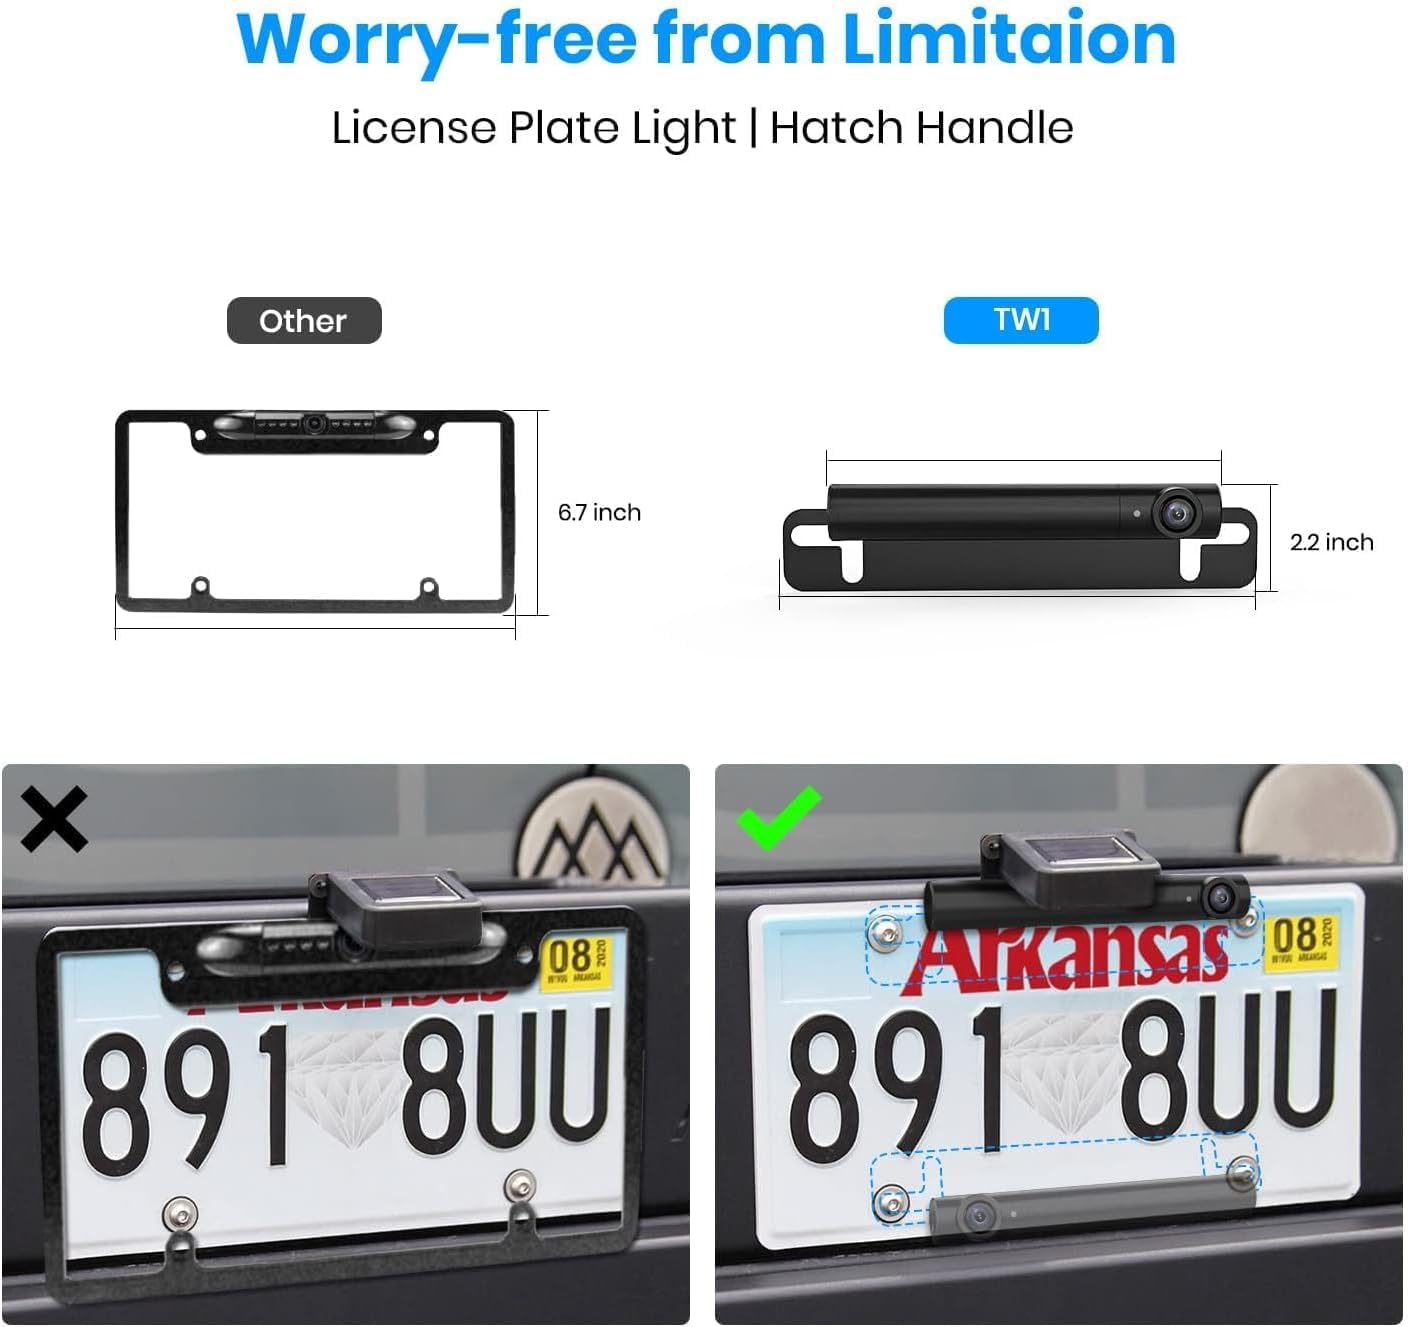
Image: A visual comparison showing the difference between a distorted, laggy signal and a clear, anti-interference signal, highlighting the system's stable transmission.
9. Specifications
- Product Dimensions: 7.95 x 10.55 x 2.87 inches
- Item Weight: 2.07 pounds
- Screen Size: 5 Inches
- Display Technology: LCD
- Video Capture Resolution: 1080p
- Voltage: 12 Volts
- Optical Sensor Technology: CMOS
- Lens Type: Wide Angle
- Special Features: Wide angle view, reversing and driving safety, IP69 waterproof, 5 Inch monitor, color and clear image, rearview backup camera, adjust brightness/contrast/saturation, flip mirror/normal image, DIY guidelines, easy to setup, USB powered, 3 mins installation, support 2 cameras, 33ft transmittable distance.
- Batteries: 1 Lithium Ion battery required (included)
10. Warranty Information
AUTO-VOX products typically come with a limited warranty covering manufacturing defects. Please refer to the warranty card included in your product packaging or visit the official AUTO-VOX website for detailed warranty terms and conditions specific to your region and purchase date.
11. Customer Support
For technical assistance, troubleshooting, or product inquiries, please contact AUTO-VOX customer support through the following channels:
- Email: Refer to your product packaging or the official AUTO-VOX website for the support email address.
- Website: Visit the official AUTO-VOX website for FAQs, support resources, and contact forms.
- Online Store: AUTO-VOX Amazon Store
Please have your product model number (B0CWGWR6PP) and purchase information ready when contacting support.


