Furniouse BR003-BL
Furniouse 6-Tier Kitchen Bakers Rack with Power Outlet (Model BR003-BL)
Instruction Manual
Introduction
This manual provides detailed instructions for the assembly, operation, and maintenance of your Furniouse 6-Tier Kitchen Bakers Rack with Power Outlet, Model BR003-BL. Please read these instructions carefully before beginning assembly or use to ensure safe and proper functionality of your product.
Important Safety Instructions
- Ensure the shelf is securely mounted to the floor if applicable, and do not exceed a 20lbs weight limit on the top shelf for safe use.
- Always place the rack on a flat, stable, and level surface to prevent tipping.
- Distribute weight evenly across all shelves to maintain stability.
- Keep small children and pets away from the assembly area.
- Do not climb on the rack or allow children to play on it.
- Avoid placing hot items directly on surfaces without protective mats.
- Do not overload the power outlets. Refer to the specifications for maximum load.
Package Contents
Before assembly, verify that all components are present and undamaged. The package includes:
- All necessary hardware for assembly.
- Metal frame components.
- MDF wood shelves and cabinet panels.
- Cabinet doors (iron mesh and sliding barn door).
- Integrated power outlet unit with power cord.
- Instruction manual.
If any parts are missing or damaged, please contact customer support.
Assembly Instructions
Assembly is required for this product. Please follow the included detailed assembly instructions carefully. It is recommended to have a second person assist with assembly for easier handling of larger components.
- Preparation: Unpack all components and lay them out on a clean, soft surface to prevent scratches. Sort all hardware by type and size.
- Frame Assembly: Begin by assembling the main metal frame structure. Ensure all connections are secure but do not fully tighten bolts until the entire frame is loosely assembled.
- Shelf Installation: Attach the MDF wood shelves to the frame. Pay attention to the orientation of each shelf as indicated in the diagram.
- Cabinet Assembly: Assemble the upper cabinet with the iron mesh doors and the lower cabinet with the sliding barn door. Ensure the sliding mechanism for the barn door is correctly installed for smooth operation. The upper cabinet features adjustable plates for flexible storage.
- Power Outlet Integration: Install the power outlet unit into its designated slot. Ensure the power cord is routed safely and is not pinched.
- Final Tightening: Once all components are in place, systematically tighten all bolts and screws. Do not overtighten.
- Placement: Carefully move the assembled rack to its desired location.
Note: The assembly process involves various bolt sizes. Carefully match each bolt to its corresponding hole as per the diagrams to avoid frustration.
Visual Assembly Guide

Figure 1: Fully assembled Furniouse 6-Tier Kitchen Bakers Rack in a kitchen environment.

Figure 2: Product dimensions, showing overall height, width, depth, and shelf spacing for planning placement.

Figure 3: Upper cabinet detail, highlighting the mesh doors and adjustable internal plate for varied storage needs.

Figure 4: Integrated power station, featuring three AC outlets and a control switch for convenient appliance use.
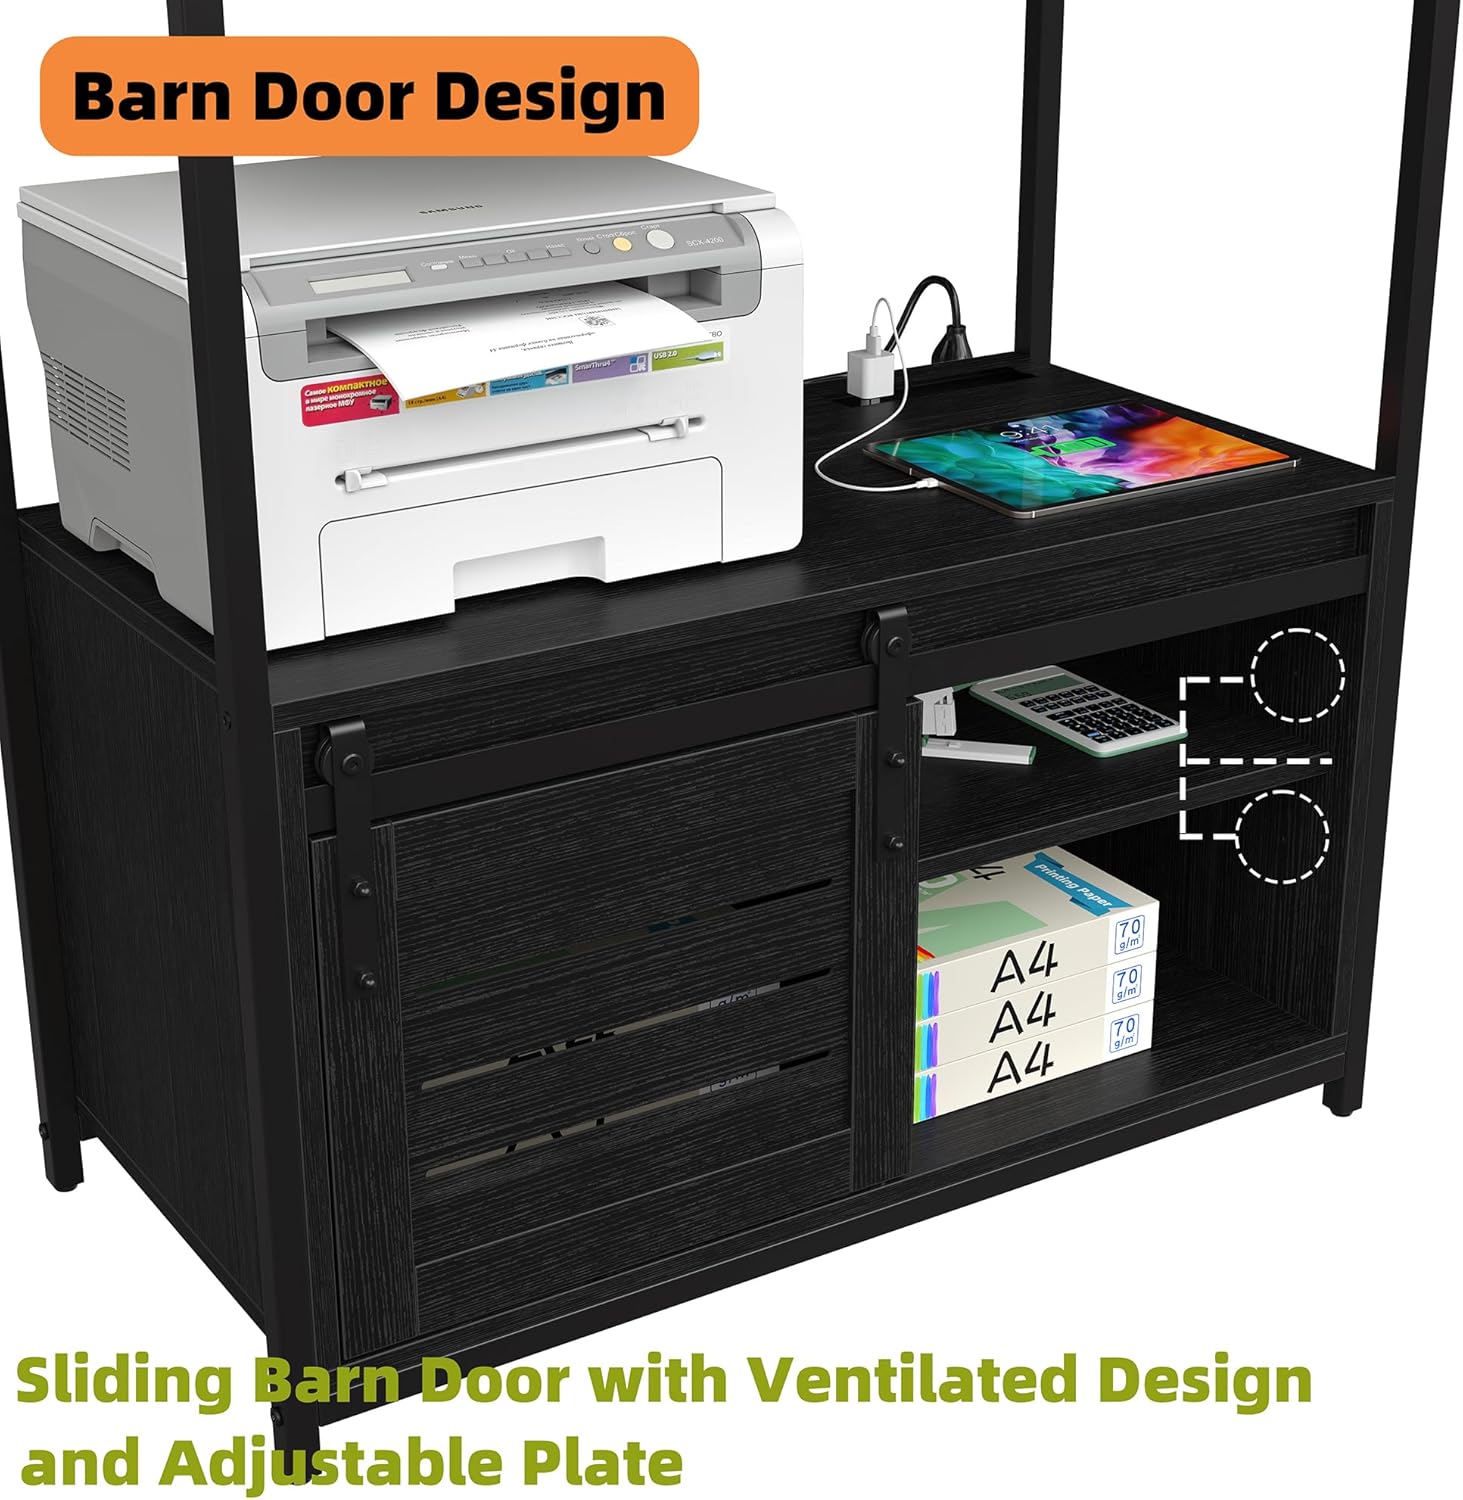
Figure 5: Lower cabinet detail, showcasing the sliding barn door design and adjustable internal plate for flexible storage.
Operating Instructions
Using the Power Outlet
The bakers rack is equipped with a built-in power station featuring 3 AC outlets (125V/12A) and a 4.9-foot power cord. This allows for convenient power access for kitchen appliances such as microwave ovens, coffee makers, and toasters, as well as charging mobile devices.
- Plug the rack's main power cord into a wall outlet.
- Use the integrated switch to turn the power outlets on or off.
- Connect your appliances to the available AC outlets.
Important: Do not exceed the maximum electrical load of 12A for the power strip to prevent overheating or damage. Avoid plugging in multiple high-wattage appliances simultaneously.
Shelf and Cabinet Usage
- The rack features multiple open shelves for easy access to frequently used items like microwaves, toasters, or decorative pieces.
- The upper cabinet includes two iron mesh doors and an adjustable internal plate, suitable for storing spices, dishes, or small appliances.
- The lower cabinet features a sliding barn door and an adjustable internal plate, offering concealed storage for larger items or pantry staples.
- Adjust the internal plates within the cabinets to customize storage space according to your needs.
Maintenance and Care
To maintain the appearance and longevity of your Furniouse Bakers Rack, follow these simple care instructions:
- Cleaning: Wipe surfaces with a dry, soft cloth. For stubborn marks, a slightly damp cloth followed immediately by a dry cloth can be used. Avoid abrasive cleaners or harsh chemicals.
- Spills: Clean up spills immediately to prevent staining or damage to the wood finish.
- Inspection: Periodically check all bolts and connections to ensure they remain tight. Retighten if necessary.
- Environment: Avoid prolonged exposure to direct sunlight or extreme humidity, which can affect the wood and metal components.
Troubleshooting
| Problem | Possible Cause | Solution |
|---|---|---|
| Cabinet doors do not align properly. | Improper hinge adjustment or uneven assembly of the cabinet frame. | Check hinge screws and adjust as needed. Ensure the cabinet frame is square during assembly. Loosen and retighten frame bolts if necessary to correct alignment. |
| Power outlets are not working. | Power switch is off, main power cord is unplugged, or circuit breaker tripped. | Ensure the power switch on the rack is in the "on" position. Verify the main power cord is securely plugged into a functional wall outlet. Check your home's circuit breaker. |
| Power outlets trip or cut out when multiple appliances are connected. | Overload of the power strip's capacity (exceeding 12A). | Reduce the number of high-wattage appliances plugged into the power strip simultaneously. Use separate wall outlets for additional high-power devices. |
| Rack feels unstable or wobbly. | Loose bolts or uneven floor surface. | Ensure all assembly bolts are securely tightened. Adjust the leveling feet (if present) or place shims under the legs to stabilize on uneven floors. |
Product Specifications
| Brand | Furniouse |
| Model Name | BR003-BL |
| Product Dimensions | 15.7"D x 31.5"W x 63"H |
| Item Weight | 55 pounds |
| Color | Black |
| Number of Shelves | 6 |
| Room Type | Kitchen (also suitable for Bathroom, Bedroom) |
| Special Feature | Portable, Built-in Power Outlet (3 AC outlets, 125V/12A, 4.9-foot cord) |
| Material | High-grade MDF wood and premium metal frame |
| Assembly Required | Yes |
| Product Care Instructions | Wipe with Dry Cloth |
Warranty and Customer Support
Furniouse is committed to providing quality products and excellent customer service. Your bakers rack comes with clear instructions and all needed parts, ensuring a straightforward assembly process.
For any questions regarding assembly, missing parts, product defects, or general inquiries, please contact Furniouse customer support. Refer to your purchase documentation or the seller's information for specific contact details and warranty terms.
You can often find support information by visiting the Furniouse Store on Amazon or by contacting the seller directly through your order history.
Related Documents - BR003-BL
 |
Furniouse CT018 Coffee Table Assembly Instructions and Guide Comprehensive assembly instructions and parts list for the Furniouse CT018 Coffee Table, including helpful hints, customer service information, and general guidelines. |
 |
EKLIPSE 24-Inch Wall Microwave Cabinet 2 Doors - Assembly Instructions Detailed assembly instructions for the EKLIPSE 24-inch 2-door wall microwave cabinet. Includes parts list, step-by-step visual guides, and contact information for support. |
 |
Panasonic Network Camera BL-VT164/BL-VP100 Series Operating Instructions Detailed operating instructions for Panasonic BL-VT164 Series and BL-VP100 Series network cameras. Covers setup, configuration, monitoring, and maintenance. |
 |
Juniper JOT Desk U-Shape Workstation Installation Guide This document provides a comprehensive installation guide for the Juniper JOT Desk U-Shape Workstation, covering various configurations, add-ons, and assembly steps. |
 |
Furrion One-Piece Trim Kit Installation Guide for 0.9 cu. ft. Airfry Microwave Oven Installation guide for the Furrion one-piece trim kit designed for the 0.9 cu. ft. Airfry Microwave Oven. Includes model compatibility, parts list, and step-by-step instructions. |
 |
Installation Guide: Lande Fan Modules LN-FAN-BB-1FPT-BL-UK & LN-FAN-BB-2FPT-BL-UK Step-by-step installation instructions for Lande's single (LN-FAN-BB-1FPT-BL-UK) and double (LN-FAN-BB-2FPT-BL-UK) fan modules into cabinets. Details product specifications and dimensions for these thermostat-controlled, long-life ball bearing fan units. |