1. Product Overview
The SHANGZHAOYUAN H110 LGA 1151 Motherboard is designed to support Intel 6th, 7th, 8th, and 9th generation Core i3/i5, Pentium, and Celeron series processors. This motherboard features dual-channel DDR4 memory support, NVME/NGFF M.2 interfaces, and integrated VGA and HDMI-compatible video outputs, making it suitable for various personal computer builds.

Image 1.1: The SHANGZHAOYUAN H110 LGA 1151 Motherboard alongside its retail packaging.
2. Key Features
- LGA 1151 Socket: Compatible with Intel 6th/7th/8th/9th gen Core i3/i5, Pentium, Celeron Series processors. Note: Compatibility with i7 processors may vary; verify your CPU model before purchase.
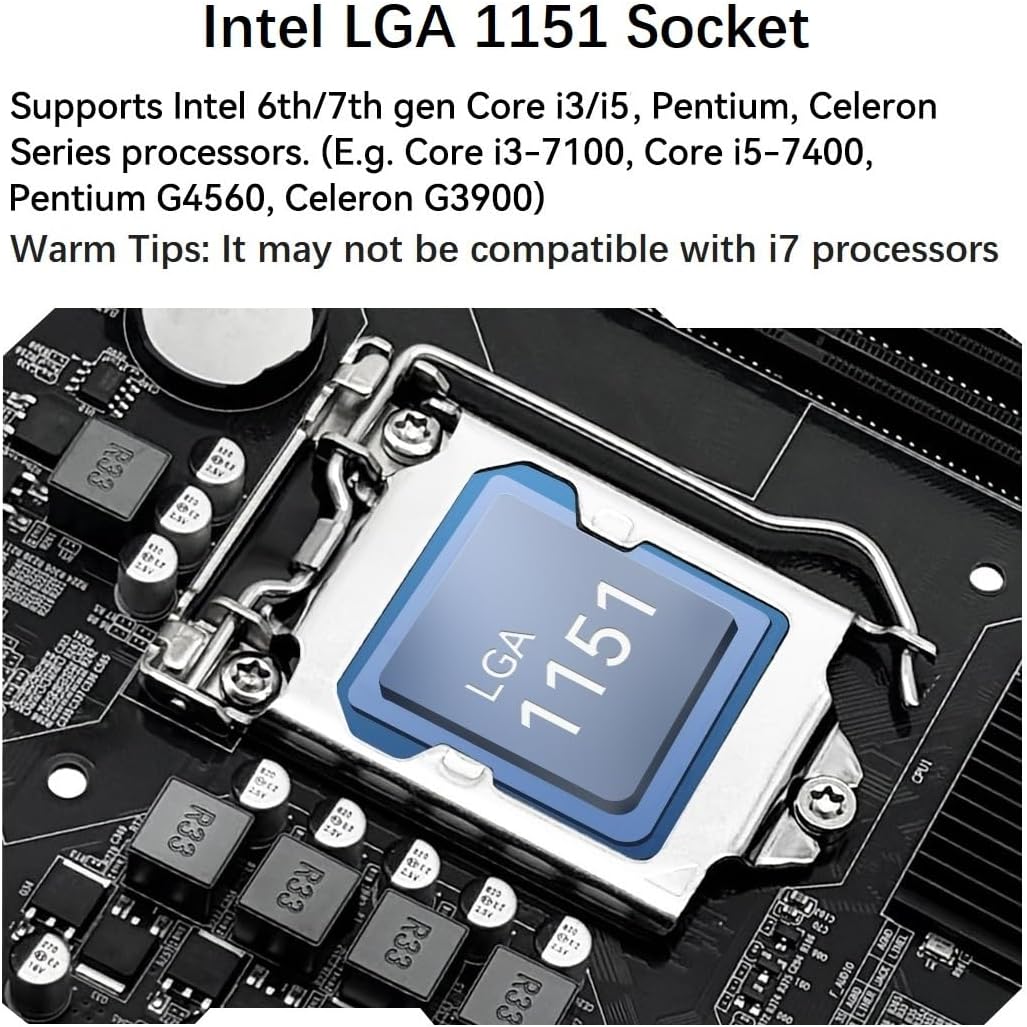
Image 2.1: Detailed view of the Intel LGA 1151 CPU socket on the H110 motherboard.
- Dual-Channel DDR4 Slot: Features 2 DDR4 RAM slots supporting Non-ECC memory up to a maximum capacity of 32GB (2x16GB) with memory clock speeds of 2133/2400MHz.

Image 2.2: The dual-channel DDR4 memory slots, highlighted in blue, ready for RAM installation.
- NVME/NGFF M.2 Interface: Includes both NVME M.2 and SATA M.2 interfaces, which can be manually switched. The NVME M.2 slot utilizes a PCIe 2.0 x4 lane, while the NGFF M.2 slot uses a SATA lane.

Image 2.3: Illustration of the NVME/NGFF M.2 interface and its manual switching mechanism.
- Video Interface: Equipped with VGA and HDMI-compatible interfaces for 1080P high-definition video output without an external graphics card. Requires a CPU with integrated graphics.
- PCIe Slot: Provides 1 PCIe X16 slot. Under the PCIe 3.0 protocol, this slot offers a throughput of 128Gbps.
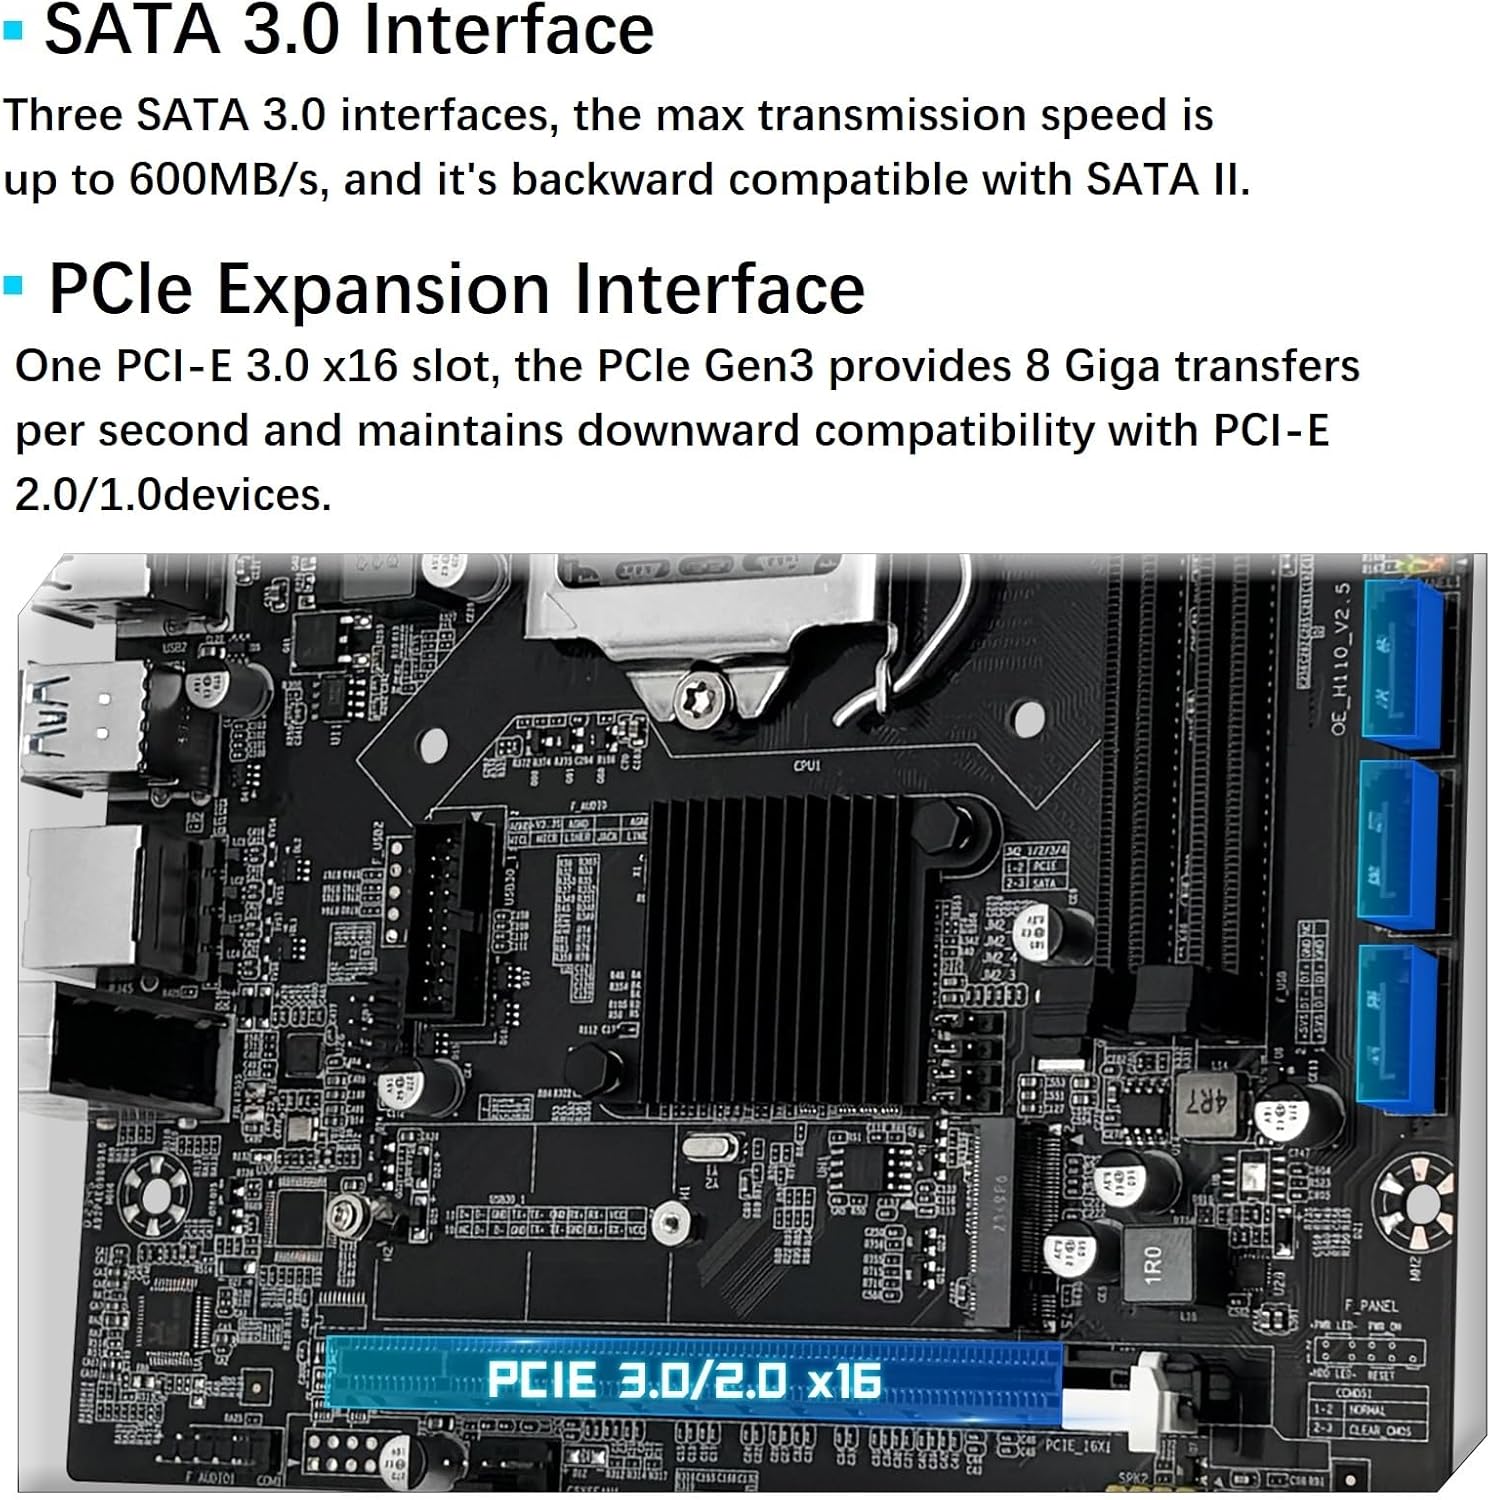
Image 2.4: The motherboard's SATA 3.0 interfaces and the PCIe X16 expansion slot.
- SATA 3.0 Interface: Three SATA 3.0 interfaces are available, offering a maximum transmission speed of up to 600MB/s, backward compatible with SATA II.
3. Setup and Installation
3.1 Component Identification

Image 3.1: Detailed diagram illustrating the various interfaces and connectors on the H110 motherboard.
3.2 Power Connections
Ensure proper power delivery to the motherboard and CPU.
- 24-PIN DC Power Connector: Connect the main power supply cable to this connector to power the motherboard.
- 8-PIN DC Power Connector: Connect the CPU power cable to this connector to supply power to the processor.

Image 3.2: Location of the 8-pin and 24-pin power connectors on the motherboard.
3.3 Clearing CMOS
To clear the CMOS settings, follow these steps:
- Reinstall the CR2032L battery into the motherboard.
- Disconnect power from the motherboard.
- Locate the CMOS clear jumper (JCMOS1).
- Use tweezers or another metal object to short the two pins of the CMOS clear jumper for approximately 5 seconds.

Image 3.3: Visual guide for clearing the CMOS by shorting the jumper pins.
4. Operating Considerations
After successful installation, ensure all necessary drivers are installed for optimal performance. It is recommended to use a driver management tool like "Driver Talent" or utilize the Windows 10 operating system's built-in driver detection capabilities to resolve driver issues.
5. Maintenance
To ensure the longevity and stable operation of your motherboard, consider the following maintenance tips:
- Regularly clean dust from the motherboard and surrounding components using compressed air.
- Ensure adequate airflow within your PC case to prevent overheating.
- Avoid exposing the motherboard to extreme temperatures or humidity.
- Periodically check all cable connections to ensure they are secure.
6. Troubleshooting
If you encounter any issues such as no display, no boot, no screen, network card not functioning, or sound card issues, please consider the following:
- Verify all power connections (24-pin, 8-pin CPU, GPU if applicable) are securely seated.
- Reseat RAM modules in their slots. Try one stick at a time if multiple are installed.
- Ensure the CPU is correctly seated and the cooler is properly installed.
- Check display cable connections (HDMI/VGA) to both the monitor and the motherboard.
- If using integrated graphics, ensure your CPU supports it.
- Perform a CMOS clear as described in Section 3.3.
- Ensure all necessary drivers are installed (refer to Section 4).
For further assistance, please contact SHANGZHAOYUAN support via Amazon.
7. Specifications

Image 7.1: Overview of the H110 Motherboard's technical specifications.
| Chipset | Intel H110 Chipset |
| CPU Socket | LGA 1151 |
| Compatible Processors | Intel 6-9th Gen Core i3/i5 Pentium, Celeron Series Processors |
| RAM Memory Technology | DDR4 |
| RAM Slot | 2*DDR4 (Max 32GB) |
| Memory Clock Speed | 2133/2400MHz |
| M.2 Slot | 1*NVME/NGFF M.2 (Switchable) |
| SATA Interface | 3*SATA 3.0 |
| PCIe Slot | 1*PCIe X16 |
| Display Interface | HDMI, VGA |
| USB Port (Rear) | 6*USB 2.0 |
| USB Port (Front) | 1*USB 3.0, 1*USB 2.0 |
| Network | 100M network |
| Audio | Realtek ALC887 2.1 channel |
| Power Connector | 24Pin+8Pin DC |
| FAN Interface | 1*4Pin System FAN, 1*4Pin CPU FAN |
| Dimensions | 197mm*170mm (7.76 x 6.69 inches) |
8. What's in the Box
The package for your SHANGZHAOYUAN H110 Motherboard includes the following items:
- 1 x SHANGZHAOYUAN H110 Motherboard
- 1 x SATA Cable
- 1 x I/O Baffle
Important Notes:
- A user manual is not included in the physical package. Please refer to this digital manual or download the PDF version from the product description page.
- The motherboard does not include a CR2032L battery. You will need to purchase this battery separately for CMOS functionality.
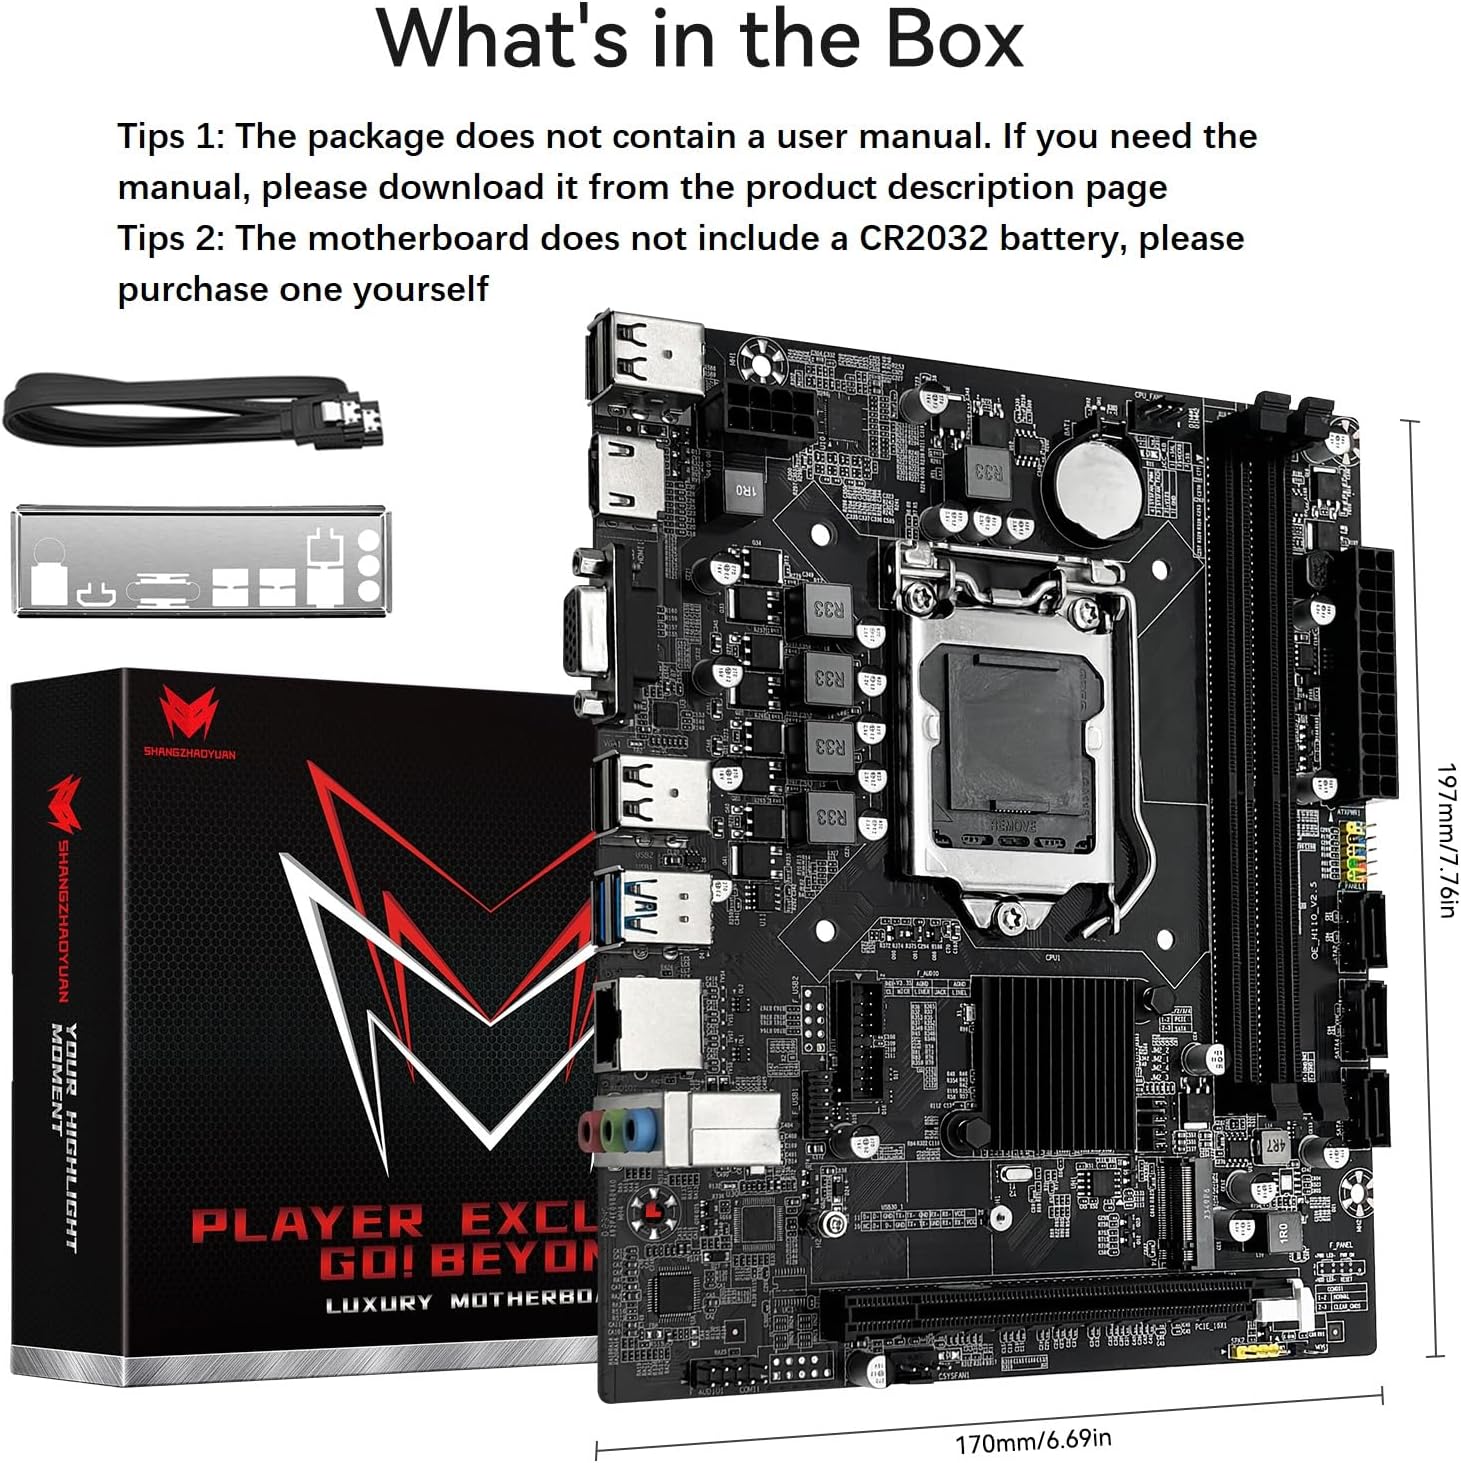
Image 8.1: The items included in the SHANGZHAOYUAN H110 Motherboard package.
9. Warranty and Support
For any product-related inquiries, technical support, or troubleshooting assistance, please contact SHANGZHAOYUAN customer support directly through the Amazon platform. Information regarding specific warranty terms and conditions can be obtained from the seller at the time of purchase or by contacting them directly.
Protection plans are available for purchase separately to extend coverage beyond the standard warranty. Refer to the product listing for details on available protection plans.