Dannilong B0CWGFWN3V
Dannilong Caged Ceiling Fan User Manual
Model: B0CWGFWN3V
Brand: Dannilong
1. Introduction
Thank you for choosing the Dannilong Caged Ceiling Fan. This modern farmhouse-style ceiling fan features a distressed paint finish, integrating seamlessly into various spaces such as bedrooms, kitchens, offices, and porches. It combines a unique caged design with a quiet DC motor and convenient remote control for optimal comfort and air circulation. This manual provides detailed instructions for safe installation, operation, maintenance, and troubleshooting.
Important Safety Information
WARNING: To reduce the risk of fire, electric shock, or personal injury, always follow these basic precautions:
- Read all instructions carefully before installing and using the fan.
- Installation must be performed by a qualified electrician.
- Ensure the supply voltage is 120 Volts AC.
- Disconnect power at the circuit breaker before installation or servicing.
- Mount the fan only to an outlet box marked 'Acceptable for Fan Support of 35 lbs (15.9 kg) or less' and use the mounting screws provided with the outlet box.
- Do not bend fan blades when installing or cleaning.
- Avoid placing objects in the path of the fan blades.
- Ensure all electrical connections are secure and comply with local codes.
2. Package Contents
Verify that all components listed below are included in your package. If any parts are missing or damaged, please contact customer support.
- Fan Body Assembly (with integrated motor and fan blades)
- Canopy
- Mounting Bracket
- Downrod & Hanger Ball (includes both 3.9-inch and 7.8-inch options)
- Screws and Hardware Kit
- Connecting Pieces (x4)
- T-shaped Connector
- Lampshade Sheets (x4)
- Bottom Bracket of Lampshade
- Remote Control
- Instruction Manual

Figure 2.1: Key components of the Dannilong Caged Ceiling Fan, highlighting the metal cage, E26 bulb base, ABS fan blades, and the reverse DC motor.
3. Product Specifications
| Feature | Description |
|---|---|
| Brand | Dannilong |
| Model Name | caged ceiling fan with light |
| Color | Black Gold |
| Material | Iron, Metal |
| Style | Farmhouse |
| Product Dimensions | 18 x 18 x 8 inches |
| Item Weight | 11 Pounds |
| Power Source | AC/DC |
| Voltage | 120 Volts |
| Control Method | Remote Control |
| Special Features | Remote Controlled, Adjustable Height, Timer, Bladeless, Reversible Motor |
| Fan Speeds | 6 Adjustable Speeds |
| Timer Function | 1H/2H/4H |
| Bulb Base | E26 (4 bulbs required, not included) |
| Indoor/Outdoor Usage | Outdoor, Indoor |
| Assembly Required | Yes |
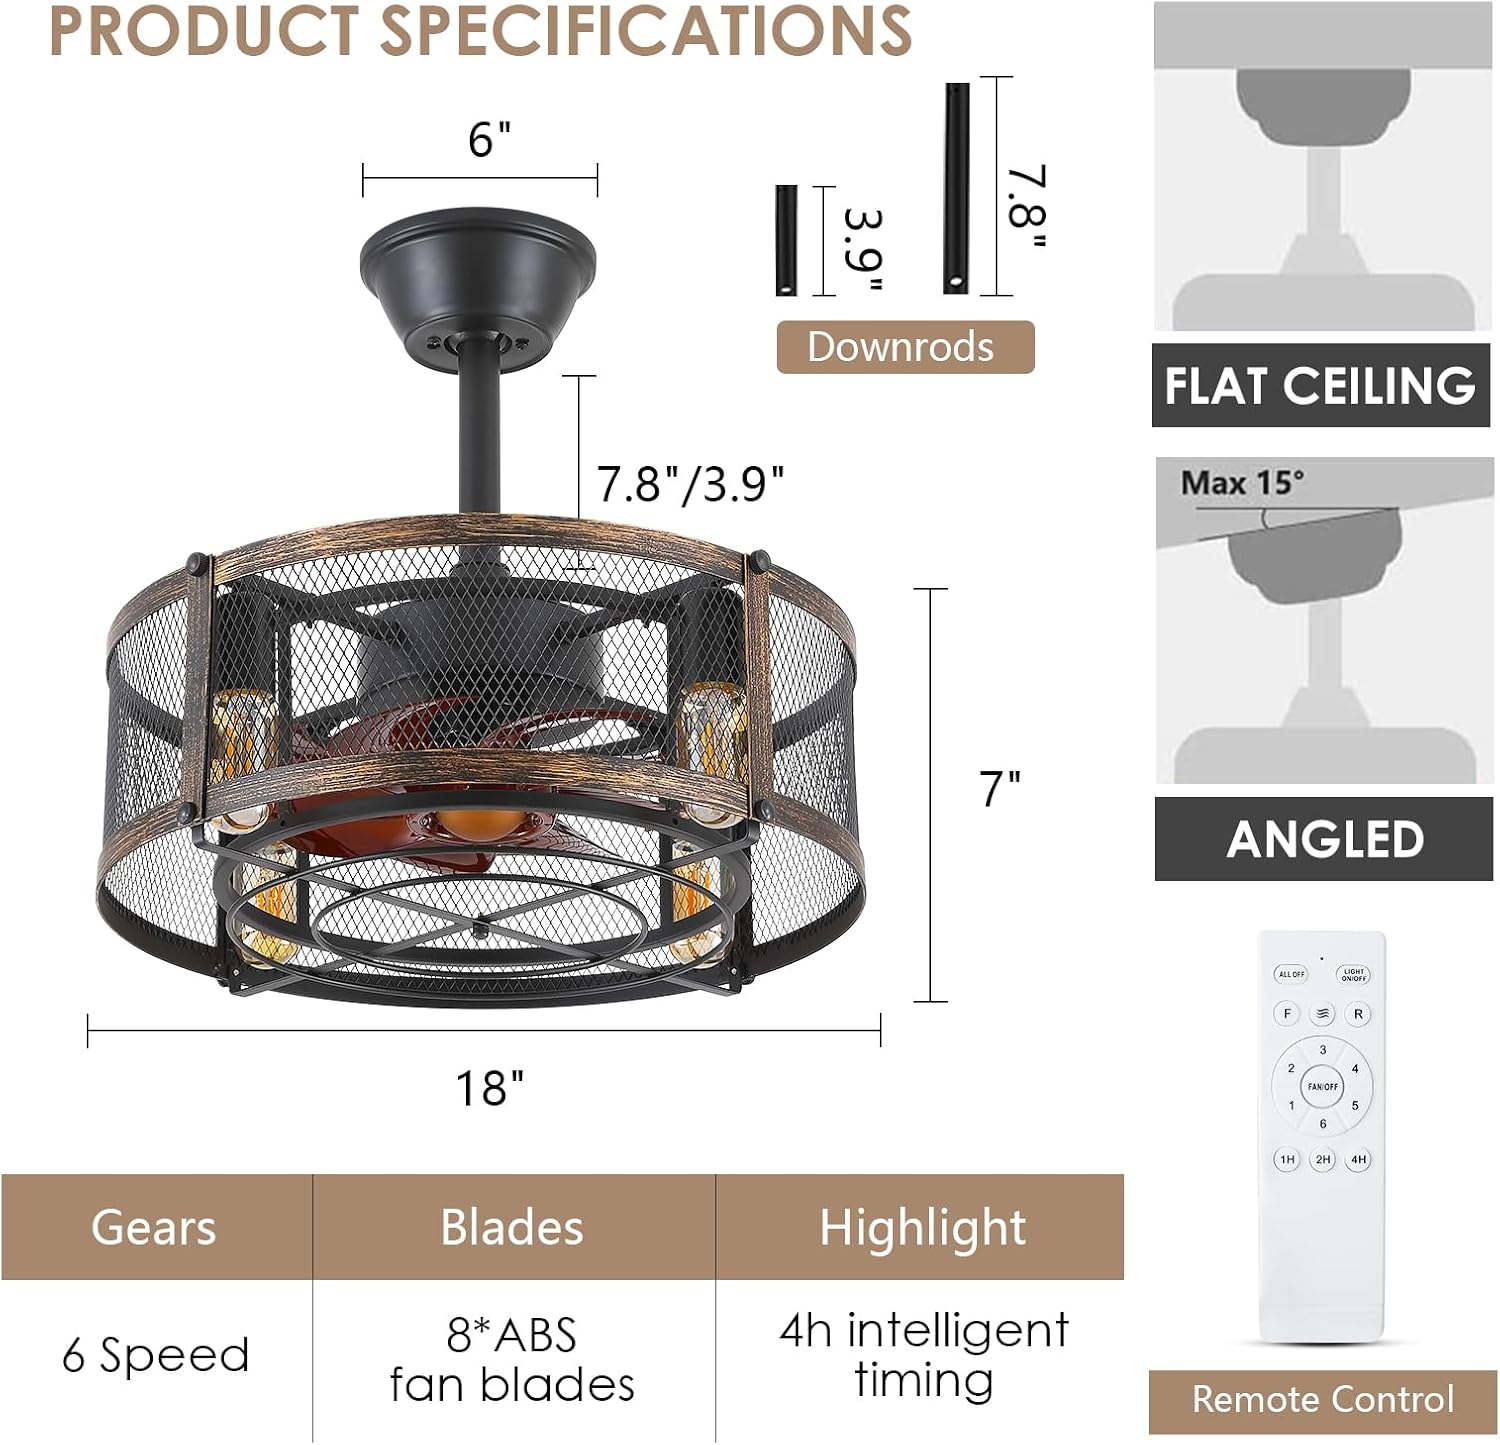
Figure 3.1: Detailed product dimensions and key specifications.
4. Setup and Installation
Follow these steps for proper installation of your Dannilong Caged Ceiling Fan. It is highly recommended to watch the official installation video for visual guidance.
Installation Steps:
- Prepare the Fan Body: Attach the downrod to the fan body assembly, ensuring all wires are properly routed through the downrod. Secure with screws.
- Install Light Bulbs: Screw four E26 base bulbs (not included) into the light sockets on the fan body.
- Assemble Lampshade: Attach the lampshade sheets to the fan body using the provided connecting pieces and screws. Ensure the mesh cage is securely fastened.
- Mounting Bracket Installation: Secure the mounting bracket to the ceiling outlet box. Ensure it is firmly attached and can support the fan's weight.
- Wiring: Carefully connect the fan's electrical wires to the household wiring according to the wiring diagram in the video. Ensure all connections are secure with wire nuts.
- Hang the Fan: Lift the fan assembly and place the hanger ball into the mounting bracket.
- Secure Canopy: Slide the canopy up to cover the mounting bracket and secure it with screws.
Video 4.1: Official installation guide for the Dannilong Caged Ceiling Fan. This video demonstrates the step-by-step assembly and wiring process.
5. Operating Instructions
Your Dannilong Caged Ceiling Fan is controlled by a convenient remote. Familiarize yourself with the remote's functions for optimal use.
Remote Control Functions:
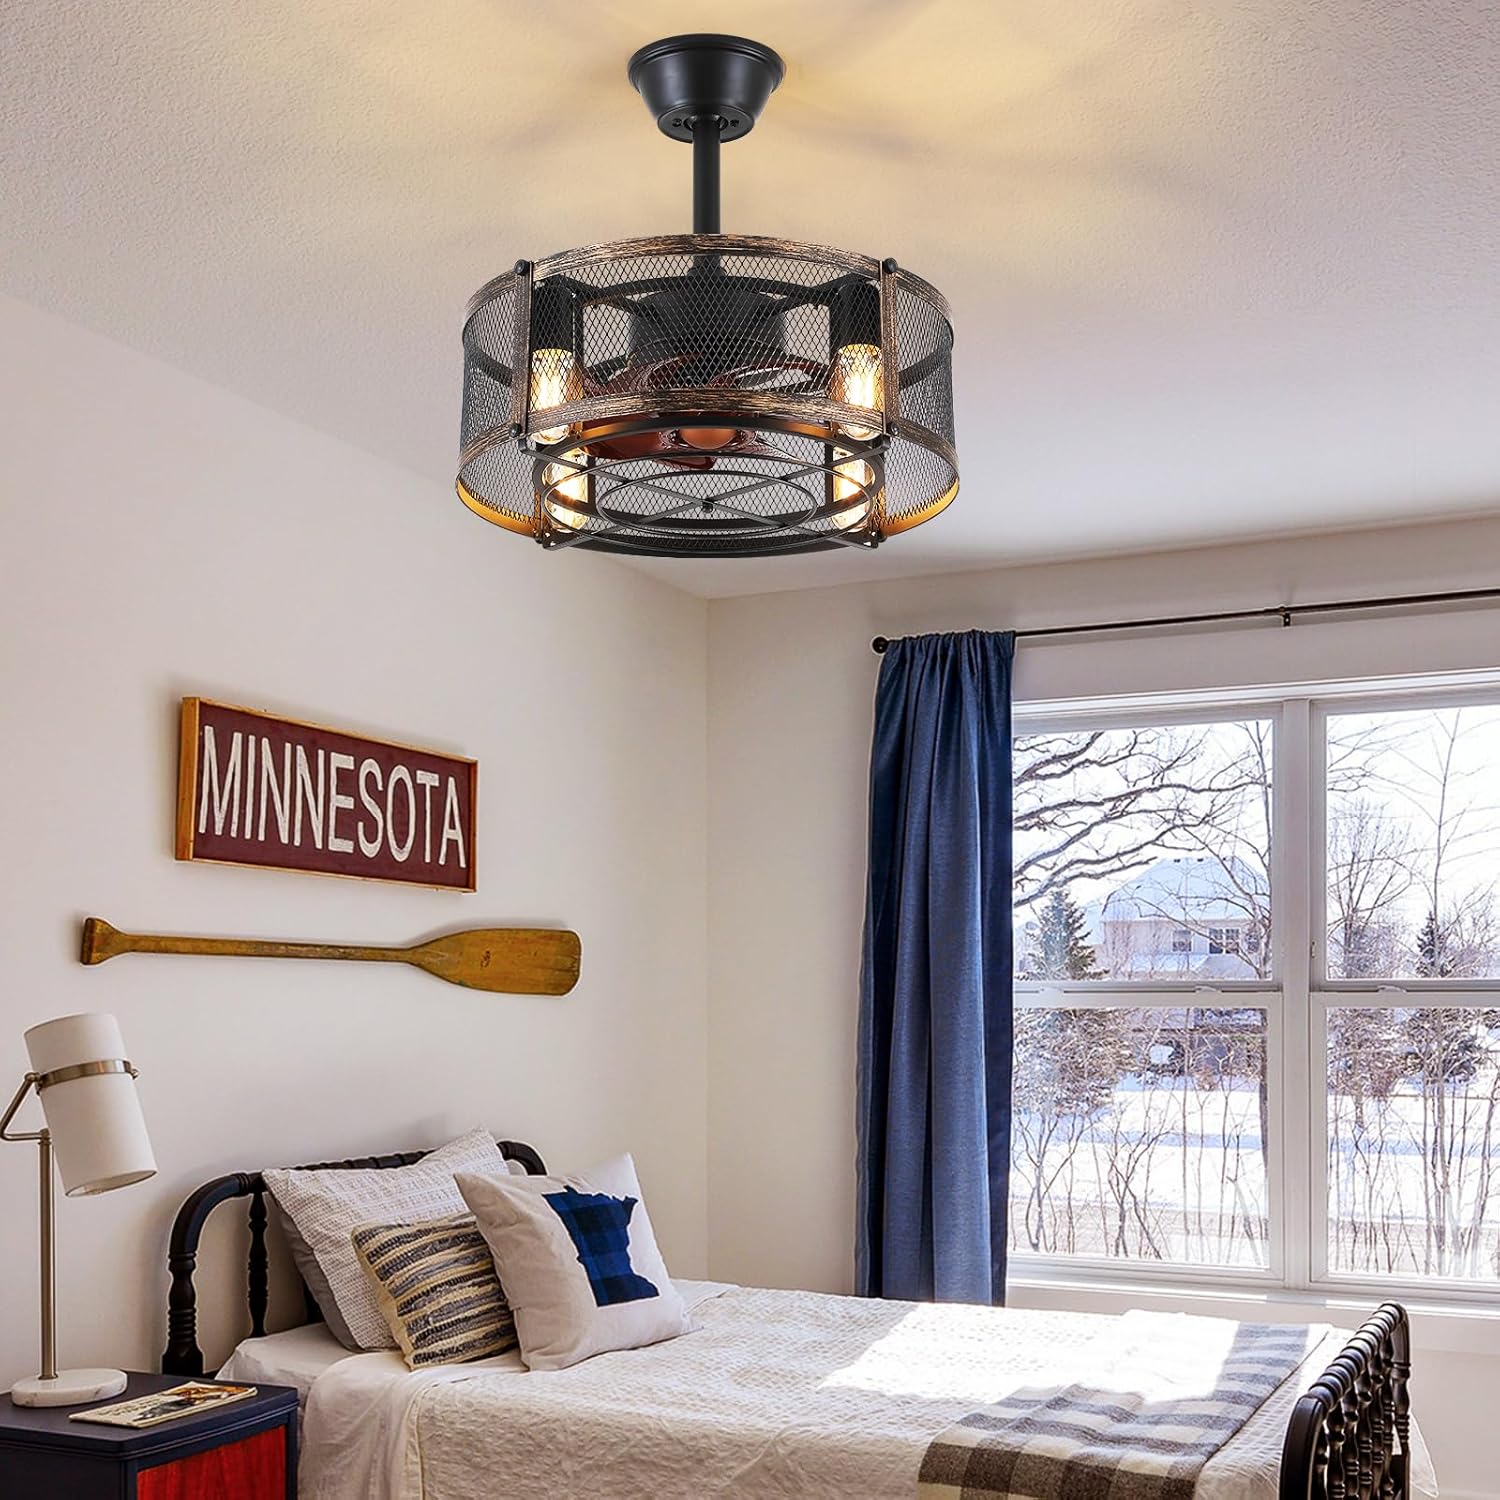
Figure 5.1: Layout of the remote control for the Dannilong Caged Ceiling Fan.
- Power On/Off: Press the power button to turn the fan and lights on or off.
- Light On/Off: Use the dedicated light button to control the fan's lighting independently.
- Fan Speed: Select from 6 adjustable fan speeds (1-6) to customize airflow. The quiet DC motor ensures a peaceful environment even at higher speeds.
- Reversible Rotation: The fan features a reversible motor for year-round comfort. Use the forward (F) button for summer (downward airflow for cooling) and reverse (R) button for winter (upward airflow for heat circulation).
- Timer Function: Set the fan to automatically turn off after 1, 2, or 4 hours using the timer buttons.
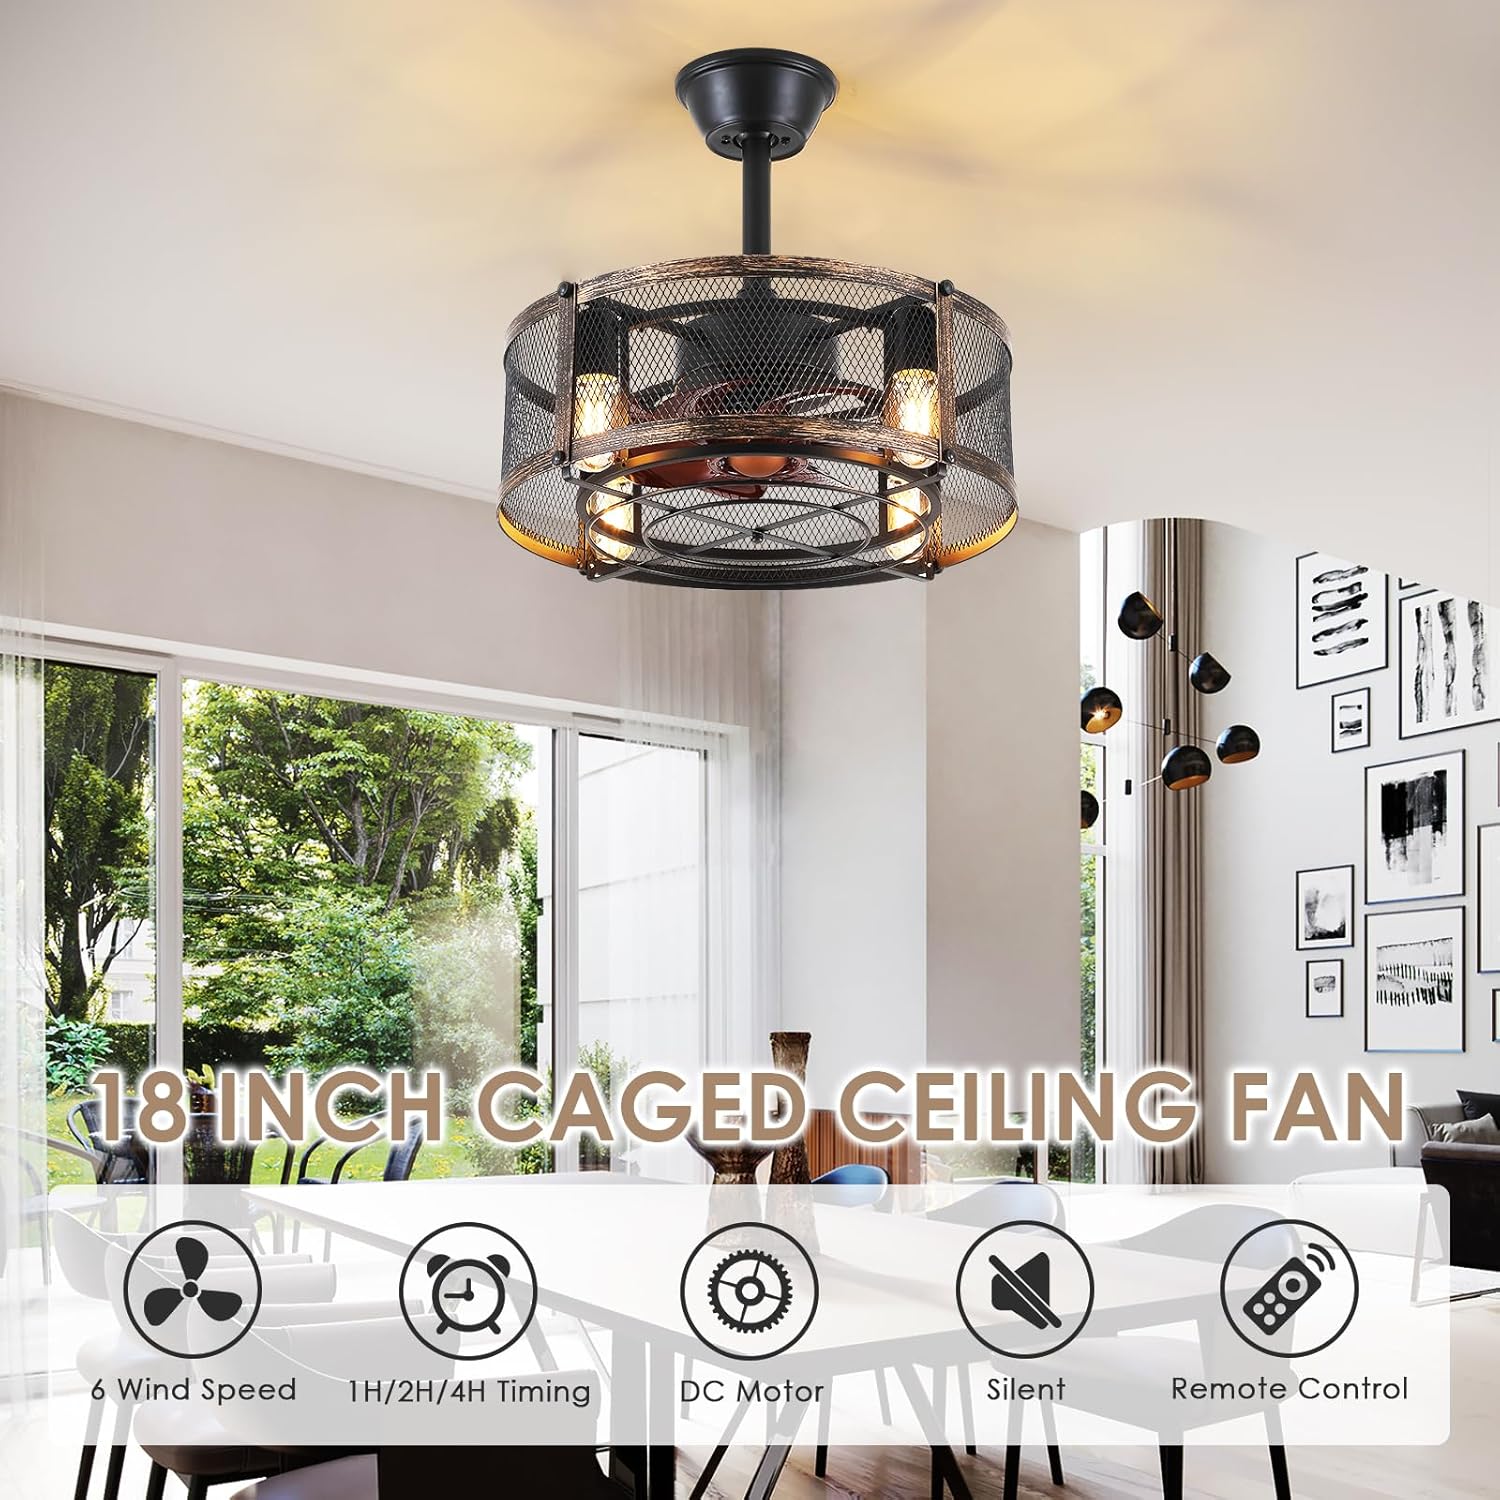
Figure 5.2: Overview of the fan's key features.

Figure 5.3: Fan speed settings and their recommended uses.

Figure 5.4: Seasonal operation with forward and reverse rotation.
Video 5.1: A display video showcasing the Dannilong Caged Ceiling Fan with lights in operation.
6. Maintenance
Regular maintenance ensures the longevity and optimal performance of your ceiling fan.
Cleaning:
- Always turn off the power at the circuit breaker before cleaning.
- Use a soft, damp cloth to clean the fan's exterior. Do not use abrasive cleaners or solvents.
- The caged design may require a brush or vacuum attachment for thorough cleaning of the interior and fan blades.
Bulb Replacement:
The fan requires four E26 base bulbs. Ensure the power is off before replacing bulbs.

Figure 6.1: Bulb requirements and compatible bulb types.
7. Troubleshooting
If you experience issues with your fan, refer to the common problems and solutions below. If the problem persists, contact customer support.
| Problem | Possible Cause | Solution |
|---|---|---|
| Fan does not start | No power to the fan; Loose wire connections; Remote control battery low. | Check circuit breaker; Ensure all wiring is secure; Replace remote control batteries. |
| Lights not working | Bulbs are loose or burnt out; Incorrect wiring. | Tighten or replace bulbs; Verify light wiring connections. |
| Fan is noisy | Loose screws; Fan not properly balanced; Obstruction in fan path. | Check and tighten all screws; Ensure fan is balanced; Remove any obstructions. |
| Remote control not responding | Batteries are dead or incorrectly inserted; Remote not paired with fan. | Replace batteries, ensuring correct polarity; Refer to remote pairing instructions (usually power cycle and press a button). |
8. Warranty and Support
Dannilong is committed to providing professional after-sales service. If you encounter any issues during the installation or use of your Dannilong Ceiling Fan, please do not hesitate to contact us. We will promptly address any concerns to ensure your satisfaction.
For support, please refer to the contact information provided with your purchase or visit the official Dannilong store on Amazon.
Online Store: Dannilong Amazon Store
Ask a question about this manual
Ask about setup, troubleshooting, compatibility, parts, safety, or missing instructions. Manuals+ will review the question and use this page’s manual context to help answer it.