1. Introduction
This manual provides detailed instructions for the safe and effective use of your CAMWORLD 4K Camcorder AC13. Please read this manual thoroughly before operating the device and retain it for future reference.
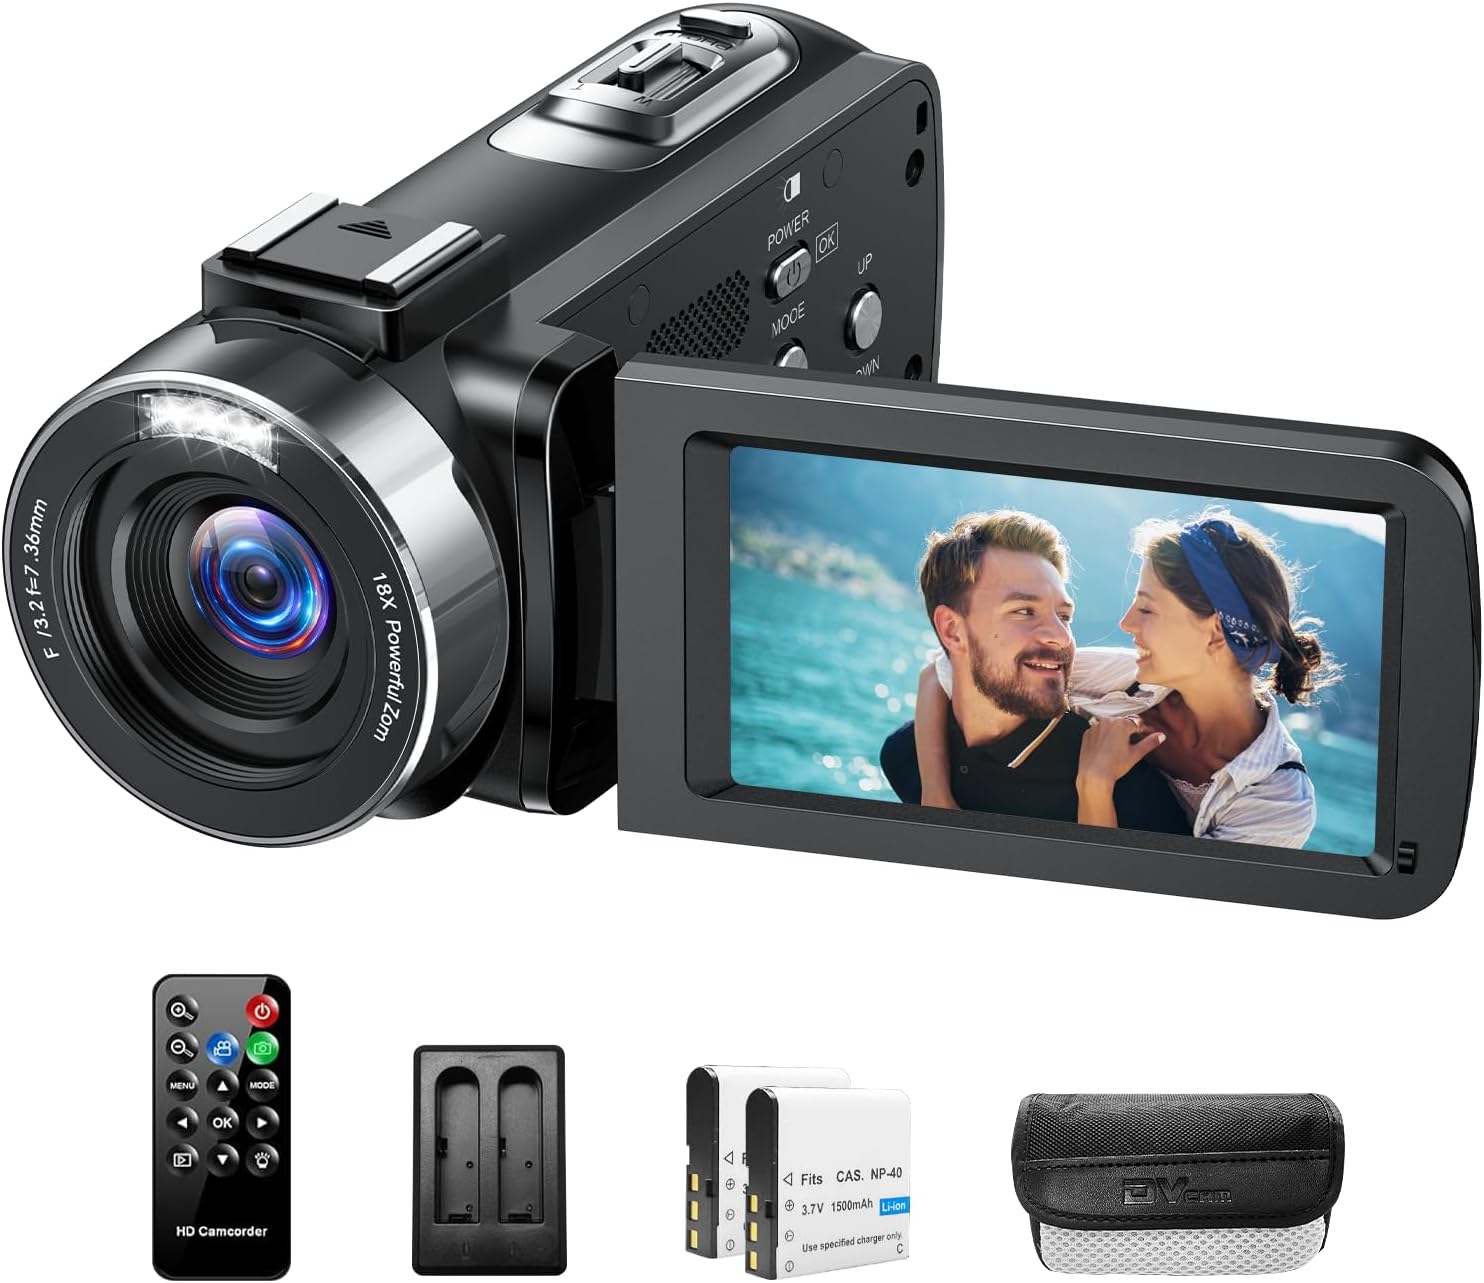
Figure 1: CAMWORLD 4K Camcorder AC13 and accessories.
2. Package Contents
Verify that all items listed below are included in your package:
- CAMWORLD 4K Camcorder AC13
- 2 x Lithium Ion Batteries
- 1 x Battery Charger
- 1 x USB Cable
- 1 x Remote Control
- 1 x DV Bag (Camera Bag)
- 1 x Lens Cover
- User Manual (this document)

Figure 2: Included accessories with the CAMWORLD 4K Camcorder AC13.
3. Setup
3.1. Battery Installation and Charging
- Open the battery compartment cover located on the bottom of the camcorder.
- Insert a fully charged Lithium Ion battery into the compartment, ensuring correct polarity.
- Close the battery compartment cover securely.
- To charge the batteries, use the provided battery charger and USB cable. Connect the charger to a power source and insert the batteries.
- A fully charged battery provides approximately 90 minutes of continuous use. The camcorder supports recording while charging.
3.2. SD Card Insertion
The camcorder requires an SD card (16-128GB, not micro SD) for storing photos and videos. An SD card is not included in the package.
- Locate the SD card slot, typically near the battery compartment or on the side.
- Insert the SD card with the metal contacts facing the correct direction until it clicks into place.
- To remove, gently press the SD card until it ejects.
3.3. Attaching the Lens Cover
Always keep the lens cover attached when the camcorder is not in use to protect the lens from dust and scratches.

Figure 3: Removing the lens cover.
4. Operating the Camcorder
4.1. Power On/Off
- To power on, open the 3.0-inch 270-degree rotatable screen. The camcorder will automatically boot up.
- To power off, close the screen or press and hold the power button.

Figure 4: The 270-degree rotating screen allows for flexible viewing angles.
4.2. Basic Photo and Video Recording
- Once powered on, the camcorder is typically in video recording mode.
- Press the MODE button to switch between video and photo modes.
- To record video, press the REC/STOP button. Press again to stop recording.
- To take a photo, press the PHOTO button (usually a separate button or a half-press of the REC/STOP button in photo mode).
4.3. Digital Zoom
The camcorder features 18X digital zoom. Use the zoom rocker switch (often labeled W/T or Zoom In/Out) to adjust the zoom level.
4.4. LED Fill Light
The built-in LED fill light assists in shooting high-definition photos and videos in low-light conditions or darkness.
- To activate the fill light, locate the dedicated button or access it through the menu settings.
Figure 5: Using the LED fill light in low-light environments.
4.5. Webcam Function
The camcorder can be used as a webcam for live streaming or video calls.
- Connect the camcorder to your computer using the provided USB cable.
- Select "PC CAM" mode on the camcorder when prompted.
- Your computer should recognize the camcorder as a webcam, allowing its use with compatible applications (e.g., YouTube, Facebook, Skype).

Figure 6: Camcorder used as a webcam.
4.6. Menu Navigation and Settings
Access the menu by pressing the MENU button. Use the directional buttons to navigate and the OK button to select options. Key settings include:
- Exposure (EV): Adjust brightness.
- White Balance: Adjust color temperature (Auto, Daylight, Cloudy, Tungsten, Fluorescent).
- Scene: Select preset shooting modes (e.g., Auto, Sport, Portrait, Landscape).
- Metering Mode: Determine how the camera measures light (e.g., Average, Center-weighted, Spot).
- ISO: Adjust light sensitivity.
- Frequency: Set video output frequency (50Hz/60Hz).
- LED Indicator Light: Turn the indicator light on or off.
4.7. Advanced Recording Features
The camcorder offers several advanced recording options:
- Loop Recording: Records continuously, overwriting the oldest footage when the memory card is full.
- Continuous Recording: Records without interruption until stopped or memory is full.
- Time-Lapse Video: Captures frames at set intervals to create a sped-up video.
- Slow Motion: Records at a higher frame rate for slow-motion playback.
- Pause Function: Temporarily pause and resume recording within a single video file.
- Self-Timer: Set a delay before taking a photo or starting a video.

Figure 7: Advanced recording features.
4.8. Remote Control Operation
The included 360° wireless remote control allows for convenient operation from a distance.
- Point the remote control towards the camcorder's IR receiver.
- Use the buttons on the remote to start/stop recording, take photos, zoom, and navigate menus.

Figure 8: Using the wireless remote control.
5. Maintenance
- Cleaning the Lens: Use a soft, lint-free cloth specifically designed for camera lenses. Avoid harsh chemicals.
- Cleaning the Screen: Wipe the screen gently with a microfiber cloth.
- General Cleaning: Use a dry, soft cloth to wipe the camcorder body. Do not expose to water or excessive moisture.
- Storage: Store the camcorder in a cool, dry place away from direct sunlight and extreme temperatures. Ensure the lens cover is on.
6. Troubleshooting
| Problem | Possible Cause | Solution |
|---|---|---|
| Camcorder does not power on. | Battery is depleted or incorrectly installed. | Ensure batteries are fully charged and correctly inserted. Try using the second battery. |
| SD card error message. | SD card is not inserted correctly, incompatible, or corrupted. | Reinsert the SD card. Ensure it is 16-128GB and not a micro SD. Try formatting the card (this will erase all data). |
| Blurry images/video. | Lens is dirty, focus issue, or insufficient lighting. | Clean the lens. Ensure adequate lighting. Hold the camcorder steady. |
| Poor audio quality. | Microphone is obstructed or recording in a noisy environment. | Ensure the microphone is clear. Consider using an external microphone (not included) for better audio. |
| Remote control not working. | Battery in remote is depleted or not pointed correctly. | Replace the remote control battery. Ensure direct line of sight to the camcorder's IR receiver. |
7. Specifications
| Feature | Detail |
|---|---|
| Brand | CAMWORLD |
| Model Number | AC13 |
| Video Capture Resolution | 4K (3840x2160) at 30FPS |
| Image Resolution | 42MP |
| Screen Size | 3 Inches (270° Rotation) |
| Digital Zoom | 18X |
| Photo Sensor Technology | CMOS |
| Flash Memory Type | SD (Supports 16-128GB) |
| Video Capture Format | MP4 |
| Supported Audio Format | AAC |
| Connectivity Technology | USB |
| Special Features | Built-In Light, Night Vision, Remote Control, Slow Motion, Time Lapse, Webcam Function, Recording While Charging |
| Batteries | 2 Lithium Ion batteries required (included) |
| Item Weight | 1.21 pounds |
| Package Dimensions | 5.67 x 5.16 x 3.43 inches |
8. Warranty and Support
For warranty information and technical support, please refer to the contact details provided with your purchase documentation or visit the official CAMWORLD website. We are committed to providing satisfactory service.