Sunitact ST1476, ST1007
Sunitact ST1476 & ST1007 Rechargeable Flashlights User Manual
Models: ST1476, ST1007
Brand: Sunitact
Introduction
This user manual provides comprehensive instructions for the safe and effective operation, maintenance, and troubleshooting of your Sunitact ST1476 and ST1007 rechargeable high lumen flashlights. Please read this manual thoroughly before using the product to ensure optimal performance and longevity.

Figure 1: Sunitact ST1476 and ST1007 Flashlight Kit
This image displays both the ST1476 and ST1007 flashlights, each packaged within its dedicated protective case. The cases also contain charging cables and other accessories, highlighting the complete kit contents.
Safety Information
- Do not look directly into the LED light when it is on, as it can cause temporary vision impairment or permanent eye damage.
- Keep the flashlight away from children.
- Do not disassemble or modify the flashlight. Unauthorized modifications can lead to damage, electric shock, or fire.
- Use only the specified rechargeable batteries and charging methods.
- Avoid exposing the flashlight to extreme temperatures or direct sunlight for prolonged periods.
- The ST1007 model is IP67 waterproof. Avoid submerging the ST1476 model in water as it is not water resistant. Always ensure charging ports are sealed when not in use.
Package Contents
The Sunitact flashlight kit typically includes the following items:
- 1x Sunitact ST1476 Rechargeable Flashlight
- 1x Sunitact ST1007 Rechargeable Flashlight
- Rechargeable Batteries (pre-installed or separate)
- USB Charging Cables
- Protective Carrying Cases
- User Manual (this document)
Product Overview
Familiarize yourself with the main components of your Sunitact flashlights.

Figure 2: Sunitact ST1476 Flashlight Components
This image shows the ST1476 flashlight, highlighting its robust design, power button with indicator lights, and the included carrying case with charging cable and battery.
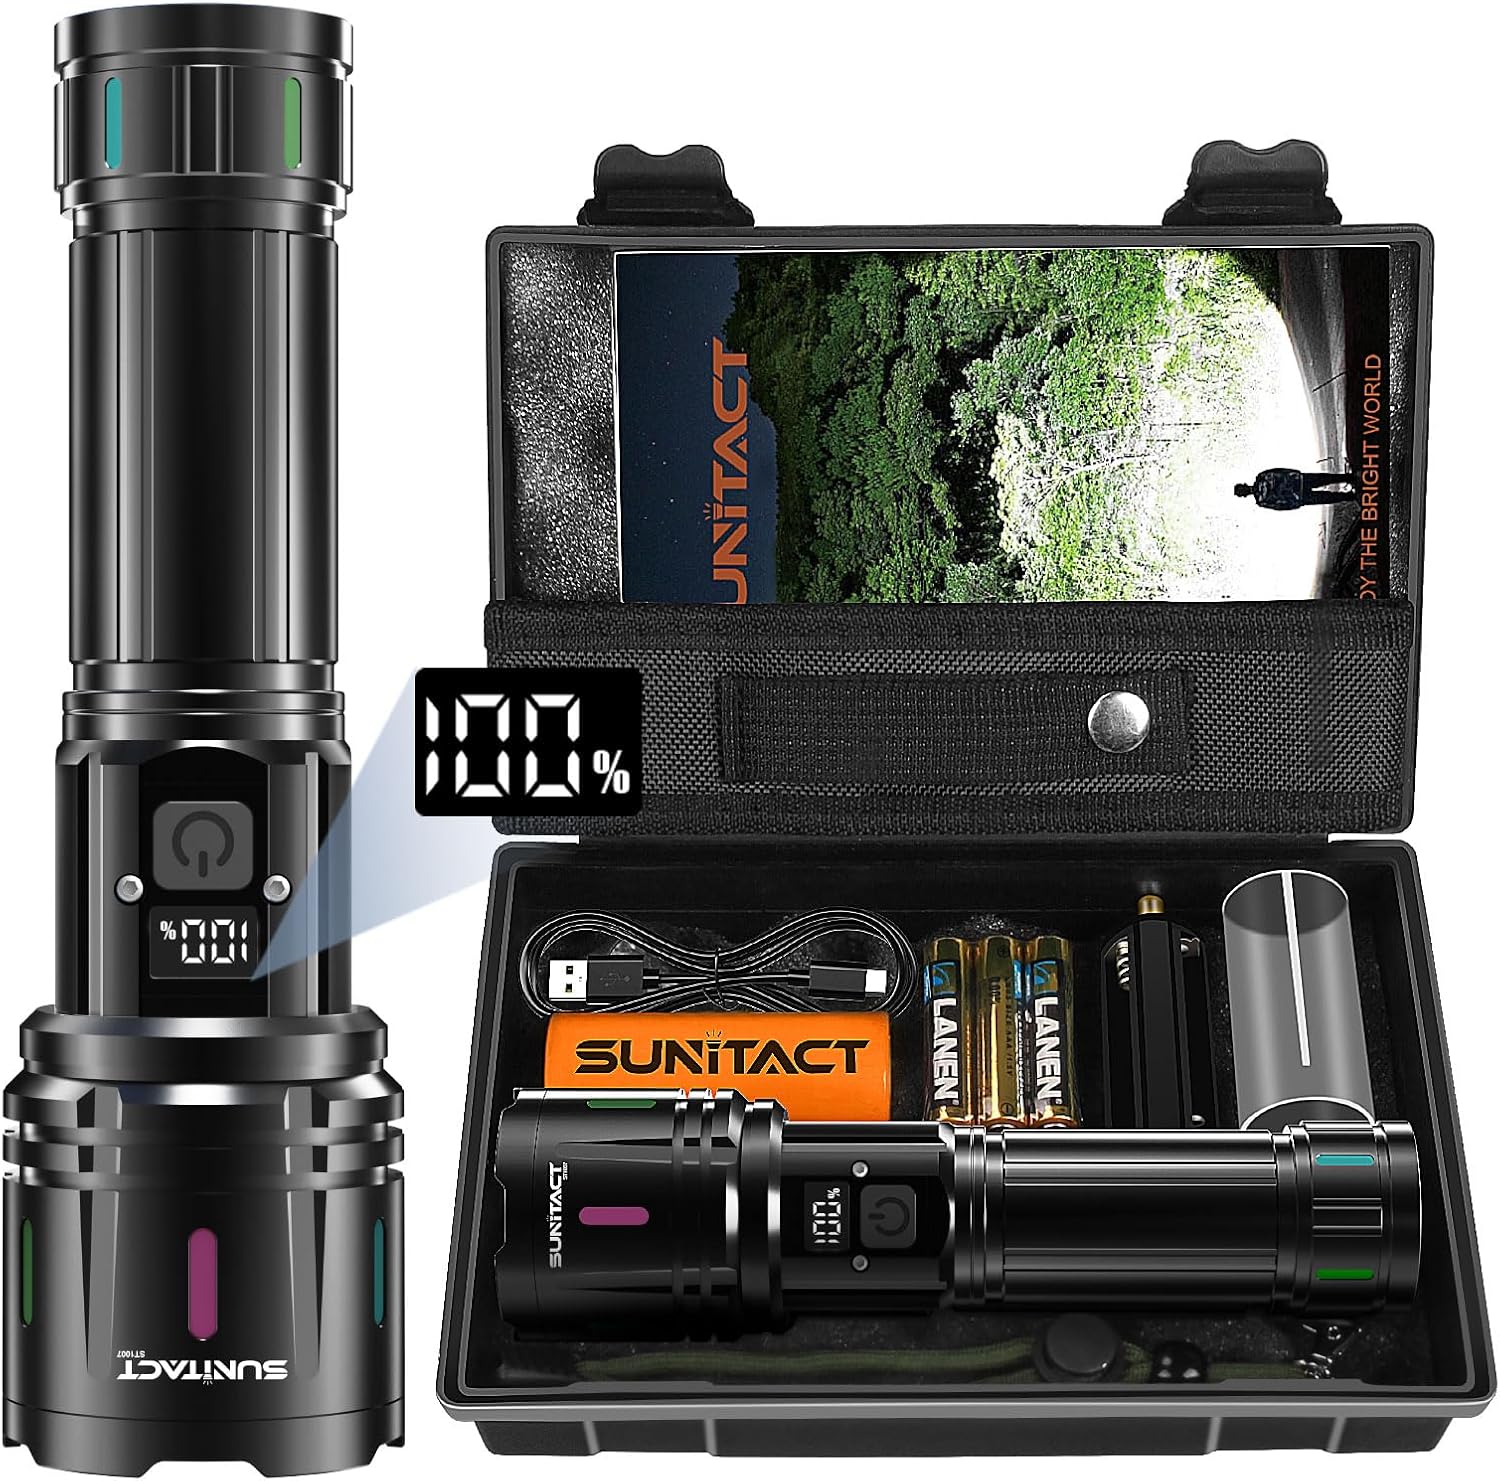
Figure 3: Sunitact ST1007 Flashlight Components
This image displays the ST1007 flashlight, featuring its digital percentage display, power button, and the accompanying carrying case with charging cable and battery.
Both models feature a durable aluminum body, a power button, and a charging port. The ST1007 model includes a digital display for battery percentage, while the ST1476 uses indicator lights.
Setup
1. Battery Installation
If the battery is not pre-installed, unscrew the tail cap of the flashlight and insert the rechargeable battery with the positive (+) end facing towards the head of the flashlight. Screw the tail cap back on securely.
2. Initial Charging
Before first use, fully charge the flashlight. Locate the USB charging port (typically under a protective cover near the power button). Connect the provided USB charging cable to the flashlight and to a USB power source (e.g., wall adapter, computer USB port).
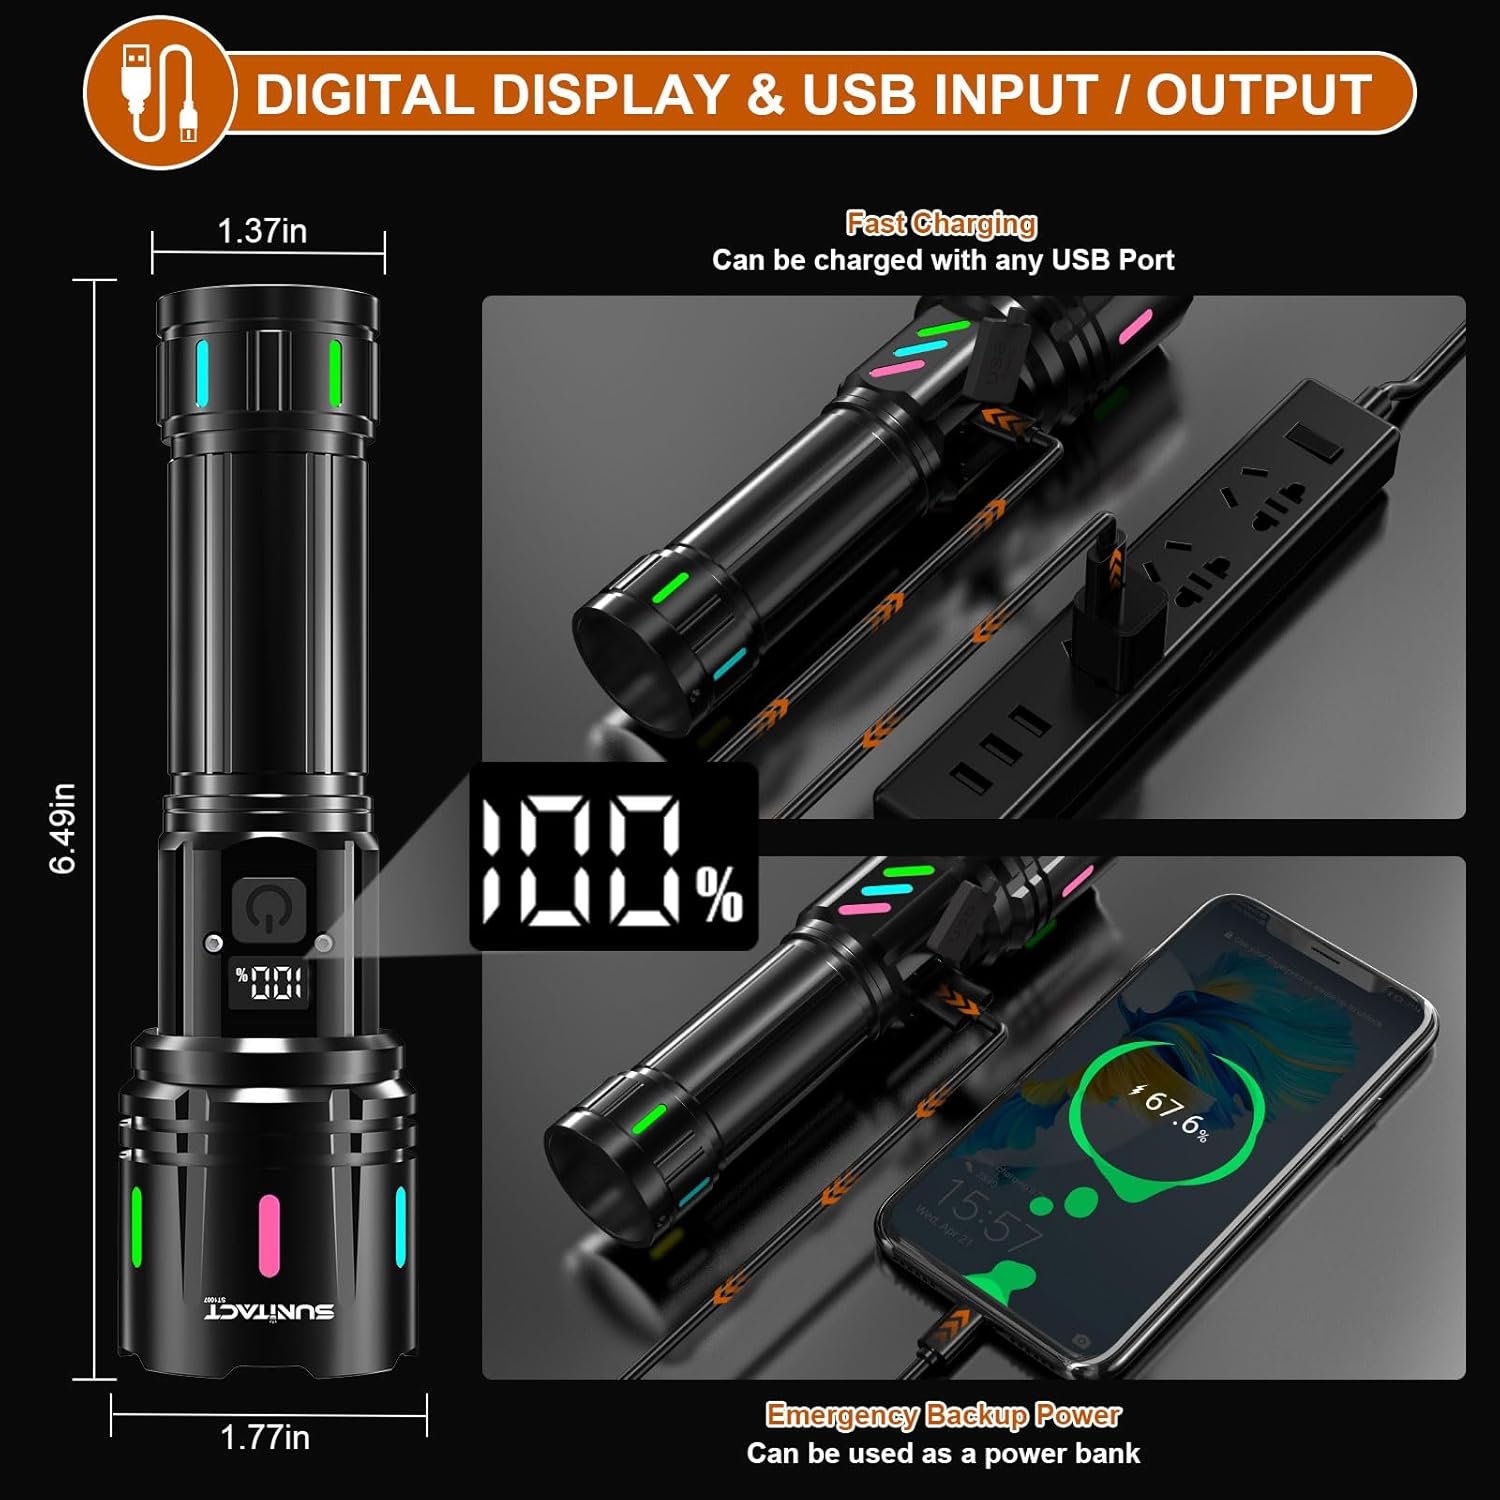
Figure 4: Digital Display and USB Charging
This image illustrates the flashlight being charged via its USB port, with the digital display showing the battery percentage. It also demonstrates the flashlight's capability to act as a power bank for charging other devices.
The ST1007 model will show the charging progress on its digital display. The ST1476 model will indicate charging status via its LED indicators. A full charge typically takes several hours. The battery is designed for long life and multiple recharges.
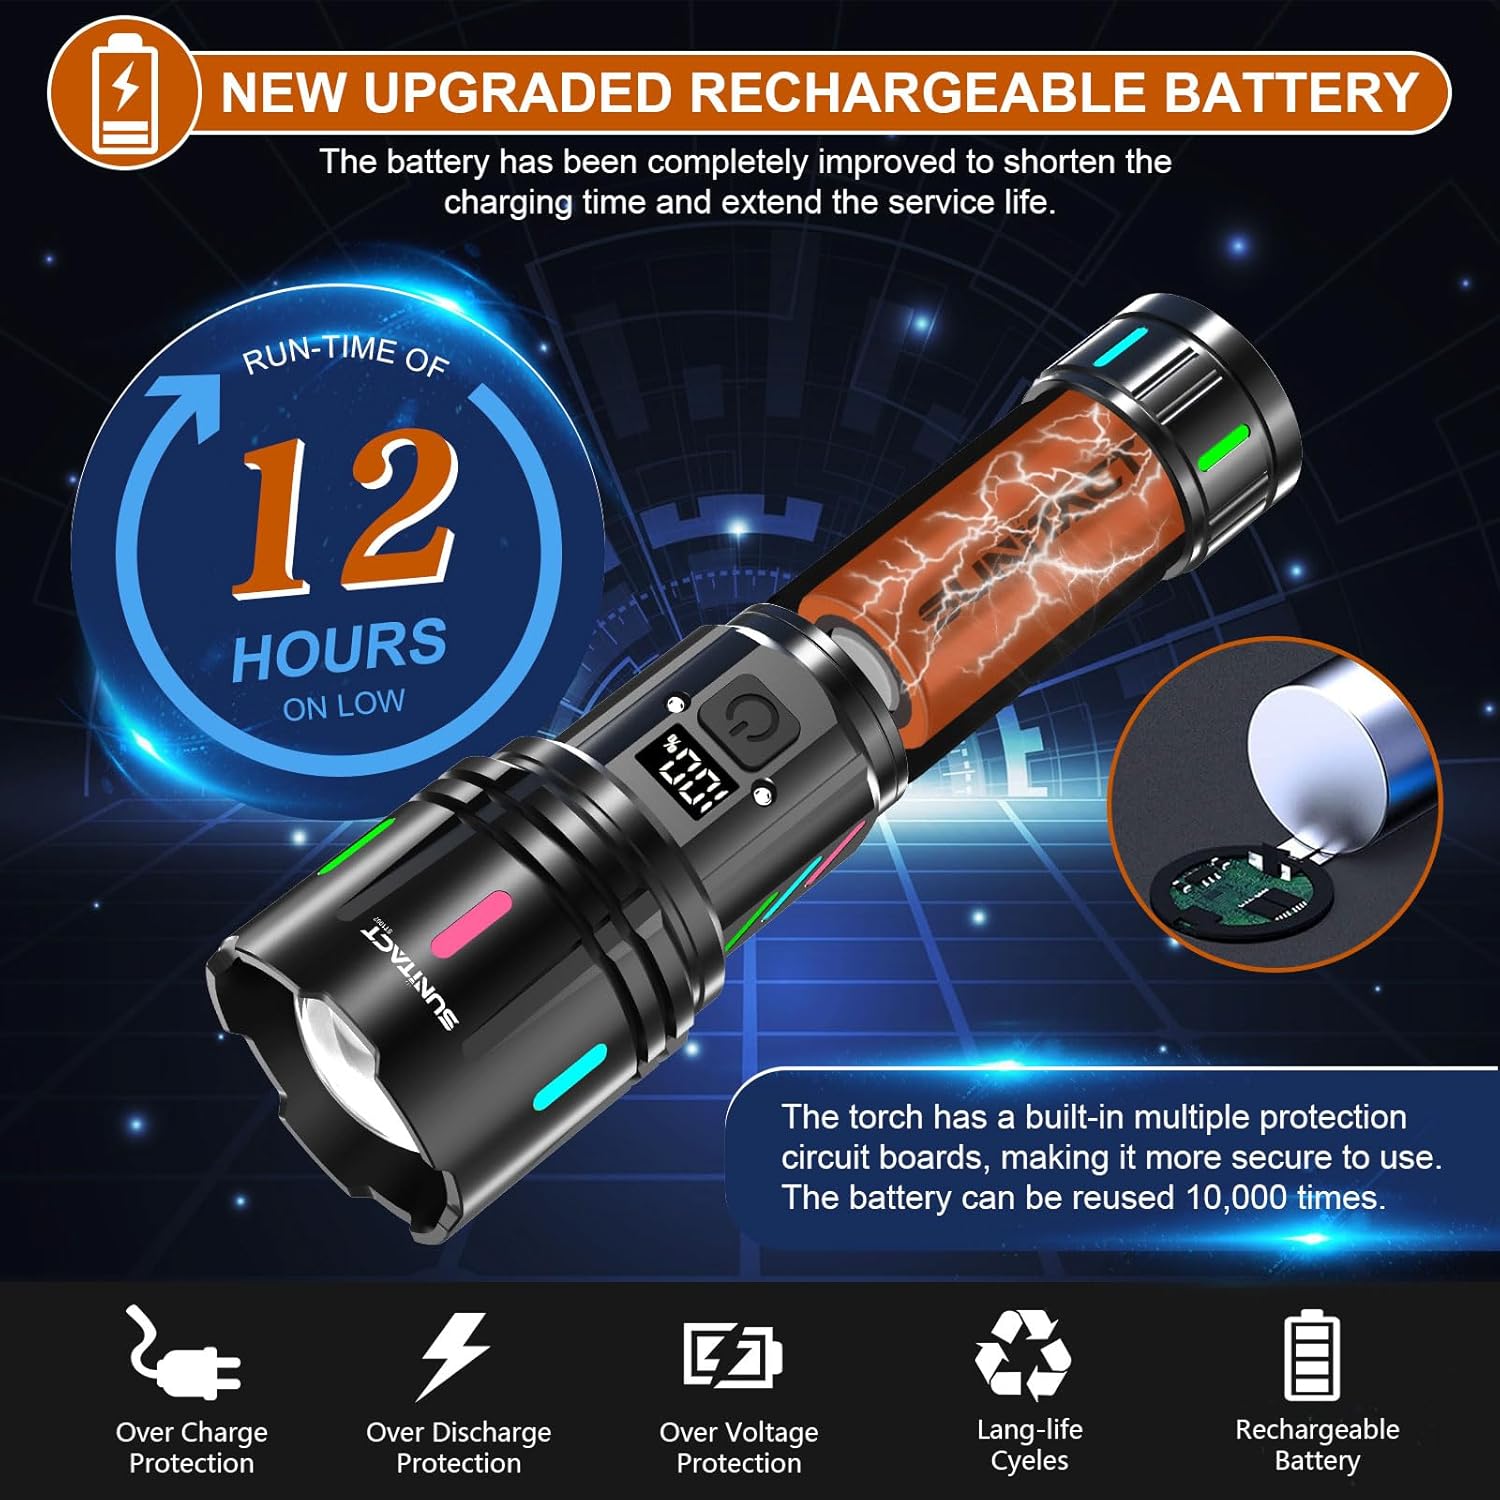
Figure 5: Battery Features and Protection
This graphic highlights the flashlight's extended run-time (up to 12 hours on low mode), advanced battery protection features (over charge, over discharge, over voltage), and the battery's impressive lifespan of over 10,000 recharge cycles.
Operating Instructions
1. Turning On/Off and Mode Switching
The flashlights feature multiple lighting modes for various situations.
- Short Press: Press the power button briefly to turn on the flashlight. Subsequent short presses will cycle through the lighting modes: High, Medium, Low, Strobe, and SOS.
- Long Press: To turn off the flashlight from any mode, press and hold the power button for approximately 3 seconds.
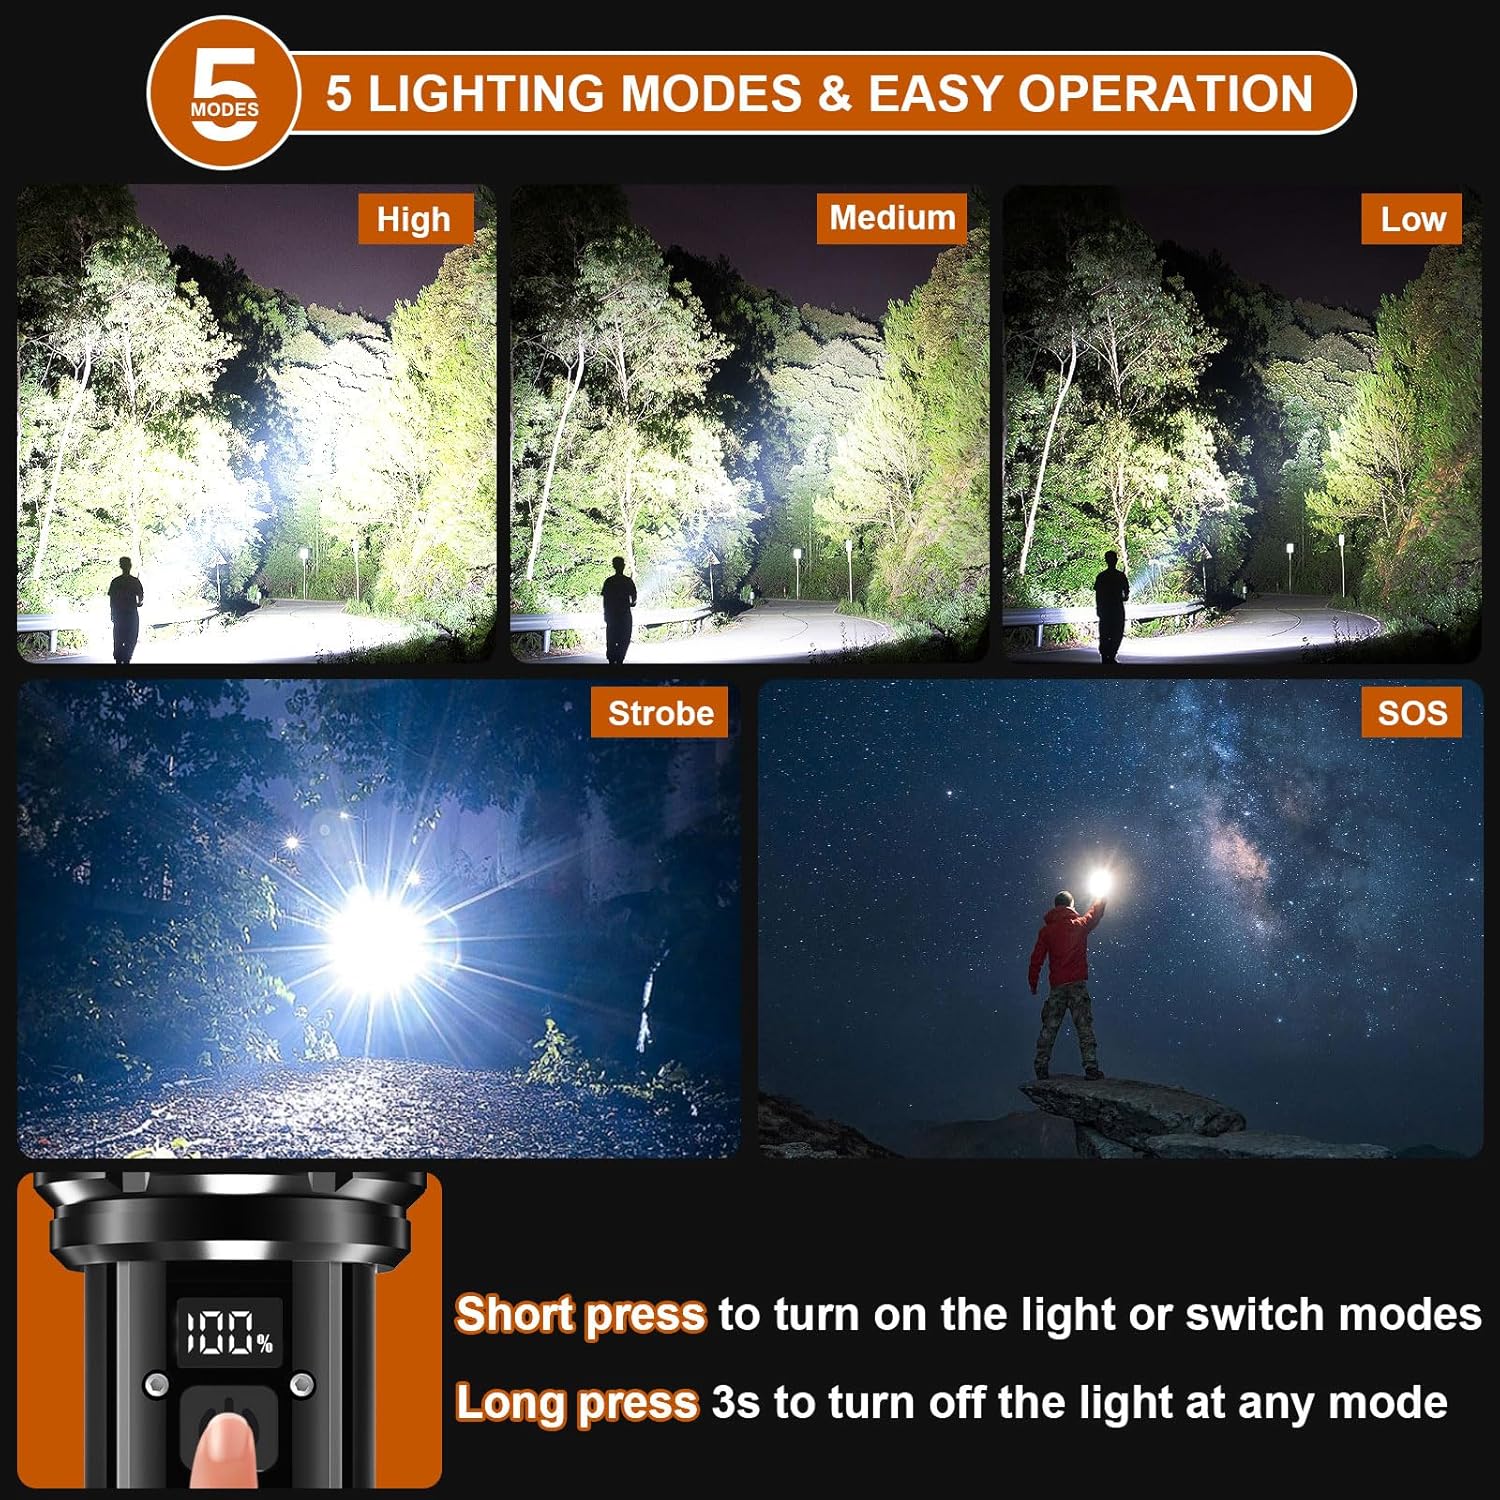
Figure 6: Lighting Modes and Operation
This image visually demonstrates the five distinct lighting modes: High, Medium, Low, Strobe, and SOS. It also provides clear instructions on how to short press the button to cycle through modes and long press for 3 seconds to turn the flashlight off.
2. Zoom Function (ST1476 Model)
The ST1476 model features an adjustable beam for floodlight or spotlight illumination.
- Zoom In (Floodlight): Extend the head of the flashlight outwards to widen the beam for a broader area of illumination.
- Zoom Out (Spotlight): Retract the head of the flashlight inwards to narrow the beam for a longer, more focused distance.

Figure 7: Zoom Functionality
This graphic illustrates the adjustable beam feature, demonstrating how to zoom in for a wide floodlight effect and zoom out for a concentrated spotlight, useful for varying illumination needs.
3. Using as a Power Bank (ST1007 Model)
The ST1007 flashlight can serve as an emergency power bank to charge other USB-powered devices.
- Connect your device's USB charging cable to the flashlight's output USB port.
- The flashlight will begin charging your device. Monitor your device's charging indicator.
Note: Using the flashlight as a power bank will deplete its internal battery. Ensure sufficient charge for both flashlight use and device charging.
4. Battery Indicator
- ST1007: The digital display shows the exact battery percentage.
- ST1476: LED indicators near the power button will show the approximate battery level. Refer to the product diagram for specific indicator meanings.
Maintenance
1. Cleaning
- Wipe the flashlight body with a soft, damp cloth. Do not use abrasive cleaners or solvents.
- Keep the lens clean for optimal light output. Use a lens cleaning cloth if necessary.
2. Battery Care
- Recharge the battery regularly, even if the flashlight is not frequently used, to maintain battery health.
- Avoid fully discharging the battery before recharging.
- If storing for an extended period, charge the battery to about 50-70% capacity.
3. Storage
- Store the flashlight in a cool, dry place, away from direct sunlight and extreme temperatures.
- Use the provided protective carrying cases to prevent scratches and damage.

Figure 8: Durability and Features
This image highlights the ST1007 flashlight's IP67 waterproof rating, its robust construction, and additional features like the safety hammer function and resistance to cold temperatures.
Troubleshooting
| Problem | Possible Cause | Solution |
|---|---|---|
| Flashlight does not turn on. | Battery is dead or not inserted correctly. | Charge the battery. Ensure battery is inserted with correct polarity. |
| Light is dim. | Low battery. Dirty lens. | Recharge the battery. Clean the lens. |
| Flashlight does not charge. | Faulty cable or power source. Charging port obstruction. | Try a different USB cable and power source. Check charging port for debris. |
| Cannot switch modes. | Button malfunction. | Ensure button is pressed correctly. If issue persists, contact customer support. |
Specifications
| Feature | Detail |
|---|---|
| Brand | Sunitact |
| Models | ST1476, ST1007 |
| Light Source Type | LED (Upgraded XHP70.2 / XHM90.2 LED Chip) |
| Brightness | Up to 1000 Lumens (per flashlight, actual output may vary by mode) |
| Power Source | Battery Powered (Rechargeable NiMH Battery) |
| Voltage | 1.2 Volts |
| Charging Port | USB Input/Output (Fast Charging) |
| Lighting Modes | High, Medium, Low, Strobe, SOS (5 Modes) |
| Run-time (Low Mode) | Up to 12 hours |
| Water Resistance | ST1007: IP67 Waterproof; ST1476: Not Water Resistant |
| Material | High Quality Aluminum |
| Special Features | Digital Display (ST1007), Power Bank Function, Zoom Function (ST1476), Safety Hammer, Overcharge Protection |
Note: Specifications are subject to change without notice.
Warranty and Support
Sunitact products are manufactured to high quality standards. For warranty information, technical support, or any inquiries regarding your flashlight, please refer to the contact information provided with your purchase or visit the official Sunitact website.
Please retain your proof of purchase for warranty claims.