
SYNYEY NPLN11A-05C/X1E (8000 BTU), NPLN11A-06C/X1E (10000 BTU), NPH-10H/X1E (14000 BTU)
Air Choice Universal Window Kit
Instruction Manual
1. Introduction and Overview
This manual provides comprehensive instructions for the installation, operation, and maintenance of your Air Choice Universal Window Kit. This kit is designed to provide a secure and efficient exhaust solution for various portable air conditioner models, including NPLN11A-05C/X1E (8000 BTU), NPLN11A-06C/X1E (10000 BTU), and NPH-10H/X1E (14000 BTU) units. Proper installation ensures optimal performance of your portable air conditioner by effectively sealing the window opening and directing hot air exhaust outdoors.

Image: Portable air conditioner unit in a living room, illustrating its use with a window kit (not explicitly shown in detail).
2. Product Components
Before beginning installation, please ensure all components listed below are present and undamaged. Refer to the image for visual identification of each part.
- Adjustable Window Panels: Typically two or more panels that slide to fit various window widths.
- Exhaust Hose Adapter: A connector piece designed to attach the portable air conditioner's exhaust hose to the window panel.
- Screws/Fasteners: For securing the panels together and to the window frame if necessary.
- Foam Seal Strips: Used to create an airtight seal around the window kit and window frame.
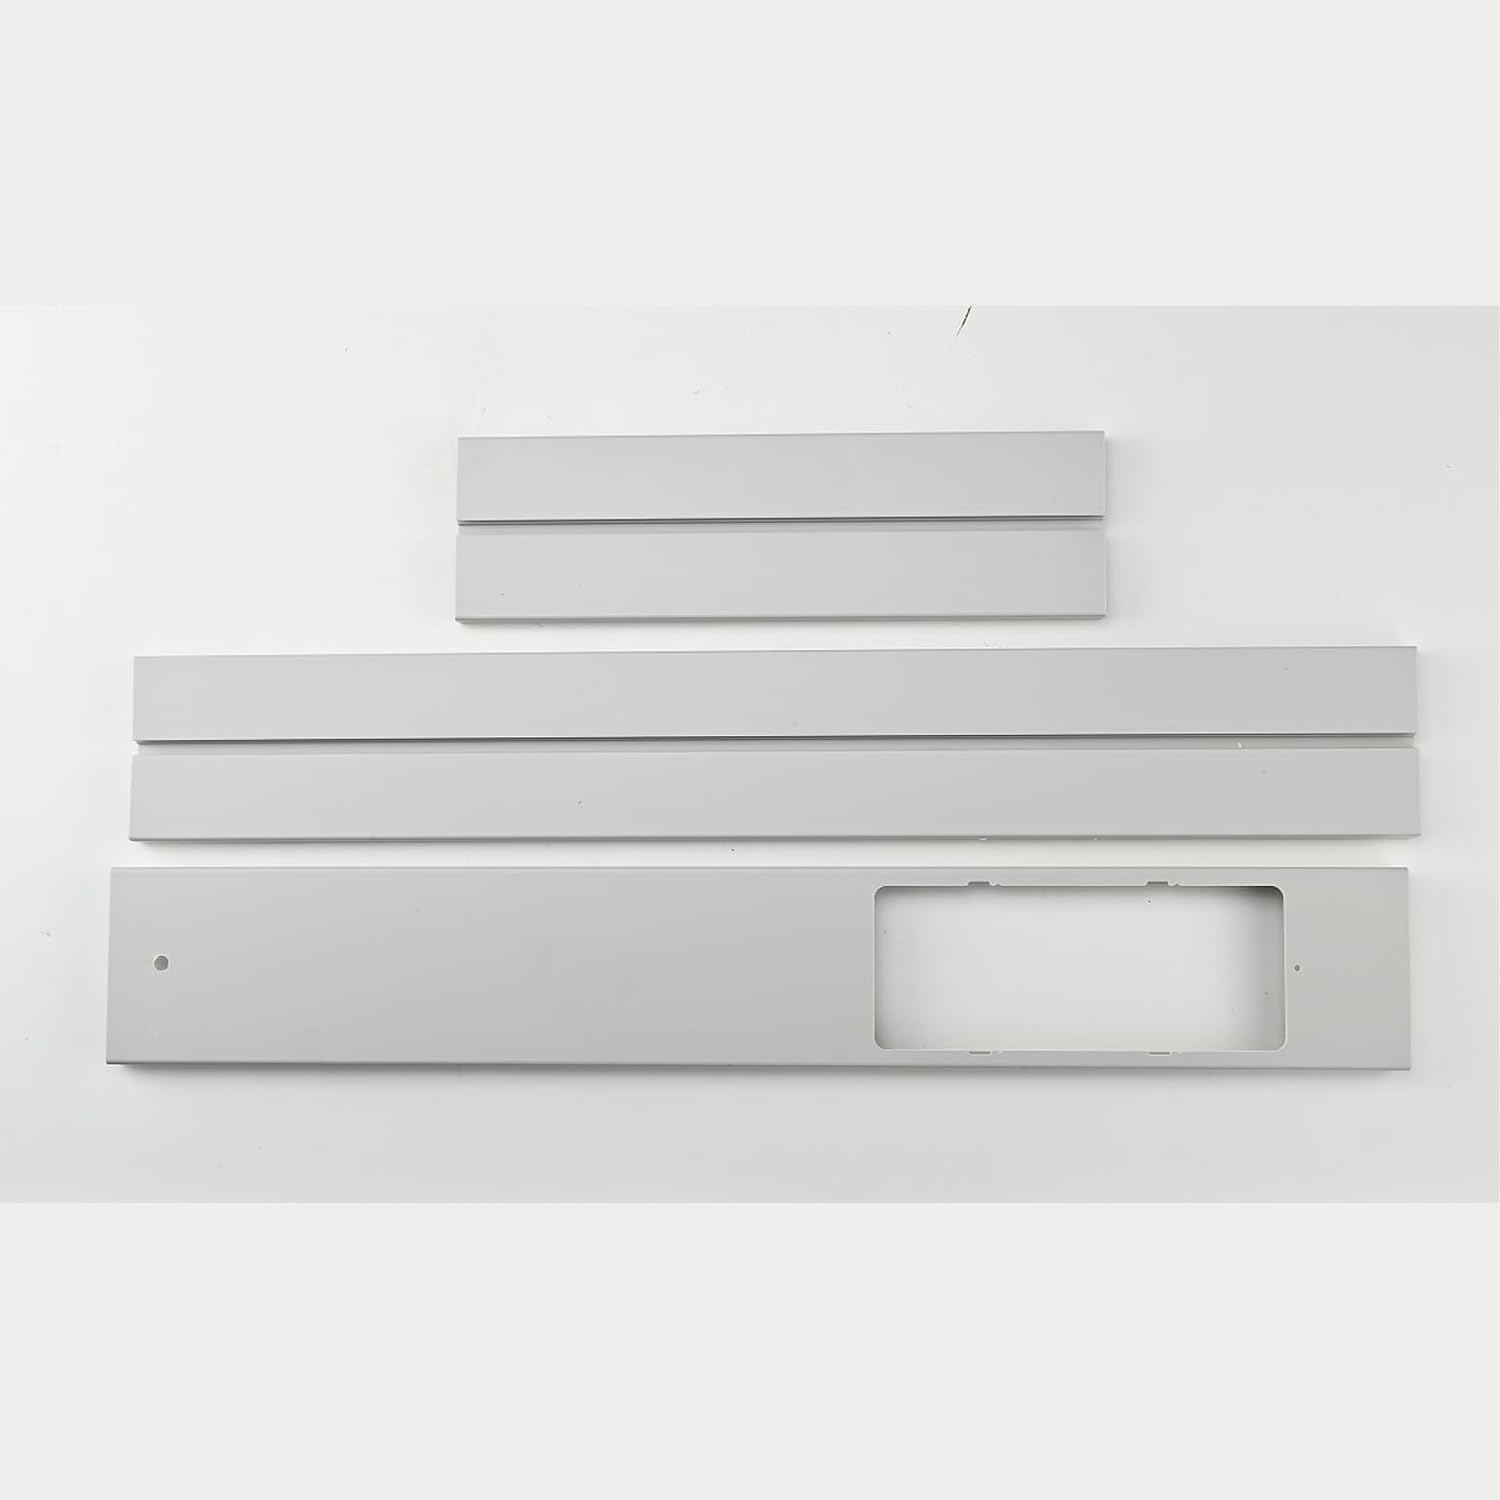
Image: The complete set of window kit components, including adjustable panels and the exhaust hose opening panel.
3. Setup and Installation
Follow these steps carefully to install the window kit for your portable air conditioner. Ensure the window surface is clean and dry before applying any seals.
- Measure Window Opening: Open your window to the desired height/width and measure the opening.
- Assemble Window Panels: Slide the adjustable window panels together to match the measured window opening. Secure them with the provided screws if applicable, ensuring a snug fit.
- Attach Exhaust Hose Adapter: Insert the exhaust hose adapter into the designated opening on the main window panel. Ensure it is securely locked in place.
- Apply Foam Seal Strips: Apply the foam seal strips along the edges of the window kit panels that will contact the window frame and the window sash. This helps prevent air leakage.
- Install Kit in Window: Place the assembled window kit into the window opening. Extend or retract the adjustable panels until they fit snugly against the window frame.
- Secure Window: Close the window sash against the top edge of the window kit to hold it firmly in place. For sliding windows, slide the window against the side of the kit.
- Connect Exhaust Hose: Attach the portable air conditioner's exhaust hose to the adapter on the window kit. Ensure a tight connection to prevent hot air from re-entering the room.
4. Operating Instructions
The Air Choice Universal Window Kit is a passive component designed to facilitate the exhaust of hot air from your portable air conditioner. Once installed, its operation is integrated with your air conditioner unit.
- Ensure Proper Seal: Regularly check that the window kit is securely fitted in the window opening and that the foam seals are intact. Any gaps can reduce the efficiency of your air conditioner.
- Hose Connection: Verify that the exhaust hose from your portable AC unit is firmly connected to the window kit adapter. A loose connection will allow hot air to escape back into the room.
- Window Closure: Always ensure the window is closed tightly against the window kit to maintain the seal and prevent the kit from dislodging.
5. Maintenance
Minimal maintenance is required for the window kit to ensure its longevity and effectiveness.
- Cleaning: Periodically wipe down the window panels with a soft, damp cloth to remove dust and grime. Avoid abrasive cleaners that could damage the surface.
- Seal Inspection: Inspect the foam seal strips for wear and tear. If they become damaged or lose their adhesive properties, replace them to maintain an airtight seal.
- Storage: When not in use, disassemble the kit if desired and store it in a clean, dry place away from direct sunlight and extreme temperatures to prevent warping or degradation of materials.
6. Troubleshooting
If you encounter issues with your window kit, consider the following common problems and solutions:
| Problem | Possible Cause | Solution |
|---|---|---|
| Air leakage around the kit | Improperly applied foam seals, gaps in window closure, or panels not fully extended. | Re-apply foam seals, ensure window is tightly closed against the kit, and fully extend panels to fit the opening. |
| Exhaust hose detaches easily | Hose adapter not securely fastened to the panel or hose not twisted/locked into adapter. | Ensure adapter is fully inserted and locked. Twist the exhaust hose firmly onto the adapter until secure. |
| Kit does not fit window opening | Incorrect measurement or panels not fully adjusted. | Re-measure window opening. Ensure panels are fully extended or retracted to match the dimensions. This kit is universal but has limits. |
7. Specifications
Key specifications for the Air Choice Universal Window Kit:
- Brand: SYNYEY
- Model Name Compatibility: NPLN11A-05C/X1E (8000 BTU), NPLN11A-06C/X1E (10000 BTU), NPH-10H/X1E (14000 BTU)
- Item Weight: 1.85 pounds
- Product Dimensions: 25.6 x 4.1 x 0.78 inches (approximate, adjustable)
- Installation Type: Window
- Form Factor: Portable
8. Warranty and Support
SYNYEY is committed to providing excellent customer service and support for your Air Choice product.

Image: Visual representation of SYNYEY's customer support commitments.
- Quick Reply: Expect a response to your inquiries within 24 hours.
- 12 Months Replacement: A replacement is available within 12 months of purchase for eligible issues.
- Lifetime After-Sales Service and Technical Support: SYNYEY provides ongoing support for the lifetime of the product.
For support, please refer to the contact information provided with your purchase or visit the official SYNYEY brand store online.
Note: Warranty terms and conditions may apply. Please retain your proof of purchase.
Ask a question about this manual
Ask about setup, troubleshooting, compatibility, parts, safety, or missing instructions. Manuals+ will review the question and use this page’s manual context to help answer it.