
Introduction
This manual provides instructions for the installation, operation, and maintenance of your XPR3SS HCT326 Automatic Irrigation Water Timer Controller. This device is designed to automate your garden watering system, offering flexible programming for efficient water management. Please read this manual thoroughly before use to ensure proper function and longevity of the product.
Product Features
- Dual Outlets: Two independent outlets allow for separate watering schedules for different zones.
- Flexible Programming: Watering duration from 1 second to 99 minutes, and frequency from 1 hour to 15 days.
- Manual Watering: Initiate watering instantly without affecting programmed schedules.
- Delay Watering: Postpone watering for a set period without interrupting the timing plan.
- Child Lock: Prevents unintended changes to settings.
- Low Battery Indication: Alerts when batteries need replacement.
- Automatic Shut-off: Timer shuts off automatically before batteries are completely dead to prevent damage.
- IPX5 Waterproof: Designed to withstand water splashes.
- Large LCD Display: For easy program checking and monitoring.
- Brass Connection: Durable inlet and outlet connections.
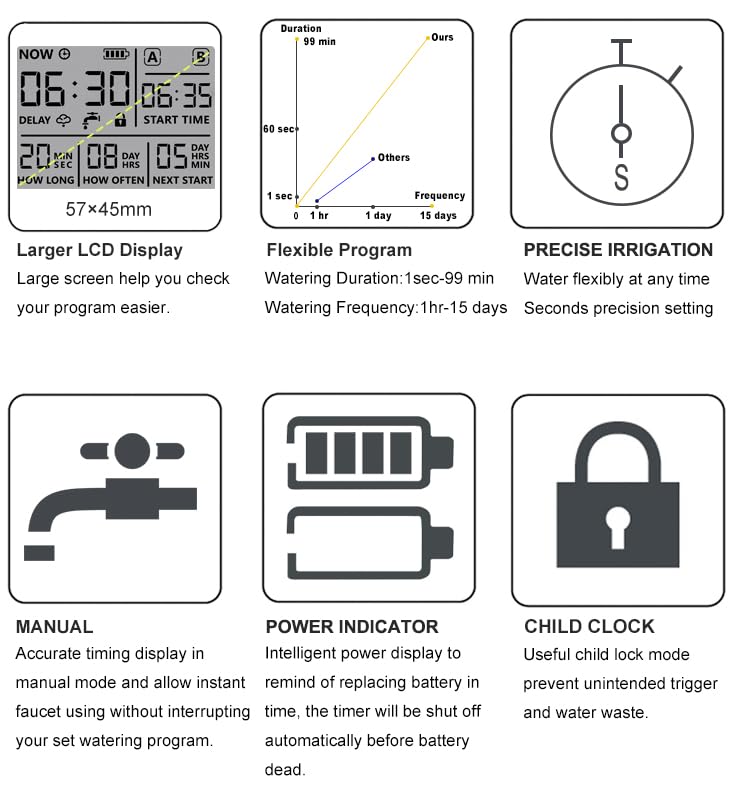
Image: XPR3SS HCT326 Water Timer showing its large LCD display and two independent outlets.
Setup
- Install Batteries:
Open the battery compartment on the back of the timer. Insert two 1.5V 'AA' alkaline batteries, ensuring correct polarity. Close the compartment securely. The timer will display a battery indicator on the screen.

Image: Rear view of the XPR3SS HCT326 Water Timer, highlighting the battery compartment. Use alkaline batteries only.
- Connect to Faucet:
Attach the timer's inlet (top connection) to your outdoor faucet. Ensure the connection is tight to prevent leaks. Use the provided adapter and O-ring if necessary for a secure fit (1/2" or 3/4" BS&NH threads supported).
- Connect Irrigation Hoses:
Connect your irrigation hoses or drip lines to the two outlets at the bottom of the timer. Ensure these connections are also secure.
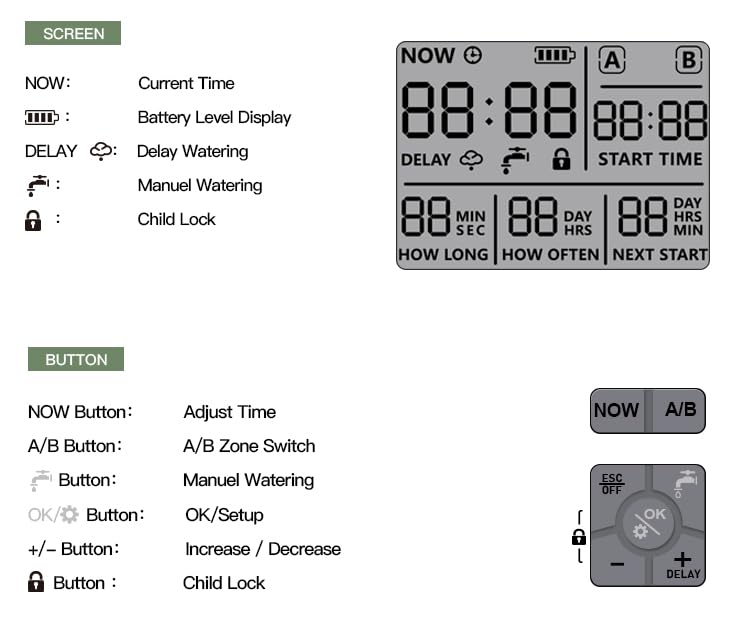
Image: Close-up of the XPR3SS HCT326 Water Timer showing the brass inlet connection with filter and the two water outlets.
Operating Instructions
The XPR3SS HCT326 features a user-friendly interface with a large LCD display and intuitive buttons. Refer to the diagram below for button and screen element identification.
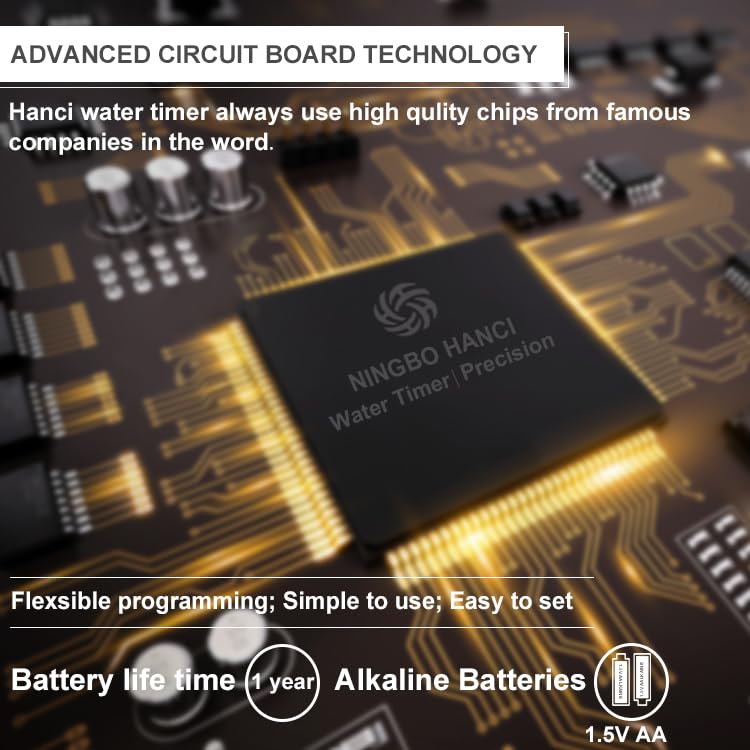
Image: Diagram illustrating the LCD display elements and button functions of the XPR3SS HCT326 Water Timer.
Screen Indicators:
- NOW: Current Time
- Battery Level Display: Indicates remaining battery power.
- DELAY: Indicates Delay Watering function is active.
- Faucet Icon: Indicates Manual Watering mode.
- Lock Icon: Indicates Child Lock is active.
- A/B: Indicates which zone (A or B) is currently being programmed or active.
- START TIME: Displays the programmed start time for watering.
- HOW LONG: Displays the watering duration (seconds/minutes).
- HOW OFTEN: Displays the watering frequency (hours/days).
- NEXT START: Displays the time until the next scheduled watering cycle.
Button Functions:
- NOW Button: Adjusts the current time.
- A/B Button: Switches between Zone A and Zone B for programming.
- Faucet Icon Button: Activates Manual Watering.
- OK/Setup Button: Confirms settings and enters setup mode.
- +/- Buttons: Increases or decreases values during programming.
- Lock/Delay Button: Activates Child Lock or Delay Watering.
- ESC/OFF Button: Exits current menu or turns off the timer.
Programming Watering Schedules:
- Set Current Time:
Press the NOW button. Use the +/- buttons to adjust the hour and minute. Press OK to confirm each setting.
- Select Zone (A or B):
Press the A/B button to select the zone you wish to program. The active zone will be indicated on the display.
- Set Watering Duration ("HOW LONG"):
Press OK to enter programming mode. The "HOW LONG" setting will flash. Use the +/- buttons to set the desired watering duration (1 second to 99 minutes). Press OK to confirm.
- Set Watering Frequency ("HOW OFTEN"):
After setting duration, the "HOW OFTEN" setting will flash. Use the +/- buttons to set the desired frequency (1 hour to 15 days). Press OK to confirm.
- Set Start Time ("START TIME"):
The "START TIME" setting will flash. Use the +/- buttons to set the desired time for watering to begin. Press OK to confirm and exit programming mode for the selected zone.
- Repeat steps 2-5 for the other zone if desired.
Manual Watering:
To water immediately without affecting your programmed schedules:
- Press the Faucet Icon Button.
- Use the +/- buttons to set the desired manual watering duration.
- Press OK to start manual watering. The timer will water for the set duration and then return to its programmed schedule.
Delay Watering:
To postpone scheduled watering for a period (e.g., due to rain):
- Press and hold the Lock/Delay Button until the "DELAY" icon appears.
- Use the +/- buttons to set the delay duration (e.g., 1 hour, 1 day).
- Press OK to confirm. The timer will pause its schedule for the set delay period and then resume.
Child Lock:
To prevent accidental changes to your settings:
- Press the Lock/Delay Button briefly. The "Lock Icon" will appear on the screen.
- To unlock, press the Lock/Delay Button briefly again. The "Lock Icon" will disappear.
OFF Mode:
To stop all watering programs for an extended period:
- Press and hold the ESC/OFF Button until the screen indicates "OFF".
- To reactivate, press the ESC/OFF Button again.
Maintenance
- Battery Replacement: When the low battery indicator appears, replace the two 1.5V 'AA' alkaline batteries promptly. The timer will shut off automatically before the batteries are completely drained to prevent data loss or damage.
- Cleaning: Periodically check the inlet filter for debris and clean it if necessary to ensure proper water flow.
- Winterization: In freezing temperatures, disconnect the timer from the faucet and store it indoors to prevent damage from ice expansion.
Troubleshooting
- Timer is not watering or not working:
- Check battery level. Replace batteries if low.
- Ensure the timer is not in "OFF" mode. Press the ESC/OFF Button to reactivate.
- Verify that the water faucet is turned on.
- Check if the Child Lock is active. Unlock if necessary.
- Ensure watering duration and frequency are correctly programmed.
- Inspect the inlet filter for clogs. Clean if blocked.
- Check water pressure. The timer requires 0.05-0.8 MPa.
- Water leaks from connections:
- Ensure all connections (faucet to timer, timer to hose) are tightened securely.
- Check the O-ring inside the inlet connection. Replace if damaged or missing.
- Timer works only once and then stops:
- Review your programmed frequency settings. Ensure it is set to repeat as desired (e.g., every X hours/days).
- Check battery level. Low batteries can cause erratic behavior.
Specifications
| Model Number | HCT326 |
| Product Dimensions | 120 × 55 × 122 mm (L×W×H) |
| Item Weight | 450 g |
| Power Supply | 2 x 1.5V 'AA' Alkaline Batteries (not included) |
| Watering Duration | 1 second to 99 minutes |
| Watering Frequency | 1 hour to 15 days |
| Water Pressure | 0.05 - 0.8 MPa |
| Waterproof Level | IPX5 |
| Valve Type | Pulse Solenoid Valve |
| Water Inlet/Outlet | 1/2" ; 3/4" BS&NH |
| Operating Temperature | 1 to 45 Celsius |
| Included Components | Water Timer, Adapter, Quick Connector, O-Ring, User Manual |
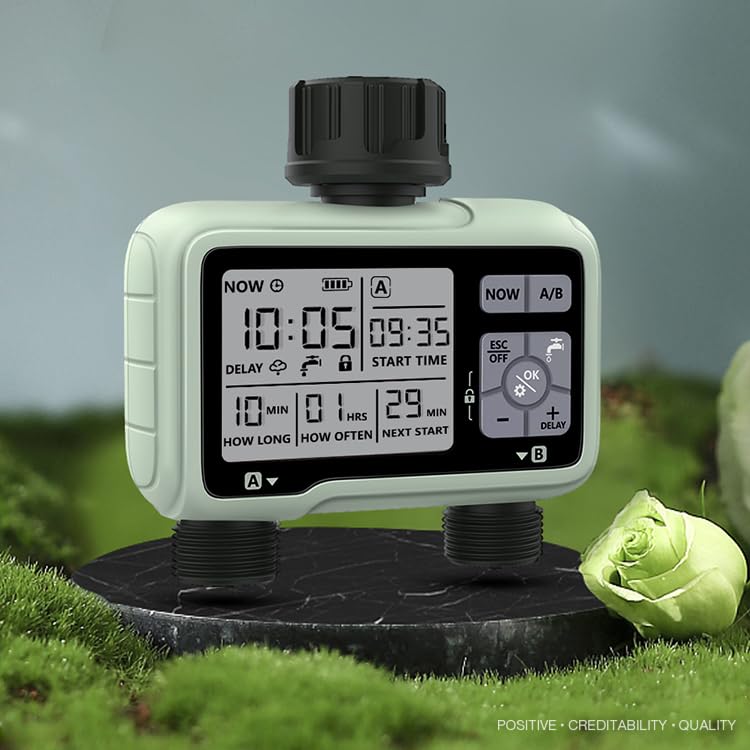
Image: Diagram showing the dimensions of the XPR3SS HCT326 Water Timer.
Warranty and Support
This product comes with a 6-month warranty from the date of purchase. Please retain your proof of purchase for warranty claims.
For technical support or warranty inquiries, please contact XPR3SS customer service through your retailer or the contact information provided with your purchase documentation.