1. Introduction
This manual provides essential information for the safe and effective installation, operation, and maintenance of the Knocokie 0131F00042SP Blower Motor. This motor is designed as a replacement for Goodman 0131F00042SP and is compatible with various Goodman, Amana, and Janitrol HVAC units. Please read all instructions carefully before proceeding with installation or operation.

Figure 1: Knocokie 0131F00042SP Blower Motor, a general view of the product.
2. Safety Information
Always observe the following safety precautions to prevent injury or damage to the product and property:
- Disconnect Power: Always ensure the main power supply to the HVAC unit is completely disconnected before attempting any installation, maintenance, or repair. Failure to do so can result in electric shock or serious injury.
- Wear Protective Gear: Wear appropriate personal protective equipment, including safety gloves and eye protection, during installation and handling.
- Qualified Personnel: Installation and servicing should ideally be performed by a qualified HVAC technician. If you are not experienced with electrical and HVAC systems, consult a professional.
- Inspect for Damage: Before installation, carefully inspect the motor for any signs of damage. Do not install a damaged motor.
- Proper Wiring: Ensure all wiring connections are secure and comply with local electrical codes. Incorrect wiring can lead to malfunction or fire hazards.
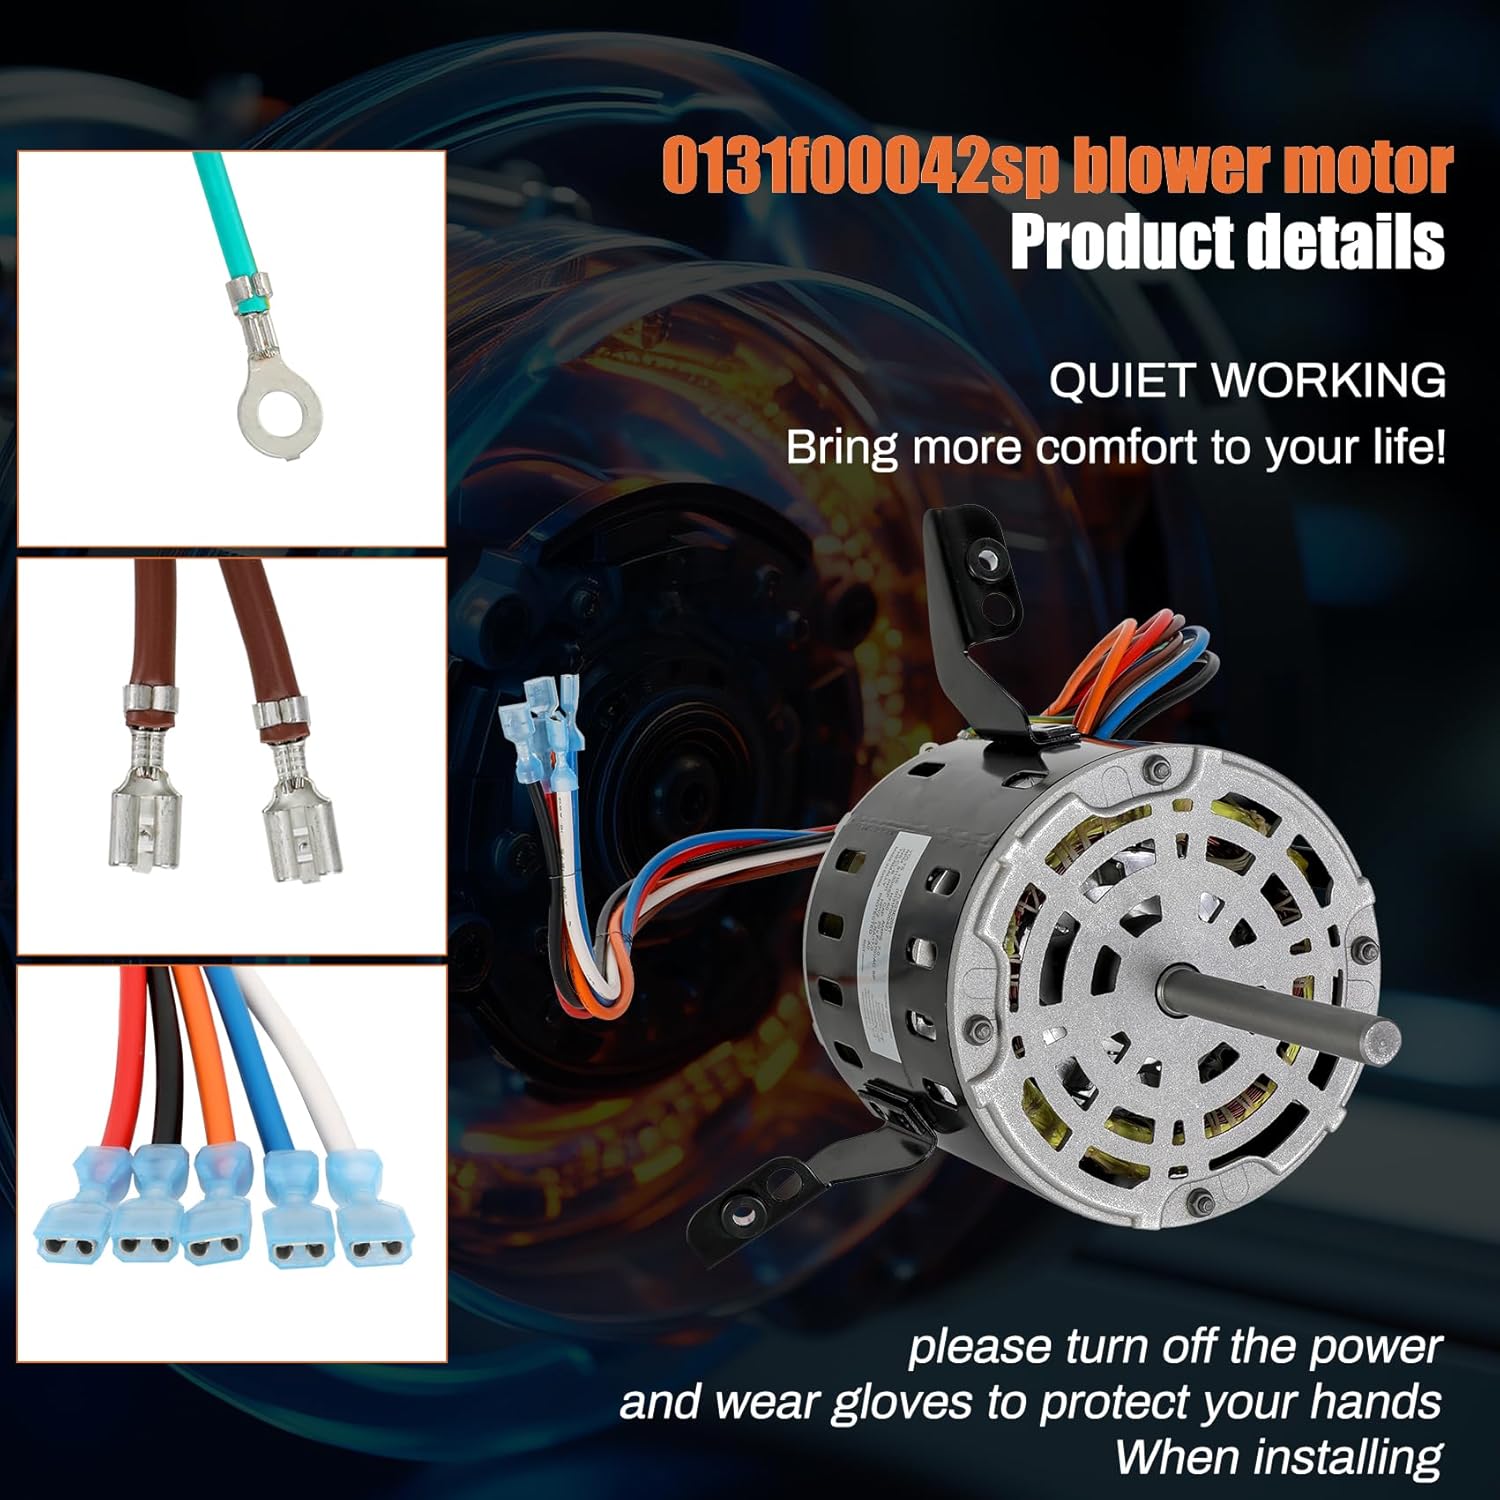
Figure 2: Product details highlighting the importance of turning off power and wearing gloves during installation.
3. Package Contents
The package should contain the following items:
- 1 x Knocokie 0131F00042SP Blower Motor
4. Specifications
The Knocokie 0131F00042SP Blower Motor features the following technical specifications:
| Parameter | Value |
|---|---|
| Manufacturer Part # | Y7L623E203T |
| Horsepower (HP) | 1/2 |
| Voltage | 115V |
| Hertz | 60 Hz |
| Amps | 7.0 A |
| LRA (Locked Rotor Amps) | 17 |
| RPM (Revolutions Per Minute) | 1130 |
| Number of Speeds | 4 |
| Rotation | CCWLE (Counterclockwise Lead End) |
| Shaft Diameter | 1/2" |
| Shaft Length | 4" |
| Height | 9" |
| Material Type | Metal |
| Weight | 15.5 Pounds |
This motor replaces obsolete part numbers 0131F00042, 0131F00022SP, 0131F00022S, and 0131F00022.
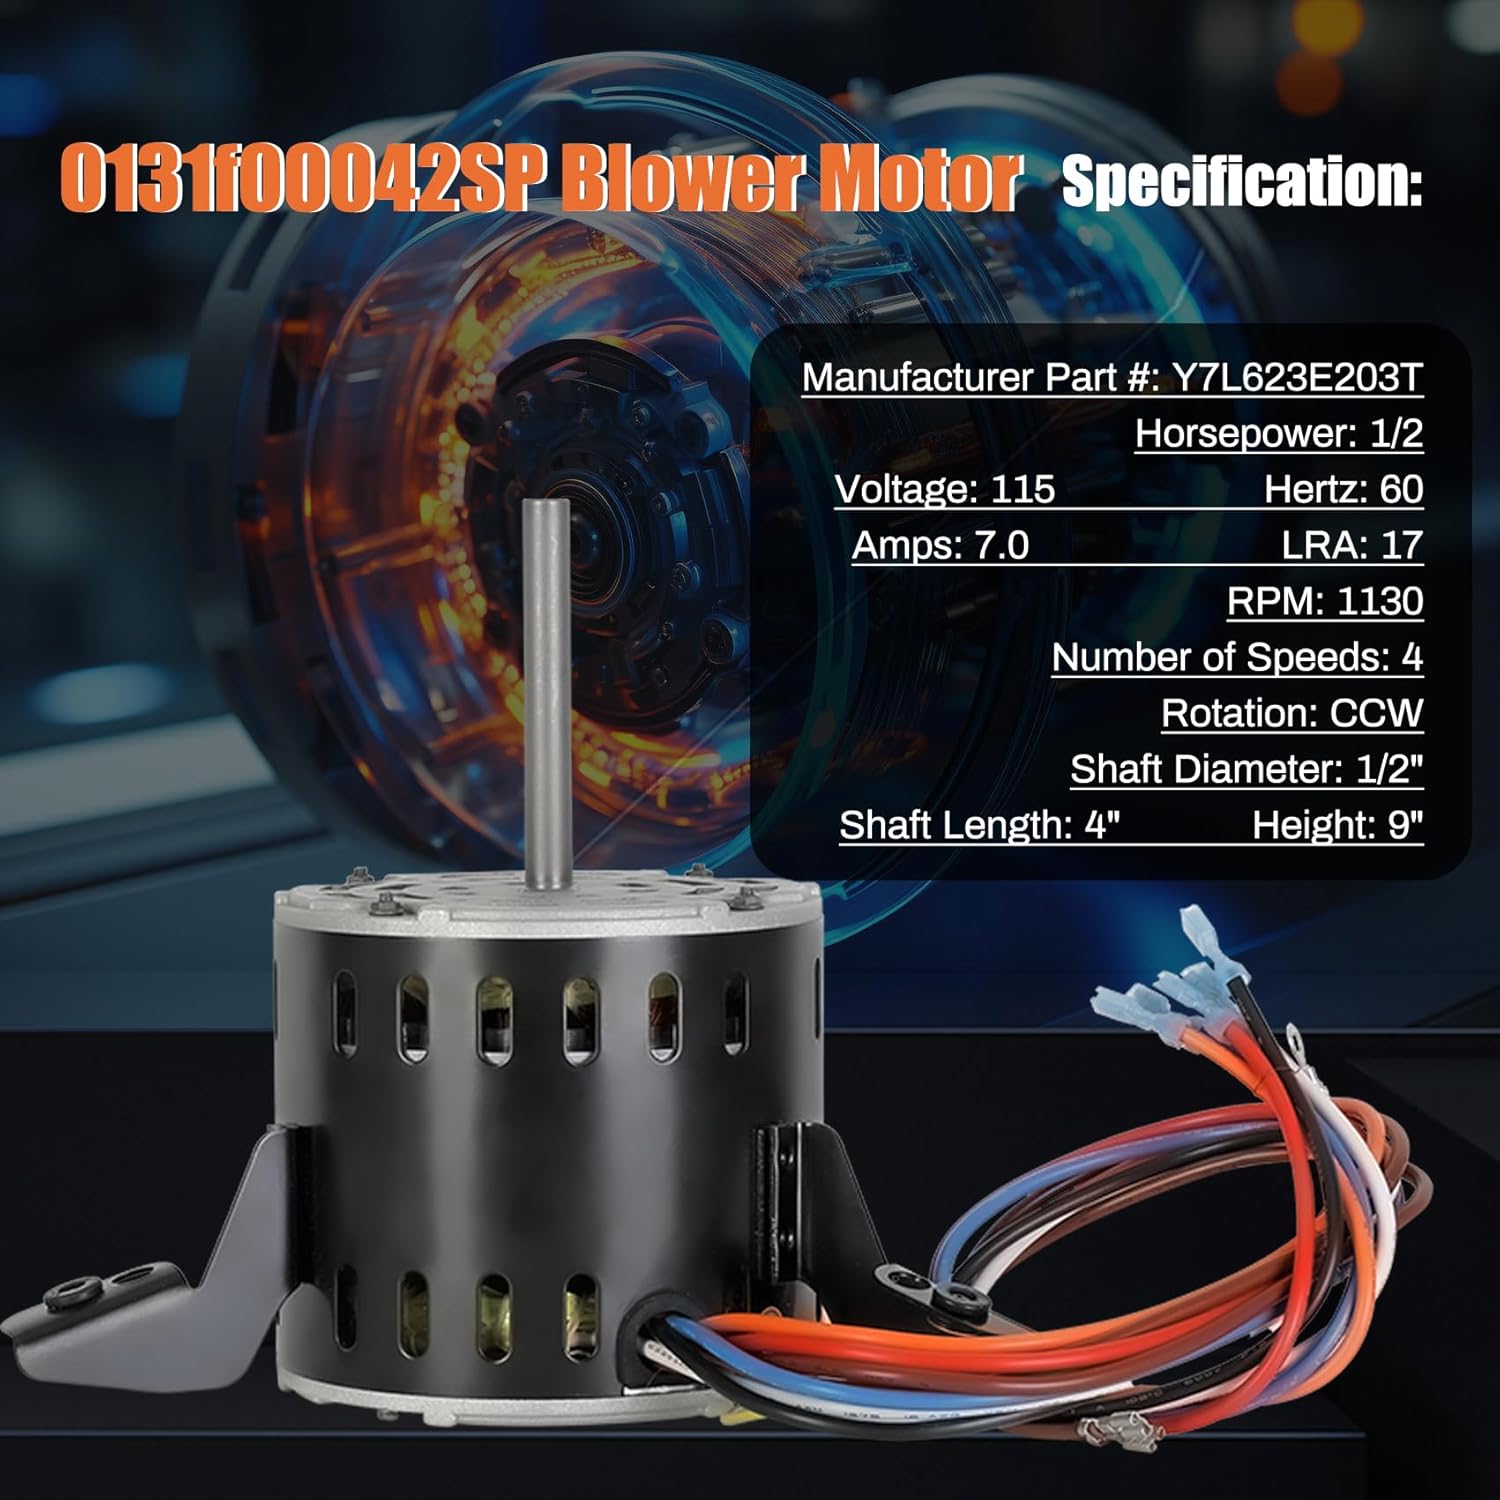
Figure 3: Visual representation of the blower motor's key specifications.

Figure 4: List of old part numbers that the 0131F00042SP blower motor replaces.
5. Compatible Models
This 1/2 HP blower motor is compatible with various Goodman, Amana, and Janitrol gas furnace models. Examples include:
- ACS90704CXA
- ACS90904CXA
- AMH80704BN
- AMH80704BX
For a comprehensive list or to confirm compatibility with your specific unit, it is recommended to consult your furnace's documentation or a qualified technician.
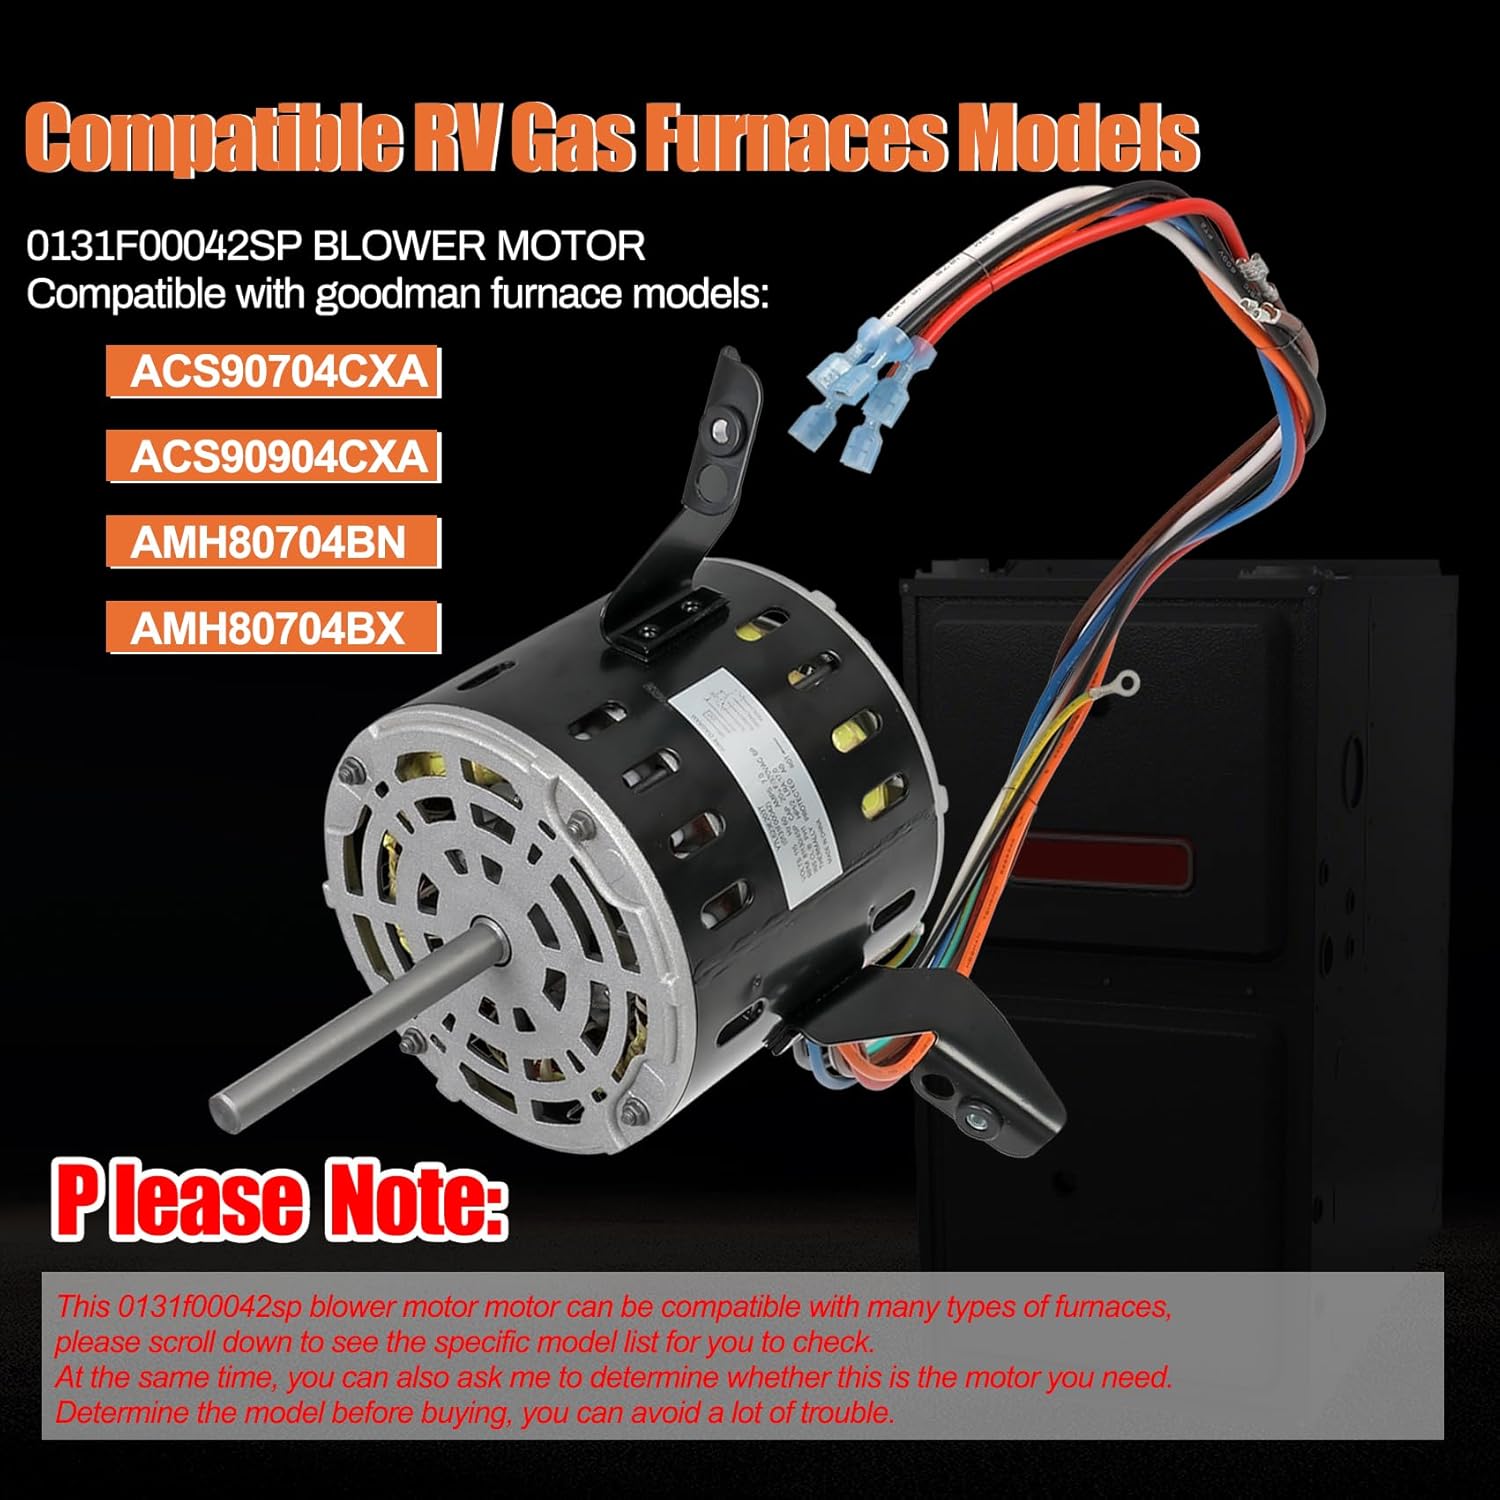
Figure 5: Visual guide to compatible RV gas furnace models.
6. Setup and Installation
This section outlines the general steps for replacing a blower motor. Specific procedures may vary depending on your HVAC unit model. Always refer to your furnace's service manual for detailed instructions.
- Power Disconnection: Turn off all power to the furnace at the main electrical panel. Verify power is off using a voltage tester.
- Access Blower Compartment: Open the access panels to the furnace's blower compartment.
- Disconnect Wiring: Carefully disconnect the existing blower motor's wiring. Note the color and connection points for each wire to ensure correct re-installation. Take photos if necessary.
- Remove Old Motor: Unbolt or unfasten the old blower motor from its mounting brackets. Remove the motor and the blower wheel (squirrel cage) assembly.
- Transfer Blower Wheel: If the new motor does not come with a blower wheel, carefully remove the blower wheel from the old motor shaft and attach it to the shaft of the new 0131F00042SP motor. Ensure it is securely fastened.
- Install New Motor: Position the new motor and blower wheel assembly into the blower compartment. Secure the motor to the mounting brackets using the appropriate fasteners.
- Connect Wiring: Reconnect all electrical wires to the new motor, matching the connections noted in step 3. Ensure all connections are tight and secure.
- Close Compartment: Close and secure all furnace access panels.
- Restore Power: Restore power to the furnace at the main electrical panel.
- Test Operation: Initiate a heating or cooling cycle to test the new blower motor's operation. Listen for unusual noises and ensure proper airflow.
Important: Always wear gloves to protect your hands during installation.

Figure 6: Diagram illustrating the typical installation position of a furnace blower motor.

Figure 7: The 0131F00042SP blower motor showing its wiring connections.
7. Operating Instructions
The Knocokie 0131F00042SP Blower Motor operates automatically as part of your HVAC system. Once properly installed, it will engage and disengage based on the commands from your furnace's control board and thermostat settings. No direct user interaction is required for its operation.
- Ensure your thermostat is set to the desired mode (Heat, Cool, or Fan).
- The motor will activate to circulate air when heating or cooling cycles are initiated, or when the fan is set to "ON".
- The motor is designed for quiet and consistent operation.
8. Maintenance
Regular maintenance helps ensure the longevity and efficient operation of your blower motor and HVAC system.
- Annual Inspection: Have your HVAC system, including the blower motor, inspected annually by a qualified technician.
- Clean Blower Wheel: Over time, dust and debris can accumulate on the blower wheel (squirrel cage), reducing airflow and efficiency. Periodically inspect and clean the blower wheel if necessary. Ensure power is disconnected before cleaning.
- Check Wiring: During inspections, verify that all electrical connections to the motor are secure and free from corrosion or damage.
- Filter Replacement: Regularly replace or clean your furnace air filter. A dirty filter can restrict airflow, causing the blower motor to work harder and potentially overheat.
9. Troubleshooting
If you encounter issues with your blower motor, consider the following common troubleshooting steps:
| Problem | Possible Cause | Solution |
|---|---|---|
| Motor does not start | No power, faulty wiring, thermostat issue, control board issue, seized motor. | Check circuit breaker. Verify all wiring connections. Ensure thermostat is set correctly. Consult a technician if motor is seized or control board is suspected. |
| Motor runs but no/low airflow | Dirty air filter, blocked vents, dirty blower wheel, incorrect motor speed setting. | Replace/clean air filter. Check for blocked return or supply vents. Clean blower wheel. Verify motor speed wiring. |
| Unusual noises (squealing, grinding) | Worn bearings, loose blower wheel, debris in blower, motor mounting issues. | Disconnect power and inspect blower wheel for looseness or debris. If noise persists, motor bearings may be worn, requiring replacement. |
| Motor overheats | Restricted airflow (dirty filter/coil), incorrect voltage, motor overload. | Ensure proper airflow by cleaning/replacing filters and coils. Verify correct voltage supply. If problem persists, consult a technician. |
If these steps do not resolve the issue, contact a qualified HVAC technician for further diagnosis and repair.
10. Warranty Information
The Knocokie 0131F00042SP Blower Motor comes with a one-year warranty from the date of purchase. This warranty covers defects in materials and workmanship under normal use. If you encounter any problems during this period, please contact the seller or manufacturer for assistance. The warranty does not cover damage resulting from improper installation, misuse, neglect, or unauthorized modifications.
11. Support
For technical support, questions regarding installation, or warranty claims, please contact your retailer or the manufacturer directly. When contacting support, please have your product model number (0131F00042SP) and purchase information readily available.