1. Introduction
The Inseego MiFi X Pro M3000 is a powerful and secure mobile hotspot designed to provide high-speed 5G and 4G LTE connectivity. It features Wi-Fi 6 technology, supporting up to 32 Wi-Fi enabled devices, including laptops, smartphones, and tablets. This device is equipped with enterprise-grade security, fast-charging capabilities, and an Ethernet port for enhanced flexibility, ensuring reliable and protected connections for personal and business use.
2. Package Contents
Verify that all items are present in your product packaging:
- Inseego MiFi X Pro M3000 Router
- USB Type-C Cable
3. Device Overview
Familiarize yourself with the physical components of your MiFi X Pro M3000 hotspot.

Figure 3.1: Front view of the Inseego MiFi X Pro M3000 5G Hotspot, displaying network status, 5G indicator, battery level, Wi-Fi status, connected devices, and Wi-Fi name/password.
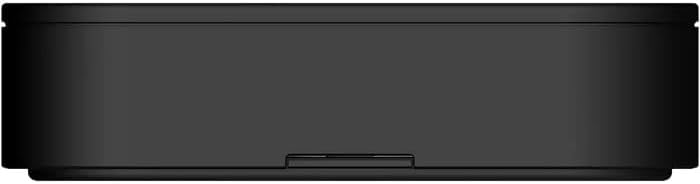
Figure 3.2: Top-down view of the Inseego MiFi X Pro M3000 5G Hotspot, illustrating its compact and rectangular form factor.

Figure 3.3: Side view of the Inseego MiFi X Pro M3000 5G Hotspot, showing the USB-C port.

Figure 3.4: Side view of the Inseego MiFi X Pro M3000 5G Hotspot, featuring both the USB-C port and the Ethernet port.
Key Components:
- Display Screen: Shows network status, battery life, Wi-Fi name (SSID), and password.
- Power Button: Used to turn the device on/off and wake the screen.
- USB-C Port: For charging the device and connecting to a computer for tethered internet access.
- Ethernet Port: Provides a wired network connection for devices.
- SIM Card Slot: Located internally, for inserting your 5G/4G LTE SIM card.
4. Setup
4.1. Inserting the SIM Card
- Ensure the device is powered off.
- Locate the SIM card slot, typically under the battery cover or on the side.
- Insert your activated Nano-SIM card into the slot with the gold contacts facing down and the notched corner aligned correctly.
- Close the SIM card slot cover or replace the battery cover.
4.2. Initial Power On and Activation
- Press and hold the Power button until the screen illuminates.
- The device will boot up and attempt to connect to the cellular network. This may take a few minutes.
- Follow any on-screen prompts for initial setup or activation, if applicable.
4.3. Connecting to Wi-Fi
- On your Wi-Fi enabled device (laptop, smartphone, tablet), open your Wi-Fi settings.
- Look for the Wi-Fi network name (SSID) displayed on the MiFi X Pro M3000's screen.
- Select the network and enter the Wi-Fi password (also displayed on the MiFi screen).
- Your device should now be connected to the internet.
5. Operating Instructions
5.1. Managing Connections
- Wi-Fi: The MiFi X Pro M3000 supports up to 32 Wi-Fi connections simultaneously. You can set up primary and guest networks for enhanced security and management.
- Ethernet: Connect a device directly to the hotspot using an Ethernet cable for a wired internet connection. Ensure the Ethernet port is enabled in the device settings.
- USB Tethering: Connect the hotspot to a computer via the USB-C cable to use it as a wired modem.
5.2. Device Settings and Management
You can manage your MiFi X Pro M3000 settings through two primary methods:
- On-Device Screen: Use the device's touch screen (if applicable) or navigation buttons to access basic settings like Wi-Fi name, password, and network status.
- Web Interface: For advanced settings, connect a device to the hotspot's Wi-Fi, then open a web browser and navigate to the device's administration page (usually
http://192.168.1.1orhttp://mifi.home). Log in with the administrator password (found on the device or in the packaging). - Inseego Mobile App: Download the Inseego Mobile app for convenient management of your device from your smartphone or tablet.
5.3. Security Features
The MiFi X Pro M3000 includes robust security features:
- WPA3 Encryption: Provides enhanced security for your Wi-Fi network.
- VPN Pass-through: Allows secure VPN connections to pass through the hotspot.
- Open VPN Support: For secure remote access.
- Wi-Fi Privacy Separation: Isolates connected devices from each other for added security.
6. Maintenance
6.1. Charging the Device
Use the provided USB Type-C cable and a compatible power adapter to charge your MiFi X Pro M3000. For optimal battery life, avoid extreme temperatures and fully discharge and recharge the battery periodically.
6.2. Software Updates
Periodically check for software updates through the device's web interface or the Inseego Mobile app. Updates can improve performance, add new features, and enhance security.
6.3. Cleaning
Gently wipe the device with a soft, dry cloth. Avoid using liquid cleaners or abrasive materials.
7. Troubleshooting
7.1. No Internet Connection
- Check Signal Strength: Verify the signal indicator on the device's screen. If the signal is weak or absent, try moving to a different location.
- SIM Card: Ensure the SIM card is correctly inserted and activated with your service provider.
- Restart Device: Power off the MiFi X Pro M3000, wait a few seconds, then power it back on.
- Data Plan: Confirm your data plan is active and has available data.
7.2. Cannot Connect to Wi-Fi
- Wi-Fi Enabled: Ensure Wi-Fi is enabled on both the hotspot and your connecting device.
- Correct Password: Double-check that you are entering the correct Wi-Fi password (SSID Key).
- Distance: Ensure your device is within the Wi-Fi range (up to 35 feet).
- Device Limit: The hotspot supports up to 32 Wi-Fi connections. If you have too many devices connected, disconnect some.
7.3. Slow Speeds
- Signal Strength: A weak cellular signal will result in slower speeds.
- Network Congestion: Performance can be affected by network congestion in your area.
- Connected Devices: Too many devices or high-bandwidth activities (streaming, large downloads) can reduce speeds for all connected devices.
- Firmware Update: Ensure your device's firmware is up to date.
8. Specifications
| Feature | Description |
|---|---|
| Model Number | M3000 |
| Connectivity Technology | 5G, 4G LTE, USB |
| Wireless Communication Standard | 802.11ax (Wi-Fi 6) |
| Frequency Band Class | Dual-Band |
| Ports | 1 Gbps Ethernet, USB Type-C |
| Special Feature | WPS |
| Compatible Devices | Personal Computer, Smartphone, Tablet |
| Recommended Uses | Business, Home |
| Item Weight | 14 ounces |
| Package Dimensions | 7 x 4 x 2 inches |
| Manufacturer | Inseego |
9. Warranty and Support
This product is covered by the manufacturer's standard warranty. Please refer to the documentation included with your purchase or visit the Inseego website for detailed warranty information and terms and conditions.
For technical support, troubleshooting assistance, or to inquire about Inseego Connect for centralized device management, please contact Inseego customer support or visit their official support portal.