Pass & Seymour RHL153PW
Legrand Radiant 150-Watt Single-Pole/3-Way LED Advanced Dimmer User Manual
Model: RHL153PW | Brand: Pass & Seymour
1. Product Overview
The Legrand Radiant 150-Watt Single-Pole/3-Way LED Advanced Dimmer (Model RHL153PW) is designed to provide precise and flicker-free control over dimmable LED light bulbs and fixtures. This dimmer features advanced circuitry to ensure a superior lighting experience, adapting to a wide range of dimmable LED lights and eliminating common issues like flickering and pop-ons. Its sleek, low-profile design integrates seamlessly into modern interiors.
This dimmer is compatible with both single-pole and 3-way wiring configurations, offering versatility for various installations. It also includes user-adjustable settings for high and low dimming limits and an optional LED Burst Mode to prevent turn-on delays.
2. Key Features
- Optimized for LED: Specifically designed for dimmable LED bulbs and fixtures (up to 150W at 120VAC), ensuring flicker-free operation.
- Advanced Dimming Technology: Maximizes LED compatibility, providing a full range of control and addressing common LED dimming issues.
- Adjustable Dimming Limits: Simple high-and-low end dimming limit adjustability via an easy-to-push calibration button, allowing customization for all lighting preferences and eliminating LED flickering.
- LED Burst Mode: Optional setting to eliminate or reduce LED turn-on delays and pop-ons.
- Easy Installation: Replaces any basic single-pole or 3-way switch or dimmer in under 15 minutes. No neutral wire is required, making it suitable for both new construction and retrofit applications.
3. Setup and Installation
Before beginning installation, ensure power is turned off at the circuit breaker. It is recommended to consult a qualified electrician if you are unsure about any steps.

Figure 3.1: Front view of the Legrand Radiant LED Advanced Dimmer, showing the main rocker switch, dimmer slide, and calibration button. A QR code for installation guidance is visible on the top right.
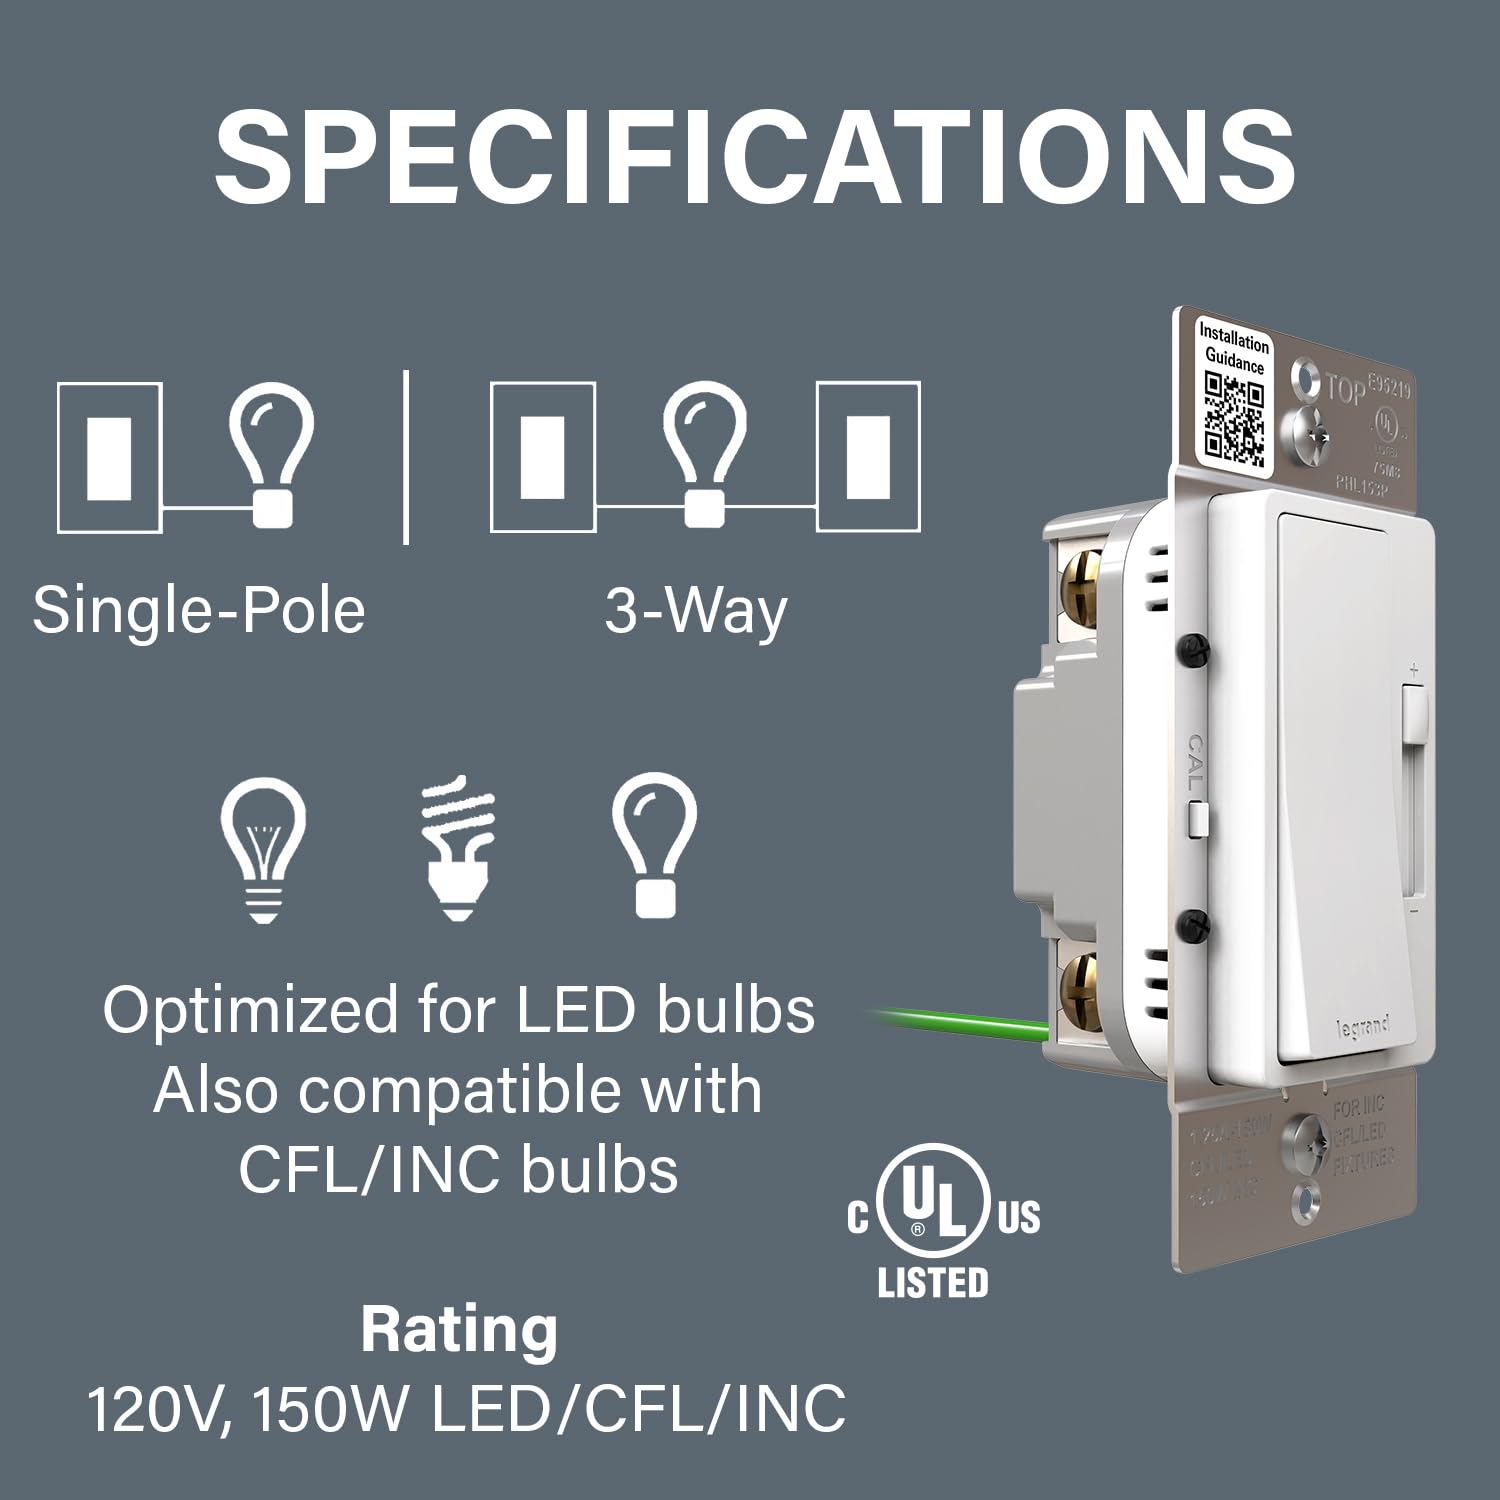
Figure 3.2: Diagram illustrating the dimmer's compatibility with single-pole and 3-way wiring, optimization for LED bulbs, and compatibility with CFL/INC bulbs. Rating: 120V, 150W LED/CFL/INC. A QR code for installation guidance is also shown. For detailed installation instructions, scan the QR code on the device or visit l.ead.me/be7J0B.
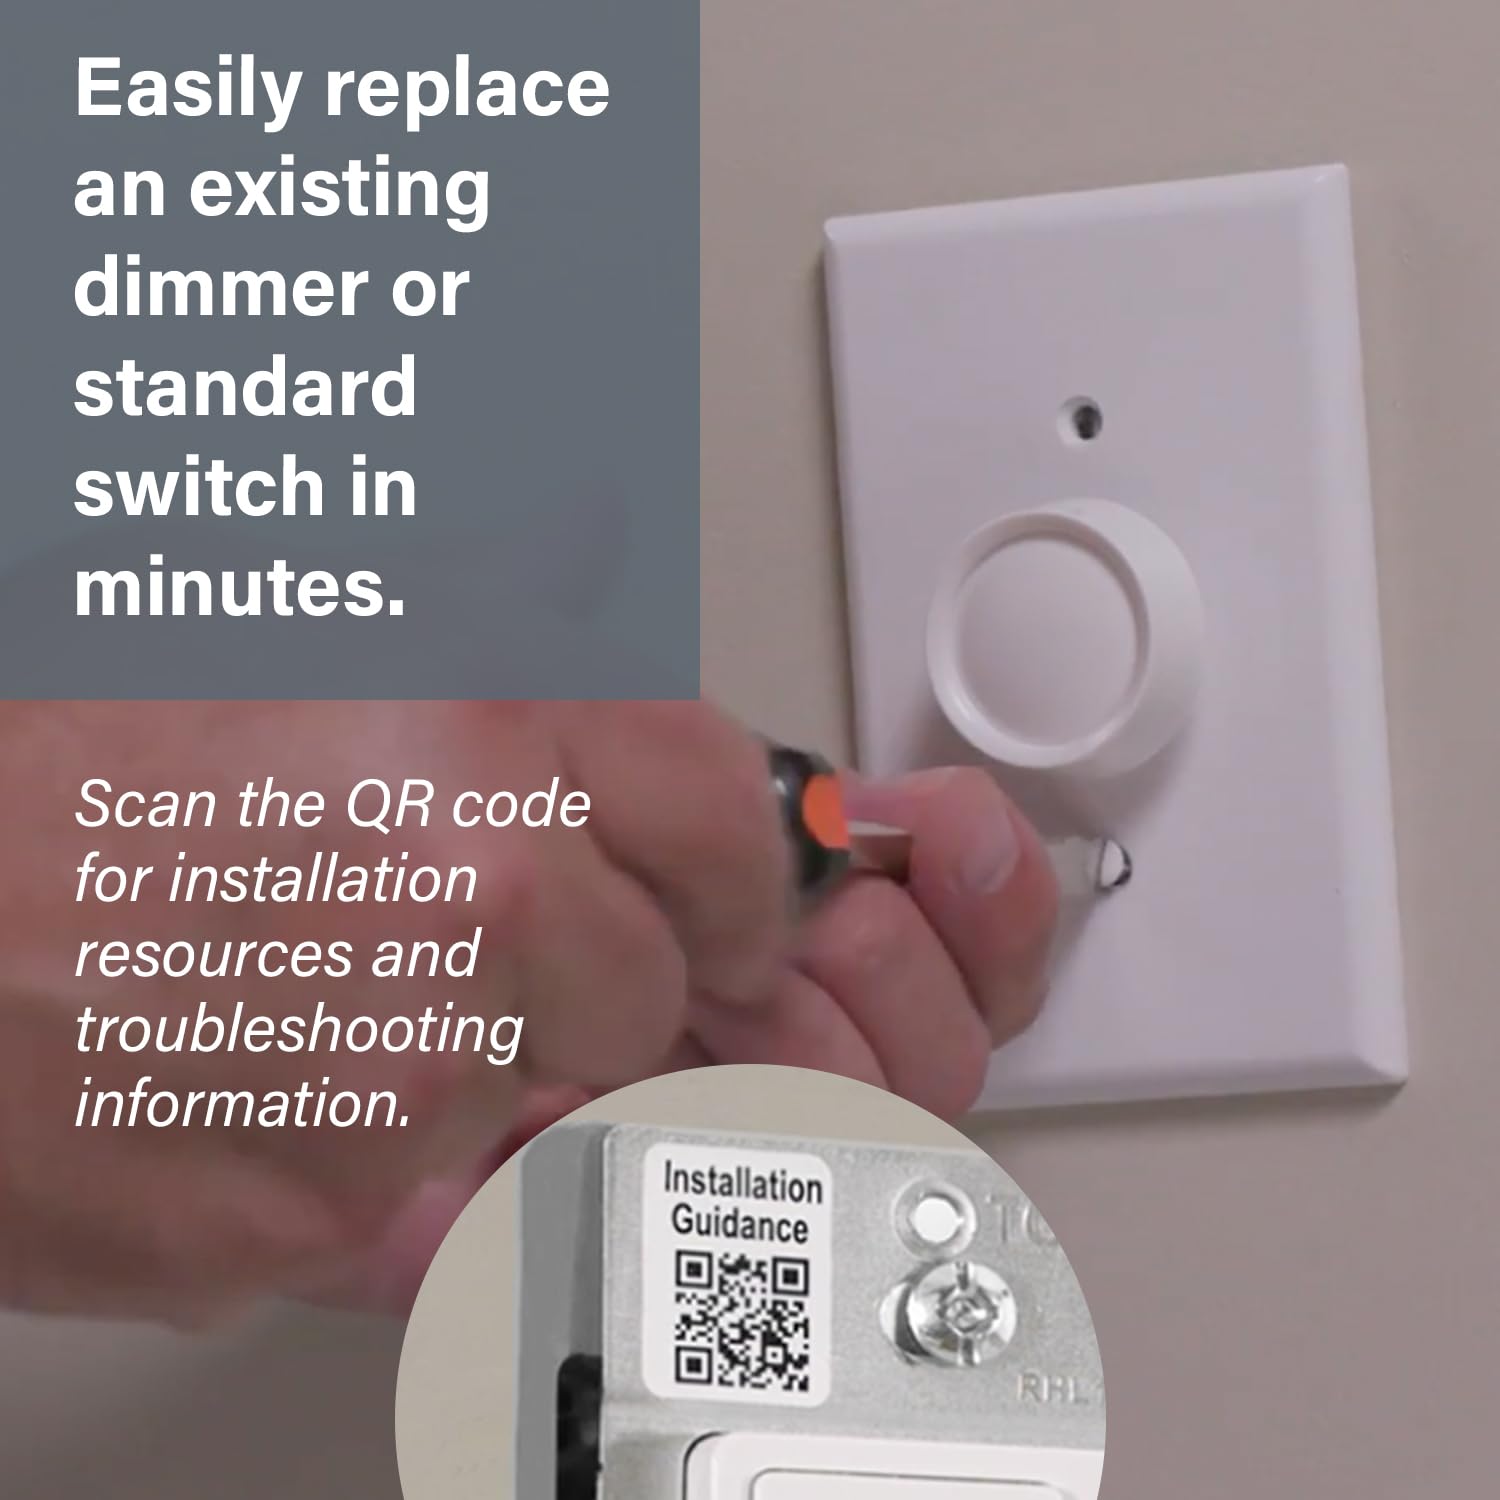
Figure 3.3: Image demonstrating the ease of replacing an existing dimmer or standard switch. The new dimmer is shown being installed into a wall box. Scan the QR code on the device for installation resources and troubleshooting information.
3.1 Wiring Instructions
- Turn Off Power: Locate the circuit breaker that controls the light fixture and turn off the power. Verify power is off using a voltage tester.
- Remove Old Switch: Carefully remove the existing switch from the wall box. Disconnect the wires.
- Connect New Dimmer: This dimmer does not require a neutral wire. Connect the wires from the wall box to the dimmer terminals as per the wiring diagram provided in the full installation guide (accessible via QR code). Ensure all connections are secure.
- Mount Dimmer: Gently push the dimmer into the wall box and secure it with the provided screws.
- Install Wall Plate: Attach the decorative wall plate (sold separately for Radiant collection) over the dimmer.
- Restore Power: Turn the power back on at the circuit breaker.
For detailed wiring diagrams and specific instructions for single-pole and 3-way installations, please refer to the complete installation guide provided with your product or accessible via the QR code on the device.
4. Operating Instructions
Once installed, the Legrand Radiant Dimmer offers intuitive control over your lighting.

Figure 4.1: A hand adjusting the dimmer slide to control light levels. The main rocker switch is used for on/off functionality.
4.1 Basic Operation
- Turn On/Off: Press the large rocker switch to turn the lights on or off.
- Dim/Brighten: Use the small slide control next to the rocker switch to adjust the light level. Slide up to brighten, slide down to dim.
- Constant Memory: The dimmer remembers the last set light level and will return to that level when turned back on.
4.2 Adjusting Dimming Range (Calibration)
The dimmer allows you to set custom high and low dimming limits to optimize performance with your specific LED bulbs and eliminate flickering at low levels.

Figure 4.2: Close-up view highlighting the small calibration button on the side of the dimmer, used for adjusting high and low dimming limits.
- Access Calibration: Locate the small calibration button on the side of the dimmer (often labeled "CAL").
- Adjust Low End: With the lights on and dimmed to their lowest desired level, press and hold the calibration button until the lights flicker or indicate calibration mode (refer to full manual for specific indicator). Adjust the low end using the dimmer slide until stable, flicker-free dimming is achieved.
- Adjust High End: Similarly, adjust the high end if your lights are too bright or not reaching full brightness.
- Save Settings: Release the calibration button to save the settings.
This process helps to eliminate flickering and optimize the dimming range for your specific lighting setup.
4.3 LED Burst Mode
The optional LED Burst Mode can be activated to help eliminate or reduce turn-on delays and "pop-ons" sometimes experienced with certain LED bulbs.

Figure 4.3: Image depicting a user activating the dimmer, with a focus on the benefit of all lights turning on simultaneously, thanks to features like LED Burst Mode.
Refer to the complete installation guide for instructions on how to activate and deactivate the LED Burst Mode, as the procedure may involve specific button presses or sequences.
4.4 Product Video
Video 4.1: An official video from Legrand showcasing the features and benefits of the Radiant Dimmers, including light level control, constant memory, and sleek design. This video provides a visual overview of the product's functionality.
5. Maintenance
The Legrand Radiant Dimmer is designed for long-lasting performance with minimal maintenance.
- Cleaning: To clean the dimmer and wall plate, wipe gently with a soft, damp cloth. Do not use abrasive cleaners, solvents, or harsh chemicals, as these can damage the finish.
- No User Serviceable Parts: There are no user-serviceable parts inside the dimmer. Do not attempt to open or repair the device.
- Regular Checks: Periodically check the dimmer and wall plate for any signs of damage or loose connections. If any issues are observed, turn off power at the circuit breaker and consult a qualified electrician.
6. Troubleshooting
If you encounter issues with your Legrand Radiant Dimmer, try the following steps. For more complex problems, refer to the full installation guide or contact customer support.
| Problem | Possible Cause | Solution |
|---|---|---|
| Lights do not turn on. | No power, incorrect wiring, bulb issue. | Check circuit breaker. Verify wiring connections. Test bulbs in another fixture. |
| Lights flicker or hum. | Incompatible bulbs, dimming range not calibrated. | Ensure bulbs are dimmable LED. Perform dimming range calibration (Section 4.2). |
| Lights do not dim to desired level. | Dimming range not calibrated, bulb limitations. | Adjust high and low dimming limits (Section 4.2). Some bulbs have limited dimming capabilities. |
| Delay when turning lights on. | LED "pop-on" effect. | Activate LED Burst Mode (Section 4.3). |
For further assistance, scan the QR code on the device for detailed troubleshooting guides or visit the manufacturer's support website.
7. Specifications
| Attribute | Detail |
|---|---|
| Model Number | RHL153PW |
| Product Dimensions | 1.46 x 1.74 x 4.19 inches; 3.81 ounces |
| Brand | Pass & Seymour (Legrand) |
| Operation Mode | ON-ON-OFF |
| Current Rating | 1.25 Amps |
| Operating Voltage | 120 Volts |
| Contact Type | Normally Closed |
| Connector Type | Crimp |
| Terminal | Screw |
| Circuit Type | 1-way, 3-way |
| Actuator Type | Push Button |
| Date First Available | February 22, 2024 |
8. Warranty and Support
This Legrand Radiant Dimmer is backed by the manufacturer's warranty. For specific warranty terms and conditions, please refer to the documentation included with your product or visit the official Pass & Seymour (Legrand) website.
For technical support, troubleshooting assistance, or to inquire about replacement parts, please contact Pass & Seymour customer service. Contact information can typically be found on the product packaging or the manufacturer's website.
You can also find additional resources and frequently asked questions by scanning the QR code on the device or visiting the provided installation guidance link: l.ead.me/be7J0B.
Related Documents - RHL153PW
 |
Pass & Seymour RW3U600 Occupancy Sensor Installation Guide Detailed installation instructions and operating guide for the Pass & Seymour RW3U600 Multi-way Wall Switch Occupancy Sensor, covering setup, wiring, adjustments, and troubleshooting. |
 |
Pass & Seymour RRW600V Vacancy Sensor Switch Installation and Operation Manual Comprehensive installation and operation manual for the Pass & Seymour RRW600V and RRW600VV2 vacancy sensor switches. This guide provides detailed instructions on wiring, setup, features, troubleshooting, and specifications for this passive infrared (PIR) motion-activated lighting control device. |
 |
Pass & Seymour IEC 309 Industrial Pin & Sleeve Watertight Devices Explore Pass & Seymour's IEC 309 Industrial Pin & Sleeve Devices, offering robust watertight protection against moisture and contaminants for demanding industrial environments. Features quick installation, durable construction, and reliable performance. |
 |
Legrand Pass & Seymour radiant LED Advanced Dimmer RHL153P - 150W Flicker-Free Control Discover the Legrand Pass & Seymour radiant LED Advanced Dimmer (RHL153P). This 150W dimmer offers flicker-free control for LED, CFL, and incandescent bulbs, featuring advanced dimming technology, easy calibration, and a modern design. Ideal for residential and commercial applications. |
 |
Legrand WZ3RCB46 radiant® Wireless AC Smart Scene Controller with Zigbee - Installation Guide Detailed installation instructions for the Legrand WZ3RCB46 radiant® Wireless AC Smart Scene Controller with Zigbee. Learn how to set up, wire, and configure your smart lighting controller, including safety, wiring, and app setup. |
 |
Legrand adorne WNAL64 Smart Dimmer with Netatmo Installation Instructions Detailed installation instructions for the Legrand adorne WNAL64 Smart Dimmer with Netatmo. Learn how to safely install and set up this smart home device, including wiring, app configuration, and system requirements. |
Ask a question about this manual
Ask about setup, troubleshooting, compatibility, parts, safety, or missing instructions. Manuals+ will review the question and use this page’s manual context to help answer it.