Outsunny A20-287V01CG
Outsunny 4-6 Man Tunnel Tent Instruction Manual
Model: A20-287V01CG
Product Overview
The Outsunny 4-6 Man Tunnel Tent is designed for comfortable outdoor living, featuring a spacious layout with two separate bedrooms, a central living area, and a vestibule. It offers protection against the elements with a 2000mm waterproof rating and UV50+ protection. This portable tent is suitable for various outdoor activities such as camping, hiking, and festivals.

Image: The Outsunny 4-6 Man Tunnel Tent, showcasing its full tunnel design with multiple sections and a grey and red color scheme.
Key Features:
- Spacious Design: Two bedrooms, a living room, and a canopy, suitable for 4-6 people.
- Weather Protection: 2000mm waterproof rating and UV50+ resistant fabric.
- Ventilation & Access: Two large side doors and mesh windows for airflow.
- Portability: Includes a double-handle carry bag for easy transport.
- Dimensions: 193H x 590L x 245W cm when set up.
Package Contents
Before beginning assembly, please ensure all components listed below are present in your package:
- Tent Fabric (Outer Flysheet and Inner Tents)
- Tent Poles (various lengths for main structure and vestibule)
- 32 x Ground Stakes
- 14 x Guy Ropes
- Carry Bag
- Hook (for lantern)

Image: A visual representation of the tent's portability, showing the carry bag, 32 ground stakes, and 14 guy ropes included with the tent.
Setup Instructions
Careful assembly is crucial for the tent's stability and performance. It is recommended that two or more people set up this tent.
- Choose a Site: Select a flat, clear area free of sharp objects. Lay out the tent's outer flysheet.
- Assemble Poles: Connect the tent pole sections. Identify the different lengths for the main arches and vestibule.
- Insert Poles: Slide the assembled poles through the corresponding sleeves on the outer flysheet. The tent has an arched shape, so ensure poles are correctly aligned with the curves.
- Raise Tent: With assistance, lift the tent structure and insert the ends of the poles into the grommets or pin-and-ring systems at the base of the tent.
- Secure Tent: Stake down the four corners of the tent firmly into the ground.
- Attach Guy Ropes: Extend and stake out all guy ropes. Adjust tension to ensure the tent fabric is taut and stable, especially in windy conditions. This helps prevent sagging.
- Install Inner Tents: Once the outer flysheet is pitched, attach the inner bedroom tents to the designated clips or toggles inside. Ensure the welded floors are flat.
- Vestibule Setup: If applicable, use the shorter poles to prop up the vestibule door to create a sunshade.

Image: A diagram illustrating the overall dimensions of the tent (5.9m L x 2.45m W x 1.93m H) and internal layout, providing a visual guide for setup and space planning.
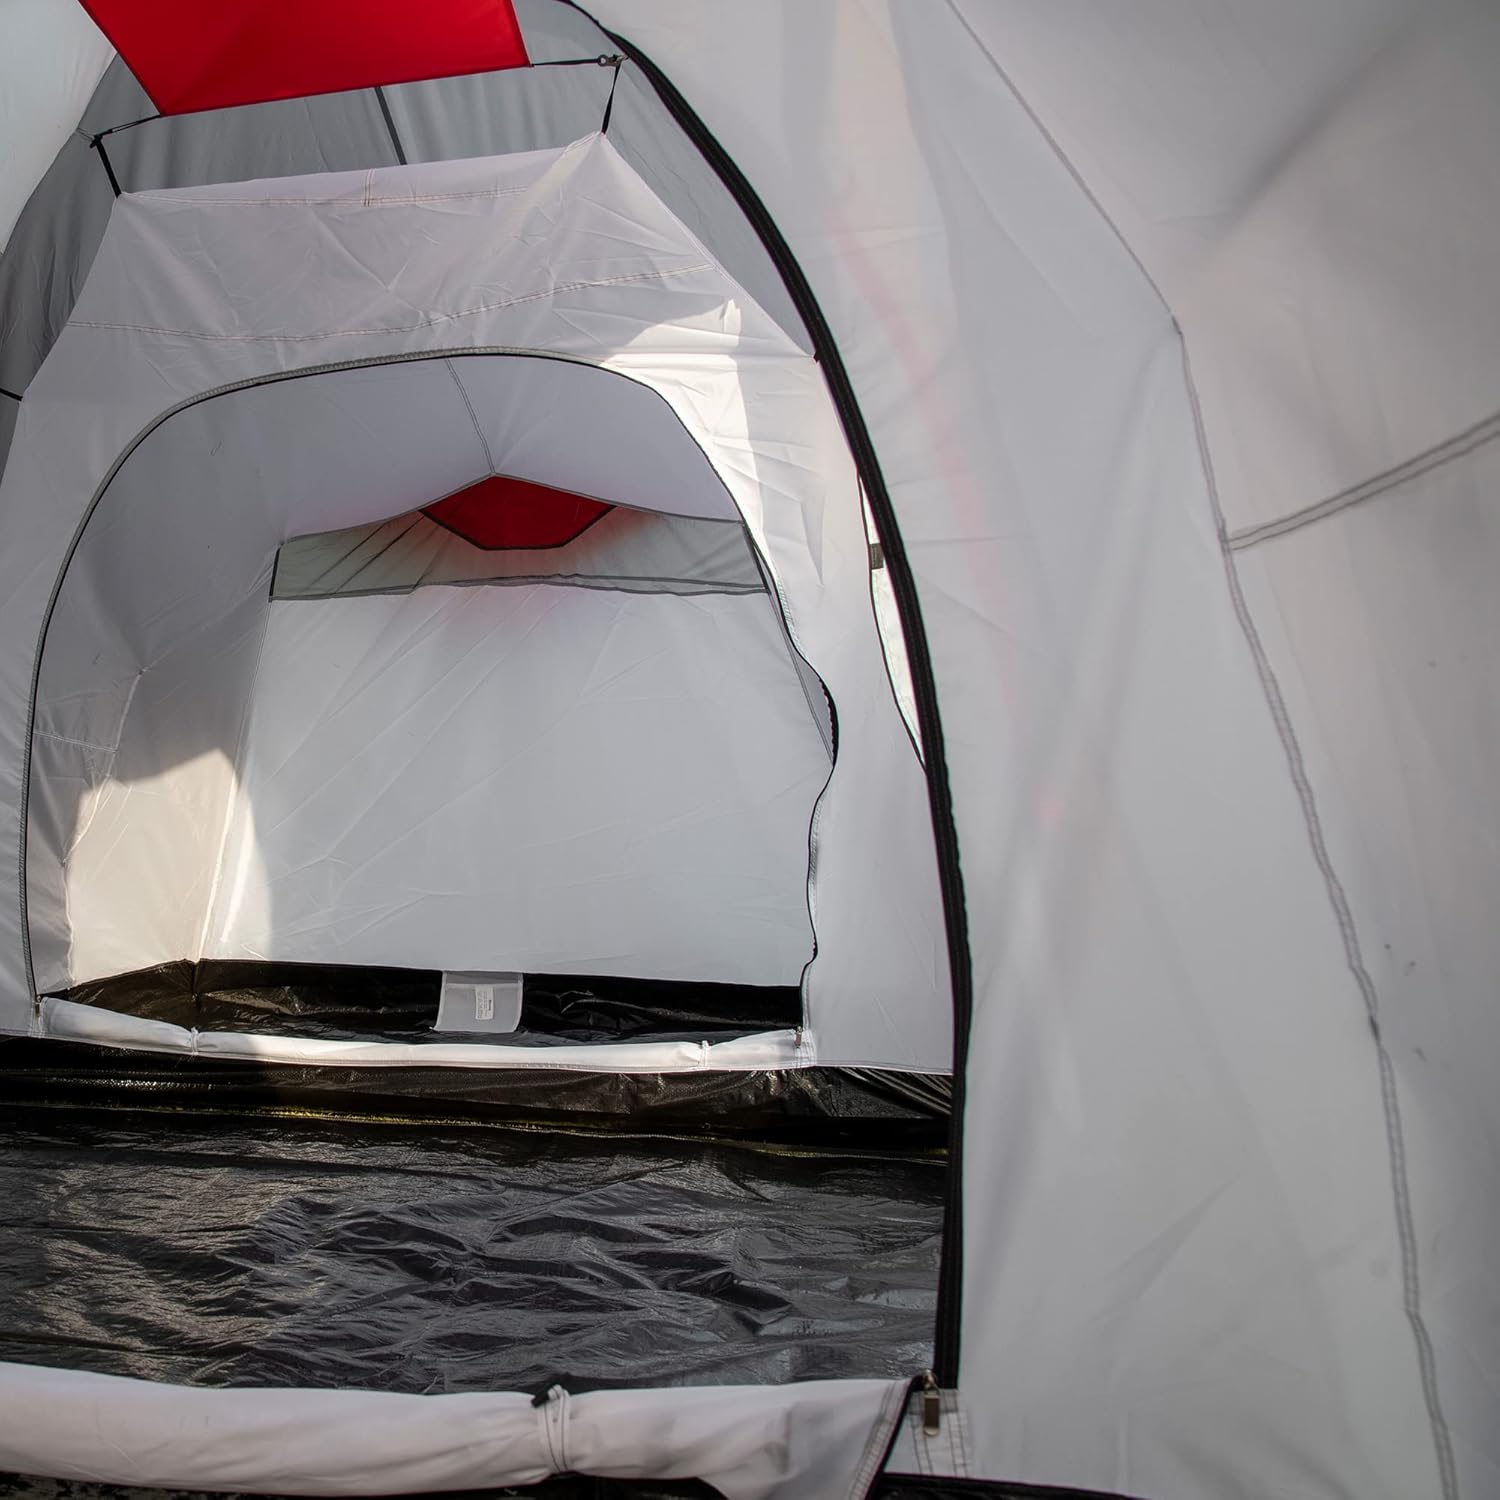
Image: An interior view of the tent, highlighting the separate inner bedroom tents and the black welded floor material designed to keep the interior dry.
Operating Instructions
To maximize your comfort and the tent's lifespan:
- Ventilation: Utilize the mesh windows to ensure proper airflow and reduce condensation inside the tent. Keep them open when weather permits.
- Door Usage: The two large side doors provide easy access. They can be rolled up and secured, or propped open with additional poles (not included) to create a sunshade.
- Room Separation: The internal doors between the living area and bedrooms can be zipped closed for privacy or left open for a more communal space.
- Lighting: A hook is provided inside the tent for hanging a lantern or light source.

Image: A close-up of the tent's side, illustrating the two main doors. Text overlays indicate that two doors are for bedroom access and two can be propped open as sunshades.

Image: Detailed views of the tent's interior, showing the welded floors for dryness, mesh windows for ventilation, and a lantern hook for internal lighting.
Maintenance
Proper maintenance will extend the life of your tent:
- Cleaning: Clean the tent with a soft sponge and mild soap (non-detergent) and lukewarm water. Do not use harsh chemicals or abrasive cleaners.
- Drying: Always ensure the tent is completely dry before packing it away. Packing a damp tent can lead to mildew and fabric degradation. Air dry in a shaded, well-ventilated area.
- Storage: Store the tent in its carry bag in a cool, dry place, away from direct sunlight and extreme temperatures.
- Pole Care: Inspect poles for damage or bending before and after each use. Clean any dirt from pole sections.
- Fabric Inspection: Periodically check the fabric for tears, punctures, or signs of wear. Repair small damages promptly to prevent them from worsening.
Troubleshooting
| Problem | Possible Cause | Solution |
|---|---|---|
| Tent sags or is not taut | Insufficient tension on guy ropes or improper pole setup. | Ensure all poles are fully inserted and correctly arched. Adjust guy ropes to be taut and stake them firmly. Re-position stakes if necessary to achieve proper tension. |
| Condensation inside tent | Lack of ventilation, high humidity, or temperature difference. | Open mesh windows and doors (when weather permits) to increase airflow. Ensure proper spacing between inner and outer tents. |
| Water leakage | Fabric damage, seam issues, or improper pitching allowing water pooling. | Inspect fabric for tears and seams for integrity. Ensure tent is pitched on level ground to prevent water pooling. Apply seam sealer if necessary. |
| Difficulty with assembly | Unfamiliarity with tent structure or insufficient assistance. | Review setup instructions carefully. Watch online tutorials if available. Ensure at least two people are assisting with setup. |
Specifications
| Feature | Detail |
|---|---|
| Model Number | A20-287V01CG |
| Brand | Outsunny |
| Capacity | 4-6 Man |
| Dimensions (L x W x H) | 590 x 245 x 193 cm |
| Folded Dimensions (L x W x H) | 60 x 26 x 26 cm |
| Weight | 9 Kilograms |
| Material | Polyester |
| Waterproof Rating | 2000mm |
| UV Protection | UV50+ |
| Rooms | 2 Bedrooms, 1 Living Area, 1 Vestibule |
| Included Accessories | 32 Ground Stakes, 14 Guy Ropes, Carry Bag |
Warranty and Support
For warranty information, product support, or to inquire about replacement parts, please contact Outsunny customer service directly. Refer to your purchase documentation or the official Outsunny website for contact details.
You can visit the official Outsunny store for more information: Outsunny Store on Amazon UK
Ask a question about this manual
Ask about setup, troubleshooting, compatibility, parts, safety, or missing instructions. Manuals+ will review the question and use this page’s manual context to help answer it.