1. Safety Information
Read and understand all safety instructions before assembling and using the trampoline. Failure to follow these instructions may result in serious injury.
1.1 General Safety Guidelines
- Adult Supervision Required: Always ensure adult supervision when the trampoline is in use.
- One Jumper at a Time: To prevent collisions and injuries, only one person should jump on the trampoline at any given time.
- Weight Limit: The maximum recommended single-user weight is 300 pounds (136 kg). The trampoline is designed for 4-5 children, but adhere strictly to the single-user weight limit to prevent uneven stress and potential frame damage.
- Clearance Area: Ensure adequate overhead clearance and a clear perimeter around the trampoline. Keep objects, structures, and other people away from the trampoline area.
- No Somersaults or Flips: Avoid somersaults, flips, or other high-risk maneuvers, as these can lead to severe head and neck injuries.
- Inspect Before Each Use: Before each use, check the trampoline for damaged, worn, or missing parts. Do not use if any components are compromised.
- Proper Entry and Exit: Always use the provided ladder for safe entry and exit. Do not jump on or off the trampoline.
- Weather Conditions: Do not use the trampoline in strong winds, rain, or other adverse weather conditions.
1.2 Product-Specific Safety Features
- ASTM Approved: This trampoline is designed to meet ASTM safety standards, prioritizing user safety.
- Safety Enclosure Net: The 360-degree sealed enclosure net provides protection, preventing users from falling off the jumping surface.
- No Gap Design: The design eliminates gaps between the jumping mat and springs, reducing the risk of foot or limb entrapment.
- Reinforced Steel Frame: Constructed with heavy-duty galvanized steel and thickened W-shaped legs for enhanced stability and structural integrity.

2. Setup and Assembly
Carefully unpack all components and verify against the parts list in your product packaging. Assembly typically requires two adults.
2.1 Frame Assembly
- Connect the galvanized steel frame sections according to the instructions provided in your package. Ensure all connections are secure.
- Attach the W-shaped legs to the main frame, ensuring they are properly aligned and tightened.

2.2 Jumping Mat and Spring Installation
- Lay the jumping mat evenly across the frame.
- Using the provided spring tool, attach the 96 springs to the jumping mat and the frame. Follow a systematic pattern (e.g., opposite sides) to ensure even tension.
- Install the spring cover pad over the springs to prevent direct contact.


2.3 Safety Enclosure Net and Pole Installation
- Assemble the safety poles and attach them to the trampoline frame.
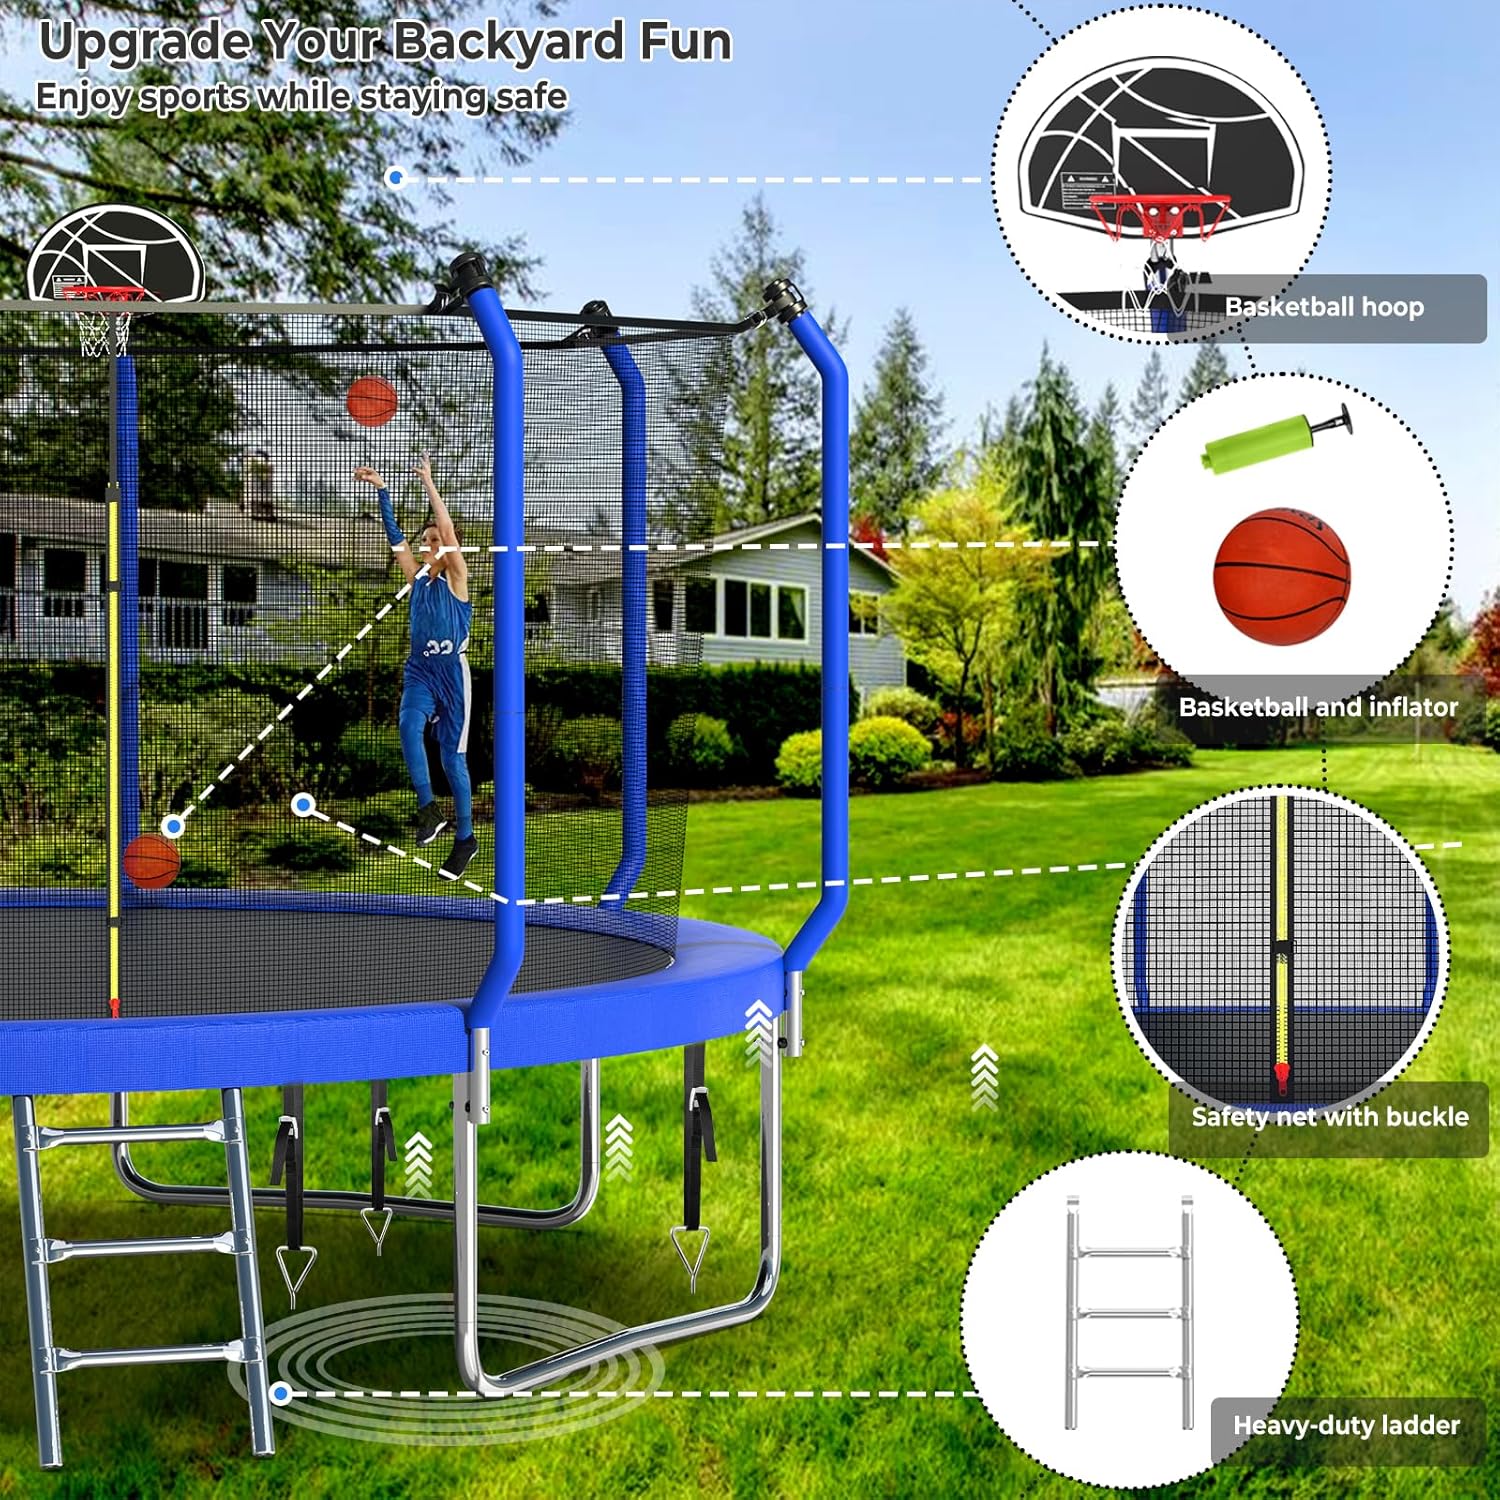
- Thread the safety net onto the poles and secure it properly. Ensure the zipper and buckles are functional and securely closed during use.
2.4 Accessory Installation
- Basketball Hoop: Attach the basketball hoop to the designated safety pole.
- LED Light: Install the solar-powered LED light string around the top perimeter of the safety net.
- Sprinkler: Attach the trampoline sprinkler to the top of the safety net poles and connect it to a water source.
- Ground Stakes: Use the provided ground stakes to anchor the trampoline securely to the ground, especially in windy conditions.

2.5 Installation Video Guide
Video: Official Lyromix Trampoline Installation Guide. This video demonstrates the step-by-step assembly process for the trampoline frame, mat, safety poles, and net.
3. Operating Instructions
Follow these guidelines for safe and enjoyable use of your Lyromix trampoline.
3.1 Trampoline Use
- Ensure the safety enclosure net zipper and buckles are fully closed before jumping.
- Jump in the center of the mat for optimal bounce and stability.
- Always land on both feet.
3.2 Basketball Hoop
- Use the provided basketball and inflator.
- Do not hang on the basketball hoop or rim, as this can damage the trampoline structure and cause injury.
3.3 Sprinkler System
- Connect the sprinkler hose to a standard garden hose.
- Turn on the water supply gradually to adjust the spray intensity.
- Ensure the sprinkler is positioned to spray water evenly over the jumping surface.
3.4 LED Light Operation
- The LED light is solar-powered. Ensure the solar panel is exposed to direct sunlight for charging.
- The light features 8 different modes. Refer to the specific light controller instructions for changing modes.
3.5 Play Video
Video: Official Lyromix Trampoline Play Video. This video demonstrates various activities and features of the trampoline in use, including jumping and the sprinkler system.
4. Maintenance
Regular maintenance ensures the longevity and safety of your trampoline.
4.1 Routine Inspection
- Frame: Periodically check all frame connections for tightness. Ensure no parts are bent or cracked.
- Springs: Inspect all springs for rust, stretching, or breakage. Replace any damaged springs immediately.
- Jumping Mat: Check the mat for tears, holes, or excessive wear.
- Safety Net and Poles: Examine the net for tears or holes. Ensure all safety pole padding is intact and the net is securely attached to the poles and frame. Check the zipper and buckles for proper function.
- Accessories: Inspect the basketball hoop, sprinkler, and LED lights for any damage or malfunction.
4.2 Cleaning
- Clean the jumping mat and frame with mild soap and water. Avoid harsh chemicals.
- Rinse the sprinkler system after use to prevent mineral buildup.
4.3 Weather Protection
- While the galvanized frame is designed for outdoor use in various weather conditions, consider using a weather cover during prolonged periods of non-use or extreme weather to extend the product's lifespan.
- Ensure ground stakes are properly installed to prevent movement during high winds.
5. Troubleshooting
This section addresses common issues you might encounter with your trampoline.
5.1 Sprinkler Not Functioning Correctly
- Issue: Sprinkler only sprays in one direction or does not rotate.
- Solution: Check for blockages in the sprinkler head or hose connection. Ensure adequate water pressure. If the issue persists, the internal mechanism may be faulty; contact customer support.
5.2 Bent Frame or Poles
- Issue: Frame or safety enclosure poles become bent.
- Solution: This often occurs due to exceeding the weight limit, improper use (e.g., multiple jumpers), or severe weather conditions (e.g., strong winds without proper anchoring). Immediately cease use. Bent structural components compromise safety and must be replaced. Contact customer support for replacement parts.
5.3 LED Lights Not Turning On/Charging
- Issue: Solar-powered LED lights do not illuminate or hold a charge.
- Solution: Ensure the solar panel is clean and receives direct sunlight for several hours to charge. Check all connections. If the lights only work when directly plugged in (if applicable) and not from the solar charge, the battery or solar panel may be defective.
5.4 Safety Net Fit Issues
- Issue: Safety net does not fit properly or is difficult to zip/buckle.
- Solution: Re-check the installation of the safety poles and net. Ensure the net is evenly distributed and tensioned. If the net is too tight or loose, it may indicate incorrect assembly or a manufacturing discrepancy.
6. Specifications
| Feature | Detail |
|---|---|
| Brand | Lyromix |
| Model Number | 14FTBC-001 |
| Frame Size | 14 Feet |
| Shape | Round |
| Color | Navy Blue |
| Product Dimensions (L x W x H) | 168" x 168" x 108" |
| Frame Material | Galvanized Steel |
| Jumping Mat Material | Polypropylene (PP) |
| Number of Springs | 96 |
| Maximum Single User Weight Recommendation | 300 Pounds |
| Item Weight | 50 Pounds |
| Included Components | Springs, Basketball Hoop, LED Light, Sprinkler, Ground Stakes |
7. Warranty and Support
7.1 Product Warranty
This Lyromix trampoline comes with a 3-month warranty from the date of purchase. This warranty covers manufacturing defects in materials and workmanship under normal use. It does not cover damage resulting from misuse, accidents, improper assembly, lack of maintenance, or natural disasters.
7.2 Customer Support
For warranty claims, technical assistance, or to order replacement parts, please contact Lyromix customer support. Refer to your purchase documentation for specific contact details or visit the official Lyromix website.


