
MECHANIC MASTER C+MAX
Mechanical Master C+Max Desktop Compact PC Case User Manual
Model: C+MAX
Introduction
This user manual provides detailed instructions for the assembly, operation, and maintenance of your Mechanical Master C+Max Desktop Compact PC Case. Designed for enthusiasts and builders, the C+Max offers a compact form factor with robust compatibility for high-performance components.
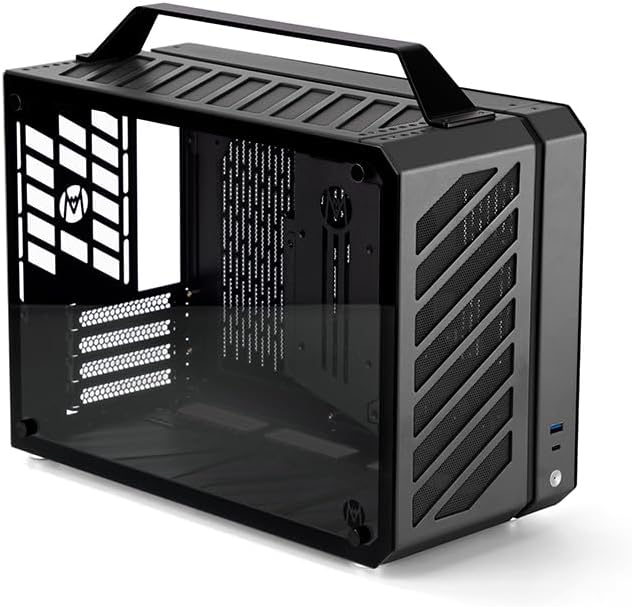
Figure 1: Mechanical Master C+Max Desktop Compact PC Case (Elegant Black)
This image displays the fully assembled Mechanical Master C+Max PC case in elegant black, showcasing its compact design and integrated handle for portability.
Product Features
- 50-Series GPU Ready: Extended length support for next-generation flagship graphics processing units, such as the RTX 5090.
- ATX PSU + 240mm AIO Combo: Offers flexible configurations for both power supply units and liquid cooling solutions.
- HDD/Fan Dual-Purpose Bracket: A versatile bracket designed to accommodate additional storage drives or enhance cooling capabilities.
- Space-Efficient Design: Maintains a compact height and width while significantly expanding GPU capacity.
- Upgraded C28 Compatibility: Provides a seamless transition from C28 builds with enhanced scalability and component support.
Package Contents
Upon opening the package, please verify that all components listed below are present and undamaged.
- Mechanical Master C+Max PC Case Chassis
- Detachable and Portable Handle
- Tempered Glass Side Panel
- Dust Proof Net
- Screwdriver (for assembly)
- Accessory Kit (screws, zip ties, etc.)
- Multi-Function Bracket (HDD/Fan)

Figure 2: Disassembled C+Max PC Case Components
This image shows the various components of the C+Max PC case in a disassembled state, including the main chassis frame, side panels, top panel, handle, and accessory brackets, illustrating the modular design.
Setup and Assembly
The C+Max case features a modular design for ease of assembly and component installation. Follow these steps for a successful build.
1. Chassis Preparation
Begin by removing all side panels and the top panel from the chassis. This provides ample access for component installation. The included screwdriver can be used for this purpose.

Figure 3: Chassis Matrix Design
This image highlights the internal "Matrix design" of the chassis, which facilitates convenient wire organization and installation of hardware such as the CPU cooler. It also shows the compatibility with long graphics cards.
2. Motherboard Installation
Install your Micro ATX (mATX) or Mini-ITX (ITX) motherboard onto the designated standoffs within the chassis. Secure it with the appropriate screws.
3. Power Supply Unit (PSU) Installation
The C+Max supports ATX power supplies up to 140mm in length, as well as SFX/SFX-L PSUs. Mount your chosen PSU in the designated ATX back mount area. Ensure proper cable routing.
4. Cooling System Installation
The case supports various cooling configurations:
- Liquid Cooling: Up to a 240mm All-In-One (AIO) liquid cooler can be installed.
- Air Cooling: Air coolers with a maximum height of 162mm are supported.
- Fans: The case supports 12cm fans (up to 2 on top, 2 on bottom) and a 9cm fan on the front (if no HDD is installed).

Figure 4: Internal Component Layout Scheme
This diagram illustrates the internal layout and component compatibility, showing placement for MATX/ITX motherboards, 240 AIO or 162mm air cooler, ATX PSU, 2.5" HDD, 385x160mm GPU, and fan placements (12cm fans on top, 9cm/12cm fans on bottom).

Figure 5: Example Build with 240mm AIO
This image demonstrates a typical internal component arrangement featuring a 240mm AIO liquid cooler, a MATX motherboard, ATX PSU, 385mm GPU, and a 12cm fan.

Figure 6: Example Build with 162mm Tower Cooler
This image illustrates an alternative internal component arrangement utilizing a 162mm tower air cooler, a MATX motherboard, ATX PSU, 385mm GPU, and 12cm fans.
5. Graphics Card Installation
The C+Max is designed to accommodate long graphics cards, up to 385mm in length and 162mm in height, including compatibility with 4090 series GPUs. Install your graphics card into the appropriate PCI-E slot.
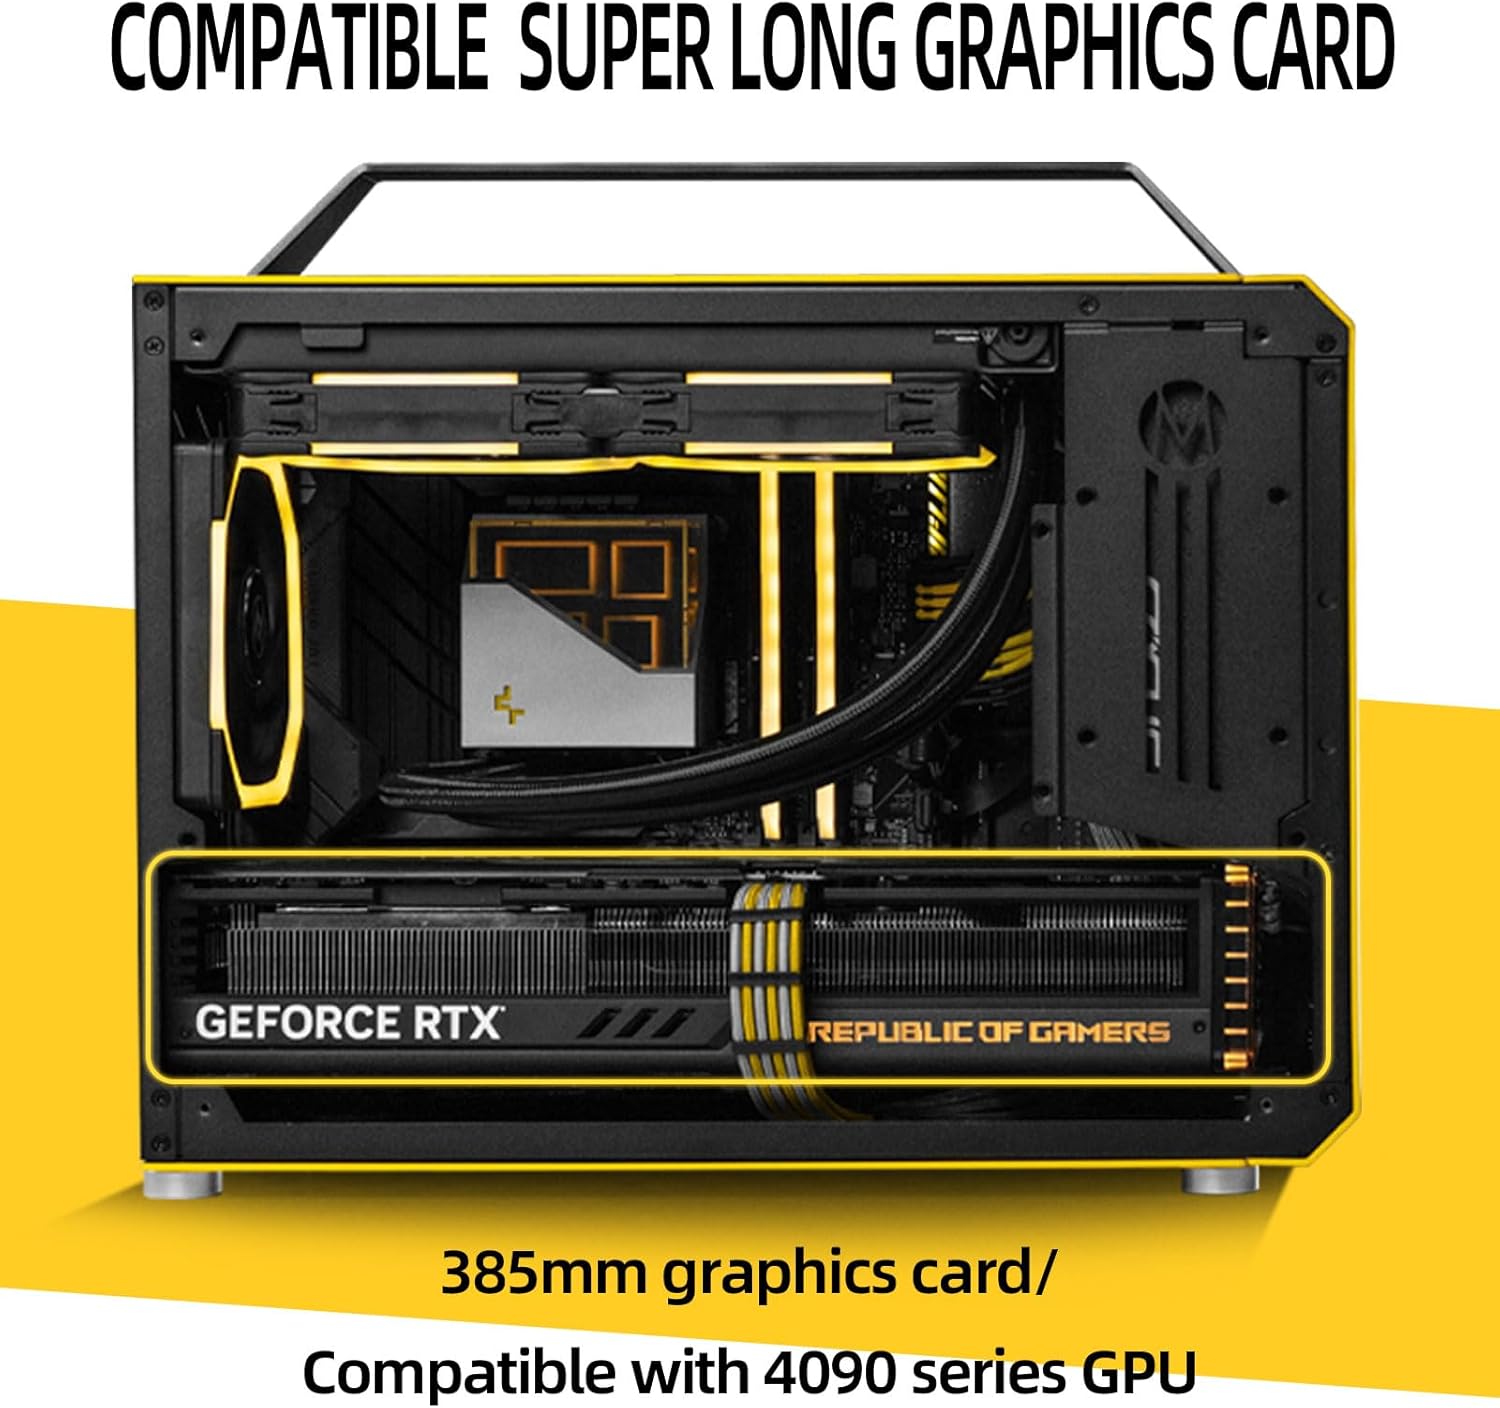
Figure 7: Long Graphics Card Compatibility
This image demonstrates the case's ability to house a super long graphics card, specifically mentioning compatibility with 385mm graphics cards and the 4090 series GPUs.
6. Storage Device Installation
Utilize the multi-function bracket to install 2.5" HDDs/SSDs or 3.5" HDDs. The case supports one 2.5" HDD and one 3.5" HDD.
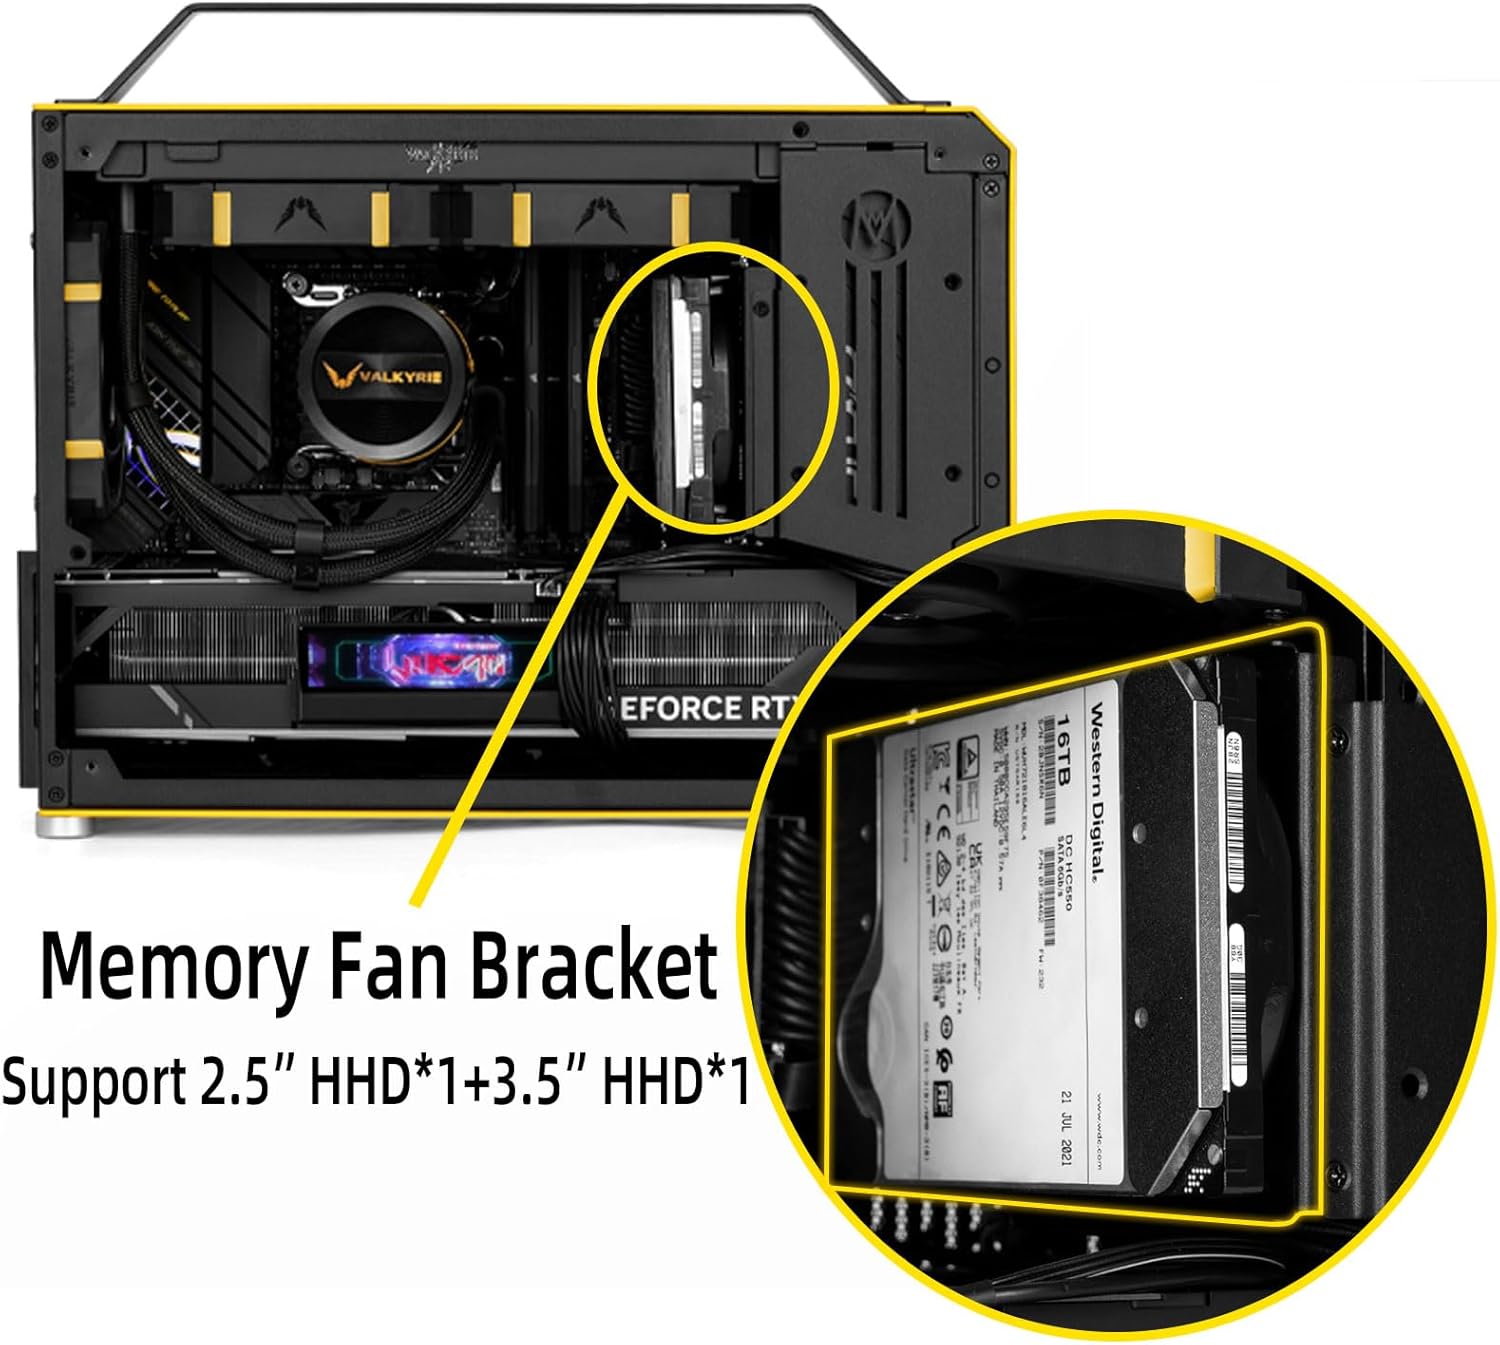
Figure 8: HDD/SSD Installation with Multi-Function Bracket
This image shows the "Memory Fan Bracket" which also functions as a hard drive holder, supporting the installation of both 2.5-inch and 3.5-inch hard drives.

Figure 9: Front I/O and Hard Drive Holder Detail
This image provides a closer look at the front I/O panel, featuring USB 3.0 and Type-C ports, and details the hard drive holder's support for 3.5-inch hard drive installation.
7. Cable Management and Final Assembly
Route all cables neatly to ensure optimal airflow and aesthetics. Once all components are installed and cables managed, reattach the side panels and top panel.
Operating Instructions
After successful assembly, connect your peripherals (monitor, keyboard, mouse) and power cable to the system.
Powering On/Off
Press the aluminum alloy power switch located on the front I/O panel to power on your system. The switch has a built-in LED indicator. To power off, use the operating system's shutdown function or press and hold the power button for a few seconds for a forced shutdown.
Front I/O Ports
The front panel provides convenient access to:
- 1 x USB 3.0 Port
- 1 x Type-C 10G Port
- Power Switch with LED Indicator
Maintenance
Regular maintenance ensures optimal performance and longevity of your PC case and components.
Dust Management
The C+Max case includes a dust proof net. Periodically clean the dust filters and internal components using compressed air or a soft brush to prevent dust buildup, which can impede airflow and cooling efficiency.
Cleaning
Wipe the exterior of the case with a soft, damp cloth. Avoid abrasive cleaners or solvents that could damage the finish. For the tempered glass panel, use a glass cleaner and a microfiber cloth.
Troubleshooting
This section addresses common issues you might encounter.
System Not Powering On
- Ensure the power cable is securely connected to both the PSU and the wall outlet.
- Verify that the power switch on the PSU (if present) is in the 'ON' position.
- Check all internal power connections, including the 24-pin motherboard connector and CPU power connector.
- Confirm that the front panel power switch cable is correctly connected to the motherboard's front panel header.
Overheating Issues
- Ensure all case fans are properly installed and spinning.
- Verify that the CPU cooler (air or AIO) is correctly mounted and making good contact with the CPU.
- Clean dust filters and internal components regularly to maintain optimal airflow.
- Check for proper cable management to avoid obstructing airflow paths.
Graphics Card Not Detected / Display Issues
- Ensure the graphics card is fully seated in its PCI-E slot.
- Verify that all necessary power cables are connected from the PSU to the graphics card.
- Check that the display cable (HDMI, DisplayPort, etc.) is securely connected to both the graphics card and the monitor.
Specifications
| Feature | Specification |
|---|---|
| Model Name | C+MAX |
| Case Type | Desktop Compact Chassis |
| Dimensions (L x W x H) | 392 x 185 x 284 mm (15.4 x 7.3 x 13.3 inches) |
| Volume | 20.5 Liters |
| Material | Outer Shell: 2mm Aluminum Alloy, Inner Shell: 1mm Steel |
| Motherboard Compatibility | ITX / Micro ATX (mATX) |
| CPU Cooler Clearance | 162mm (Air Cooler), 240mm (Liquid Cooler AIO) |
| Graphics Card Length | Up to 385mm |
| Graphics Card Height | Up to 162mm |
| Power Supply Unit (PSU) | ATX (max 140mm length), SFX / SFX-L |
| Storage Drive Bays | 1 x 2.5" HDD/SSD, 1 x 3.5" HDD (via multi-function bracket) |
| Front I/O Ports | 1 x USB 3.0, 1 x Type-C (10Gbps), Aluminum Alloy Power Switch with LED |
| Fan Support | Top: 2 x 12cm; Bottom: 2 x 9cm or 2 x 12cm; Front: 1 x 9cm (if no HDD) |
| Included Accessories | Detachable Handle, Tempered Glass Side Panel, Dust Proof Net, Screwdriver |
| Optional Accessories | Aluminum Alloy Ventilation Side Panel |
| Item Weight | 9.24 pounds |
| Color | Elegant Black |

Figure 10: C+Max Case Dimensions
This image provides a visual representation of the C+Max case dimensions (392mm L x 185mm W x 284mm H), shown next to a monitor for scale.

Figure 11: Case Size Comparison
This image compares the length, width, and height specifications of various Mechanical Master cases, including C24, C26, C28, and CMAX, highlighting the C+Max's dimensions relative to other models.
Figure 12: Detailed C+Max Specifications
This image presents a comprehensive table of specifications for the C+Max case, including case name, size, material, CPU cooler, graphics card, PSU, pre-I/O, standard accessories, and optional accessories, along with a supplementary explanation regarding fan and HDD installation.
Warranty and Support
For warranty information and technical support, please refer to the official MECHANIC MASTER website or contact their customer service directly. Keep your purchase receipt as proof of purchase for warranty claims.
Manufacturer: Mechanic Master
Brand: MECHANIC MASTER
Related Documents - C+MAX
 |
Mechanic Master iF25 Portable MATX Computer Case Specifications and Build Guide Detailed specifications, features, and build guidance for the Mechanic Master iF25, a portable MATX computer case. This guide covers component compatibility, internal layout, and typical build scenarios for ATX and SFX power supplies, various cooling solutions, and long graphics cards. |
 |
Mechanic Master C28 Little Horizon PC Case Installation Manual & Guide Comprehensive installation manual and guide for the Mechanic Master C28 Little Horizon computer case, covering setup, component compatibility, and assembly for MATX/ITX builds with air or water cooling. |
 |
Mechanic Master iF16-T ITX Computer Case Installation Manual A comprehensive installation manual for the Mechanic Master iF16-T ITX computer case, detailing component compatibility, assembly steps, and important considerations for building a PC. |
 |
Dimplex VFMi C Storage Heater: Installation and Operating Manual Comprehensive installation, operation, and technical information for the Dimplex VFMi C Storage Heater, including safety guidelines, troubleshooting, and specifications. |
 |
MECHANIC DT3 Data Cable Detection Board User Manual Comprehensive user manual and guide for the MECHANIC DT3 USB Data Cable Detection Board. Learn how to test USB Type-C, Lightning, Micro USB, and Mini USB cables for data and charging anomalies. |
 |
MECHANIC GDR2 Multifunctional Polishing Pen User Guide Detailed information on the MECHANIC GDR2 multifunctional polishing pen, designed for mobile phone repair, including features, specifications, and usage instructions for chip grinding, cutting, and drilling. |
Ask a question about this manual
Ask about setup, troubleshooting, compatibility, parts, safety, or missing instructions. Manuals+ will review the question and use this page’s manual context to help answer it.