VEVOR K11-100mm (BS4-KP100-57)
VEVOR K11-100mm Dividing Head
User Manual
Product Overview
The VEVOR K11-100mm Dividing Head is a precision CNC rotational 4th axis designed to enhance the capabilities of your milling or engraving machine. It allows for the precise positioning and machining of workpieces at various angles, facilitating the creation of complex shapes and curved profiles. Equipped with a K11-100mm 3-jaw chuck and a Nema23 2-phase stepper motor, this unit offers high accuracy and reliable performance for intricate machining tasks.
Key features include a 6:1 reduction ratio for expanded indexing angles, robust 6061 aluminum alloy construction, and a versatile 3-jaw chuck system for secure workpiece clamping.
Package Contents
Please verify that all components listed below are included in your package:
- 1 x Dividing Head (with K11-100mm 3-Jaw Chuck)
- 1 x Tailstock
- 1 x MT2 Rotate the Thimble
- 3 x Card Plate Anti-Claw (External Jaws)
- 1 x T-wrench
- 1 x Numerical Control Cable
- 1 x User Manual
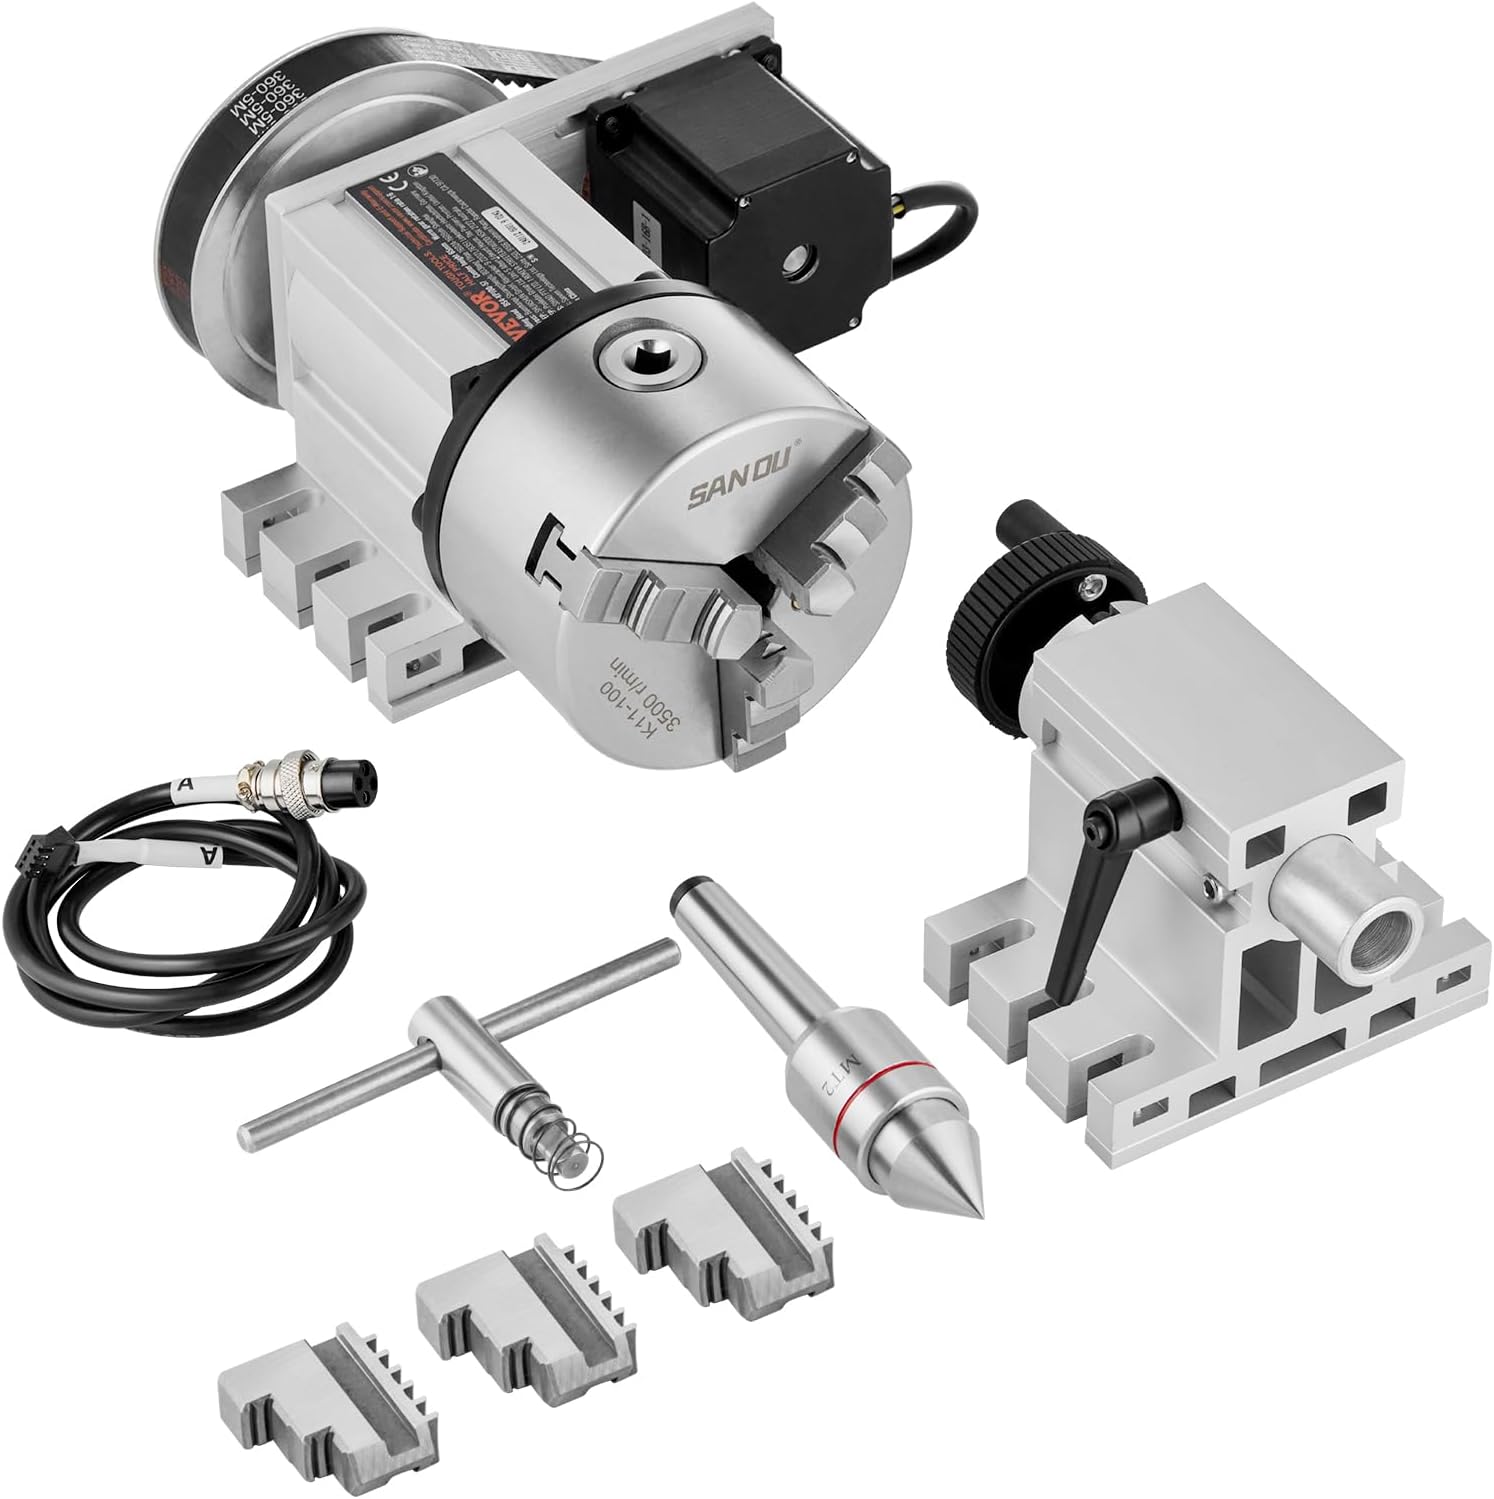
Image: The VEVOR K11-100mm Dividing Head with its K11-100mm 3-jaw chuck, tailstock, MT2 thimble, T-wrench, numerical control cable, and three external jaw plates.
Specifications
| Parameter | Value |
|---|---|
| Item Model Number | BS4-KP100-57 |
| Center Height | 2.6" / 65 mm |
| Voltage | DC 3.75V, 2.5A |
| Chuck Type | K11-100mm 3 Jaw Chuck |
| Gear Ratio | 6:1 |
| Chuck Clamping Diameter (Internal Jaw) | 0.08-1.18'' / 2-30 mm |
| Chuck Clamping Diameter (External Jaw) | 1.18-3.15'' / 30-80 mm |
| Net Weight | 17.6 lbs / 8 kg |
| Product Dimensions (Dividing Head) | 8.3 x 6.5 x 4.5 in / 210 x 165 x 115 mm |
| Product Dimensions (Tailstock) | 6.5 x 4.3 x 3.3 in / 165 x 110 x 85 mm |
| Stepper Motor | Nema23 2-phase, 57x57x56 mm, 4 leads |

Image: A visual representation of the dividing head and tailstock with key dimensions and a table summarizing all technical specifications.
Setup
Unpacking and Inspection:
Carefully remove all components from the packaging. Inspect each part for any signs of damage during transit. If any damage is found, contact VEVOR customer support immediately.
Mounting the Dividing Head:
The dividing head features a robust base designed for secure mounting to your CNC machine's work table. Use appropriate T-nuts and bolts (not included) to firmly attach the dividing head. Ensure it is aligned correctly with your machine's axis.

Image: The dividing head securely mounted on a milling machine table, ready for operation.
Mounting the Tailstock:
Position the tailstock opposite the dividing head, ensuring its center height aligns with the dividing head's center. Secure the tailstock to the work table using T-nuts and bolts. The tailstock provides support for longer workpieces, preventing deflection during machining.

Image: The dividing head and tailstock positioned together, demonstrating a typical setup for supporting a workpiece.
Connecting the Stepper Motor:
Connect the numerical control cable from the dividing head's Nema23 stepper motor to your CNC controller's appropriate axis output. Ensure the connection is secure to prevent signal loss during operation.

Image: A detailed view of the Nema23 stepper motor, highlighting its compact size and four-wire connection, crucial for precise positional control.
Chuck Jaw Installation/Change:
The K11-100mm chuck comes with both internal and external jaws. To change jaws, use the provided T-wrench to loosen the chuck screws, remove the current jaws, and install the desired set. Ensure jaws are properly seated and tightened before use. The internal jaws are suitable for clamping workpieces from 2-30mm, while external jaws are for 30-80mm.
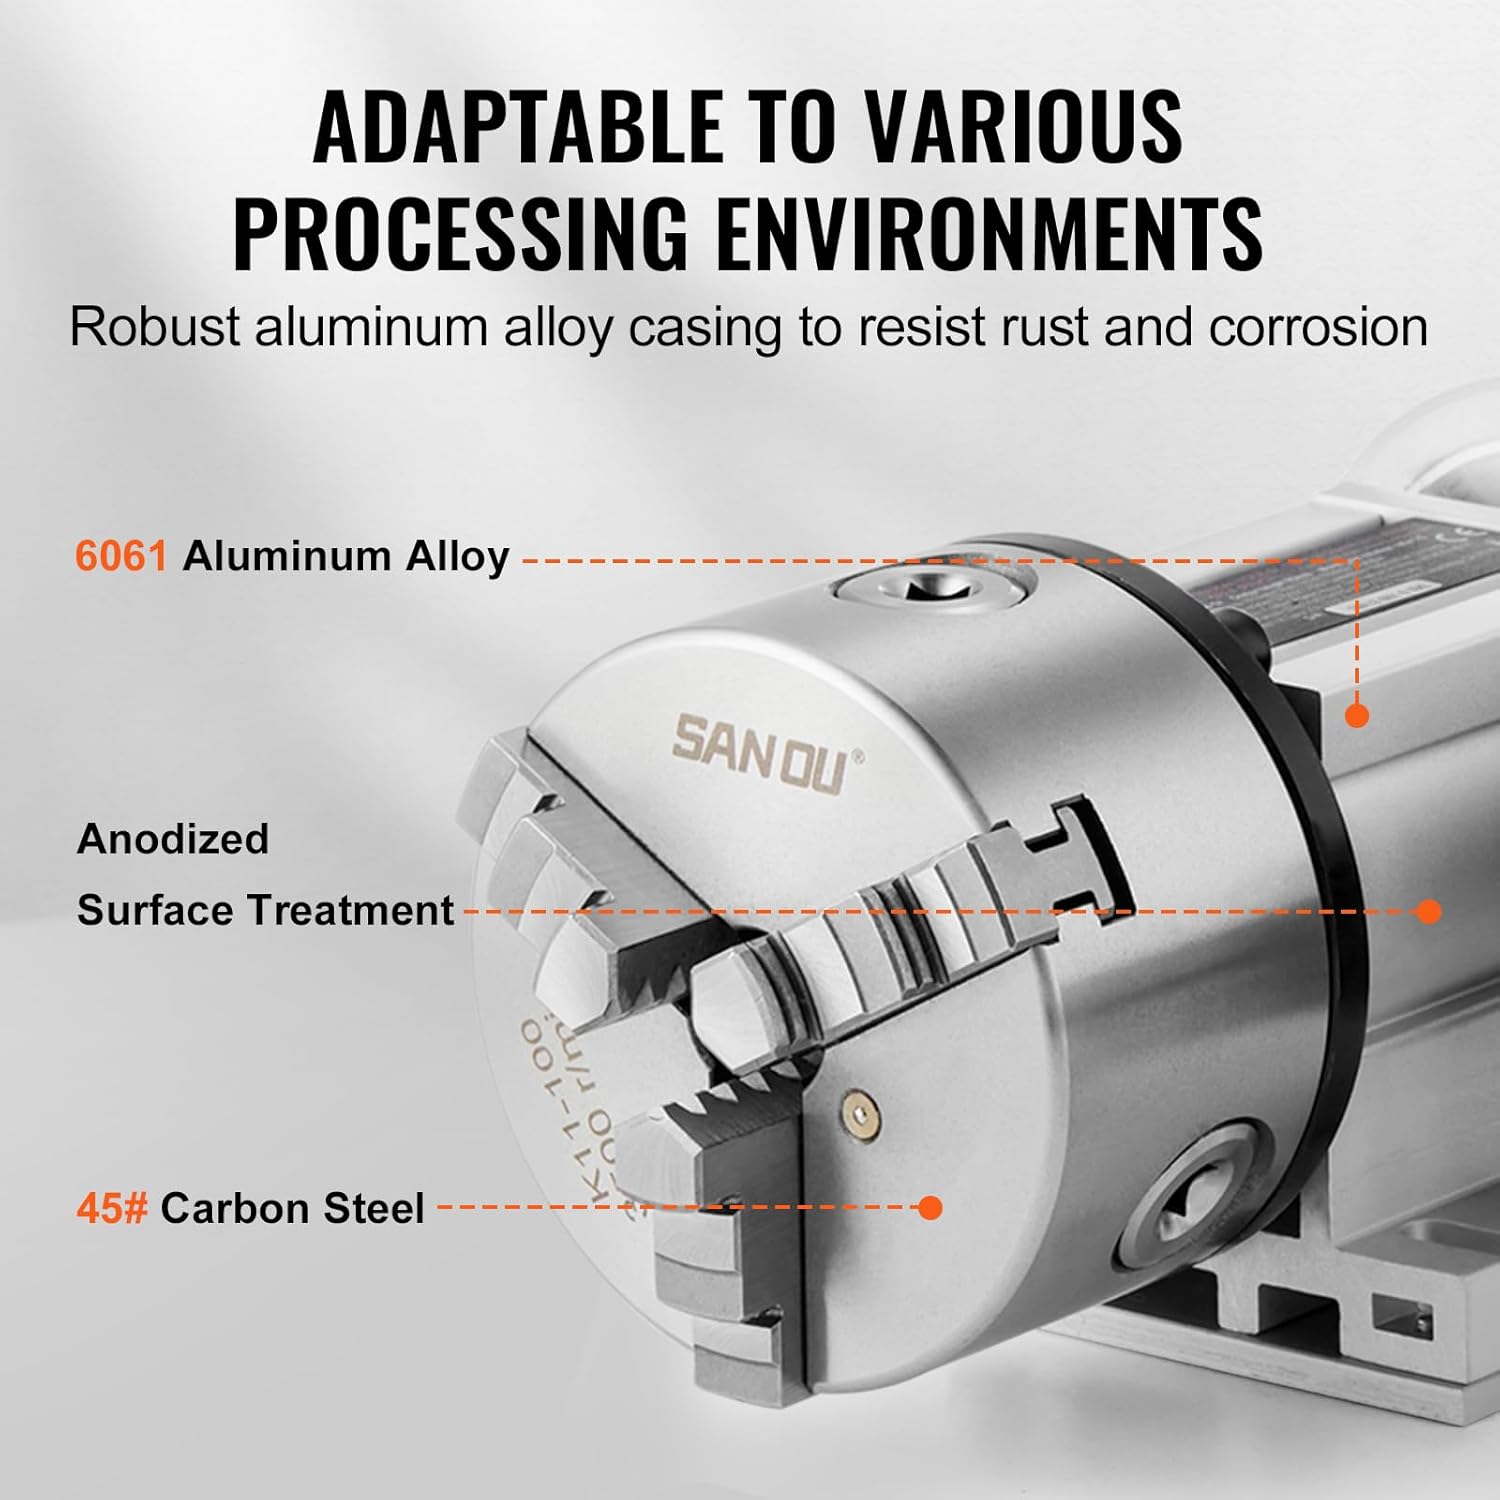
Image: A close-up of the 3-jaw chuck, illustrating its construction from 6061 aluminum alloy and 45# carbon steel, designed for firm, non-slip clamping.
Operating Instructions
Workpiece Clamping:
Select the appropriate jaws (internal or external) based on your workpiece diameter. Insert the workpiece into the chuck and use the T-wrench to tighten the jaws evenly until the workpiece is firmly secured. Ensure the workpiece is centered and runs true to minimize runout.
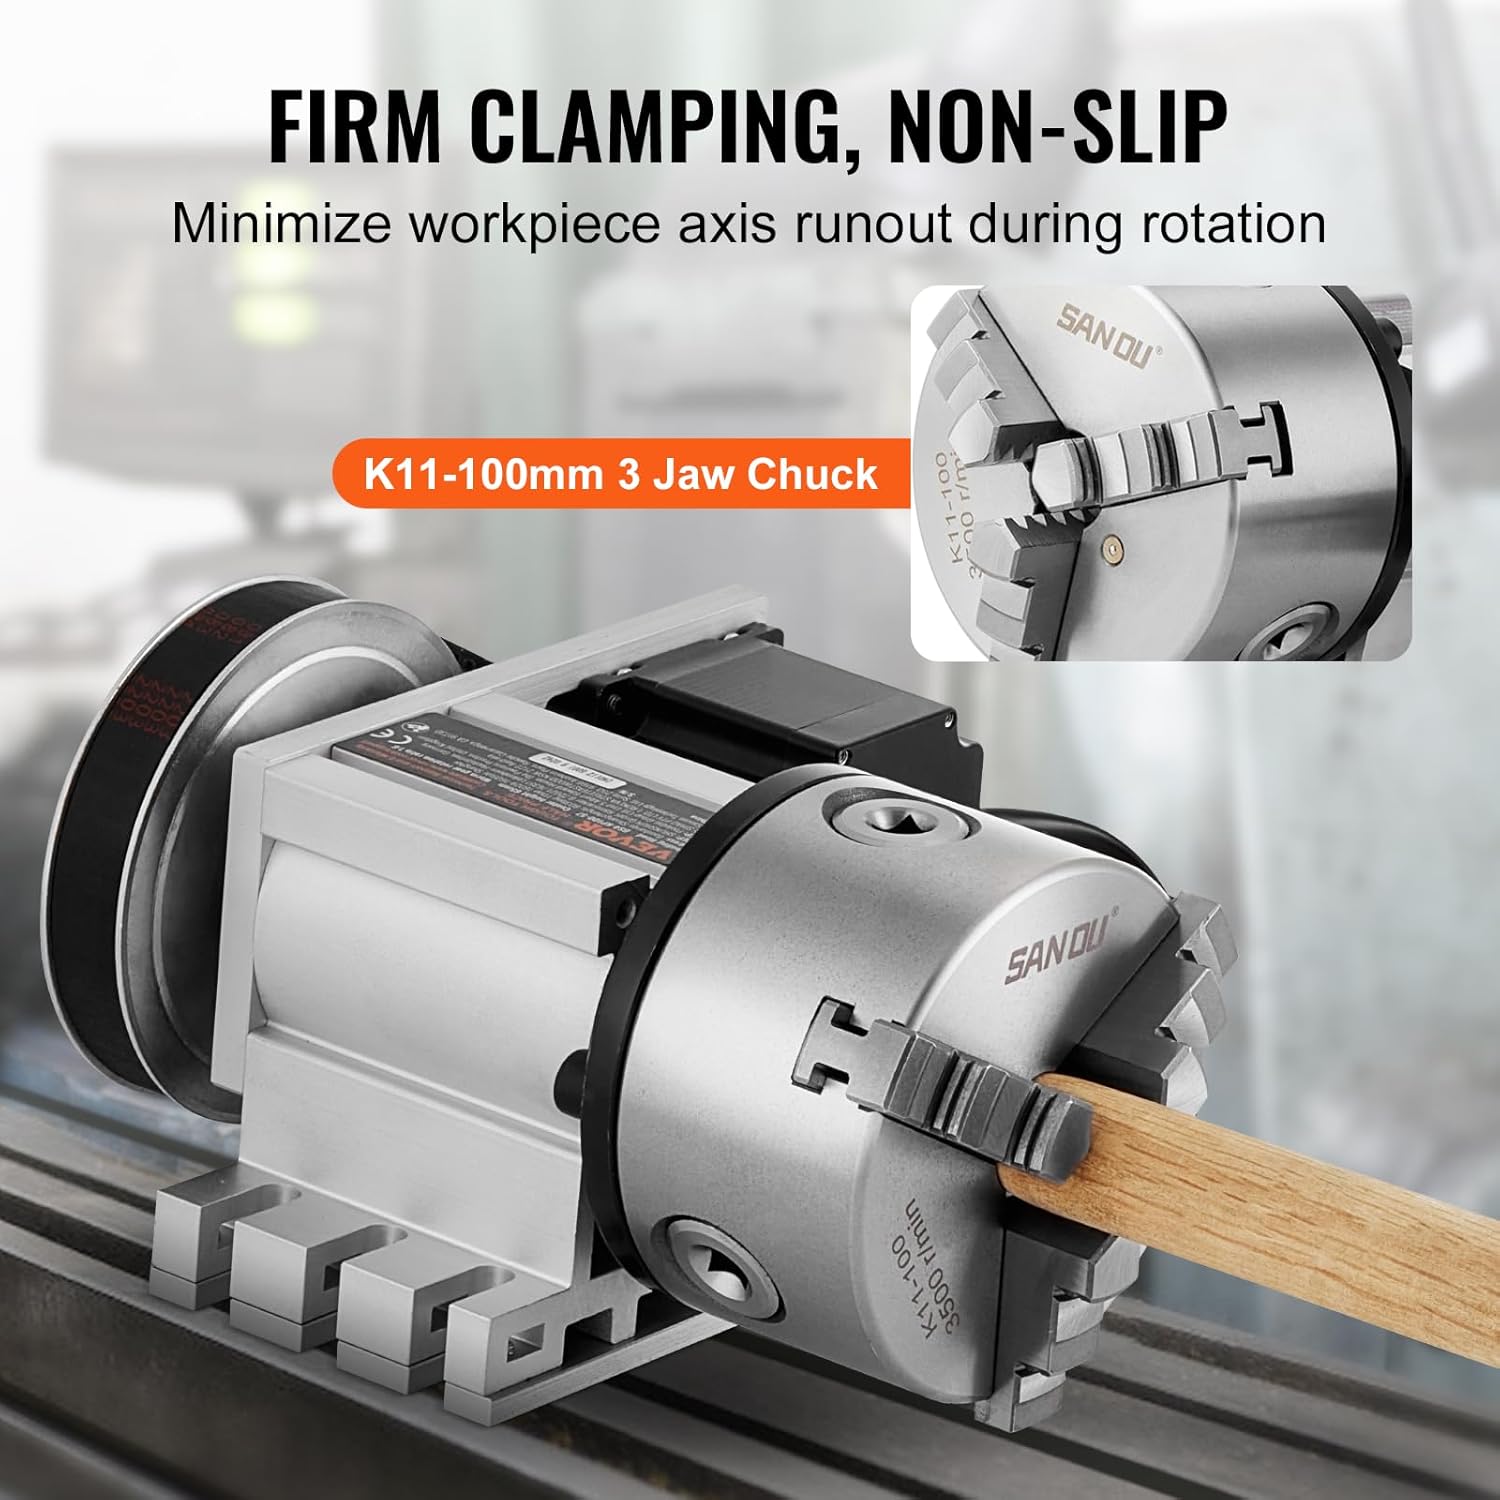
Image: A wooden workpiece firmly clamped within the 3-jaw chuck, demonstrating the secure grip for machining operations.
CNC Program Integration:
Integrate the dividing head into your CNC machine's control software. The 4th axis (A-axis) will allow you to program rotational movements. Utilize the 6:1 gear ratio for precise indexing and angular positioning. This ratio reduces the motor's speed, providing finer control over rotational increments and reducing vibrations.
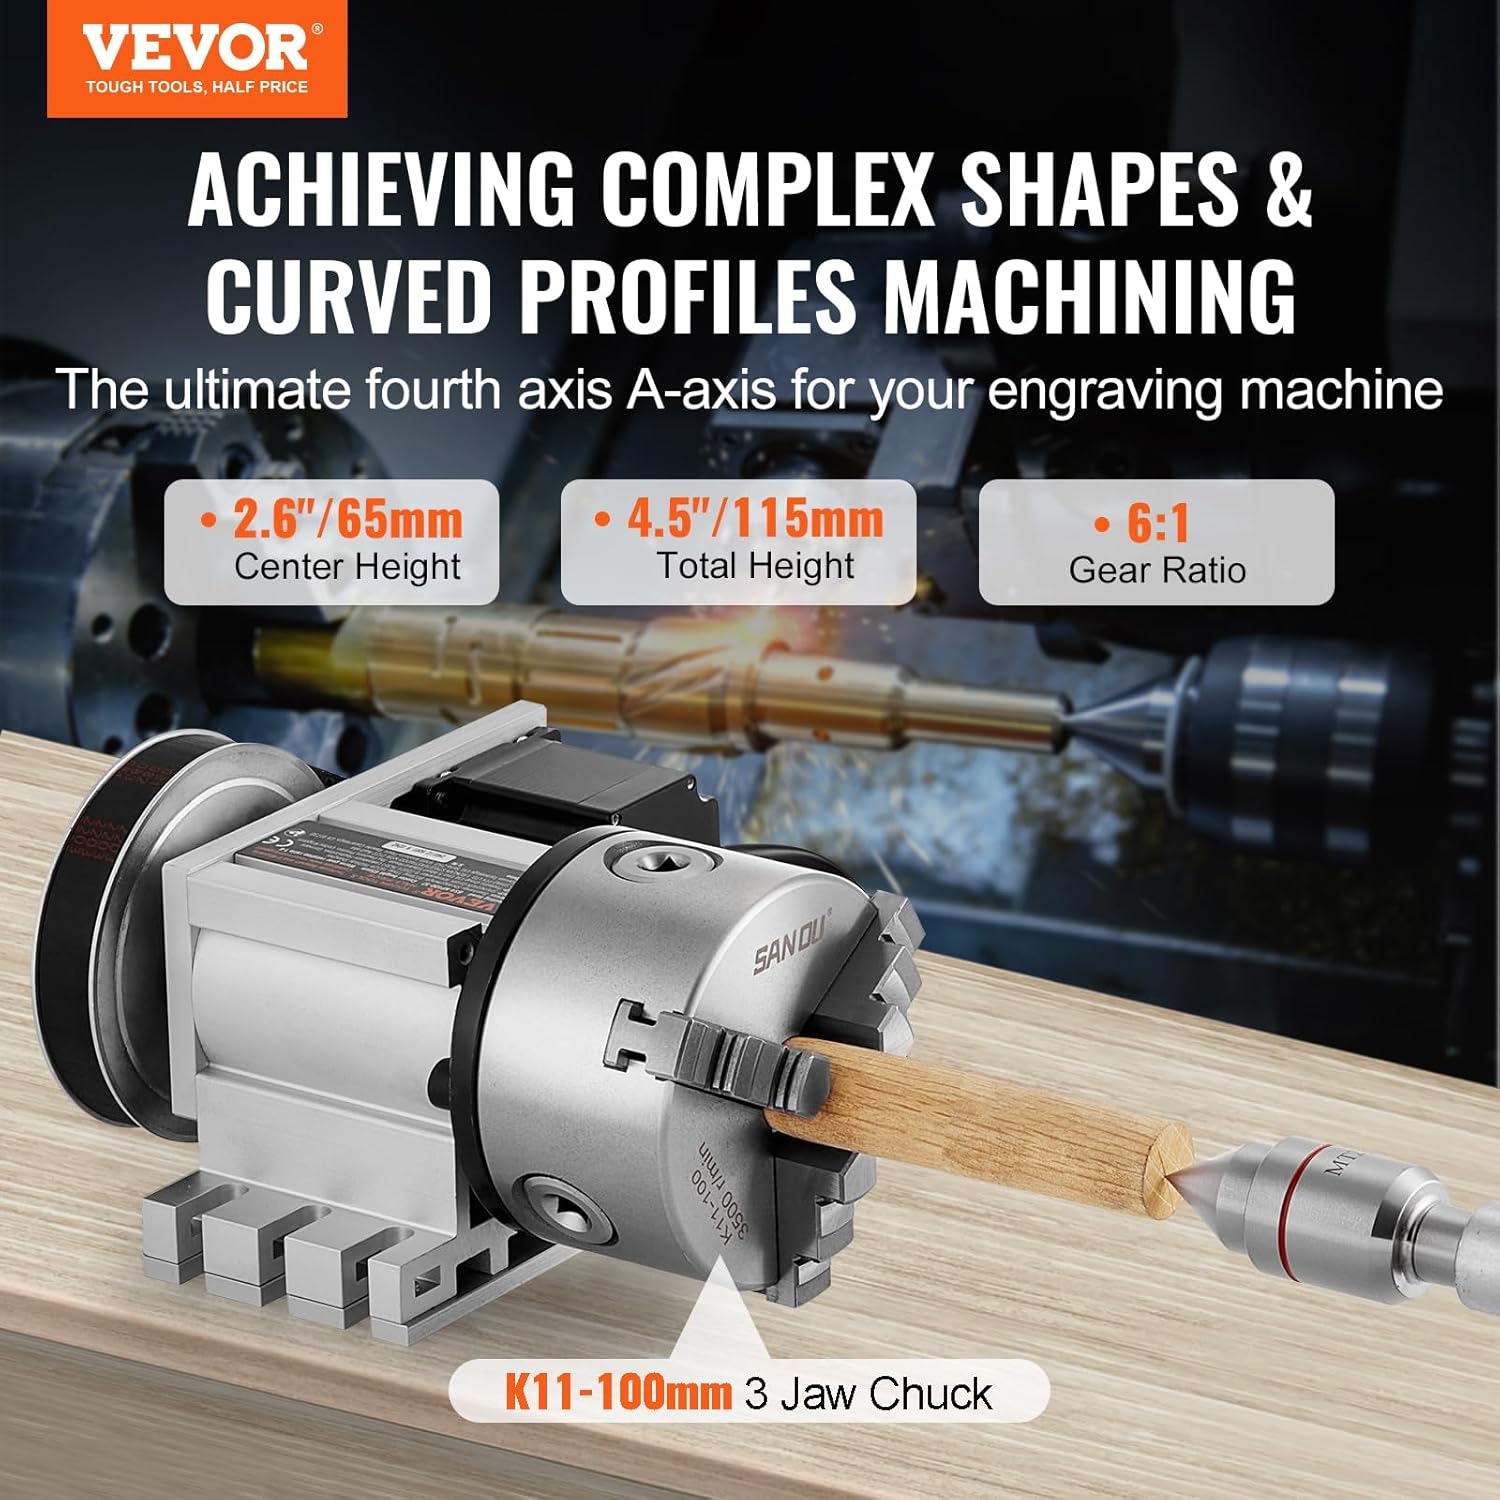
Image: The dividing head highlighting its 6:1 gear ratio, which enables accurate rotation and indexing of workpieces for complex machining.
Machining Operations:
Once the workpiece is secured and the CNC program is loaded, initiate your machining operations. The dividing head will rotate the workpiece to the programmed angles, allowing for multi-sided machining, helical cuts, and other complex geometries. Monitor the process to ensure smooth operation and desired results.
Maintenance
Cleaning:
After each use, clean the dividing head and chuck thoroughly to remove chips, dust, and coolant residue. Use a soft cloth and a suitable cleaning agent. Avoid abrasive materials that could damage the anodized surface.
Lubrication:
Regularly apply a thin layer of machine oil to the chuck jaws and other moving parts to ensure smooth operation and prevent rust. Refer to your CNC machine's lubrication guidelines for compatible oils.
Inspection:
Periodically inspect the dividing head for any signs of wear, loose fasteners, or damage. Pay close attention to the chuck jaws, gear mechanism, and stepper motor connections. Tighten any loose bolts and replace worn parts as necessary.
Storage:
When not in use, store the dividing head in a clean, dry environment to protect it from dust and moisture. Applying a light coat of rust preventative oil is recommended for long-term storage.
Troubleshooting
| Problem | Possible Cause | Solution |
|---|---|---|
| Dividing head not rotating | Loose or disconnected numerical control cable; Stepper motor fault; Incorrect CNC program settings. | Check cable connections; Consult CNC machine manual for motor diagnostics; Verify A-axis settings in CNC software. |
| Inaccurate indexing/rotation | Workpiece not securely clamped; Backlash in gear mechanism; Incorrect gear ratio setting in CNC software. | Re-clamp workpiece firmly; Inspect gear for wear and adjust if possible; Ensure 6:1 gear ratio is correctly configured in CNC software. |
| Excessive vibration/noise | Loose mounting bolts; Worn bearings in stepper motor or chuck; Unbalanced workpiece. | Tighten all mounting bolts; Inspect and replace worn components; Ensure workpiece is balanced or supported by tailstock. |
| Chuck jaws sticking | Accumulation of debris; Lack of lubrication; Rust. | Clean jaws thoroughly; Apply machine oil to jaw slides; Remove any rust with fine abrasive and lubricate. |
Warranty and Support
For information regarding product warranty, returns, or technical support, please refer to the official VEVOR website or contact VEVOR customer service directly. Keep your purchase receipt as proof of purchase for any warranty claims.
You can visit the official VEVOR store for more information: VEVOR Official Store
Related Documents - K11-100mm (BS4-KP100-57)
 |
VEVOR Semi-Universal Dividing Heads Operation Manual & Parts List This manual provides detailed information on the operation, construction, and parts list for VEVOR Semi-Universal Dividing Heads, including models BS-0, BS-1, and BS-2. It covers features, specifications, and application of change gears for milling spiral flutes. |
 |
VEVOR Variable Speed Mini Lathe Instruction Manual Comprehensive instruction manual for the VEVOR Variable Speed Mini Lathe, covering safety rules, product features, parts identification, grounding, adjustment, operation, gear mounting, and troubleshooting. |
 |
VEVOR Engraving Machine 4-Axis Chuck Combination User Guide This user guide provides essential maintenance instructions and operational steps for the VEVOR 4-axis engraving machine chuck combination. Learn how to properly lubricate, clean, and install the chuck for optimal performance and longevity. |
 |
VEVOR Variable Speed Mini Lathe Instruction Manual - 550W Precision Metal Lathe Comprehensive instruction manual for the VEVOR Variable Speed Mini Lathe (Model CJ1BA). Learn about its features, specifications (550W, 0-2500 RPM, 100mm chuck), safety guidelines, operation, maintenance, and troubleshooting for precision metalworking. |
 |
VEVOR Variable Speed Mini Lathe Instruction Manual This instruction manual provides essential information for the safe and effective operation of the VEVOR Variable Speed Mini Lathe. It covers safety guidelines, product specifications, operational procedures, and maintenance tips for various machining tasks. |
 |
VEVOR 4-Jaw Self-Centering Wood Chuck Manual & Specifications (KP2-3/4, KP96, KP965) Comprehensive manual and technical specifications for the VEVOR 4-Jaw Self-Centering Wood Chuck models KP2-3/4, KP96, and KP965. Includes descriptions, packing lists, safety precautions, mounting instructions, and maintenance tips. |
Ask a question about this manual
Ask about setup, troubleshooting, compatibility, parts, safety, or missing instructions. Manuals+ will review the question and use this page’s manual context to help answer it.