
1. Safety Instructions
Please read and understand all safety instructions before operating the Ingco 60W Adjustable Temperature Soldering Iron. Failure to follow these instructions may result in electric shock, fire, or serious injury.
- Electrical Safety: Ensure the power supply matches the specifications (220-240V ~ 50/60Hz). Do not use the soldering iron in wet conditions or near flammable liquids or gases. Always unplug the tool when not in use or before changing tips.
- Heat Hazard: The soldering iron tip reaches very high temperatures. Do not touch the tip or heating element. Allow the iron to cool completely before storing. Use the provided stand to prevent accidental contact and damage.
- Ventilation: Soldering fumes can be harmful. Always work in a well-ventilated area or use a fume extractor.
- Personal Protective Equipment: Wear safety glasses to protect your eyes from solder splashes. Avoid wearing loose clothing or jewelry that could get caught or come into contact with the hot tip.
- Children and Bystanders: Keep children and unauthorized persons away from the work area. Store the tool out of reach of children.
- Proper Use: Use the soldering iron only for its intended purpose. Do not modify the tool. If the power cord is damaged, it must be replaced by a qualified service technician to avoid hazards.
2. Product Overview
The Ingco 60W Adjustable Temperature Soldering Iron, Model SI016923 HT2, is a reliable tool for various soldering applications. It features precise temperature control and a quick heating ceramic element.
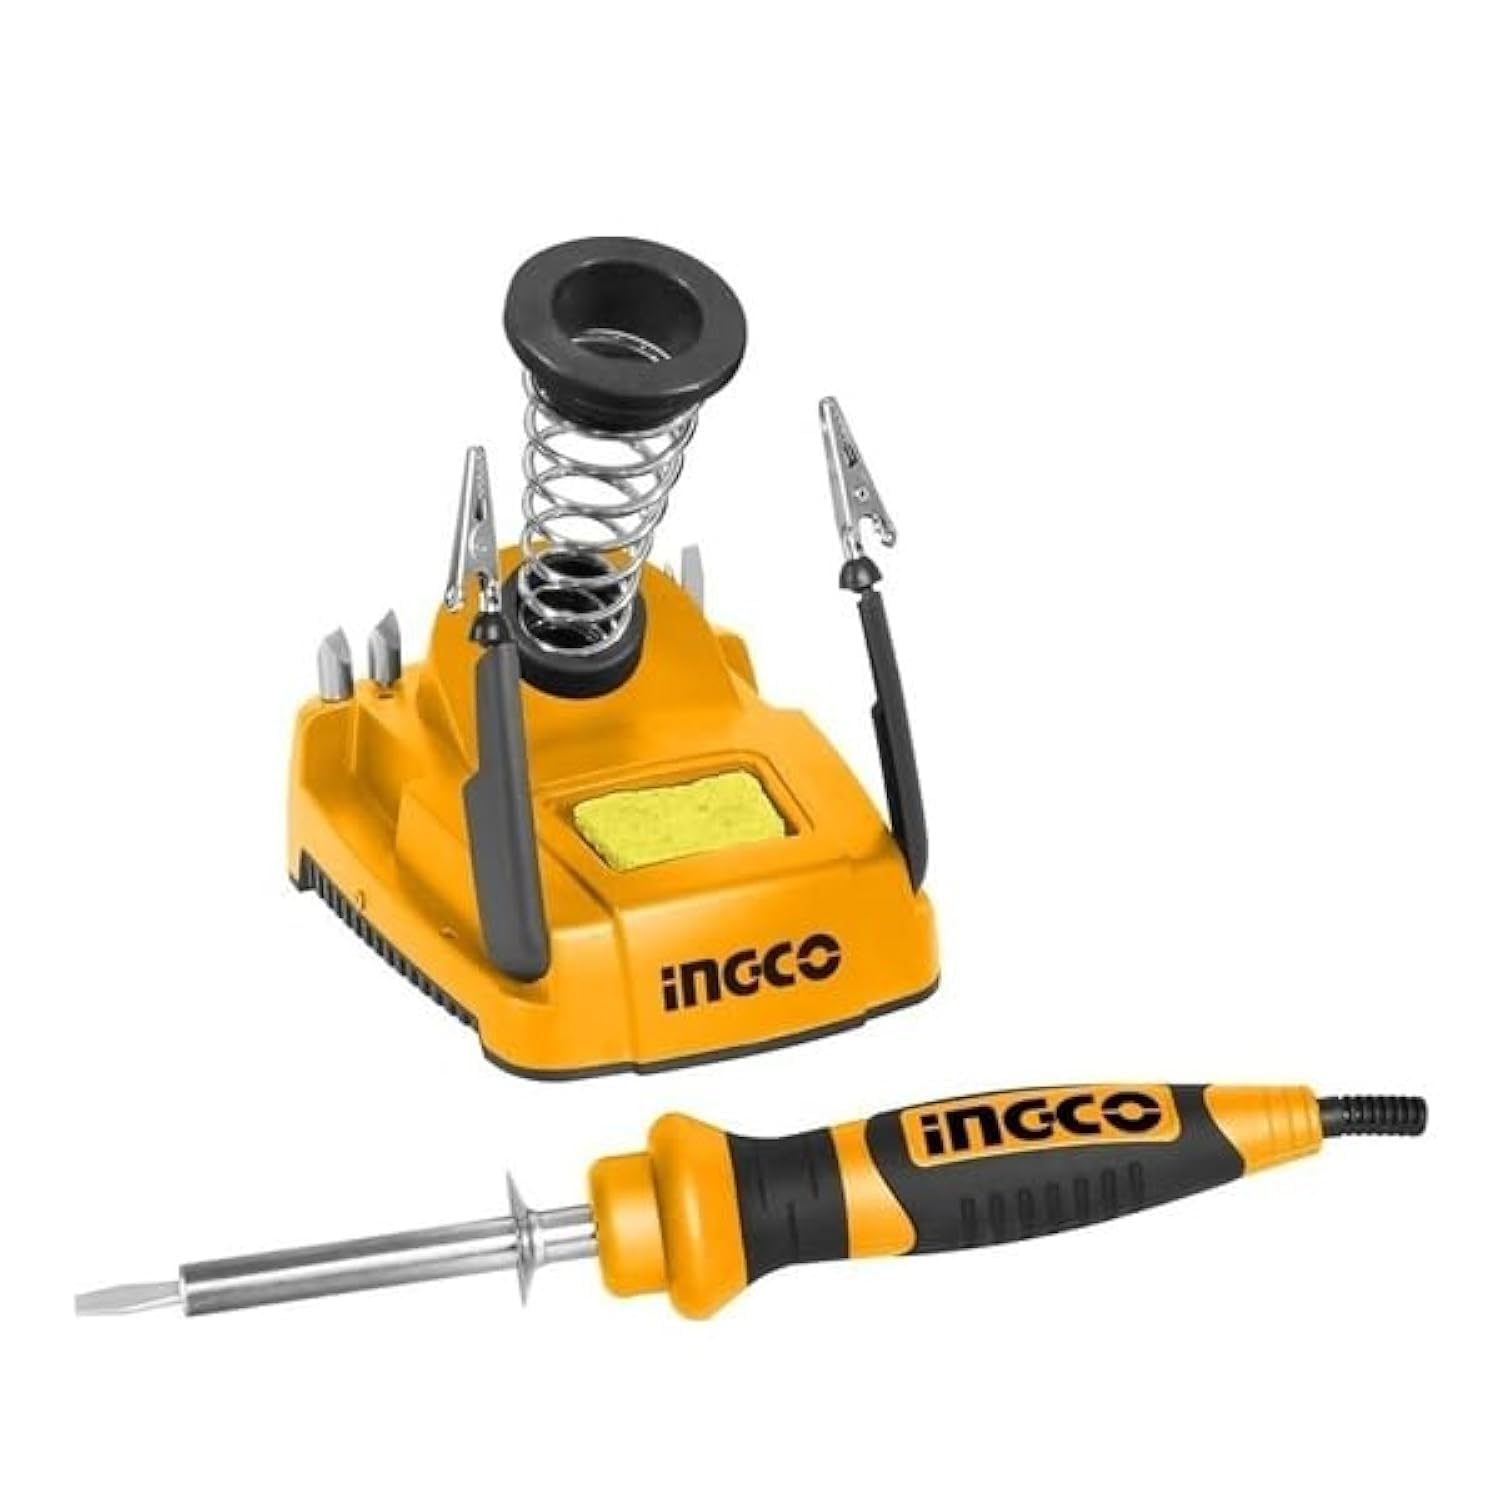
Figure 1: Ingco 60W Adjustable Temperature Soldering Iron with Stand. This image shows the main soldering iron unit, its integrated stand, and the power cord. The iron features a comfortable handle and a fine tip suitable for precision work.
Key Features:
- Adjustable Temperature: The tip temperature can be precisely adjusted via a rotary thermostat.
- Fast Heating: Equipped with an integrated ceramic heating element for rapid and stable heat-up.
- Digital Display: Provides a clear digital readout for temperature monitoring.
- Durable Tip: Features a straight-head tip with a replaceable, long-lasting protection cover.
- Convenient Stand: Includes a holder piece for safe placement during and after use.
3. Specifications
| Feature | Specification |
|---|---|
| Model | SI016923 HT2 |
| Voltage | 220-240V ~ 50/60Hz |
| Input Power | 60W |
| Preheating Time | 1-2 minutes |
| Display Type | LED Digital |
| Heating Element | Integrated Ceramic |
| Tip Type | Straight-head, Adjustable Temperature |
| Product Dimensions | 10 x 20 x 37 cm |
| Item Weight | 2.38 kg |
| Number of Items | 1 |
| Number of Channels | 1 |
4. Setup
Follow these steps to set up your Ingco Soldering Iron for first use:
- Unpack: Carefully remove all components from the packaging. Ensure the soldering iron, stand, and any included accessories are present and undamaged.
- Placement: Place the soldering iron stand on a stable, heat-resistant, and non-flammable surface. Ensure there is adequate space around your work area for safety and ventilation.
- Power Connection: Plug the soldering iron's power cord into a grounded electrical outlet that matches the specified voltage (220-240V).
- Initial Heating: Place the soldering iron securely in its stand. Turn on the power. The digital display will show the current temperature. Allow 1-2 minutes for the iron to reach the desired operating temperature.
- Tinning the Tip: Before first use, or after changing a tip, it is crucial to "tin" the tip. Apply a small amount of solder to the hot tip until it is fully coated. This protects the tip from oxidation and ensures efficient heat transfer.
5. Operating Instructions
Operating the Ingco Soldering Iron effectively requires proper technique and safety awareness.
Temperature Adjustment:
- The soldering iron features a rotary thermostat for temperature control. Rotate the dial on the handle to increase or decrease the desired temperature.
- Monitor the digital LED display for the current temperature reading. Allow a few moments for the iron to stabilize at the new setting.
Soldering Technique:
- Prepare Components: Ensure the components and PCB pads to be soldered are clean and free of dirt or oxidation.
- Heat Joint: Touch the hot soldering iron tip to both the component lead and the PCB pad simultaneously. Ensure good contact for efficient heat transfer.
- Apply Solder: After a few seconds, when the joint is hot enough, apply solder to the opposite side of the joint from the iron tip. The solder should flow smoothly and quickly around the joint, forming a shiny, conical connection. Do not apply solder directly to the iron tip.
- Remove Solder and Iron: Once the solder has flowed correctly, first remove the solder wire, then remove the soldering iron from the joint.
- Allow to Cool: Let the joint cool naturally without disturbing it. A good solder joint will appear shiny and smooth.
During Breaks:
Always place the soldering iron securely in its stand during short breaks to prevent accidental burns or damage to your workspace.
6. Maintenance
Regular maintenance ensures the longevity and optimal performance of your soldering iron.
- Tip Cleaning: Regularly clean the soldering tip using a damp sponge or brass wool. This removes excess solder and oxidation, maintaining efficient heat transfer. Always re-tin the tip after cleaning.
- Tip Replacement: If the tip becomes pitted, corroded, or no longer accepts solder, it should be replaced. Ensure the iron is unplugged and cool before attempting to replace the tip. Refer to the product specifications for compatible replacement tips.
- General Cleaning: Keep the body of the soldering iron and the stand clean. Wipe with a dry cloth. Do not use abrasive cleaners or solvents.
- Storage: When not in use, ensure the soldering iron is unplugged and completely cool. Store it in a dry, safe place, away from moisture and out of reach of children.
7. Troubleshooting
If you encounter issues with your Ingco Soldering Iron, refer to the following common problems and solutions:
| Problem | Possible Cause | Solution |
|---|---|---|
| Iron not heating up | Not plugged in; Power outlet fault; Damaged heating element; Loose connection. | Check power connection; Test outlet with another device; Contact customer support if heating element is suspected to be faulty. |
| Solder not melting or flowing poorly | Tip is dirty/oxidized; Incorrect temperature setting; Insufficient contact with joint; Old/poor quality solder. | Clean and re-tin the tip; Increase temperature setting; Ensure good contact with both components; Use fresh, good quality solder. |
| Tip discolors quickly or corrodes | Lack of tinning; Too high temperature; Aggressive flux. | Always tin the tip after cleaning; Reduce temperature if possible; Use appropriate flux for your solder. |
| Digital display not working | Internal electrical fault. | Unplug and re-plug the iron. If the issue persists, contact customer support. |
If you experience a problem not listed here, or if the suggested solutions do not resolve the issue, please contact Ingco customer support for further assistance.
8. Warranty and Support
Ingco products are manufactured to high-quality standards. For information regarding warranty coverage, please refer to the warranty card included with your purchase or visit the official Ingco website. Keep your purchase receipt as proof of purchase for any warranty claims.
For technical support, replacement parts, or service inquiries, please contact your local Ingco dealer or authorized service center. You can find contact information on the official Ingco website or through your product retailer.
Manufacturer: Ingco
First Available Date: February 19, 2024