Rcovasc B0CVVTQB93
Rcovasc Electric Powered Slot Car Race Track Set User Manual
Model: B0CVVTQB93
Introduction
This manual provides detailed instructions for the assembly, operation, maintenance, and troubleshooting of your Rcovasc Electric Powered Slot Car Race Track Set. Please read this manual thoroughly before use to ensure safe and optimal performance.
The set includes a race track, two electric-powered cars (red and green), foundations, curve walls, and Hot Wheels track components.
What's in the Box
- Slot car race track set
- 2 electric powered cars (Red and Green)
- Foundations for track support
- Curve walls to prevent cars from flying off
- Power adapter
- 2 Remote controllers

Setup Instructions
Follow these steps to assemble your slot car race track:
- Unpack Components: Carefully remove all track pieces, cars, controllers, and accessories from the packaging.
- Lay Out Track Pieces: Refer to the assembly diagram to connect the track pieces. Ensure all connections are secure and flat. The set includes curved (A) and straight (B) track sections, along with a power track (D).
- Install Foundations and Walls: Attach the cylindrical brackets (P1, P2, P3) to the underside of the track where indicated to provide stability, especially for elevated sections and curves. Secure the curve walls along the outer edges of the curved track sections to prevent cars from derailing.
- Connect Power Track: Integrate the power track section (D) into your layout. This section provides power to the cars.
- Connect Power Adapter: Plug the power adapter into the designated port on the power track section. Then, plug the adapter into a standard electrical outlet.
- Connect Controllers: Insert the controller cables into the corresponding ports on the power track section.
- Place Cars on Track: Carefully place the red and green slot cars onto the track, ensuring the guide pins on the bottom of the cars are correctly seated in the track slots.

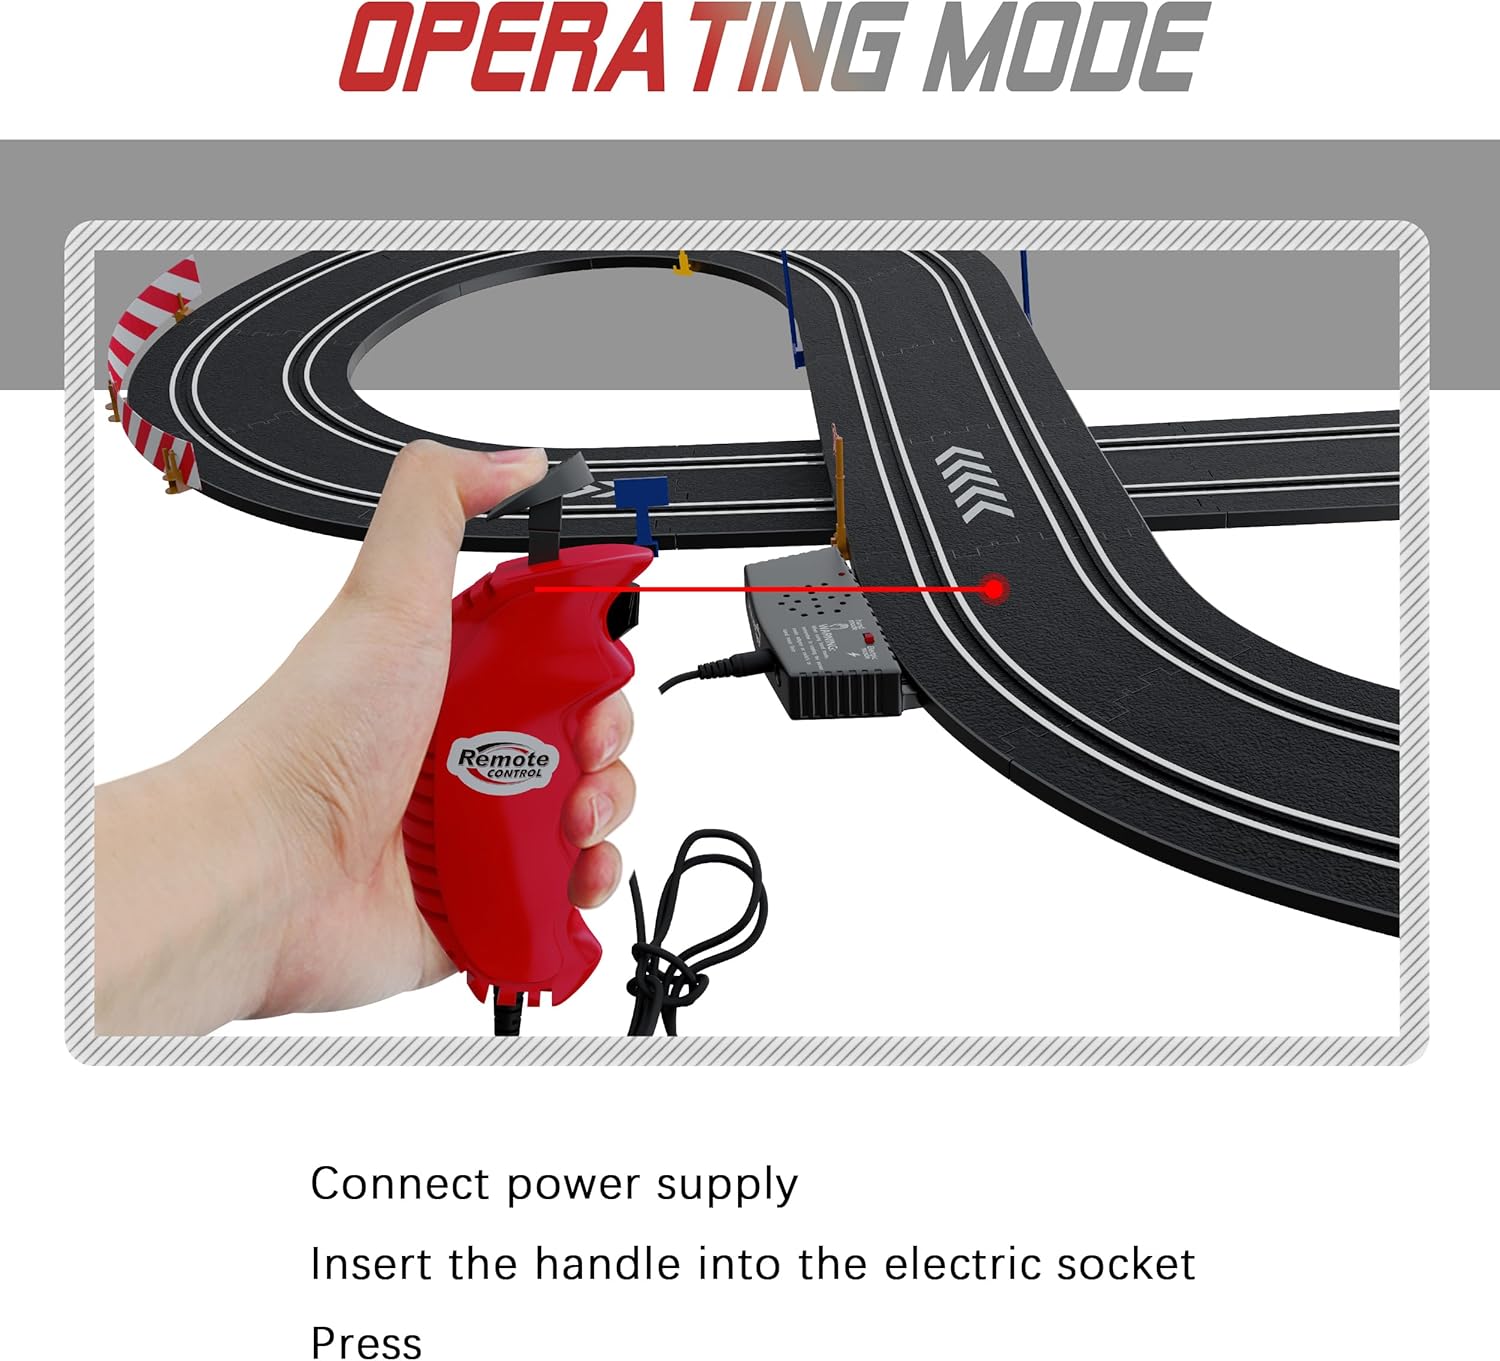
Operating Instructions
Your slot car race track offers two operation methods: electric and manual.
Electric Mode
- Ensure the power adapter is connected to the power track and a wall outlet.
- Confirm the controllers are securely plugged into the power track.
- Place the cars on the track.
- Press the trigger on your remote controller to accelerate your car. Release the trigger to slow down.
- The electric booster button on the controller can be used for additional speed on straight sections.
Manual Mode (Hand-Crank)
For manual operation, you will use the hand-crank feature on the controllers to generate power for the cars. This mode does not require the power adapter to be plugged into a wall outlet, but the controllers must still be connected to the power track.
- Ensure the power adapter is unplugged from the wall outlet.
- Connect the controllers to the power track.
- Rotate the hand-crank on your controller to generate power and move your car. The faster you crank, the faster the car will go.
Important: The speed limiter helps maintain a suitable speed for completing loops and navigating curves without derailing.
Maintenance
Proper maintenance ensures the longevity and performance of your race track set.
- Track Cleaning: Regularly wipe down track surfaces with a clean, dry cloth to remove dust and debris. This ensures good electrical contact for the cars.
- Car Brushes: The brushes on the bottom of the cars are crucial for power pickup. Ensure they are clean and positioned correctly to make good contact with the track's metal rails. Refer to the diagram for correct brush usage.
- Storage: When not in use, disassemble the track and store all components in their original packaging or a suitable container to prevent damage. Store in a cool, dry place away from direct sunlight.
- Connections: Periodically check all track connections and controller plugs to ensure they are secure and free from damage.

Troubleshooting
| Problem | Possible Cause | Solution |
|---|---|---|
| Car not moving or moving slowly. |
|
|
| Car derails frequently. |
|
|
| One car works, the other doesn't. |
|
|
Specifications
- Model: B0CVVTQB93
- Brand: Rcovasc
- Package Dimensions: 13.94 x 8.66 x 3.23 inches
- Item Weight: 2.44 pounds
- Recommended Age: 36 months - 4 years (Manufacturer recommended)
- Power Source: Electric (via power adapter) or Manual (hand-crank)
- Cars Included: 2 (Red and Green)
Warranty and Support
For warranty information or technical support, please contact Rcovasc customer service through the retailer where the product was purchased. Keep your purchase receipt as proof of purchase.
You can also visit the official Rcovasc store on Amazon for more information and contact options: Rcovasc Store
no relevant documents
Ask a question about this manual
Ask about setup, troubleshooting, compatibility, parts, safety, or missing instructions. Manuals+ will review the question and use this page’s manual context to help answer it.