MOWOX POWER MWSG1012
MOWOX POWER 10' x 12' Gazebo with Mosquito Netting Instruction Manual
Model: MWSG1012 | Brand: MOWOX POWER
Introduction
This manual provides detailed instructions for the assembly, operation, maintenance, and troubleshooting of your MOWOX POWER 10' x 12' Gazebo with Mosquito Netting. Please read this manual thoroughly before assembly and use to ensure proper setup and safe operation.
Important Safety Information
- Always assemble and disassemble the gazebo on a stable, flat surface.
- Use the provided spikes to secure the gazebo to the ground. Exercise caution when handling spikes to prevent injury.
- During windy weather, ensure the gazebo is securely anchored. Consider disassembling in extreme weather conditions.
- Keep children and pets away from the assembly area.
- Do not use open flames or heating appliances inside the gazebo.
Components List
Please verify that all parts listed in your product's packaging are present before beginning assembly. Refer to the detailed parts diagram included in your physical package for identification.
Typical components include:
- Main Frame Poles (Legs, Beams, Roof Supports)
- Roof Fabric (Main Canopy, Ventilated Top)
- Mosquito Netting Curtains
- Ground Stakes/Spikes
- Reinforcement Ropes
- Assembly Hardware (Bolts, Screws, Washers, Nuts)
- Tools (Wrench, Hex Key - usually included)
Assembly Instructions
Assembly typically requires two people. Follow the steps carefully, referring to the diagrams in your physical manual for visual guidance.
Step 1: Unpack and Identify Parts
Carefully unpack all components and lay them out. Identify each part using the provided parts list and diagrams. Ensure all hardware is present.
Step 2: Assemble the Main Frame
Begin by connecting the main support legs and horizontal beams. Ensure all connections are secure but do not fully tighten bolts until the entire frame is assembled. The frame is constructed from high-quality steel with a rust-resistant coating, and support legs are thickened for stability.

Image: Close-up of the textured alloy steel frame, highlighting its robust construction.
Step 3: Install the Roof Structure
Attach the roof support poles to the main frame. This gazebo features a double-layer roof designed for ventilation and includes an anti-mosquito netting layer between the two fabric layers.

Image: Illustration of the double-ventilated roof, demonstrating airflow and mosquito protection.
Step 4: Attach the Canopy Fabric
Carefully spread the main canopy fabric over the roof structure. Ensure it is centered and evenly distributed before securing it to the frame. The canopy is made from durable PA coated fabric, offering UV protection and 300mm H2O waterproofness.

Image: Details of the canopy fabric, highlighting waterproof, UV protective, and high-quality polyester features, along with a ceiling hook.
Step 5: Install Mosquito Netting
Attach the mosquito netting curtains to the designated hooks or rails on the gazebo frame. These curtains are designed to keep out insects and feature zipper closures for easy access.
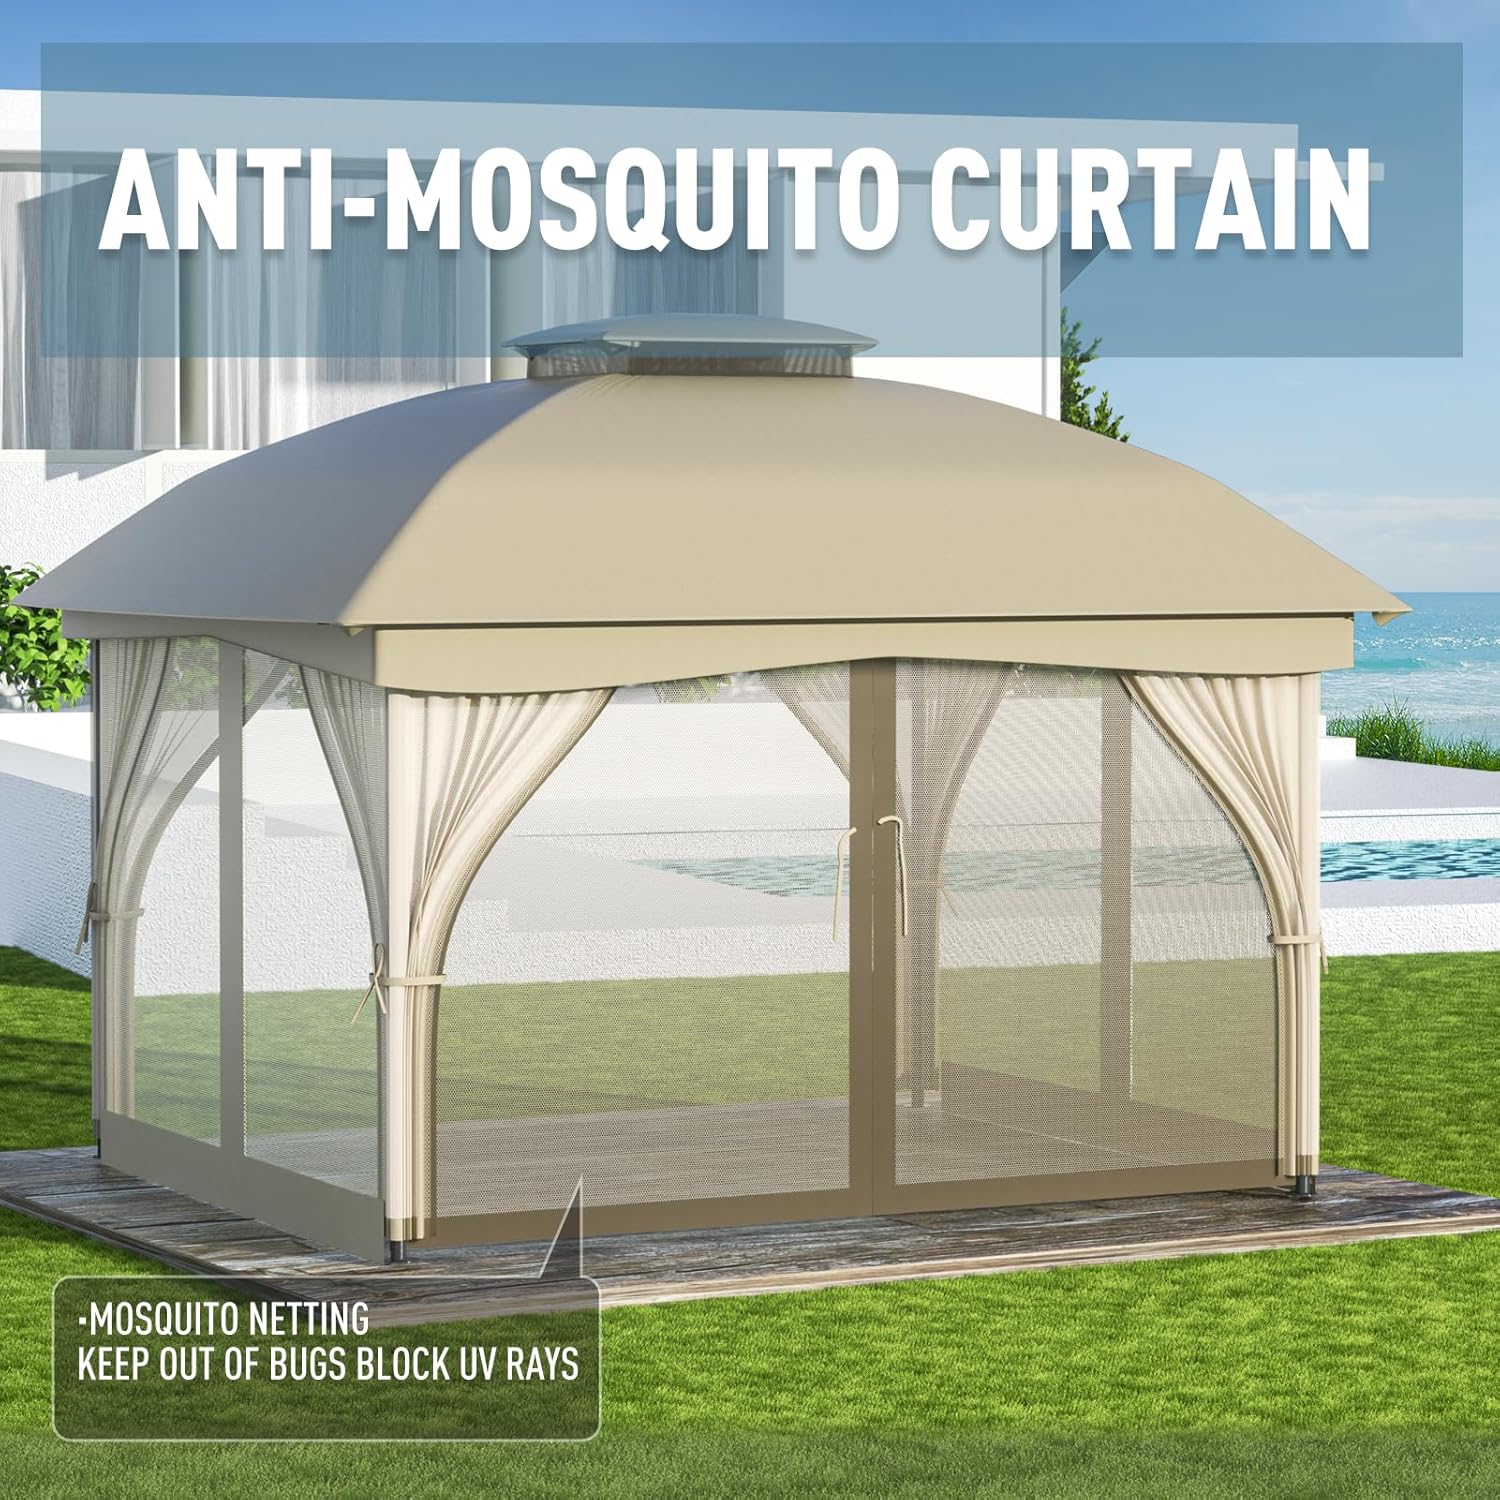
Image: Gazebo with anti-mosquito curtains, illustrating their function in bug prevention and UV protection.
Step 6: Secure the Gazebo
Once the gazebo is fully assembled, secure it to the ground using the appropriate fixing options for your surface:
- For Solid Ground: Use expanding spikes to anchor the gazebo base plates.
- For Soft Ground (e.g., Grass): Use floor spikes to secure the gazebo.
- Additional Reinforcement: Utilize the provided 4-corner fixing ropes for extra stability, especially in windy conditions.

Image: Visual guide to the three available fixing options for securing the gazebo.
Step 7: Final Tightening
Once all components are in place and the gazebo is secured, go back and fully tighten all bolts and screws. Do not overtighten.
Operating Your Gazebo
Mosquito Netting Use
The integrated mosquito netting can be zipped closed to create an enclosed space, protecting you from insects. When not needed, the netting can be tied back to the gazebo legs using the attached straps.
Ventilation System
The double-layer roof design promotes air circulation, reducing heat buildup inside the gazebo and enhancing comfort. This European-style ventilation helps maintain a pleasant environment.
Ceiling Hook
A ceiling hook is provided at the center of the gazebo roof. This can be used for hanging lightweight decorative items or a small, battery-operated light fixture. Do not exceed the weight limit specified in your physical manual.
Care and Maintenance
Cleaning the Canopy Fabric
Clean the canopy fabric periodically with mild soap and water. Use a soft brush or cloth. Rinse thoroughly and allow to air dry completely before folding or storing. Do not use harsh chemicals or abrasive cleaners, as these can damage the PA coating and UV protection.
Frame Maintenance
Inspect the steel frame regularly for any signs of rust or damage. Clean the frame with a damp cloth. If rust spots appear, clean them and apply a rust-inhibiting paint to prevent further corrosion. Ensure all bolts and connections remain tight.
Mosquito Netting Care
The mosquito netting can be gently hand-washed with mild soap and water. Avoid machine washing or using bleach. Ensure it is completely dry before zipping or storing to prevent mildew.
Winter Storage
For prolonged lifespan, it is recommended to disassemble and store the gazebo in a dry, sheltered location during winter months or periods of severe weather.
Troubleshooting
- Gazebo feels unstable after assembly:
Ensure all bolts and screws are fully tightened. Verify that the gazebo is properly anchored to the ground using the appropriate spikes or ropes for your surface type. Recheck that all frame components are correctly connected according to the assembly diagrams.
- Water pooling on the roof:
While the canopy is waterproof, prolonged heavy rain can sometimes lead to minor pooling if the fabric sags. Ensure the canopy is tautly stretched over the frame. Check for any bent roof supports that might cause sagging. In very heavy rain, it's advisable to periodically push up on the underside of the canopy to release accumulated water.
- Mosquito netting does not close completely:
Check for any obstructions in the zipper path. Ensure the netting is correctly attached to all hooks or rings along the frame. If the netting appears too short, verify it is installed on the correct side and orientation.
- Difficulty during assembly:
Assembly can be complex and is often easier with two people. Refer to the detailed diagrams in your physical manual. Ensure all parts are correctly oriented before attempting to connect them. Do not force parts together; if they don't fit, recheck the instructions and part numbers.
Product Specifications
| Brand | MOWOX POWER |
| Model Number | MWSG1012 |
| Product Dimensions | 144"L x 120"W x 112"H (12'L x 10'W x 9.33'H) |
| Floor Area | 120 Square Feet |
| Item Weight | 61.7 Pounds |
| Frame Material | Alloy Steel |
| Canopy Material | PA Coated Polyester Fabric |
| Water Resistance Level | Waterproof (300mm H2O) |
| UV Protection | Yes |
| Roof Type | Double Ventilated |
| Assembly Required | Yes |
| Color | Khaki |

Image: Dimensional drawing of the gazebo, illustrating its overall size and proportions.
Warranty and Customer Support
Warranty Information
Specific warranty details are typically provided with your purchase documentation. Please refer to the warranty card or contact the seller for information regarding coverage and duration.
Customer Support
If you have any questions, require assistance with assembly, or need replacement parts, please contact MOWOX POWER customer support. You can typically reach us through the platform where you made your purchase or via the contact information provided in your product packaging. We aim to respond to inquiries within 24 hours.
For online purchases, you may also visit the MOWOX POWER Store on Amazon for additional product information and support.
Related Documents - MWSG1012
 |
10x12 Outdoor Gazebo Tent: Assembly, Usage, and Care Guide Comprehensive guide for the 10x12 Outdoor Gazebo Tent, covering assembly steps, usage tips for sun and rain protection, and detailed care instructions for cleaning fabric and frame. Ideal for backyards, gardens, and decks. |
 |
HOTEEL 12x20 Heavy Duty Outdoor Patio Gazebo Assembly Instructions Comprehensive assembly guide for the HOTEEL 12x20 Heavy Duty Outdoor Patio Gazebo. Includes a detailed parts list and step-by-step instructions with textual descriptions of diagrams for setting up your gazebo, complete with mosquito netting and curtains. |
 |
Outsunny 84C-517V00 Gazebo Assembly Instructions and Safety Guide Comprehensive assembly instructions and safety guidelines for the Outsunny 84C-517V00 gazebo. Includes parts list, step-by-step assembly diagrams described textually, and contact information. |
 |
Outsunny Hexagonal Gazebo Assembly Instructions Step-by-step guide for assembling the Outsunny hexagonal gazebo, including parts list and assembly diagrams. |
 |
10 ft. x 12 ft. Aluminum Hardtop Gazebo with Netting Instruction Manual Comprehensive instruction manual for assembling and maintaining the 10 ft. x 12 ft. Aluminum Hardtop Gazebo with Netting by Sunjoy. Includes safety guidelines, parts list, step-by-step assembly instructions, and warranty information. |
 |
Domi 10'x12' Metal Patio Gazebo with Resin Roof Assembly Manual LGMZ1715 Assembly manual for the Domi 10'x12' Metal Patio Gazebo with Resin Roof, model LGMZ1715. Provides detailed instructions and parts list for construction of this outdoor structure. |
Ask a question about this manual
Ask about setup, troubleshooting, compatibility, parts, safety, or missing instructions. Manuals+ will review the question and use this page’s manual context to help answer it.