1. Product Overview
The SUPERJARE Bakers Rack with Power Outlets is a versatile kitchen storage solution designed to organize appliances and kitchen essentials efficiently. Featuring a spacious desktop, adjustable shelving, integrated power outlets, and convenient S-shaped hooks, this rack enhances functionality and organization in your kitchen or other living spaces.

Image: The SUPERJARE Bakers Rack with Power Outlets, displaying its multi-tiered design, integrated power strip, and various kitchen items organized on its shelves.
2. Assembly Instructions
Assembly of your SUPERJARE Bakers Rack is designed to be straightforward. All necessary hardware and clear, numbered instructions are included to ensure a stress-free setup process.
2.1 Key Components
- Sturdy steel frame components
- Durable particleboard shelves
- Integrated power strip with 3 AC outlets and 1 safe switch
- 6 S-shaped hooks for hanging utensils or mugs
- Anti-tip device for enhanced stability
- Adjustable feet for leveling on uneven surfaces
2.2 Assembly Steps
- Unpack all components and verify against the parts list in the included manual.
- Attach the steel frame components using the provided screws and tools. Ensure all connections are secure.
- Install the particleboard shelves into the designated slots on the frame. The middle shelf is adjustable to two different height levels.
- Secure the integrated power strip to the designated area on the back panel.
- Attach the S-shaped hooks to the side bars as desired for hanging items.
- Install the anti-tip device to the top rear of the rack and secure it to a wall for maximum stability.
- Adjust the leveling feet at the bottom of the rack to ensure it stands stable and level on your floor.

Image: A detailed view highlighting the anti-tip device for wall attachment, the six S-shaped hooks for hanging, and the adjustable feet for stability on uneven floors.
Assembly Video Guide
Video: An official product video demonstrating the assembly process and showcasing the features of the SUPERJARE Kitchen Bakers Rack with Power Outlet. This video provides a visual guide to help with setup.
3. Operating Instructions
3.1 Power Outlets
The bakers rack includes a built-in power strip with 3 AC outlets and 1 safe switch, providing convenient access to power for your kitchen appliances. The power cord is 6.5 feet long, offering flexibility in placement.
- To use: Plug the rack's main power cord into a grounded wall outlet.
- Powering appliances: Plug your coffee machine, blender, microwave, or other appliances directly into the outlets on the rack.
- Safety switch: Use the integrated safe switch to turn power on or off to all connected devices simultaneously. This helps conserve energy and provides an easy way to power down appliances when not in use.

Image: A close-up view of the integrated power strip, showing three AC outlets and a red on/off safety switch, with appliances plugged in.
3.2 Adjustable Middle Shelf
The middle shelf of the bakers rack can be adjusted to two different height levels, allowing you to customize storage space for items of varying sizes, from microwaves to spice collections.
- To adjust: Refer to the assembly manual for specific instructions on how to safely reposition the middle shelf. Ensure the shelf is securely locked into place at the desired height before placing items on it.
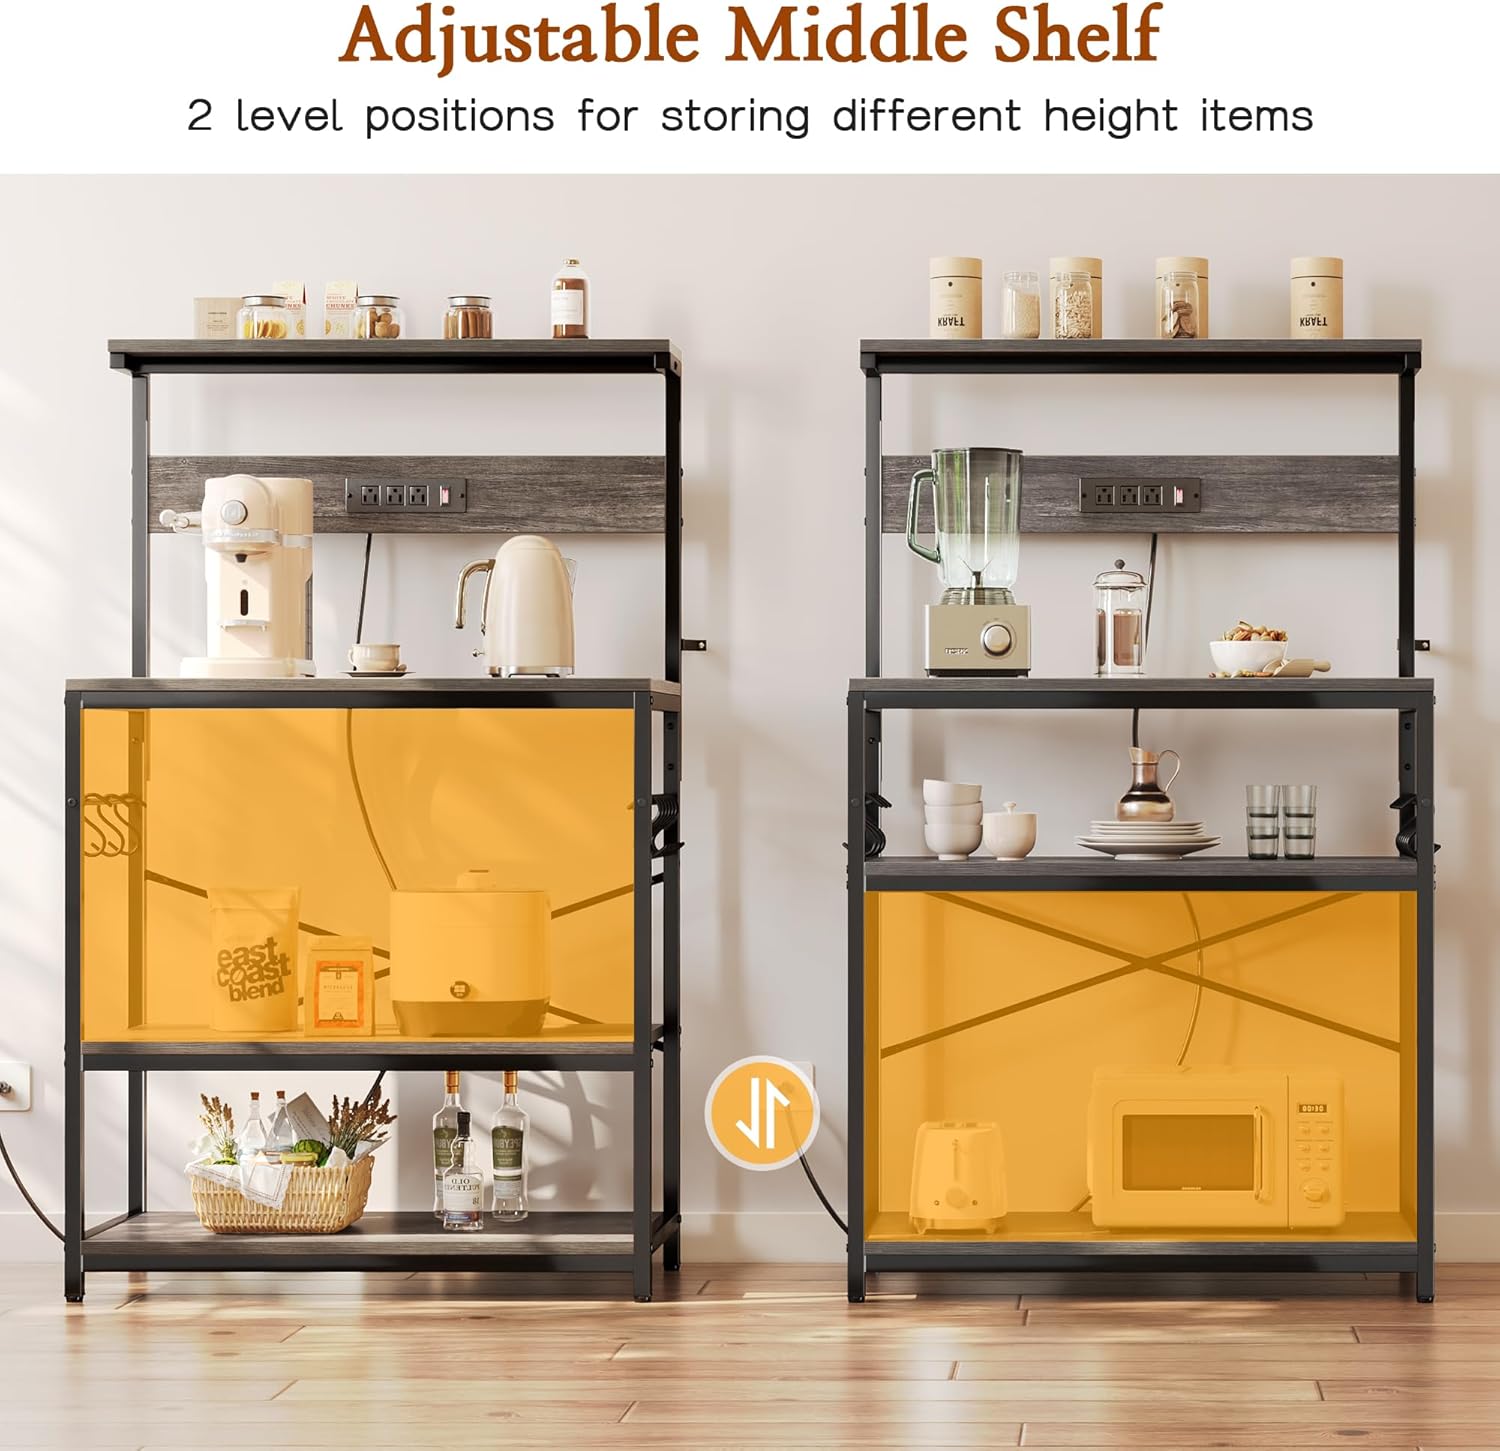
Image: A visual representation demonstrating the two possible height adjustments for the middle shelf, allowing for flexible storage of different-sized items.
3.3 S-Shaped Hooks
Six S-shaped hooks are provided to hang kitchen tools, mugs, or towels, keeping them within easy reach and helping to maintain an organized space.
Usage Example Video
Video: A user review showcasing the bakers rack set up as a coffee station, highlighting the convenience of the integrated power outlets for various appliances.
4. Maintenance
To ensure the longevity and appearance of your bakers rack, follow these simple maintenance guidelines:
- Cleaning: Wipe surfaces with a soft, damp cloth. Avoid abrasive cleaners or harsh chemicals that may damage the finish.
- Spills: Clean up spills immediately to prevent staining, especially on the engineered wood surfaces.
- Stability Check: Periodically check all screws and connections to ensure they remain tight. Re-tighten if necessary.
- Weight Distribution: Distribute weight evenly across the shelves to maintain stability and prevent warping.
5. Troubleshooting
If you encounter any issues with your bakers rack, consider the following:
- Rack wobbles: Ensure all assembly screws are tightened. Adjust the leveling feet at the bottom of the rack to compensate for uneven flooring. Verify the anti-tip device is correctly installed and secured to the wall.
- Power outlets not working: Check if the rack's main power cord is securely plugged into a functional, grounded wall outlet. Ensure the safe switch on the power strip is in the 'ON' position (indicated by a red light). Test the wall outlet with another appliance to confirm it is supplying power.
- Difficulty adjusting shelf: Ensure no items are obstructing the shelf's movement. Follow the specific instructions in the assembly manual for safe shelf adjustment.
6. Specifications
| Feature | Detail |
|---|---|
| Material | Engineered Wood, Metal |
| Color | Charcoal Gray |
| Special Feature | Heavy Duty |
| Shelf Type | Tiered Shelf |
| Number of Shelves | 2 (plus top surface and upper small shelf) |
| Room Type | Kitchen, Living Room |
| Finish Type | Unfinished |
| Assembly Required | Yes |
| Mounting Type | Floor Mount |
| Recommended Uses | Kitchen appliance organization, Coffee bar, Plant rack, Bookshelf |
| Included Components | Hardware, 6 S-shaped Hooks |
| Product Dimensions | 16.5 x 31.5 x 50.59 inches |
| Item Weight | 31.8 pounds |
| Power Outlets | 3 AC Outlets, 1 Safe Switch, 6.5-foot Power Cord |

Image: A comprehensive diagram illustrating all key dimensions of the bakers rack, including height, width, depth, and shelf spacing.
7. Warranty and Support
For warranty information or product support, please refer to the documentation included with your purchase or contact SUPERJARE customer service directly through their official website or the retailer where the product was purchased.