BIG RED T83505-2
BIG RED T83505-2 Torin Pro Series Hydraulic Low Profile Floor Jack
User Instruction Manual
Product Overview
The BIG RED T83505-2 Torin Pro Series Hydraulic Low Profile Floor Jack is engineered for general and heavy-duty industrial use, offering a substantial 3.5 ton (7,000 lb.) lifting capacity. Its low-profile design allows access under vehicles with minimal ground clearance, with a lift range extending from 3.25 inches to 22 inches. Constructed from high-strength steel with a rust-resistant powder-coated finish, this jack is built for durability. The dual pump system provides rapid lifting, making it efficient for various cars, trucks, and SUVs. Maneuverability is enhanced by two large steel casters and two 360-degree swivel casters. For safety, it incorporates a built-in overload system to prevent use beyond its rated capacity, and a wide stance ensures stability during operation.
Important Safety Information
WARNING: Read, understand, and follow all instructions and warnings before using this product. Failure to do so may result in property damage, serious injury, or death.
- Always use this jack on a hard, level surface.
- Do not exceed the rated capacity of 3.5 tons (7,000 lbs).
- This jack is a lifting device only. Immediately after lifting, support the vehicle with appropriate jack stands. Do not work under a vehicle supported only by the jack.
- Ensure the vehicle is in park (or gear for manual transmission) and the parking brake is engaged. Block wheels that are not being lifted.
- Center the load on the saddle. Off-center loads can cause the jack to tip.
- Do not use the jack for purposes other than lifting vehicles.
- Keep hands and feet clear of moving parts and the area under the load.
- Wear appropriate safety gear, including eye protection.
- Inspect the jack before each use. Do not use if damaged, altered, or leaking hydraulic fluid.
- Only qualified personnel should perform maintenance or repairs.
What's in the Box
- 1 x BIG RED T83505-2 Hydraulic Low Profile Floor Jack
- 1 x Handle Assembly
- 1 x User Manual (this document)
Components and Features
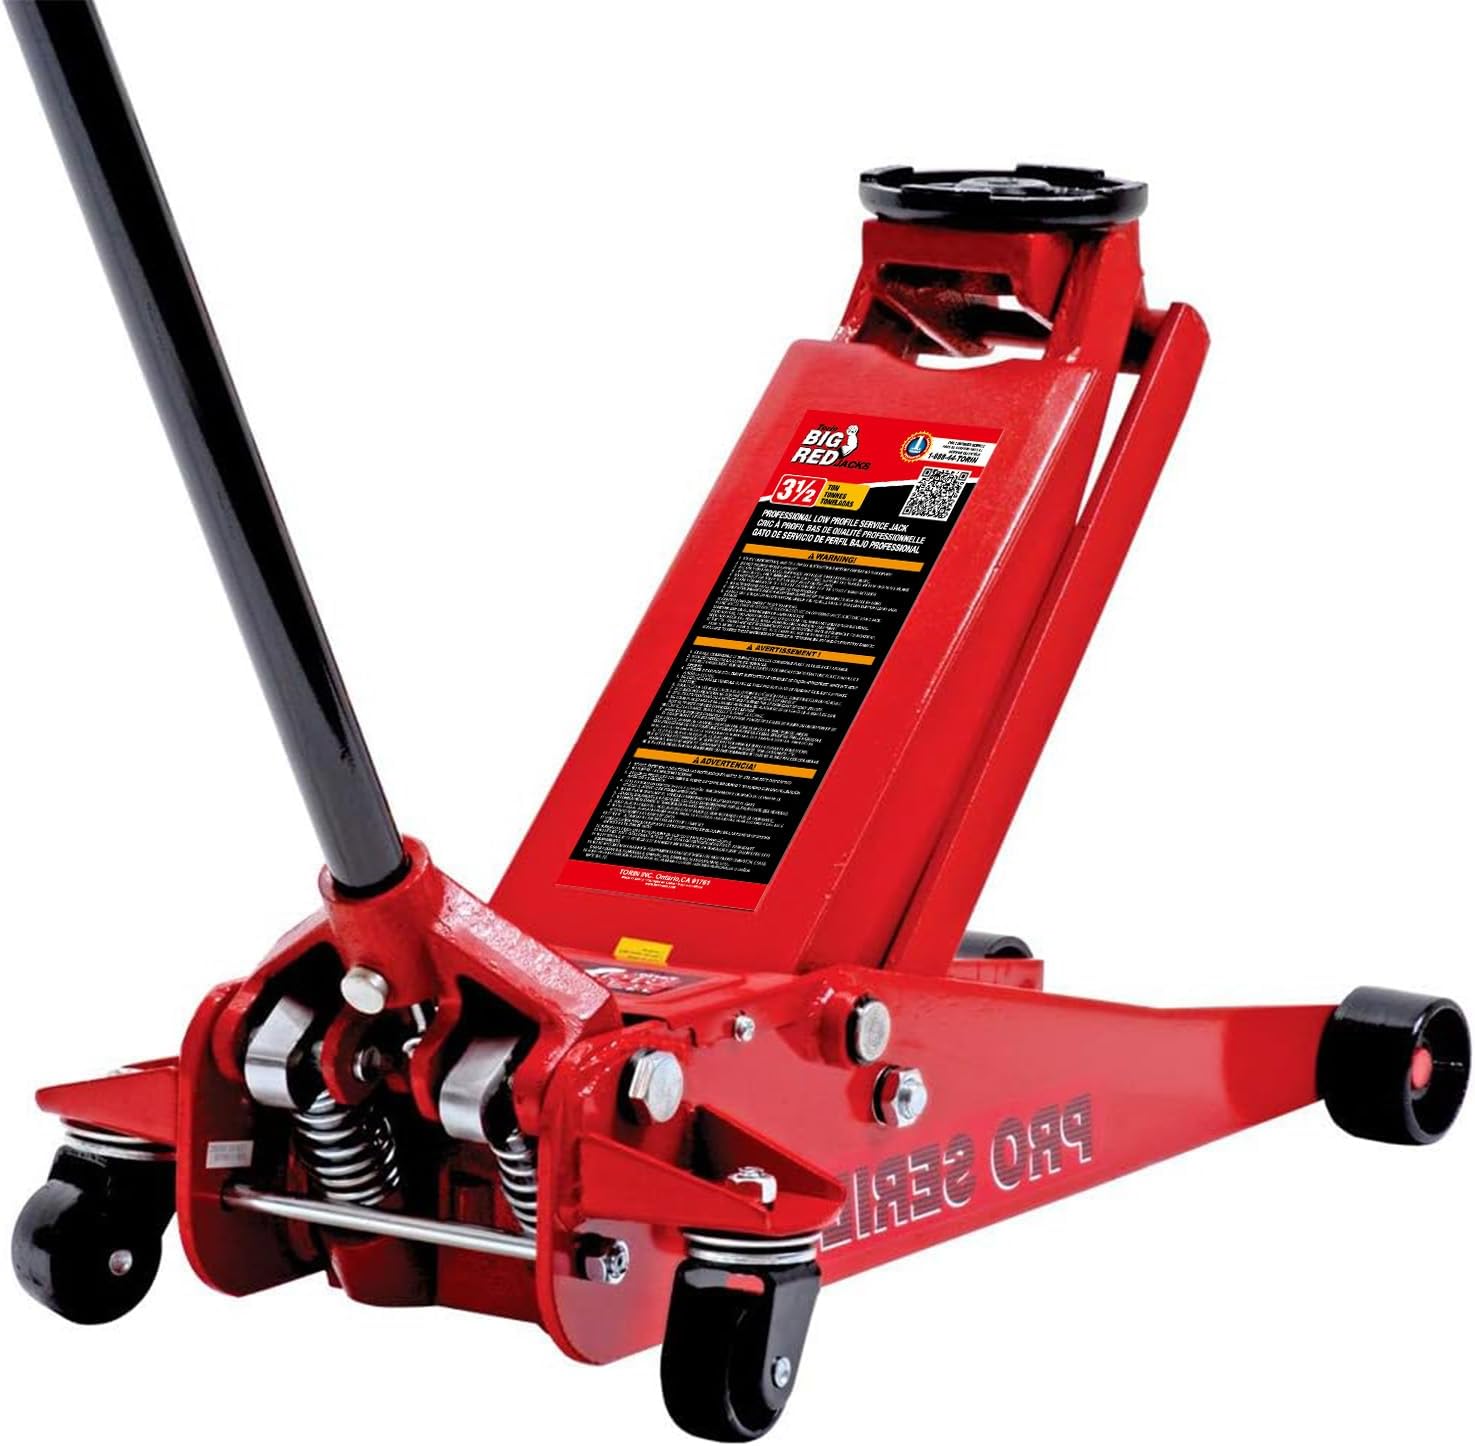
Figure 1: Front view of the BIG RED T83505-2 Floor Jack. This image shows the overall design, including the lifting arm, saddle, and front wheels.

Figure 2: Side view of the floor jack with the handle inserted. This perspective highlights the low-profile design and the handle's attachment point.

Figure 3: The floor jack in its fully lowered position, showcasing its minimal height for accessing low-clearance vehicles.

Figure 4: A detailed view of the dual pump mechanism and the robust springs, illustrating the quick lift system.
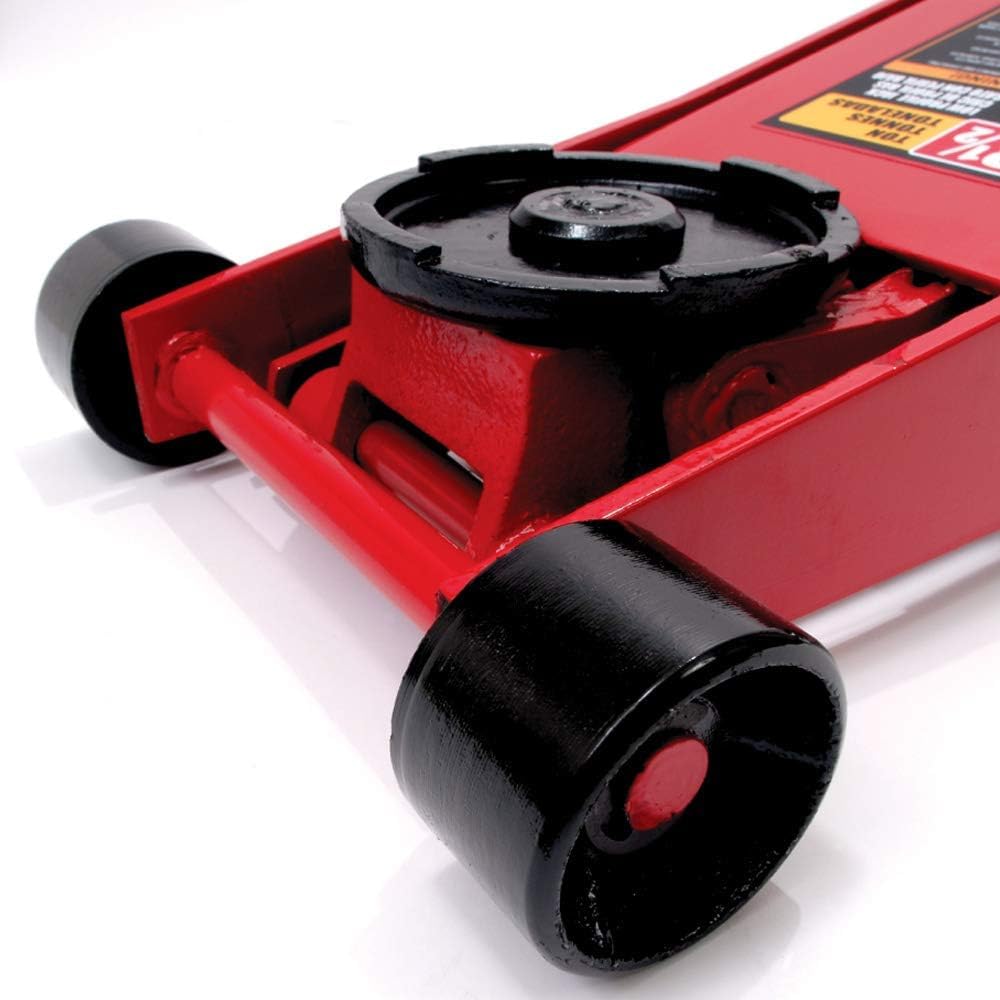
Figure 5: Close-up of the rear 360-degree swivel casters and the lifting saddle, designed for smooth positioning and secure load contact.
The jack features a large steel saddle for secure contact with the vehicle's lifting point, a long handle for leverage and control, and durable steel and swivel casters for easy movement. The dual piston quick lift pump significantly reduces the number of strokes required to lift a load.
Setup and Initial Preparation
- Unpacking: Carefully remove the jack and all components from the packaging. Inspect for any shipping damage.
- Handle Assembly: Insert the handle into the handle socket on the jack. Align the holes and secure it with the provided screw or pin, ensuring it is firmly seated.
- Purging Air from Hydraulic System (Bleeding):
- With the jack fully lowered, remove the oil filler plug (usually a rubber stopper or screw on the hydraulic cylinder).
- Pump the handle rapidly 10-15 times to remove any trapped air.
- Replace the oil filler plug.
- Test the jack by lifting it to its full height and then lowering it completely. Repeat a few times. If the jack does not lift smoothly or reaches full height, repeat the bleeding process.
Operating Instructions
- Prepare the Vehicle: Park the vehicle on a hard, level surface. Engage the parking brake and place the transmission in park (or lowest gear for manual). Block the wheels that are not being lifted to prevent accidental movement.
- Position the Jack: Locate the vehicle manufacturer's recommended lifting points. Slide the jack under the vehicle, positioning the saddle directly under the designated lifting point. Ensure the jack is stable and the load is centered on the saddle.
- Lift the Vehicle: Close the release valve by turning the handle clockwise until it is firmly closed. Pump the handle up and down to raise the vehicle to the desired height. Lift only high enough to allow for the placement of jack stands.
- Secure with Jack Stands: Immediately after lifting, place appropriately rated jack stands under the vehicle's designated support points. Ensure the vehicle is securely resting on the jack stands before proceeding. NEVER work under a vehicle supported only by the floor jack.
- Lower the Vehicle: Once work is complete and jack stands are removed (ensure they are clear of the vehicle), slowly open the release valve by turning the handle counter-clockwise. The vehicle will begin to lower. Control the lowering speed by adjusting how much you open the valve.
- Remove the Jack: Once the vehicle is fully lowered and resting on its wheels, remove the floor jack.

Figure 6: The floor jack correctly positioned under a vehicle's front axle, with additional jack stands providing crucial support. Always use jack stands when working under a vehicle.

Figure 7: Another view of the floor jack and jack stands in use, demonstrating proper vehicle support during maintenance or repair.
Maintenance
- Lubrication: Periodically lubricate all moving parts, including the pivot points, casters, and handle mechanism, with light machine oil.
- Hydraulic Fluid: Check the hydraulic fluid level every 6 months. With the jack fully lowered and on a level surface, remove the oil filler plug. The fluid level should be just below the filler hole. If low, add high-quality hydraulic jack oil (ISO VG 15 or equivalent). Do not use brake fluid or motor oil.
- Cleaning: Keep the jack clean and free of dirt, grease, and debris. Wipe down the ram and pump plungers regularly.
- Storage: Store the jack in a clean, dry place with the ram fully retracted to prevent corrosion and extend seal life.
- Inspection: Before each use, inspect the jack for any signs of damage, wear, or leaks. Pay attention to welds, casters, and the hydraulic cylinder. Do not use a damaged jack.
Troubleshooting
| Problem | Possible Cause | Solution |
|---|---|---|
| Jack will not lift load. | Release valve open; Air in hydraulic system; Low hydraulic fluid; Overload. | Close release valve; Bleed air from system (see Setup); Add hydraulic fluid; Reduce load (do not exceed capacity). |
| Jack lifts slowly or erratically. | Air in hydraulic system; Low hydraulic fluid; Dirty fluid. | Bleed air from system; Add hydraulic fluid; Consult qualified service personnel for fluid replacement. |
| Jack will not lower. | Release valve stuck or obstructed. | Check for obstructions around the release valve; Gently try to open the valve. If still stuck, do not force; consult service. |
| Jack leaks hydraulic fluid. | Damaged seals; Loose fittings. | Discontinue use immediately. Consult qualified service personnel for repair. |
Specifications
| Model Number | T83505-2 |
| Brand | BIG RED / Torin |
| Load Capacity | 3.5 Tons (7,000 lbs) |
| Maximum Lifting Height | 22 Inches |
| Minimum Lifting Height | 3.25 Inches |
| Product Dimensions (L x W x H) | 33.07 x 16.14 x 8.07 inches |
| Item Weight | 93.9 pounds |
| Pump Type | Dual Piston Quick Lift |
| Material | High-Strength Steel |
| Finish | Powder-Coated (Red) |
Warranty Information
This BIG RED T83505-2 Torin Pro Series Hydraulic Low Profile Floor Jack includes a limited 1-year manufacturer warranty. This warranty covers defects in materials and workmanship under normal use. For warranty claims or further details, please refer to the warranty card included with your product or contact the manufacturer directly.
Customer Support
For technical assistance, parts inquiries, or general support regarding your BIG RED T83505-2 Floor Jack, please contact Torin customer service. Have your model number (T83505-2) and purchase information ready when contacting support.
Please note: Contact information for the manufacturer is typically provided on the product packaging or within the included warranty documentation.
Ask a question about this manual
Ask about setup, troubleshooting, compatibility, parts, safety, or missing instructions. Manuals+ will review the question and use this page’s manual context to help answer it.