1. Introduction
The OSD Audio DAC-X200 is a powerful 2-channel Class D stereo amplifier designed to deliver high-fidelity audio. It features a built-in Hi-Res 24bit/192khz DAC, offering superior digital audio conversion. With versatile input options including USB, Optical, and RCA, and A/B speaker switching, this amplifier is suitable for various home audio setups, from driving bookshelf speakers to powering floorstanding units.
2. Safety Instructions
- Power Source: Connect the unit only to the specified power supply voltage.
- Ventilation: Ensure adequate ventilation. Do not block ventilation openings.
- Water and Moisture: Do not expose the unit to rain, moisture, or excessive humidity.
- Heat Sources: Keep the unit away from heat sources such as radiators, heat registers, stoves, or other heat-producing appliances.
- Cleaning: Clean only with a dry cloth.
- Servicing: Do not attempt to service this product yourself. Refer all servicing to qualified service personnel.
- Placement: Place the unit on a stable, flat surface. Avoid placing heavy objects on top of the amplifier.
3. Package Contents
Verify that all items are present in the package:
- OSD Audio DAC-X200 Amplifier
- Quick Start Guide
- Power Cable
- Remote Control (if included with your model)
4. Product Overview
4.1 Front Panel
The front panel provides access to essential controls for daily operation.

Figure 4.1: Front view of the DAC-X200 amplifier, showing the power button, speaker selectors, balance, and volume controls.

Figure 4.2: Detail of the front panel, highlighting the Power button and Speaker A/B selection buttons.

Figure 4.3: Detail of the front panel, showing the Balance and Volume control knobs.
4.2 Rear Panel
The rear panel houses all input and output connections for audio sources and speakers.
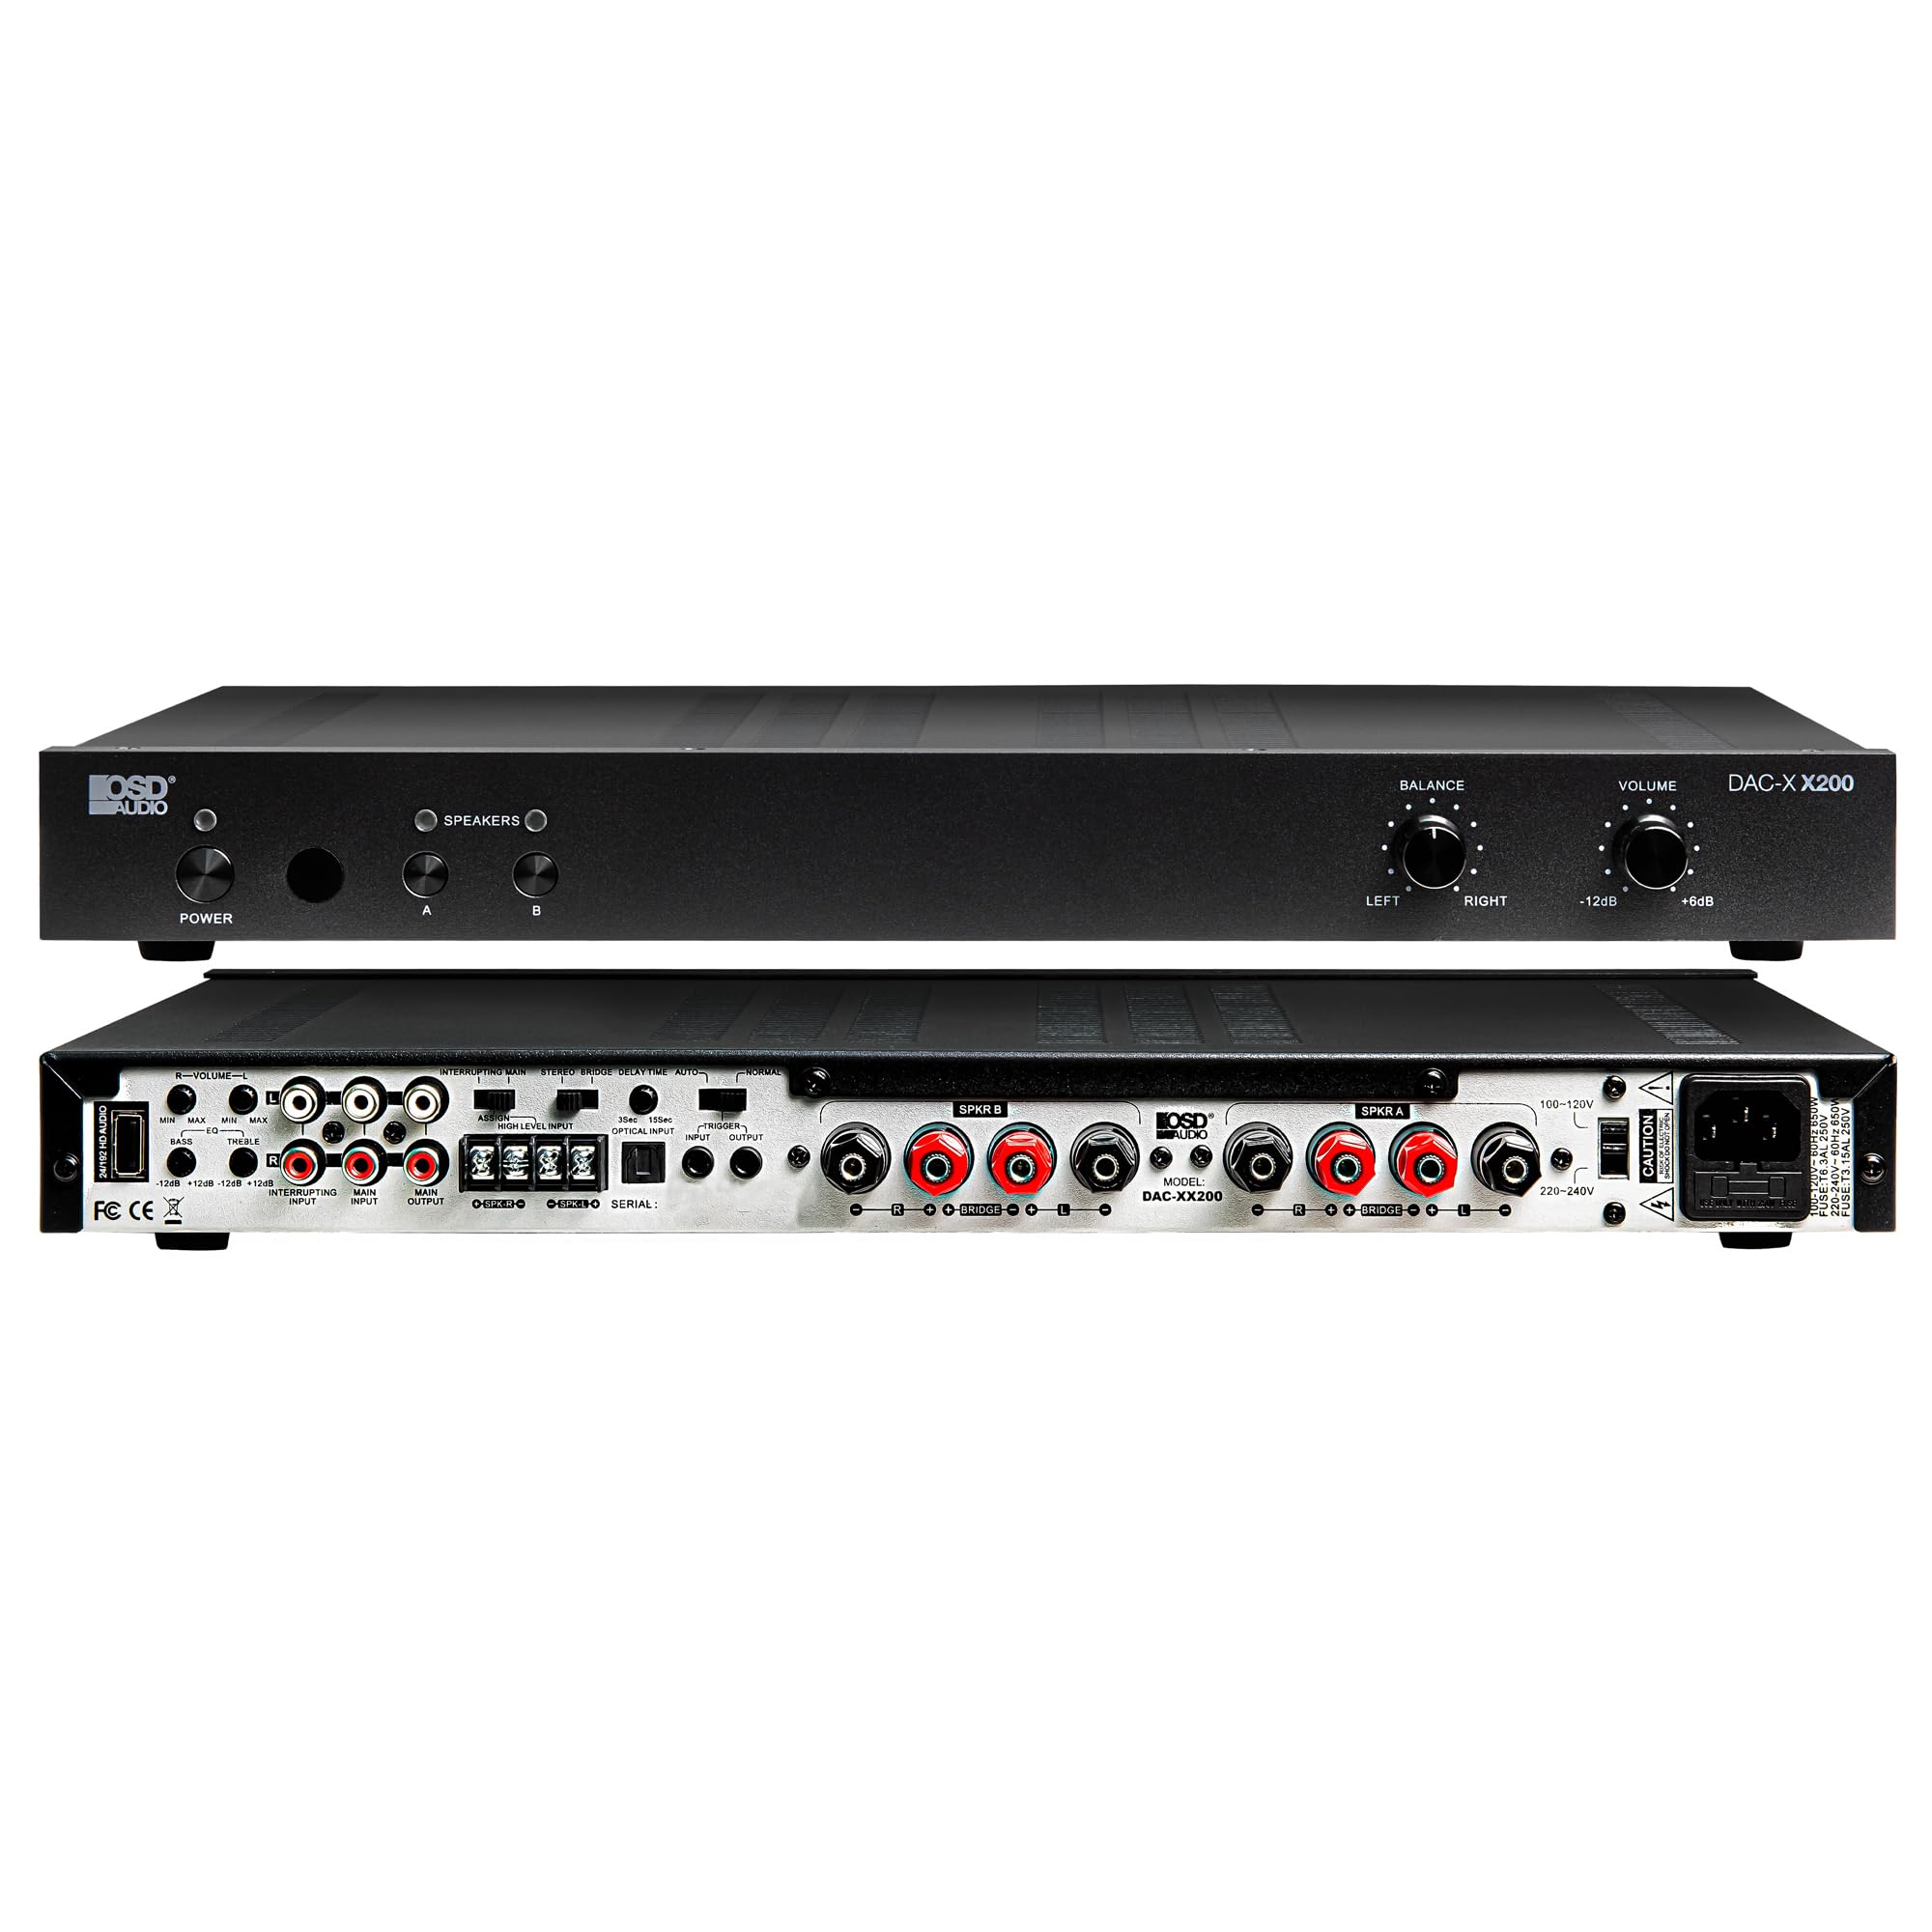
Figure 4.4: Rear view of the DAC-X200 amplifier, displaying various audio inputs (USB, Optical, RCA), speaker outputs, and power input.

Figure 4.5: Detail of the rear panel inputs, including USB, Optical, and RCA connections.

Figure 4.6: Detail of the rear panel speaker output terminals for Speaker A and Speaker B.
5. Setup
5.1 Placement
Place the DAC-X200 on a flat, stable surface with adequate space around it for ventilation. Avoid enclosed cabinets or areas with poor airflow to prevent overheating.
5.2 Connecting Speakers
- Ensure the amplifier is powered off and unplugged.
- Connect your passive speakers to the SPEAKER A and/or SPEAKER B terminals on the rear panel. Observe correct polarity (+ to + and - to -).
- For optimal performance, use high-quality speaker wire.
5.3 Connecting Audio Sources
The DAC-X200 supports multiple input types:
- USB Input: Connect a computer or other USB audio source using a Type A to Type A USB 2.0 cable.
- Optical Input: Connect digital audio sources like TVs or CD players using an optical cable.
- RCA Inputs: Connect analog audio sources such as music streamers, turntables (with a pre-amp), or other devices using RCA cables.
5.4 Power Connection
After all audio and speaker connections are made, connect the supplied power cable to the amplifier's power inlet and then to a suitable AC power outlet.
6. Operating Instructions
6.1 Power On/Off
Press the POWER button on the front panel to turn the amplifier on or off. The power indicator light will illuminate when the unit is on.
6.2 Input Selection
The DAC-X200 features smart source switching, automatically detecting and switching to an active input. If multiple inputs are active, you may need to manually select the desired input using the remote control (if applicable) or by cycling through inputs.
6.3 Volume Control
Adjust the overall output volume using the VOLUME knob on the front panel. Rotate clockwise to increase volume and counter-clockwise to decrease it.
6.4 Tone Controls
Use the BALANCE knob to adjust the left/right channel balance. The DAC-X200 also includes bass and treble adjustment knobs (located on the rear panel or accessible via remote, depending on model variation) to fine-tune the sound to your preference or room acoustics.
6.5 A/B Speaker Switching
Press the A or B buttons on the front panel to select which set of speakers (Speaker A, Speaker B, or both) are active. This allows for multi-room audio configurations.
7. Maintenance
- Cleaning: Use a soft, dry cloth to clean the exterior of the amplifier. Do not use liquid cleaners or aerosols.
- Ventilation: Periodically check that the ventilation openings are clear of dust and debris.
- Storage: If storing the unit for an extended period, unplug it from the power outlet and store it in a cool, dry place.
8. Troubleshooting
| Problem | Possible Cause | Solution |
|---|---|---|
| No power | Power cable not connected; Power outlet not active; Amplifier off. | Check power cable connection; Test power outlet; Press the Power button. |
| No sound | Incorrect input selected; Speaker cables loose; Volume too low; Speakers A/B not selected. | Select correct input; Check speaker connections; Increase volume; Ensure Speaker A or B is active. |
| Distorted sound | Input signal too high; Speaker impedance mismatch; Faulty cable. | Reduce source volume; Verify speaker impedance (8̣ or 4̣); Replace audio cables. |
| Input not switching automatically | Multiple active sources; Specific source not detected. | Manually select input; Ensure only one source is playing if auto-switching is desired. |
9. Specifications
- Model: DAC-X200
- Output Power: 100W RMS per channel at 8̣; 225W RMS per channel at 4̣; 450W bridged mono
- Number of Channels: 2
- DAC: Hi-Res 24bit/192khz, DSD formats supported
- Inputs: USB, Optical, RCA
- Speaker Zones: A/B Switching
- Dimensions (L x W x H): 16.7 x 10 x 2 inches
- Material Type: Plastic
- UPC: 810074881173
10. Warranty Information
OSD Audio products are designed for reliability and performance. This product is covered by a limited warranty against defects in materials and workmanship. Please refer to the official OSD Audio website or your purchase documentation for specific warranty terms and conditions, including duration and coverage details. Keep your proof of purchase for warranty claims.
11. Support
For technical assistance, troubleshooting not covered in this manual, or service inquiries, please contact OSD Audio customer support. You can find contact information, FAQs, and additional resources on the official OSD Audio website.
Website: www.osdaudio.com