
Goplus SU-4130
Goplus 21-Inch Rolling Lawn Aerator SU-4130 Instruction Manual
Model: SU-4130 | Brand: Goplus
1. Introduction
This manual provides essential information for the safe and effective use of your Goplus 21-Inch Rolling Lawn Aerator. Please read these instructions carefully before assembly and operation. Keep this manual for future reference.
The Goplus Rolling Lawn Aerator is designed to reduce soil compaction and promote healthier lawn growth by allowing water, air, and nutrients to penetrate the soil more effectively. Its robust construction and sharp tine spikes make it suitable for various soil types.
2. Safety Information
Always follow basic safety precautions when using this product to reduce the risk of injury.
- Read and understand all instructions before operating the aerator.
- Wear appropriate personal protective equipment, such as sturdy gloves and closed-toe shoes, during assembly and operation.
- Keep children and pets away from the work area.
- Inspect the aerator for any damaged or loose parts before each use. Do not use if damaged.
- Ensure the drum is securely closed if filled with sand or stones.
- Use the aerator only for its intended purpose: lawn aeration.
- Store the aerator in a dry, secure place, out of reach of children.
3. Package Contents
Verify that all components are present before beginning assembly. Refer to the assembly diagram for identification.
- Aerator Drum with Spikes
- Lower Handle Section
- Upper Handle Sections (multiple, interlocking)
- Handle Grip
- Assembly Hardware (bolts, nuts, washers)

Image: This image displays the Goplus 21-Inch Rolling Lawn Aerator, highlighting its key dimensions including the 51-inch handle length and 21-inch drum width. It provides a complete view of the assembled tool.
4. Assembly Instructions
Follow these steps to assemble your Goplus Rolling Lawn Aerator:
- Unpack Components: Carefully remove all parts from the packaging and lay them out. Ensure all listed components are present.
- Connect Lower Handle to Roller: Attach the bottom section of the handle to the aerator drum using the provided bolts and nuts. Ensure a secure fit.
- Assemble Upper Handle: Interlock each section of the upper handle. Align the spring pins with the holes and push until they click into place.
- Attach Handle Grip: Slide the handle grip onto the top section of the handle.
- Final Check: Verify that all connections are tight and secure before use.

Image: This visual guide illustrates the three main steps for assembling the aerator: 1. Unpacking all components, 2. Connecting the lower handle section to the roller drum, and 3. Interlocking the upper handle sections to form the complete handle.
5. Operating Instructions
5.1 Preparing for Aeration
- Moisture Level: Aerate when the soil is moist but not waterlogged. This allows the spikes to penetrate easily. Avoid aerating extremely dry or wet soil.
- Clear Debris: Remove any large rocks, branches, or other debris from the lawn that could obstruct the aerator or cause damage.
- Add Weight (Optional): For deeper penetration, the aerator drum can be filled with sand or small stones. To do this, open the cap on the side of the drum, fill it, and securely close the cap.

Image: A person demonstrating how to fill the aerator drum with sand to increase its weight, allowing for deeper spike penetration into the soil.
5.2 Aerating the Lawn
- Grip the Handle: Hold the comfortable gripping handle firmly with both hands.
- Push Forward: Push the aerator across your lawn in a consistent pattern, similar to mowing. The sharp tine spikes will puncture the soil as the drum rolls.
- Overlap Passes: For thorough aeration, slightly overlap each pass to ensure even coverage.
- Target Areas: Pay extra attention to high-traffic areas or spots with visible soil compaction.
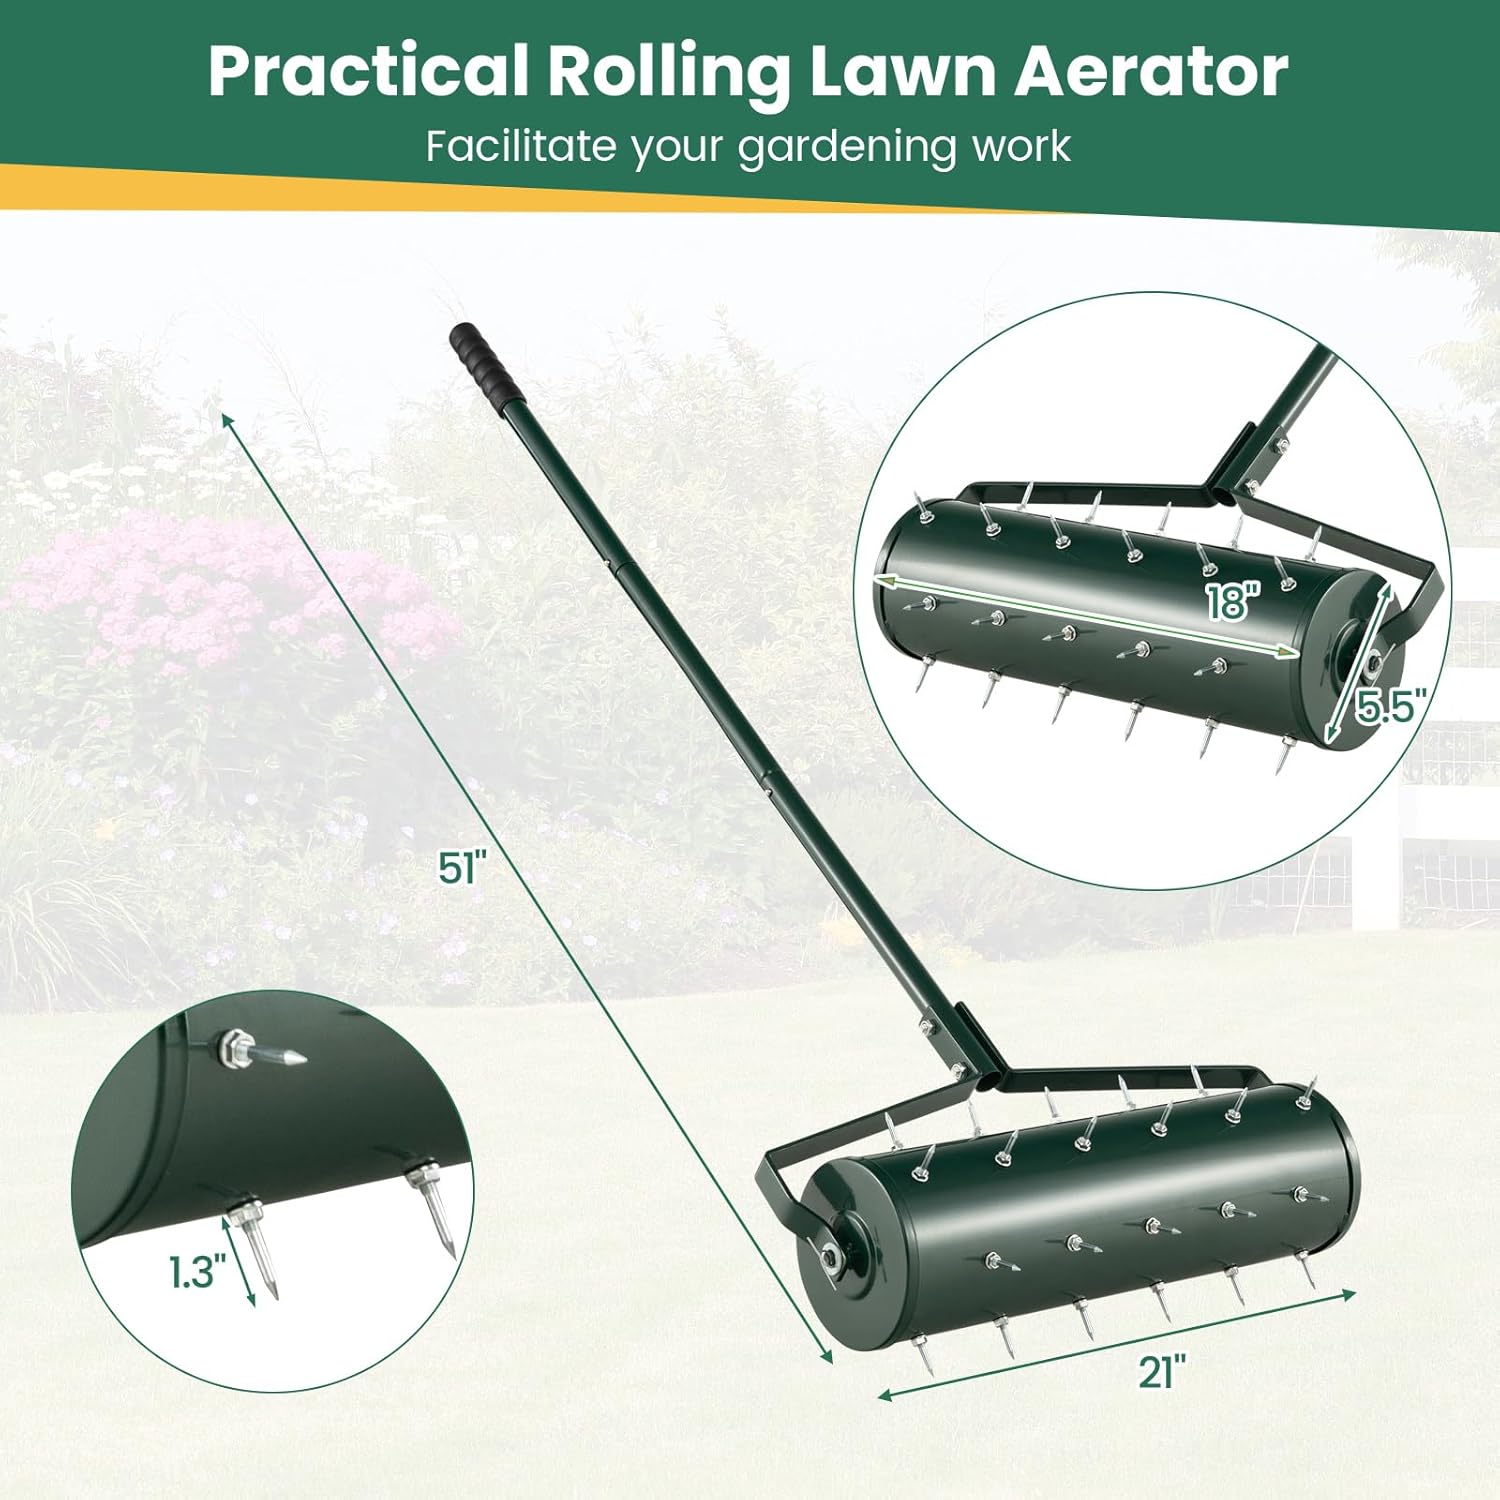
Image: This diagram visually explains the process and benefits of lawn aeration. It shows compact soil before aeration, how aeration allows water, nutrients, and oxygen to reach roots, and the resulting healthier lawn after 6-8 weeks.

Image: This image highlights the versatility of the aerator's sharp tine spikes, demonstrating their ability to efficiently puncture and loosen different soil compositions, including common dirt, sandy soil, and clay.
6. Maintenance
Proper maintenance ensures the longevity and performance of your aerator.
- Cleaning: After each use, clean any soil or debris from the spikes and drum. A stiff brush and water can be used. Dry thoroughly to prevent rust.
- Inspection: Regularly check all bolts, nuts, and connections for tightness. Tighten any loose fasteners.
- Spike Condition: Inspect the spikes for wear or damage. While designed for durability, extreme conditions may cause wear over time.
- Storage: Store the aerator in a dry, covered area to protect it from the elements. If the drum was filled with sand/stones, you may empty it for lighter storage or leave it filled if preferred.
7. Troubleshooting
If you encounter issues with your aerator, refer to the following common problems and solutions:
| Problem | Possible Cause | Solution |
|---|---|---|
| Spikes not penetrating soil deeply enough. | Soil is too dry or too hard. Insufficient weight in the drum. | Water the lawn lightly a day before aerating. Fill the drum with sand or stones for added weight. |
| Aerator is difficult to push. | Soil is too wet or muddy. Debris caught in spikes. | Wait for the soil to dry slightly. Clear any debris from the spikes. |
| Loose handle or wobbly operation. | Loose assembly bolts or handle connections. | Check and tighten all bolts and ensure handle sections are fully interlocked. |
8. Specifications
| Feature | Detail |
|---|---|
| Model Number | SU-4130 |
| Product Dimensions | 21 x 5.5 x 51 inches (L x W x H) |
| Item Weight | 11.99 pounds |
| Brand | Goplus |
| Material | Powder-Coated Metal Frame |
| Drum Fill Capacity | Approx. 6.8 liters (for 21-inch model) |
| Spike Length | 1.3 inches |

Image: A detailed table outlining the specifications of the Goplus Rolling Lawn Aerator, listing color, material, product size (for 17.5-inch and 20.5-inch models), drum dimension, spike length, sand capacity, and net weight. Note that this manual focuses on the 21-inch model, which has similar characteristics.
9. Warranty and Support
For warranty information or technical support, please refer to the retailer's return policy or contact Goplus customer service directly. Contact details are typically available on the product packaging or the official Goplus website.
Please have your model number (SU-4130) and purchase date available when contacting support.
Ask a question about this manual
Ask about setup, troubleshooting, compatibility, parts, safety, or missing instructions. Manuals+ will review the question and use this page’s manual context to help answer it.