Introduction
The ASUS Prime A620-PLUS WIFI6 motherboard is engineered to support AMD Ryzen 7000-series and 8000-series processors, offering a robust foundation for PC DIY builders and users. This manual provides essential information for setup, operation, and maintenance of your motherboard, ensuring optimal performance and stability.
Safety Information
Always observe the following safety precautions when handling your motherboard:
- Disconnect power before installation or maintenance.
- Wear an anti-static wrist strap to prevent electrostatic discharge (ESD) damage.
- Handle the motherboard by its edges to avoid touching sensitive components.
- Ensure proper ventilation within your PC case to prevent overheating.
- Keep the motherboard away from moisture and extreme temperatures.
Package Contents
Verify that all items are present in your motherboard package:
- ASUS Prime A620-PLUS WIFI6 Motherboard
- User Manual
- I/O Shield
- SATA 6Gb/s Cables
- M.2 Screw Package
- Wi-Fi Antenna
- Support DVD (for drivers and utilities)
Motherboard Layout
Familiarize yourself with the key components and connectors on your ASUS Prime A620-PLUS WIFI6 motherboard.

Figure 1: Top-down view of the ASUS Prime A620-PLUS WIFI6 Motherboard, highlighting the CPU socket, RAM slots, and PCIe slots.
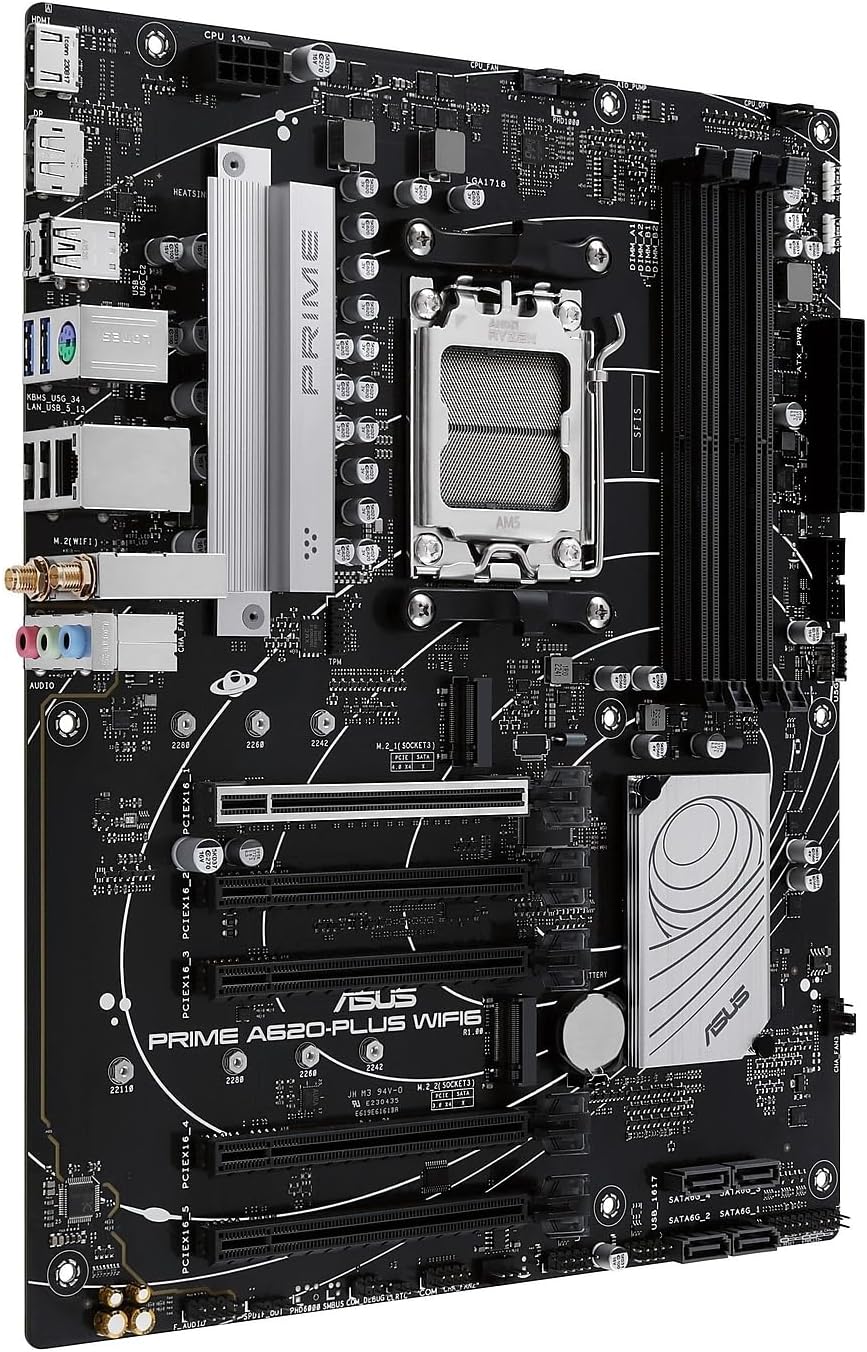
Figure 2: Angled view of the motherboard, showcasing the rear I/O panel with various ports including USB, HDMI, DisplayPort, and audio jacks.
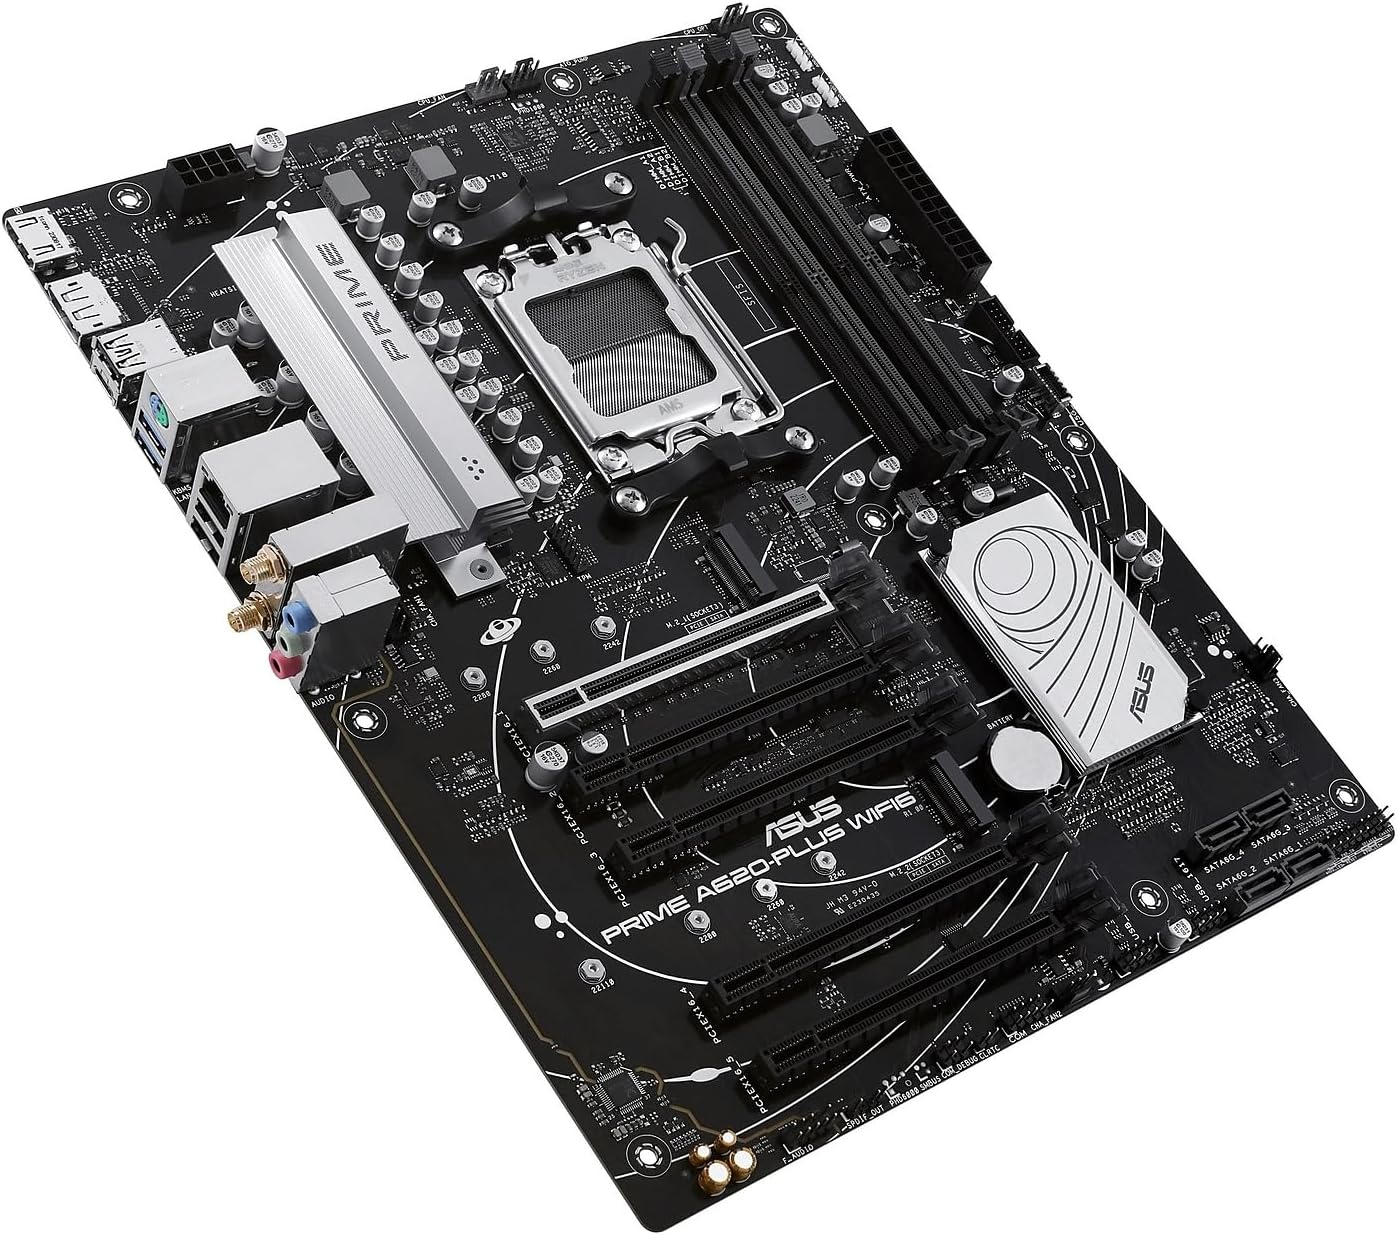
Figure 3: A different angled perspective of the motherboard, providing a clearer view of the M.2 slots and SATA ports.
- CPU Socket (AM5): Located centrally, this socket supports AMD Ryzen 7000-series/ 8000-series processors.
- DDR5 DIMM Slots: Four slots for DDR5 memory modules, supporting up to 192GB.
- PCIe 4.0 x16 Slot: For graphics cards and other expansion cards.
- Dual M.2 Slots: For high-speed NVMe SSDs.
- SATA 6Gbps Ports: For traditional SATA hard drives and SSDs.
- Rear I/O Panel: Includes DisplayPort, HDMI, USB 5Gbps Type-C, USB Type-A, Realtek 1Gb Ethernet, and audio jacks.
- Wi-Fi 6 Module: Integrated for wireless connectivity.
Setup
1. CPU Installation (AM5 Socket)
- Open the CPU socket lever.
- Align the CPU with the socket's triangle mark and carefully place it into the socket. Do not force it.
- Close the lever to secure the CPU.
2. RAM Installation (DDR5)
- Open the clips on both ends of the DDR5 DIMM slots.
- Align the notch on the memory module with the notch in the DIMM slot.
- Press down firmly on both ends of the memory module until the clips snap into place.
3. Storage Installation (Dual M.2, SATA)
- M.2 SSD: Insert the M.2 SSD into the slot at an angle, then push it down and secure it with the provided M.2 screw.
- SATA Drives: Connect SATA data cables from your drives to the SATA 6Gbps ports on the motherboard. Connect power cables from your power supply to the drives.
4. Graphics Card Installation (PCIe 4.0)
- Open the latch on the PCIe 4.0 x16 slot.
- Align your graphics card with the slot and press down firmly until it clicks into place.
- Secure the graphics card to your PC case with screws.
5. Power Connections
- Connect the 24-pin ATX power connector from your power supply to the motherboard.
- Connect the 8-pin ATX 12V power connector (CPU power) to the motherboard.
6. Front Panel Connections
Connect your PC case's front panel cables (power button, reset button, USB ports, audio jacks, etc.) to the corresponding headers on the motherboard. Refer to the motherboard layout diagram for precise locations.
Operating
1. BIOS/UEFI Setup
Upon first boot, press the DEL key to enter the BIOS/UEFI setup utility. This intuitive graphical interface allows you to configure system settings, including:
- Memory Overclocking: Adjust DDR5 memory speeds for enhanced performance.
- Boot Options: Set boot priority for your operating system drive.
- Secure Boot: Enable for enhanced security, especially for Windows 11 installations.
- Fan Control: Fine-tune fan speeds for optimal cooling and noise levels using Fan Xpert 2+.
2. Driver Installation
For optimal performance and functionality, install the latest drivers. The included support DVD contains necessary drivers and utilities. Alternatively, download the latest versions from the official ASUS support website.
- Armoury Crate: This ASUS software simplifies driver updates, system monitoring, and Aura Sync RGB control.
3. Networking
- Wi-Fi 6: Connect to wireless networks for high-speed internet access. Ensure the included Wi-Fi antenna is properly installed.
- Realtek 1Gb Ethernet: For stable wired network connections.
4. Audio
- Two-Way AI Noise Cancelation: Utilize this feature to reduce background noise from both microphone input and audio output, enhancing communication clarity during gaming or video conferences.
5. Aura Sync RGB Lighting
The motherboard features onboard Addressable Gen 2 headers. Connect compatible RGB LED strips and devices to these headers and synchronize lighting effects using the Aura Sync software for a personalized aesthetic.
Maintenance
- Cleaning: Regularly clean dust from the motherboard and components using compressed air. Ensure the system is powered off and unplugged before cleaning.
- BIOS Updates: Periodically check the ASUS support website for BIOS/UEFI updates. Updating the BIOS can improve system stability, compatibility, and performance. Follow the instructions provided by ASUS carefully during the update process.
- Driver Updates: Keep your drivers updated using Armoury Crate or by regularly checking the ASUS support website. Updated drivers ensure optimal performance and compatibility with new software and hardware.
Troubleshooting
If you encounter issues with your motherboard, consider the following common troubleshooting steps:
- No Power/No Boot:
- Check all power connections (24-pin ATX, 8-pin ATX 12V).
- Ensure the power supply is functioning correctly.
- Verify that the CPU and RAM are properly seated.
- Display Issues:
- Ensure the graphics card is fully seated in its PCIe slot.
- Check display cable connections to both the graphics card/motherboard and monitor.
- Test with a different display cable or monitor if possible.
- System Instability/Crashes:
- Update BIOS/UEFI to the latest version.
- Ensure all drivers are up to date.
- Run memory diagnostic tools to check for RAM errors.
- Monitor CPU and GPU temperatures to prevent overheating.
- Network Connectivity Problems:
- For Wi-Fi, ensure antennas are connected and drivers are installed.
- For Ethernet, check the cable connection and ensure network drivers are installed.
- Reset your router/modem.
Specifications
| Feature | Detail |
|---|---|
| Brand | ASUS |
| Model Name | PRIME A620-PLUS WIFI6 |
| CPU Socket | Socket AM5 |
| Compatible Processors | AMD Ryzen 7000-series/ 8000-series processors |
| Chipset Type | AMD A620 AM5 |
| RAM Memory Technology | DDR5 |
| Memory Clock Speed | 7600 MHz (OC) |
| Memory Storage Capacity | 192 GB (Max) |
| PCIe Slots | 1 x PCIe 4.0 x16, 2 x PCIe 4.0 x1 |
| M.2 Slots | Dual M.2 Slots |
| SATA Ports | 4 x SATA 6Gbps ports |
| Wireless Connectivity | WiFi 6 |
| Ethernet | Realtek 1Gb Ethernet |
| Audio | Two-Way AI Noise Cancelation |
| Dimensions | 12 x 9.6 x 1.6 inches |
| Item Weight | 1.8 pounds |
Warranty and Support
ASUS provides comprehensive warranty and support for its products. For detailed warranty terms, technical assistance, and driver downloads, please visit the official ASUS support website:
You may also contact ASUS customer service for further assistance.


