WADA POWER Q8-7
WADA POWER 7 kW Single-Phase EV Charging Station
User Manual
1. Introduction
Thank you for choosing the WADA POWER 7 kW Single-Phase EV Charging Station. This manual provides essential information for the safe and efficient installation, operation, and maintenance of your charging station. Please read this manual thoroughly before using the product and keep it for future reference.
2. Important Safety Instructions
To ensure safe operation and prevent damage, observe the following safety precautions:
- Always connect the charging station to a properly grounded electrical outlet.
- Do not attempt to open, disassemble, or modify the charging station.
- Keep the charging station and cables away from water, heat, and flammable materials.
- Ensure the charging cable is not damaged before each use. Do not use if damaged.
- This device includes comprehensive safety protections: overvoltage, undervoltage, ground fault, lightning, leakage, overcurrent, intelligent temperature control, relay adhesion, input shutdown, and vehicle/personal protection.
- Equipped with Type B RCD (AC 30mA + DC 6mA) for enhanced safety.
- The unit has an IP55 protection rating against dust and water, and an IK10 impact resistance rating.

This image illustrates the various safety features integrated into the WADA POWER EV charger, such as protection against overheating, short circuits, ground leakage, residual currents, overloads, overvoltages, and undervoltages, ensuring a secure charging environment.
3. Product Overview and Components
3.1 Package Contents
Verify that all items are present in the package:
- WADA POWER EV Charging Station (Model Q8-7)
- 5-meter Type 2 Charging Cable
- Wall Mounting Accessories (including screw set)
- 2 x RFID Cards
- User Manual
3.2 Key Features
- Maximum Output Power: 7 kW
- Adjustable Current: 8-32 A (adjustable in 1A increments)
- Charging Interface: Type 2, IEC 62196-2
- Display: 4.3-inch color LCD screen
- Control Modes: Plug-and-charge, RFID card, Mobile App (Wi-Fi/Bluetooth)
- Cable Material: TPU
- Protection Rating: IP55 (water and dust), IK10 (impact)

This image provides a comprehensive view of the WADA POWER EV charging station, including the main unit, the Type 2 charging connector, the cable holder, and a visual representation of the mobile application interface for smart control.
4. Installation and Setup
4.1 Before Installation
Before proceeding with installation, ensure the following:
- Verify your mains voltage is within 200-240V.
- Confirm your electric vehicle uses a Type 2 charging interface (IEC 62196-2).
- Consult a qualified electrician for electrical wiring to ensure compliance with local regulations.
4.2 Mounting the Charging Station
The charging station can be mounted on a wall or a dedicated pole (pole not included). Use the provided wall mounting accessories.
- Choose a suitable location, ensuring it is protected from direct sunlight and heavy rain, and is easily accessible for charging.
- Mark the drilling points on the wall using the mounting bracket as a template.
- Drill holes and insert wall plugs.
- Secure the mounting bracket to the wall using the screws.
- Attach the charging station to the mounted bracket.
4.3 Electrical Connection
The recommended power cable is 3 x 6 mm² copper. Connect the L1, N, and PE terminals according to the wiring diagram provided by your electrician.
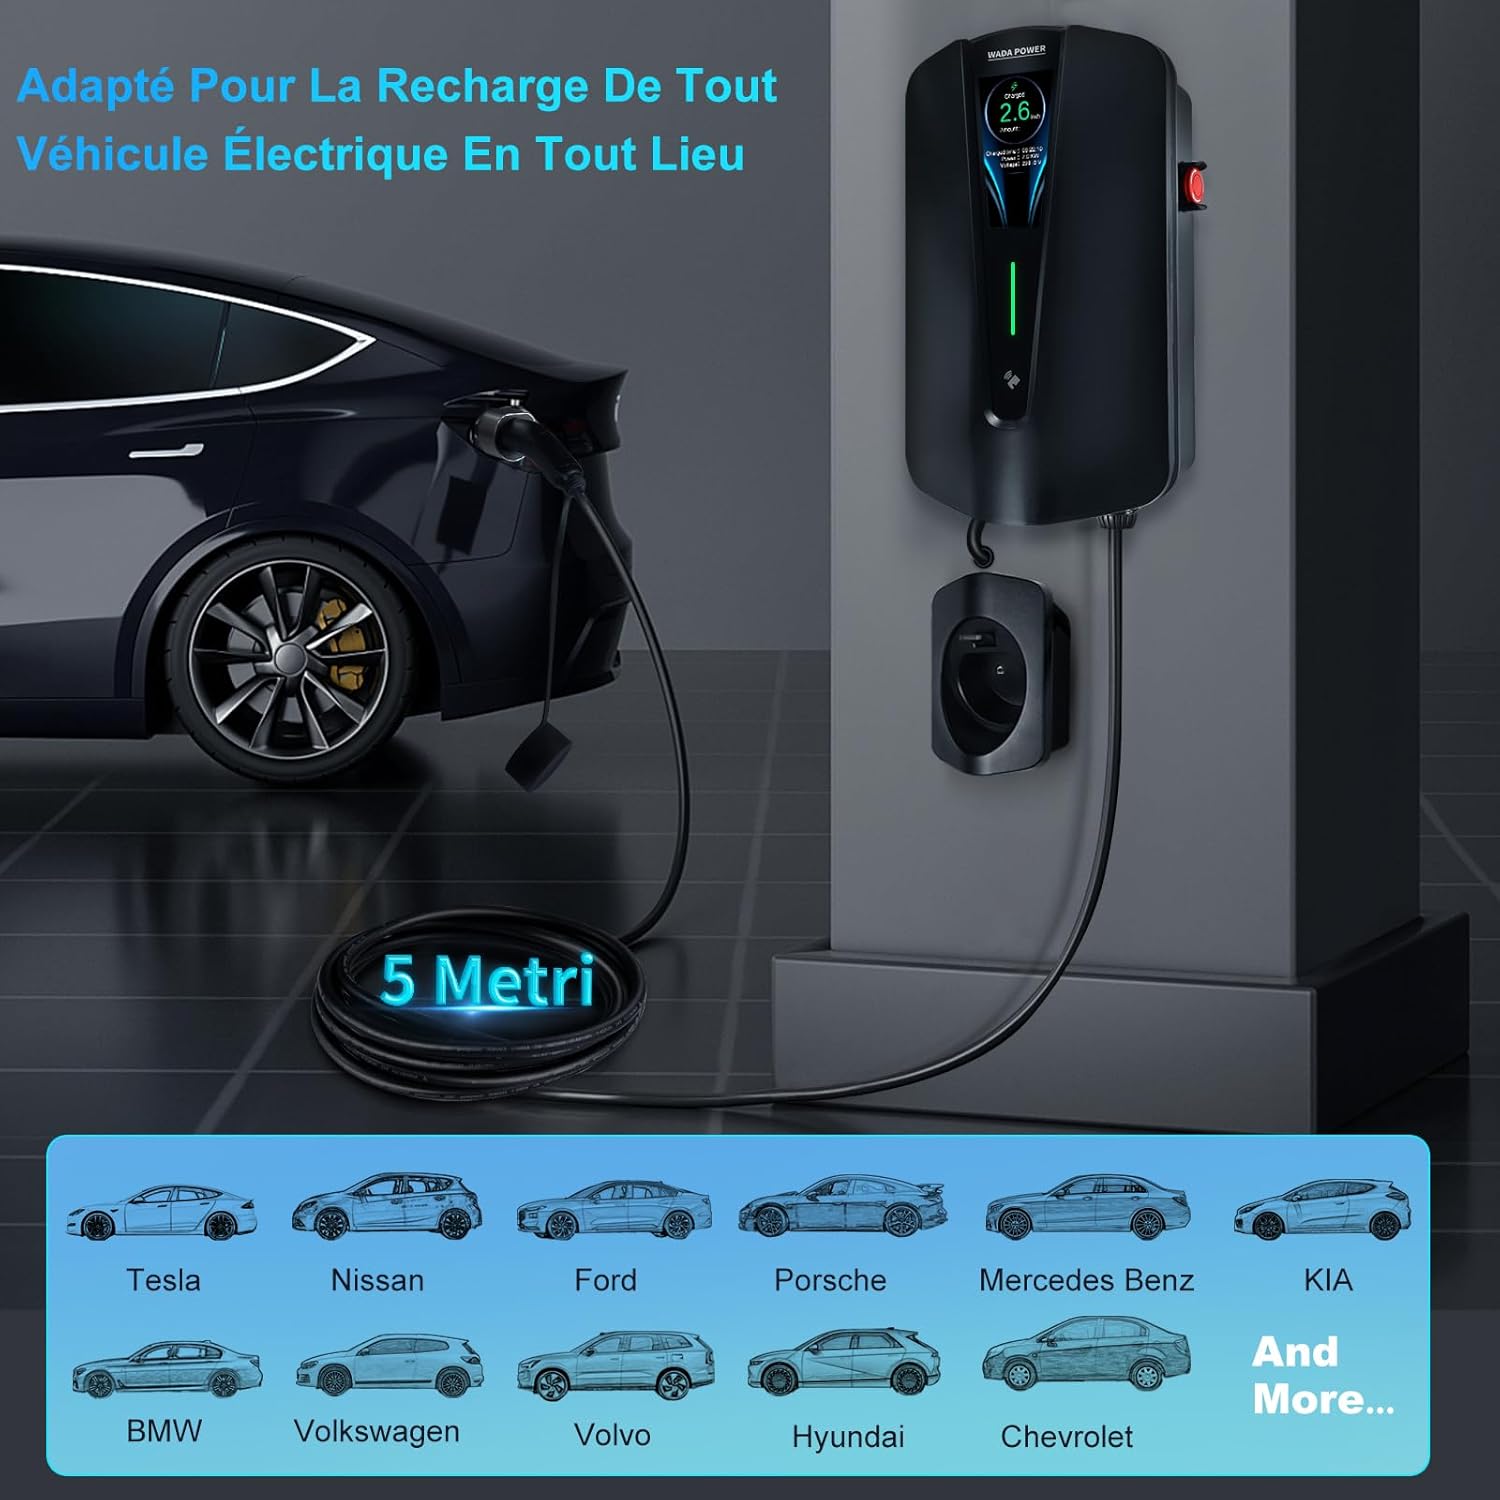
This image demonstrates a typical wall-mounted installation of the charging station, connected to an electric vehicle. It also highlights the broad compatibility of the charger with various EV brands, including Tesla, Nissan, Ford, Porsche, Mercedes Benz, KIA, BMW, Volkswagen, Volvo, Hyundai, and Chevrolet.
5. Operating Instructions
5.1 Starting a Charge
The WADA POWER charging station offers two primary methods to initiate charging:
- Plug-and-Charge: Simply plug the Type 2 connector into your vehicle's charging port. The charging process will begin automatically.
- RFID Card Control: Tap one of the provided RFID cards against the designated area on the charging station to activate it. Then, connect the cable to your vehicle.

This image shows a hand using an RFID card to activate the charging station, emphasizing the security and ease of use. Insets highlight the Type 2 IEC 62196-2 standard connector, the durable TPU cable, and the convenient cable suspension support.
5.2 Using the Mobile Application
The WADA POWER app provides advanced control and monitoring features. Connect via Wi-Fi (2.4 GHz) or Bluetooth (up to 10 meters).
- Download the WADA POWER app from your smartphone's app store.
- Follow the in-app instructions to connect your charging station via Wi-Fi or Bluetooth.
- Once connected, you can:
- Control charging remotely (start/stop).
- Monitor charging status in real-time (current, voltage, power, charged amount).
- Schedule charging sessions (single time interval).
- Adjust the charging current (8-32 A).
- View and download charging history.
- Authorize other users to use the station.
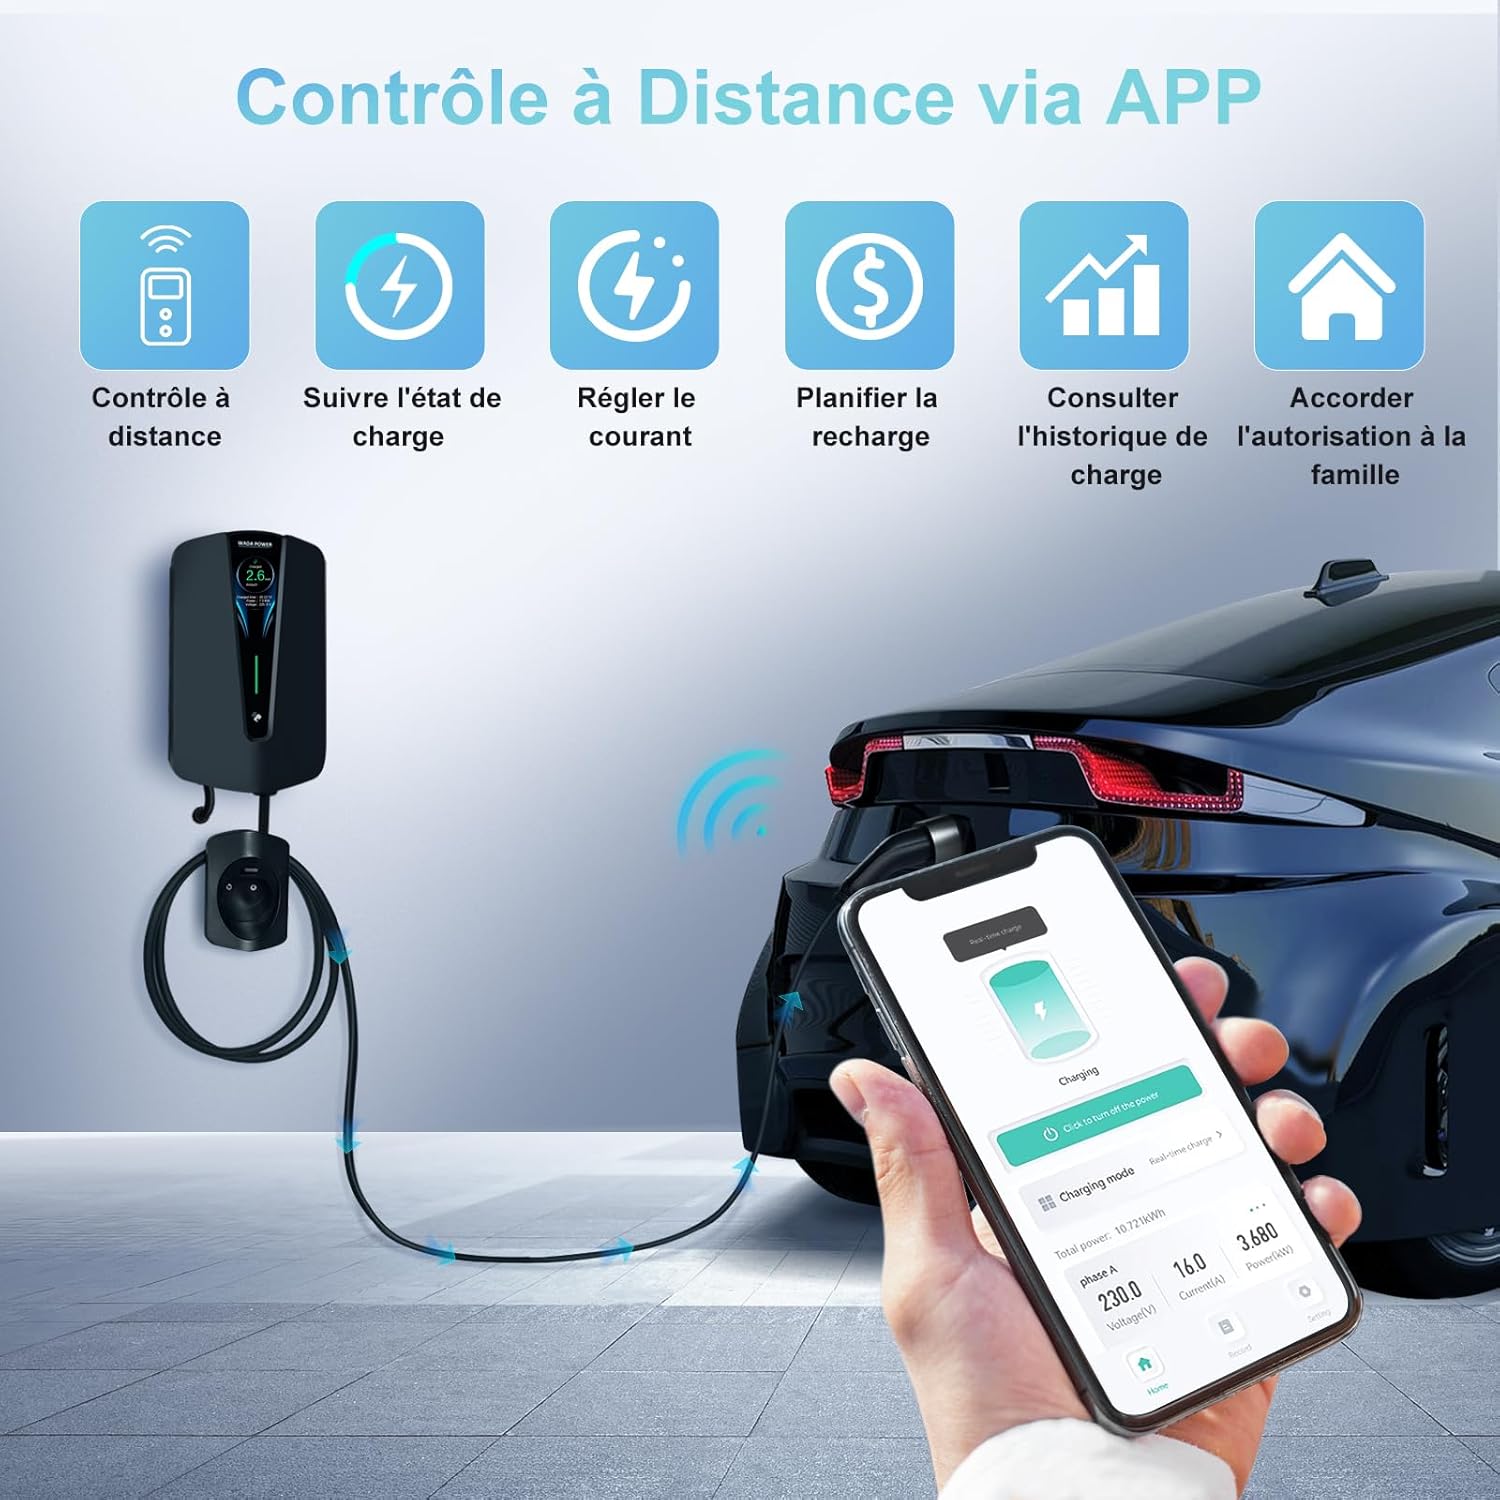
This image illustrates the convenience of controlling the charging station remotely through the dedicated mobile application, showcasing features such as remote control, charge status monitoring, current adjustment, charge scheduling, charge history review, and user authorization.
5.3 LCD Screen and LED Indicator
The 4.3-inch LCD screen displays real-time charging information, including charged amount, charging time, power, and voltage. The LED indicator provides a quick visual status of the charging process.

This image provides a detailed view of the charging station's 4.3-inch LCD screen, which clearly displays essential charging information such as the charged amount, charging time, current power, and voltage. The intelligent LED indicator also provides a quick visual cue of the operational status.
6. Maintenance
Regular maintenance ensures the longevity and optimal performance of your charging station:
- Cleaning: Wipe the exterior of the charging station with a soft, damp cloth. Do not use abrasive cleaners or solvents.
- Cable Inspection: Periodically inspect the charging cable and connector for any signs of wear, damage, or corrosion. Replace if necessary.
- Ventilation: Ensure the area around the charging station is clear to allow for proper ventilation.
7. Troubleshooting
If you encounter issues with your WADA POWER charging station, refer to the table below for common problems and solutions:
| Problem | Possible Cause | Solution |
|---|---|---|
| Charging not starting | No power to the unit; Cable not fully inserted; RFID card not detected; App not activated. | Check circuit breaker; Re-insert cable firmly; Re-tap RFID card; Activate via app. |
| App connectivity issues | Wi-Fi/Bluetooth off; Out of range; Incorrect password; App outdated. | Ensure Wi-Fi/Bluetooth is on; Move closer to unit; Re-enter password; Update app. |
| Slow charging speed | Current setting too low in app; Vehicle's charging capacity limit. | Adjust current setting in app to a higher value (up to 32A); Consult vehicle manual for charging limits. |
| Error message on LCD | Internal fault; Over-temperature; Voltage anomaly. | Refer to specific error code in a more detailed technical manual (if available); Disconnect and reconnect power; Allow unit to cool down. If persistent, contact support. |
8. Technical Specifications
| Feature | Specification |
|---|---|
| Model Number | Q8-7 |
| Material | TPU (cable) |
| Charging Interface | Type 2, IEC 62196-2 |
| Number of Phases | Single-phase |
| Max Output Power | 7 kW |
| Input Voltage Frequency | 50 Hz / 60 Hz |
| Input Voltage | 200-240 V |
| Output Voltage | 200-240 V |
| Output Current | 32 A |
| Adjustable Current | 8-32 A (1 A step adjustable) |
| Recommended Power Cable | 3 x 6 mm², copper |
| Input Terminal | L1/N/PE |
| RCD | AC 30mA + DC 6mA |
| Operating Temperature | -30 ℃ ~ +50 ℃ |
| Storage Temperature | -40 ℃ ~ +80 ℃ |
| Ambient Humidity | 5% ~ 95% (non-freezing, non-condensing) |
| Altitude | <2000 m |
| Status Indication | LED indicator |
| Screen | 4.3" color LCD screen |
| Start Mode | Plug-and-charge, RFID card, Mobile App |
| Communication Mode | Wi-Fi (2.4 GHz), Bluetooth (10 meters) |
| Protection Rating | IP55, IK10 |
| Cable Length | 5 m |
| Mounting | Wall mount or pole mount (pole optional) |
| Screen Language | English only |
| App Language Support | English, French, German, Spanish, Italian, Portuguese, Polish, Chinese, Japanese, Korean, etc. |
| Compatibility | Suitable for all electric vehicles and plug-in hybrids with Type 2 interface. |
9. Warranty and Support
9.1 Warranty Information
The WADA POWER EV Charging Station comes with a 1-year guarantee from the date of purchase, covering manufacturing defects. This warranty does not cover damages caused by user misuse, improper installation, or unauthorized modifications.
9.2 Customer Support
For technical assistance, troubleshooting, or warranty claims, please contact WADA POWER customer support through the retailer where you purchased the product. Please have your product model number (Q8-7) and proof of purchase ready when contacting support.
Ask a question about this manual
Ask about setup, troubleshooting, compatibility, parts, safety, or missing instructions. Manuals+ will review the question and use this page’s manual context to help answer it.