1. Introduction
This manual provides detailed instructions for the safe and effective use of your VEVOR P19 Banding Strapping Kit. Please read this manual thoroughly before operation and retain it for future reference. This kit is designed for securing packages, pallets, and various items using PET strapping and metal seals.
2. Safety Information
Always prioritize safety when operating any tools. Failure to follow safety guidelines may result in injury or damage to property.
- Wear appropriate personal protective equipment (PPE), including safety gloves and eye protection, during operation.
- Ensure the work area is clear of obstructions and well-lit.
- Keep hands and fingers away from moving parts of the tensioner and sealer during use.
- Do not use the tools for purposes other than their intended use.
- Inspect tools and strapping materials for damage before each use. Do not use damaged equipment.
- Keep children and unauthorized personnel away from the work area.
3. Package Contents
The VEVOR P19 Banding Strapping Kit includes the following components:
- 1 x Strapping Tensioner Tool
- 1 x Banding Sealer Tool
- 1 x PET Strapping Roll (1000 ft / 300 m length, 5/8" width, 0.03" thickness)
- 300 x Metal Strapping Buckles (for 5/8" width strapping)

Figure 3.1: Included components of the VEVOR P19 Banding Strapping Kit.
4. Product Overview
The VEVOR P19 kit consists of a tensioner, a sealer, PET strapping, and metal buckles, each designed for specific functions in the strapping process.
4.1 Strapping Tensioner
The tensioner tool is used to pull the PET strapping tight around the item being secured. It features a mechanism to feed the strap and a handle to apply tension, ensuring a secure fit.
4.2 Banding Sealer
The sealer tool is used to crimp the metal buckles onto the tensioned strapping, creating a strong, permanent seal that holds the strap in place.
4.3 PET Strapping
The kit includes high-strength PET (Polyethylene Terephthalate) strapping. This material is known for its durability, resistance to corrosion and damage, and ability to withstand various temperatures. It is also reusable.
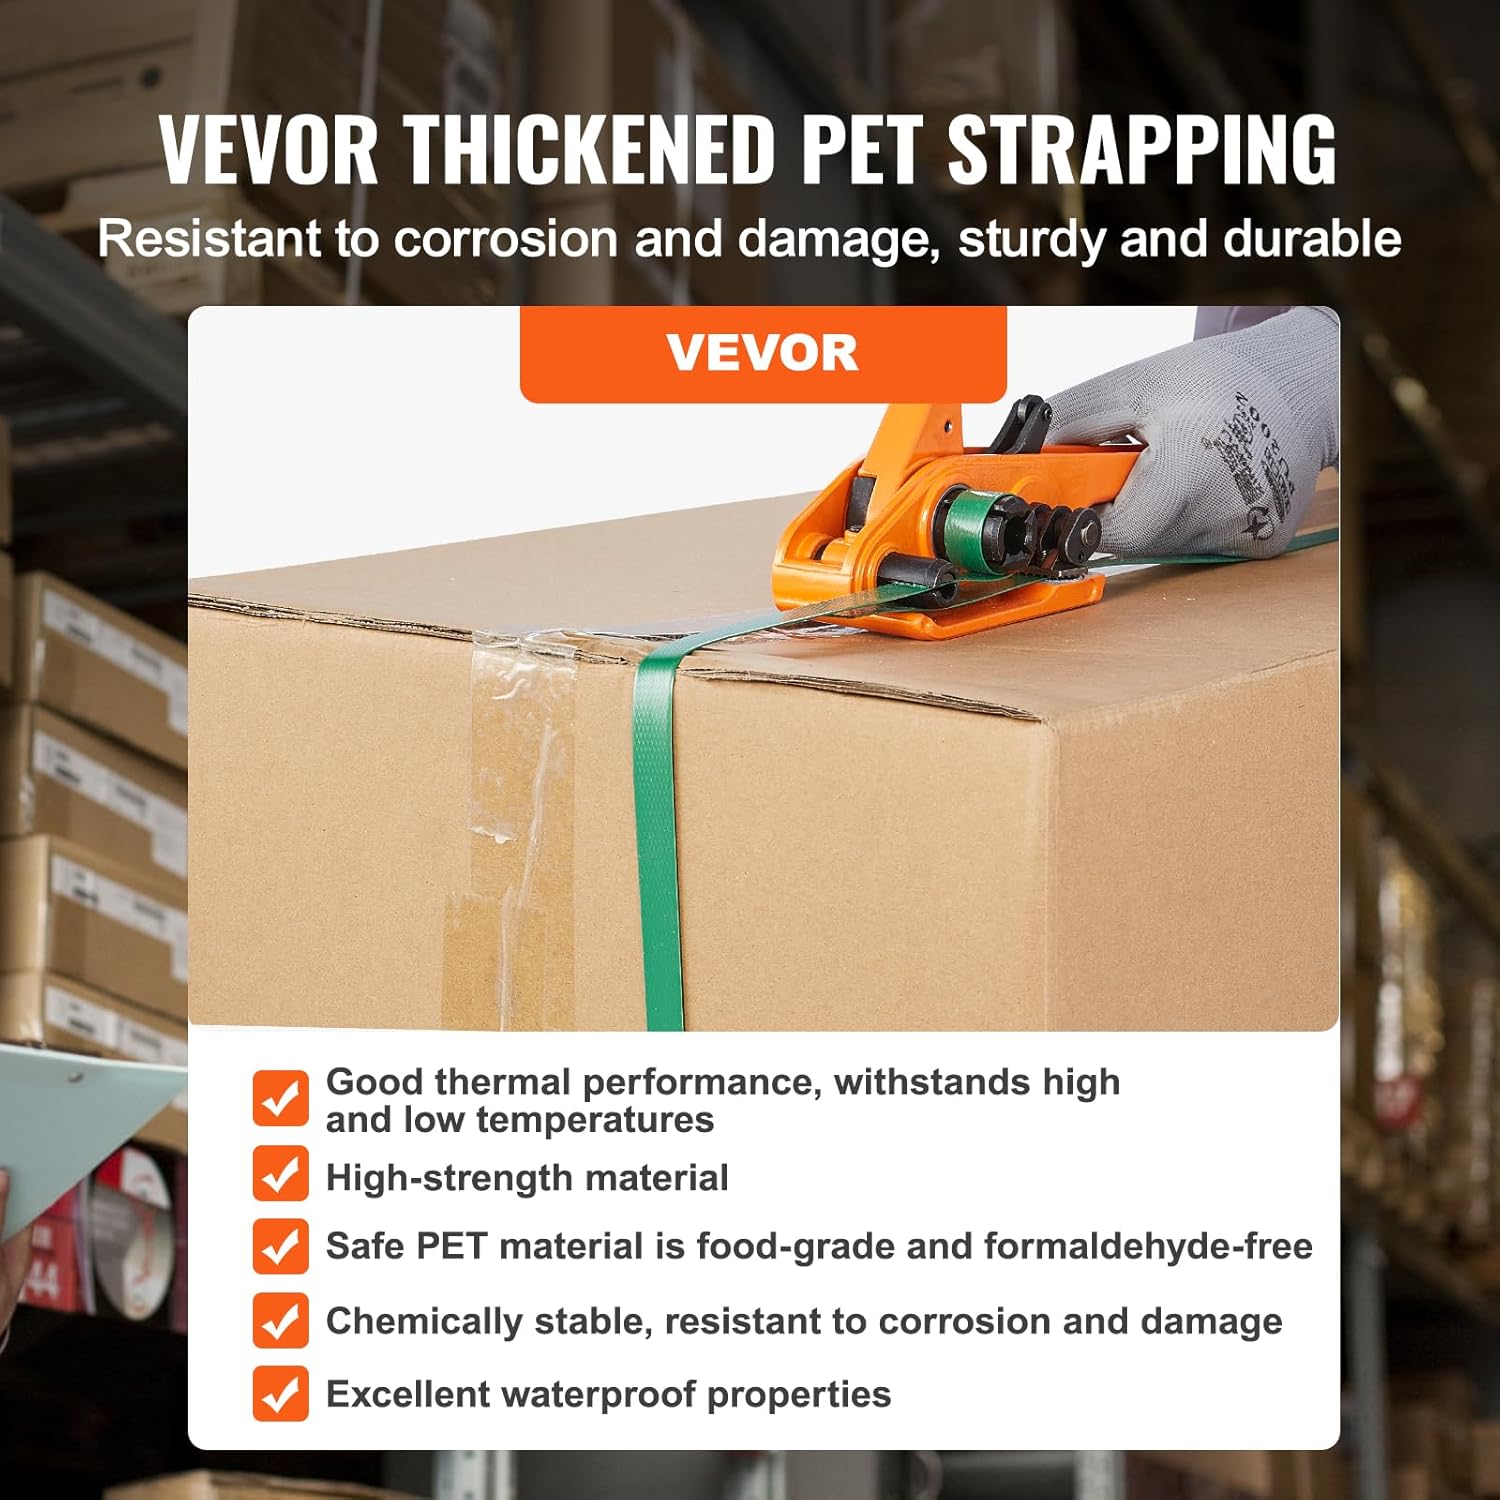
Figure 4.1: Features of VEVOR PET Strapping.
4.4 Metal Buckles
These metal buckles are used in conjunction with the sealer to secure the ends of the PET strapping, forming a closed loop around the item.

Figure 4.2: Dimensions of the Strapping Sealer and Tensioner.
5. Setup
Before beginning any strapping operation, ensure all components are present and in good working condition. No assembly is required for the tensioner or sealer tools.
- Unpack all items from the kit.
- Inspect the tensioner and sealer for any signs of damage or wear.
- Ensure the PET strapping roll is free from kinks or damage.
- Have a sufficient quantity of metal buckles readily available.
6. Operating Instructions
Follow these steps to effectively strap your items using the VEVOR P19 kit:
- Step 1: Wrap the Strapping. Wrap the PET strapping around the item you wish to secure. Ensure there is enough overlap to feed through the tensioner and apply a buckle. Do not cut the strap yet.
- Step 2: Feed the Strapping into the Tensioner. Take one end of the strapping and insert it through the three cylinders of the tensioner. Then, take the other end of the strapping (the one coming from the roll) and insert it into the first and second cylinders of the tensioner. Ensure the strap is flat and not twisted.
- Step 3: Tension the Strap. Push the tensioner handle forward and backward repeatedly to tighten the strap around the item. Continue until the strap is taut and the item is securely held.
- Step 4: Position the Buckle. Place a metal buckle over both layers of the tensioned strap, ensuring it is positioned correctly for crimping. The buckle should be placed near the tensioner.
- Step 5: Crimp the Buckle. Use the banding sealer tool to firmly clamp the metal buckle. Apply sufficient pressure to crimp the buckle securely onto the strap, creating a strong seal.
- Step 6: Cut the Excess Strap. After the buckle is crimped, press down the tensioner handle to activate the integrated cutter, which will cut off the excess strapping from the roll.

Figure 6.1: Step-by-step guide for operating the strapping kit.

Figure 6.2: Strapping tensioner in operation.
7. Maintenance
Proper maintenance ensures the longevity and reliable performance of your strapping kit.
- Cleaning: After each use, wipe down the tensioner and sealer with a clean, dry cloth to remove any dust or debris.
- Lubrication: Periodically apply a small amount of light machine oil to the moving parts of the tensioner and sealer to ensure smooth operation.
- Inspection: Regularly inspect the tools for signs of wear, damage, or loose components. Pay close attention to the cutter blade on the tensioner and the crimping jaws on the sealer.
- Storage: Store the tools and strapping materials in a dry, clean environment, away from direct sunlight and extreme temperatures.
8. Troubleshooting
If you encounter issues during operation, refer to the following common troubleshooting tips:
- Strap not tensioning properly:
- Ensure the strap is correctly threaded through the tensioner's cylinders.
- Check for any debris or obstructions in the tensioner mechanism.
- Verify the strap width matches the tool's specifications (5/8 inch).
- Buckle not crimping securely:
- Ensure the buckle is correctly positioned over both layers of the strap.
- Apply firm and even pressure to the sealer handles.
- Inspect the sealer jaws for wear or damage.
- Strap not cutting cleanly:
- Ensure the strap is fully tensioned before attempting to cut.
- Check the cutter blade on the tensioner for dullness or damage.
If problems persist, contact VEVOR customer support for assistance.
9. Specifications
Detailed specifications for the VEVOR P19 Banding Strapping Kit:
| Feature | Specification |
|---|---|
| Model Number | P19 |
| Material | Aluminum (tools), Metal (buckles), PET (strapping) |
| Strapping Type | PET (Polyethylene Terephthalate) |
| Strapping Length | 1000 ft (300 m) |
| Strapping Width | 5/8 inch |
| Strapping Thickness | 0.03 inch |
| Strapping Breaking Tension | 1100 lbs (500 kg) |
| Strapping Sealer Size | 15.16" L x 1.77" W x 4.72" H (385 x 45 x 120 mm) |
| Number of Buckles | 300 PCS |
| Product Weight | 20.4 lbs (9.24 kg) |
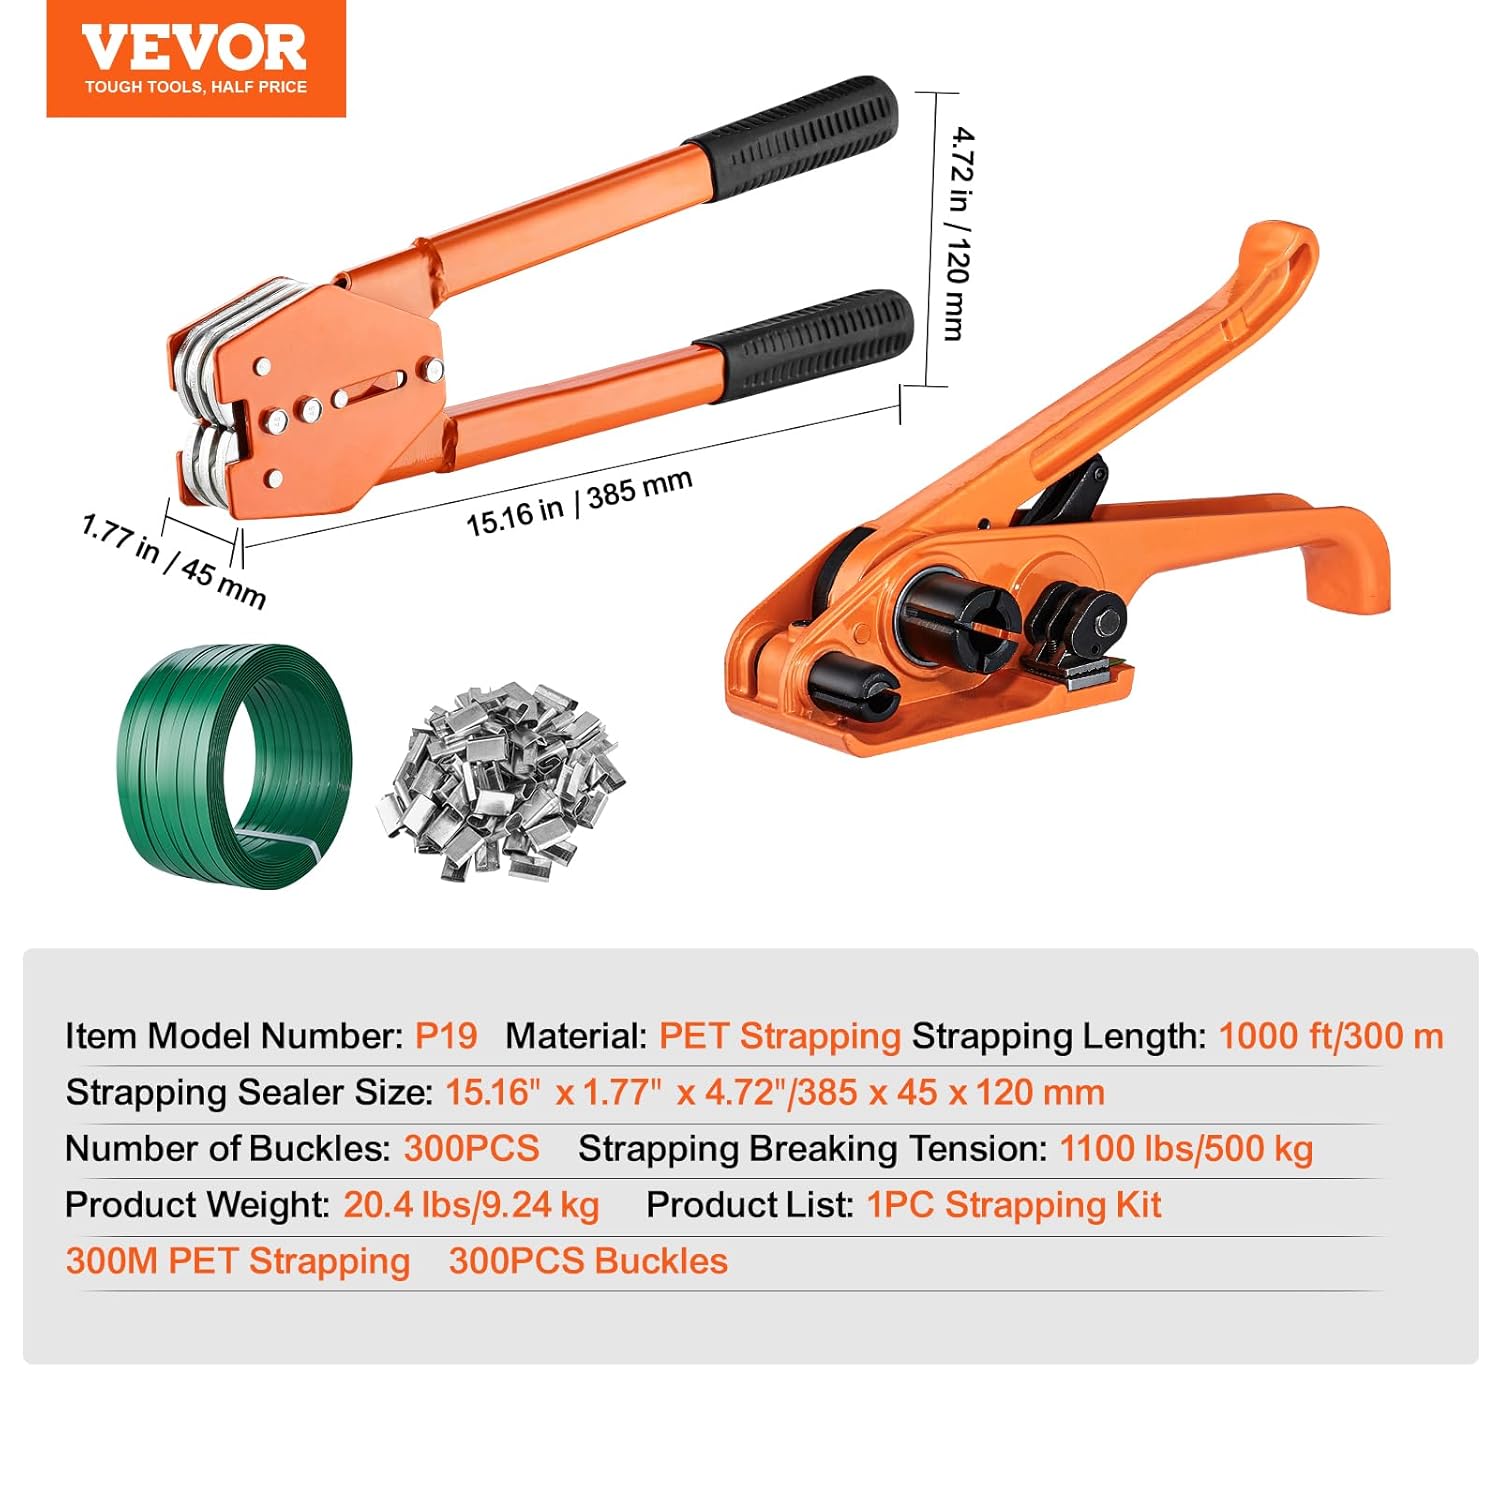
Figure 9.1: Summary of Product Specifications.
10. Warranty and Support
For warranty information, technical support, or any inquiries regarding your VEVOR P19 Banding Strapping Kit, please contact VEVOR customer service. Refer to the product packaging or the official VEVOR website for the most current contact details.
VEVOR Official Website: www.vevor.com