1. Product Overview
This manual provides instructions for the A-Premium Brake Light Switch, model SLS595. This component is designed to activate your vehicle's brake lights when the brake pedal is pressed and can also affect other systems such as cruise control. Proper installation and function are crucial for vehicle safety.

Image 1.1: The A-Premium Brake Light Switch, model SLS595, shown with its packaging. This switch is a critical component for vehicle braking systems.
2. Vehicle Compatibility
The A-Premium Brake Light Switch (SLS595) is compatible with the following Mercedes-Benz W203 Series models:
- Mercedes-Benz C230: 2002 (L4 2.3L)
- Mercedes-Benz C240: 2001-2005 (V6 2.6L)
- Mercedes-Benz C280: 2006-2007 (V6 3.0L)
- Mercedes-Benz C32 AMG: 2002 (V6 3.2L)
- Mercedes-Benz C320: 2001-2005 (V6 3.2L)
This switch features a 4-blade connector. Always verify compatibility with your specific vehicle model and year before installation.

Image 2.1: Visual representation of compatible Mercedes-Benz models for the brake light switch.
3. Product Components and Structure
The A-Premium Brake Light Switch is engineered with specific components to ensure reliable performance:
- Metal Plated Terminal: Designed for low resistance loss and excellent electrical conductivity, with anti-corrosive coating.
- Composite Material Housing: High-strength housing that is resistant to fracture, ensuring durability and safety.
- Precision Spring: Provides consistent and accurate response.
- H62 Brass Sheet: Used for internal contacts, offering good conductivity.
- Buckle: Secures the switch in place during installation.
- Push Rod: The movable component that interacts with the brake pedal, designed for sensitive response and smooth operation.

Image 3.1: Detailed diagram illustrating the internal and external components of the brake light switch.
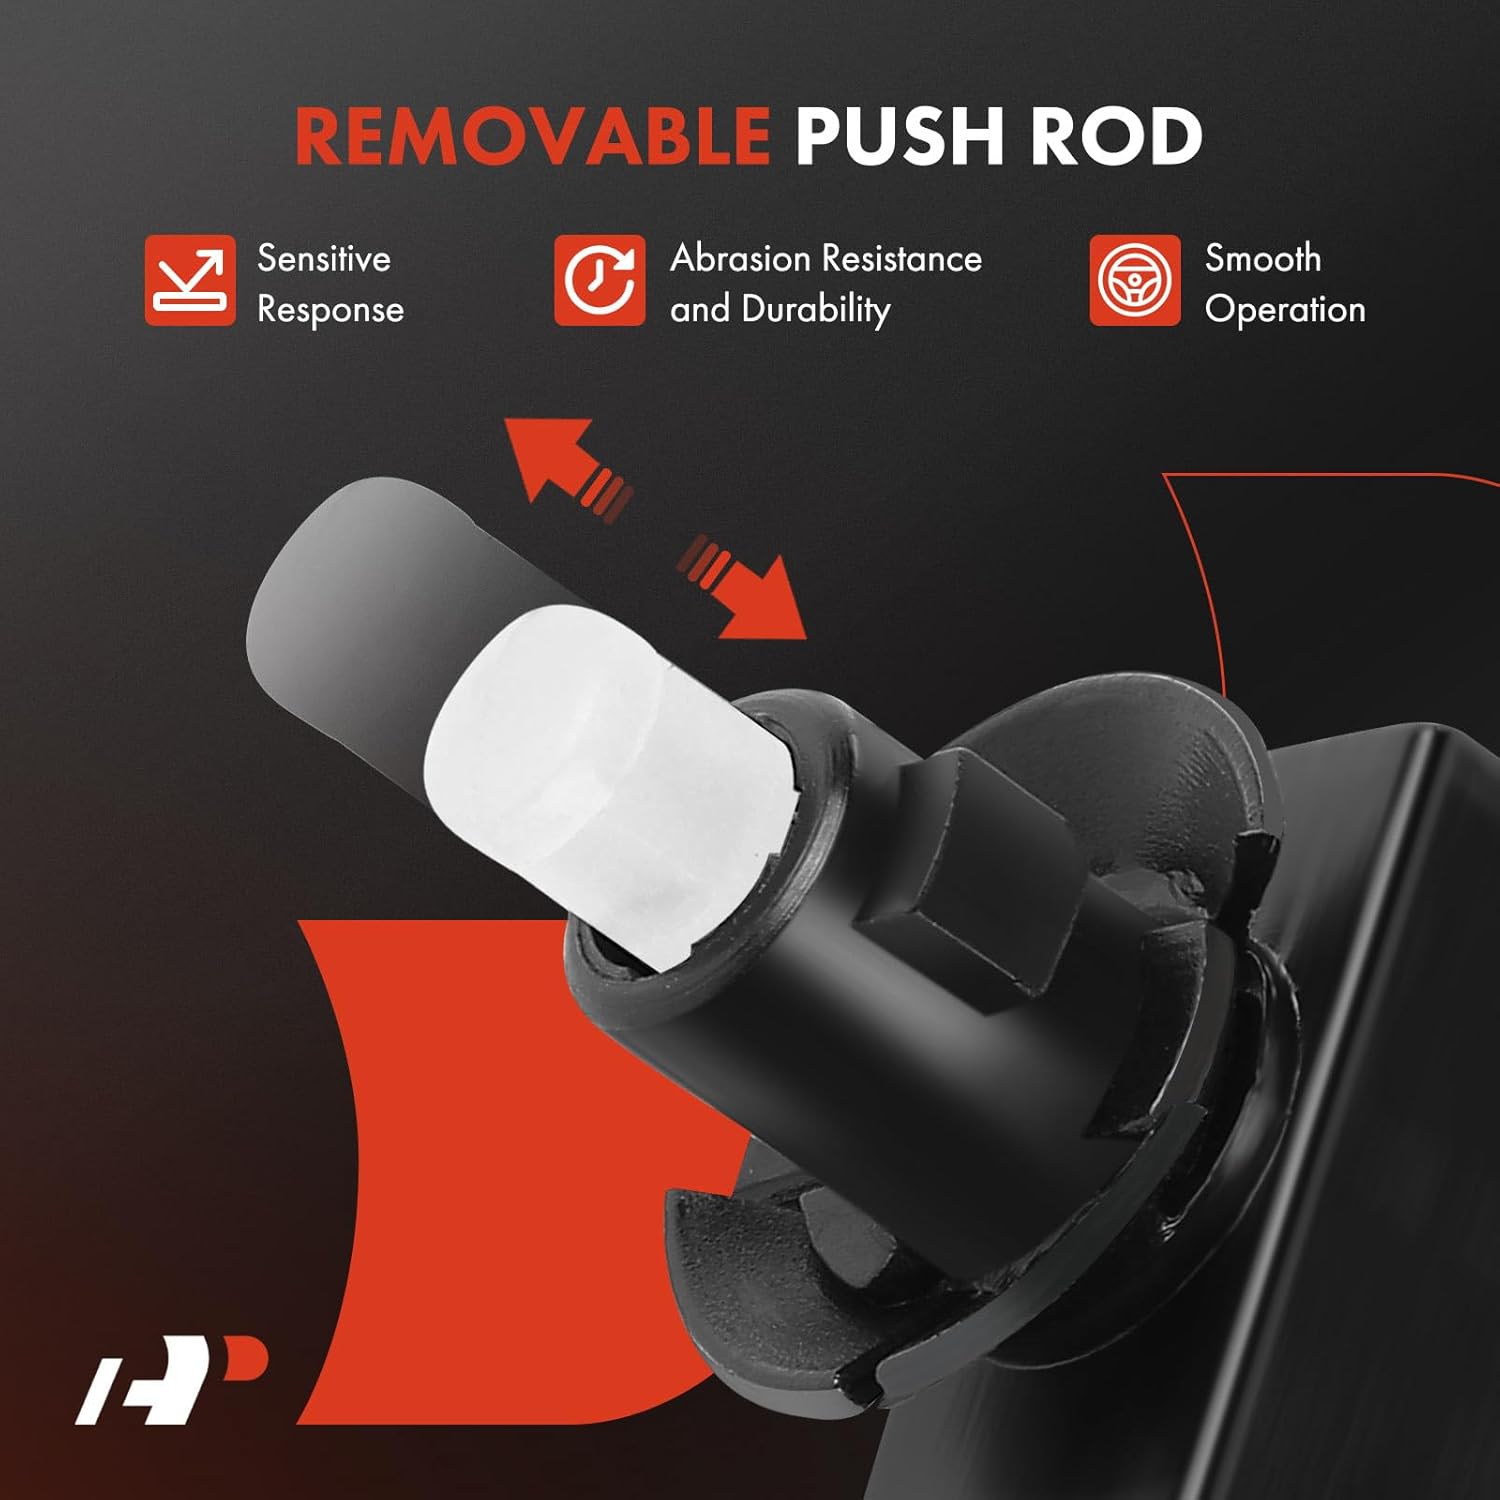
Image 3.2: A close-up view of the removable push rod, highlighting its design for sensitive and durable operation.

Image 3.3: The high-strength composite housing, designed for durability and resistance to damage.

Image 3.4: The electroplated coating terminal, engineered for optimal electrical conductivity and corrosion resistance.

Image 3.5: The precisely-fitted 4-pin plug, ensuring a secure and reliable connection to the vehicle's wiring harness.
4. Specifications
| Specification | Detail |
|---|---|
| Model Number | SLS595 |
| Reference Numbers | SLS595, 1S12459, 0015453809, 001545380928 |
| Attachment Method | Push-in |
| Color | Black |
| Connector Gender | 1 Female |
| Terminal Quantity | 4 Blades |
| Terminal Gender | Male |
| Wiring Harness Included | No |
| Mounting Hardware Included | No |
| Operating Voltage | 12V |
| Operation Mode | Automatic |
| Contact Type | Normally Open |
| Circuit Type | 1-way |
| Actuator Type | Push Button |
| Contact Material | Metal |
| International Protection Rating | IP00 |
5. Installation (Setup)
The A-Premium Brake Light Switch is designed for direct replacement and easy installation. However, due to the critical safety function of this component and the complexity of automotive electrical systems, it is highly recommended to consult your vehicle's specific shop manual for detailed instructions or seek assistance from a qualified mechanic.
General Installation Steps (Consult vehicle-specific manual for exact procedure):
- Safety First: Disconnect the vehicle's battery to prevent electrical shorts or accidental activation.
- Locate the Old Switch: The brake light switch is typically located near the brake pedal arm, often mounted to the pedal bracket.
- Disconnect Wiring: Carefully unplug the electrical connector from the old switch.
- Remove Old Switch: Depending on the vehicle, the old switch may twist out, unclip, or require a specific tool for removal.
- Install New Switch: Insert the new A-Premium Brake Light Switch into the mounting position. Ensure it is securely seated and properly aligned.
- Connect Wiring: Reconnect the electrical connector to the new switch.
- Test Functionality: Reconnect the battery. With the ignition on (engine off), press the brake pedal to verify that the brake lights illuminate correctly. Also, check for proper operation of any other systems affected by the brake switch (e.g., cruise control disengagement).
Attention: If you do not have an installation manual or sufficient skills to install this part, it is recommended that you seek help from a qualified mechanic.

Image 5.1: Detailed view of the switch's connector and push rod, important for correct installation and function.
6. Operation
The brake light switch operates automatically. When the brake pedal is pressed, the push rod of the switch is released, completing an electrical circuit. This action sends a signal to the vehicle's electronic control unit (ECU) and directly to the brake lights, causing them to illuminate. This signal also informs other vehicle systems, such as the cruise control, to disengage.
A properly functioning brake light switch ensures:
- Accurate and timely activation of brake signals.
- Correct disengagement of cruise control.
- Enhanced driving safety by clearly indicating braking to other drivers.

Image 6.1: Illustrates the function of the brake light switch in activating vehicle brake lights for safety.
7. Maintenance
The A-Premium Brake Light Switch is designed for long-term reliability and typically requires no routine maintenance. However, periodic inspection during vehicle servicing is recommended. Check for:
- Physical Damage: Inspect the switch and its wiring for any signs of cracks, corrosion, or loose connections.
- Proper Function: Ensure brake lights illuminate immediately and consistently when the brake pedal is pressed, and turn off when released.
- Pedal Feel: Verify that the brake pedal operates smoothly without obstruction from the switch.
If any issues are observed, refer to the troubleshooting section or consult a qualified mechanic.
8. Troubleshooting
If you experience issues related to your brake light switch, consider the following common problems and solutions:
- Brake Lights Not Working:
- Check the brake light bulbs.
- Inspect the wiring harness for damage or loose connections.
- Verify the brake light switch is properly installed and making contact with the brake pedal.
- Test the switch for continuity with a multimeter (if comfortable with electrical testing).
- Brake Lights Always On:
- Ensure the brake pedal returns to its full resting position.
- Check if the brake light switch is stuck in the 'on' position or improperly adjusted.
- Inspect the push rod for damage or obstruction.
- Cruise Control Malfunction:
- If cruise control does not engage or disengage properly, the brake light switch could be a factor. Verify brake light function first.
- Dashboard Warning Lights:
- A malfunctioning brake light switch can sometimes trigger dashboard warning lights (e.g., ABS, ESP, or brake system warnings). Consult a diagnostic scanner for specific fault codes.
For persistent issues or if you are unsure about diagnosing the problem, it is advisable to consult a professional automotive technician.
9. Warranty and Support
A-Premium offers a one-year unlimited-mileage guarantee on this brake light switch. This warranty covers defects in materials and workmanship under normal use and service.
For warranty claims, technical support, or further assistance, please contact A-Premium customer service through their official channels or the retailer where the product was purchased. Keep your proof of purchase for warranty validation.
You can find more information and contact details by visiting the A-Premium Store on Amazon.