
Product Overview
The GE SmartHQ Leak Sensor system is designed to detect water leaks in your home or property. When connected to the SmartHQ platform, it provides real-time alerts at the first sign of water, helping to prevent potential damage. Its compact design allows for easy installation in various locations, including under or behind appliances such as dishwashers, water heaters, and more. The advanced technology ensures accurate detection, providing peace of mind against water damage.

Figure 1: Example of a small water leak that the SmartHQ system is designed to detect.
Key Features
- Whole-home leak detection with proactive alerts 24/7 via the SmartHQ app.
- Smart technology for early leak detection to reduce water damage risk.
- Wireless operation for flexible installation and placement.
- Suitable for placement in basements, under sinks, near washing machines, or hot water heaters.
- The included gateway supports up to 5 sensors for comprehensive home protection.
- Easy connection to both the SmartHQ Home app and SmartHQ Management Ecosystem.
1. Setup Instructions
1.1 Unboxing and Components
Before beginning installation, ensure all components are present in the package. The kit includes the SmartHQ Gateway, water leak sensors, AAA batteries, a wall plug, and a charging cable.
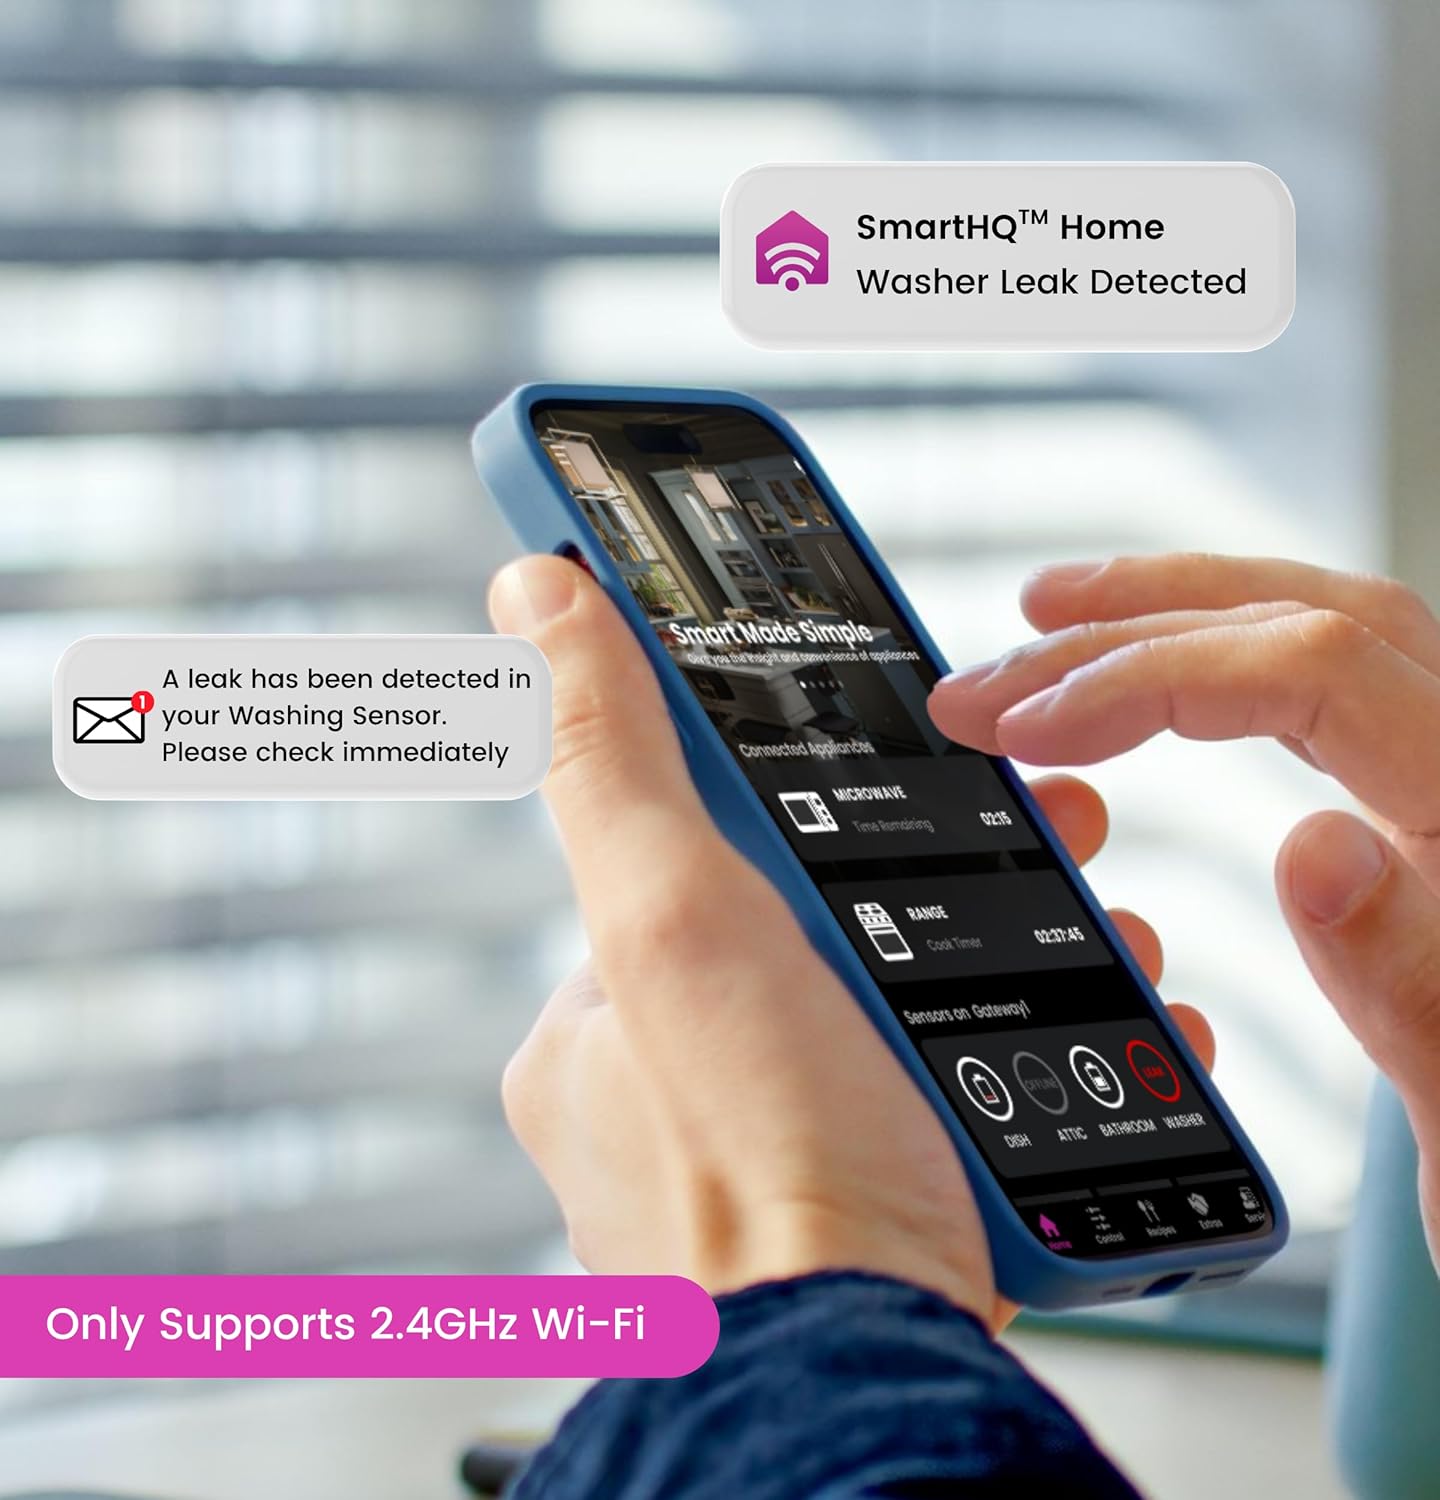
Figure 2: What's in the Box - Gateway, 3 Sensors, AAA Batteries, USB-C Cable, and User Guide.
1.2 App Installation and Gateway Connection
Download the SmartHQ app from your device's app store. Follow the in-app instructions to connect your Gateway. Plug the Gateway into a power outlet using the provided wall plug and USB-C cable. The indicator light on the Gateway will flash during the connection process. Once connected, the app will confirm successful pairing. Note that the SmartHQ system only supports 2.4GHz Wi-Fi networks.

Figure 3: Steps to Connect the Gateway via the SmartHQ App.

Figure 4: SmartHQ App indicating support for 2.4GHz Wi-Fi only.
Video 1: Official GE Appliances SmartHQ WiFi Water Leak Detector overview and setup guide. This video demonstrates the initial setup process and key features of the leak detection system.
1.3 Sensor Pairing and Placement
Once the Gateway is connected, you can pair your leak sensors. Insert the provided AAA batteries into each sensor. In the SmartHQ app, select the option to "Pair New Sensor" and follow the prompts. The indicator light on the sensor will flash during pairing. After pairing, strategically place the sensors in areas prone to water leaks, such as under sinks, near water heaters, washing machines, or in basements. The system supports up to five sensors per Gateway.

Figure 5: Steps to Pair Sensors to the Gateway via the SmartHQ App.

Figure 6: Example Sensor Placement for Whole-Home Coverage.
2. Operating Instructions
2.1 Monitoring and Alerts
The SmartHQ system continuously monitors for water leaks. In the event of a leak, the system will send an immediate alert to your SmartHQ app on your smartphone. The app will indicate which sensor detected the leak, allowing for quick identification of the problem area.

Figure 7: SmartHQ App displaying a leak alert notification.

Figure 8: Real-time leak detection displayed in the SmartHQ app.
Upon receiving an alert, promptly investigate the indicated location to mitigate potential water damage. The system is designed for early detection, providing valuable time to address issues before they escalate.
3. Maintenance
3.1 Battery Replacement
Each leak sensor requires 2 AAA alkaline batteries (included). The SmartHQ app will provide notifications when sensor battery levels are low, indicating it's time for replacement. To replace batteries, carefully open the sensor casing, remove the old batteries, and insert new ones, ensuring correct polarity. Dispose of used batteries according to local regulations.
3.2 Cleaning
Wipe the exterior of the sensors and Gateway with a soft, dry cloth as needed. Do not use abrasive cleaners or immerse the devices in water.
4. Troubleshooting
4.1 Sensor Not Connecting or Pairing
- Ensure the Gateway is powered on and connected to your home's 2.4GHz Wi-Fi network. The SmartHQ system only supports 2.4GHz Wi-Fi.
- Verify that the sensor batteries are correctly installed and have sufficient charge.
- Bring the sensor closer to the Gateway during the pairing process.
- Restart the SmartHQ app and attempt the pairing process again.
- If issues persist, try removing the sensor from the app (if partially paired) and re-adding it from scratch.
4.2 False Leak Alerts
- Check the sensor's location for any residual moisture or condensation that might trigger a false alert.
- Ensure the sensor is placed on a dry, flat surface.
- If a sensor repeatedly gives false alerts, try resetting it by removing and reinserting the batteries.
4.3 No App Notifications
- Confirm that your smartphone has an active internet connection.
- Check your phone's notification settings to ensure that the SmartHQ app is permitted to send notifications.
- Verify that the Gateway is connected to your Wi-Fi network and has internet access.
5. Product Specifications
| Feature | Detail |
|---|---|
| Brand | GE |
| Model Number | SPLK30N01A |
| UPC | 084691918394 |
| Item Weight | 13.4 ounces |
| Product Dimensions | 2.88 x 2.88 x 0.62 inches (each sensor) |
| Power Source | Battery Powered (Sensors), Wall Plug (Gateway) |
| Battery Type | AAA Alkaline (2 per sensor, 6 included for 3-pack) |
| Control Method | App (SmartHQ) |
| Maximum Range | 20 Meters (Sensor to Gateway) |
| Sensor Technology | Bluetooth Low Energy Mesh |
| Compatible Devices | Smartphone |
| Included Components | 3 Water Leak Sensors, 6 AAA Batteries, Gateway, Wall Plug, Charging Cable |
6. Warranty and Support
For warranty information, technical support, or to register your product, please visit the official GE Appliances website or contact their customer service. You can also find additional resources and products at the GE Appliances Store on Amazon.