Introduction
This manual provides comprehensive instructions for the proper setup, operation, and maintenance of your Lococo 2.4 Ghz Wireless Microphone Transmitter Receiver system. Please read this manual thoroughly before using the product to ensure optimal performance and longevity.
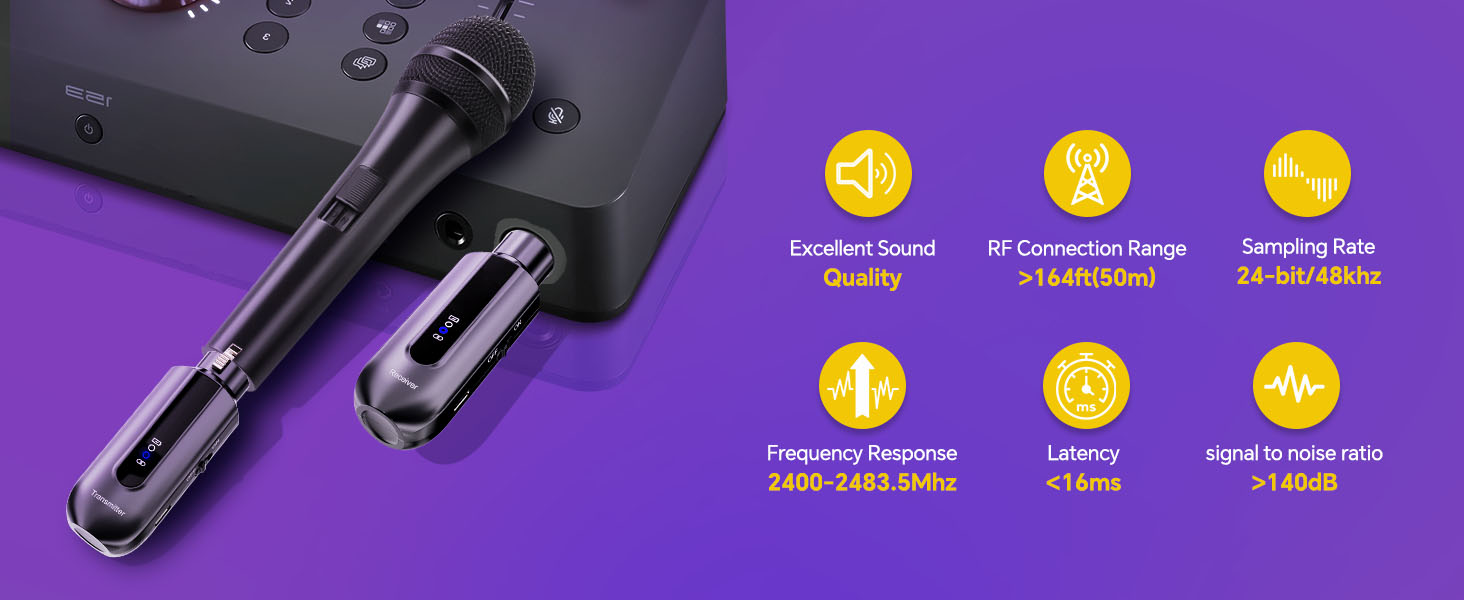
The Lococo wireless system offers a reliable 2.4GHz band transmission, designed for high signal stability and low interference, making your dynamic or condenser microphone wireless. It features 48V phantom power support for condenser microphones and a long-lasting built-in battery.
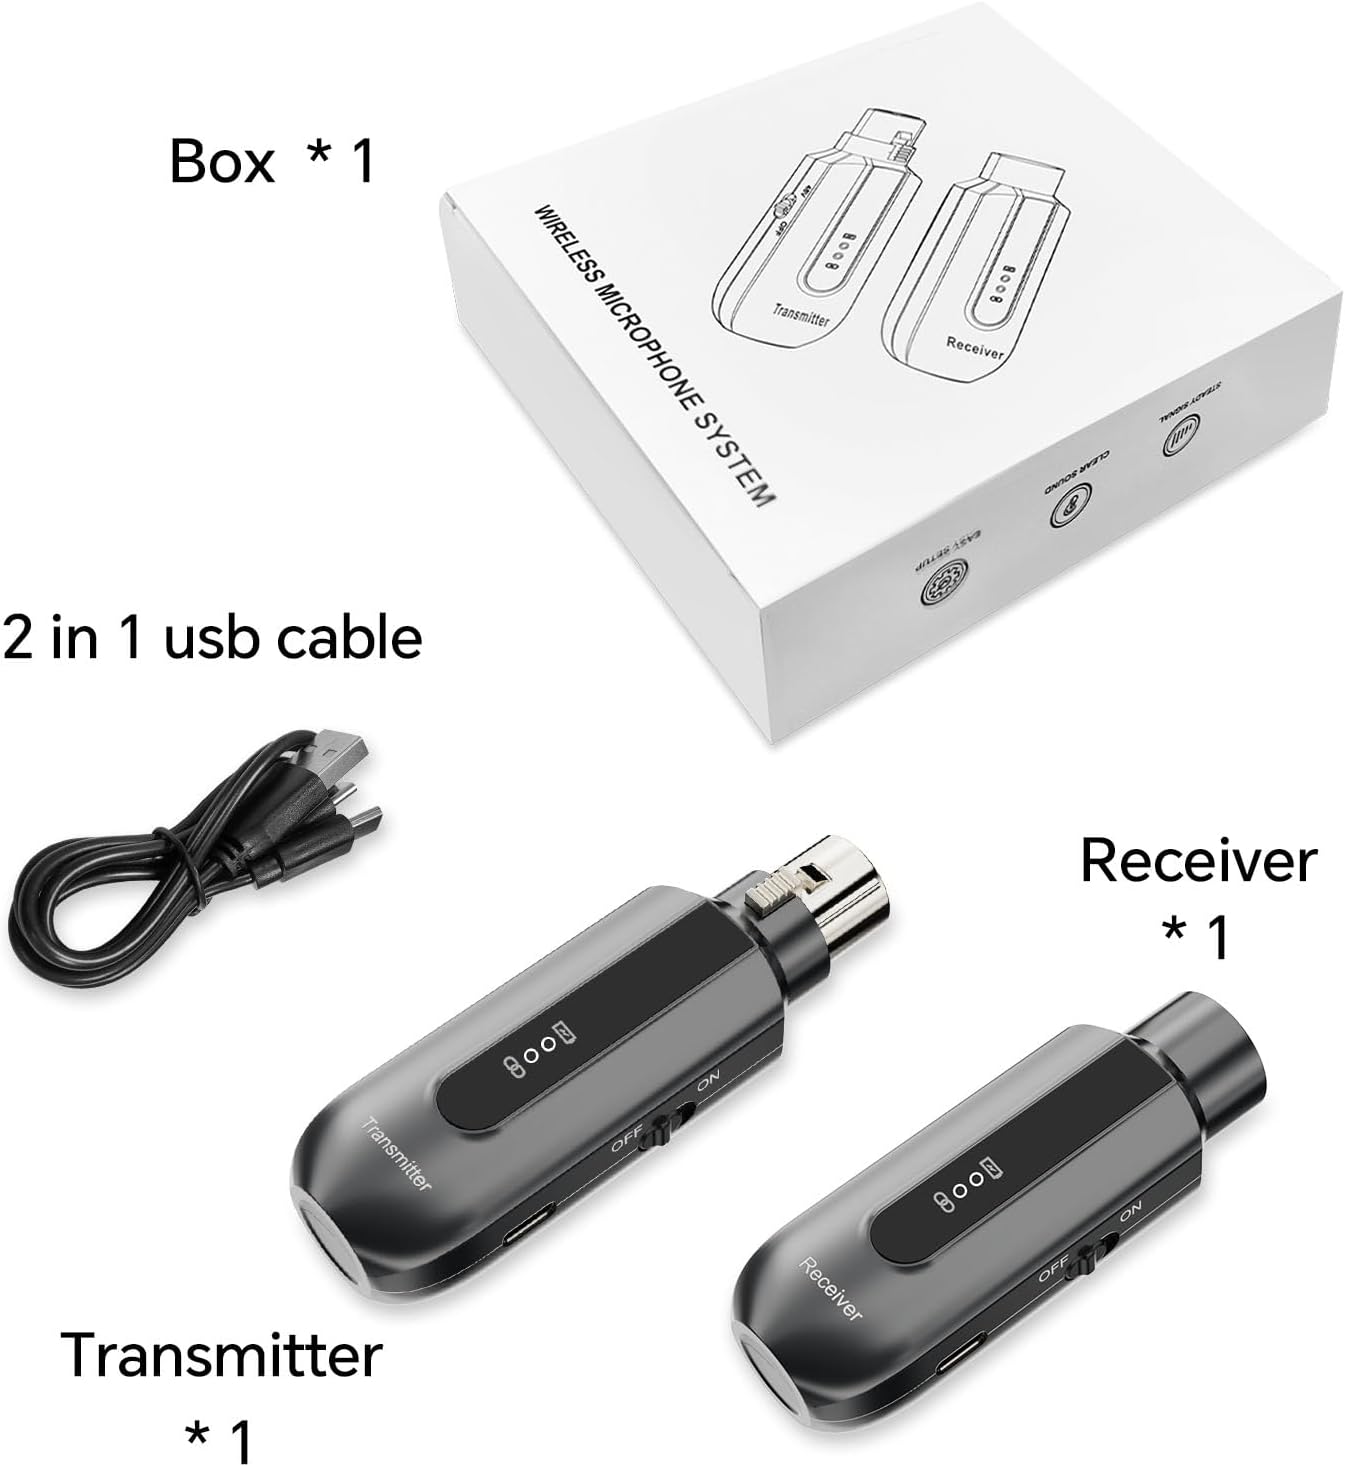
What's in the Box
- Receiver (1 unit)
- Transmitter (1 unit)
- 2-in-1 USB Charging Cable (1 unit)
- User Manual (1 unit)
Product Overview: Components and Controls
Familiarize yourself with the key components and controls of the transmitter and receiver units.
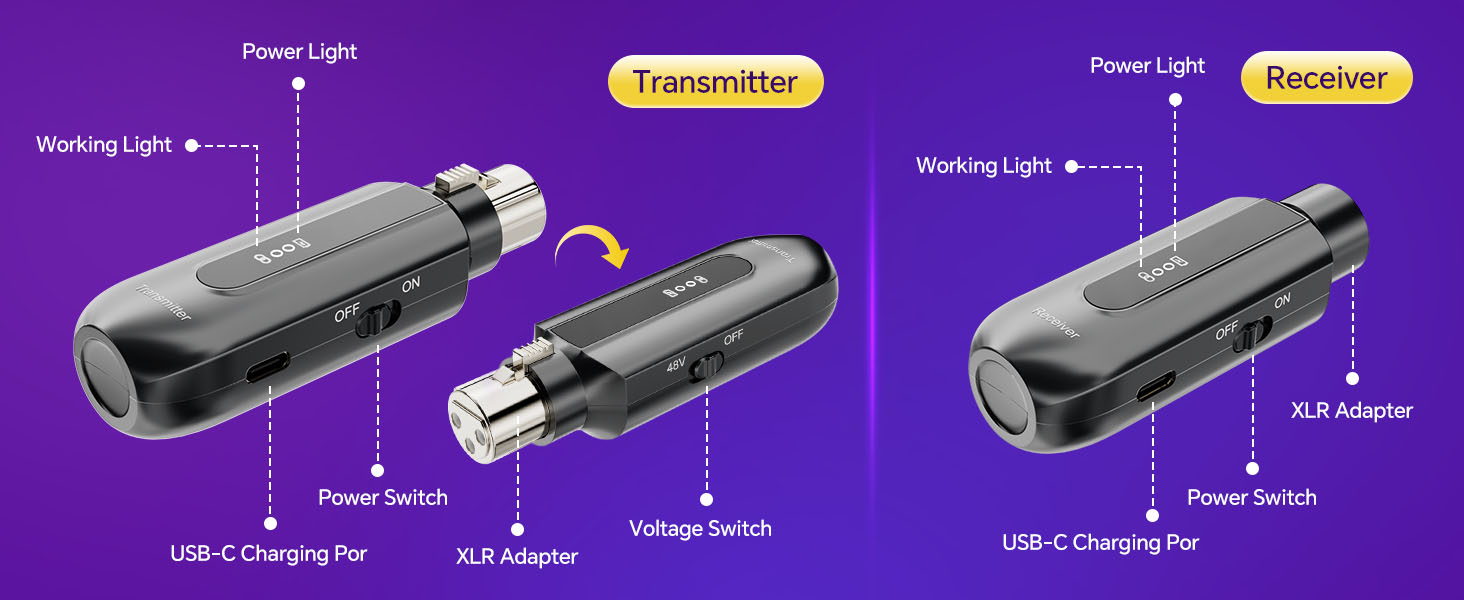
Transmitter
- XLR Adapter: Connects to your microphone.
- Power Switch: Turns the transmitter ON/OFF.
- Voltage Switch (48V): Activates 48V phantom power for condenser microphones. Turn OFF for dynamic microphones.
- USB-C Charging Port: For charging the internal battery.
- Power Light: Indicates charging status (Red for charging, Green for full).
- Working Light: Indicates connection status (Blue when connected).
Receiver
- XLR Adapter: Connects to your audio mixer, PA system, or other audio input device.
- Power Switch: Turns the receiver ON/OFF.
- USB-C Charging Port: For charging the internal battery.
- Power Light: Indicates charging status (Red for charging, Green for full).
- Working Light: Indicates connection status (Blue when connected).
Setup Instructions
Follow these steps for initial setup and connection:
- Charge the Units: Before first use, fully charge both the transmitter and receiver using the provided 2-in-1 USB cable. Refer to the 'Charging Instructions' section for details.
- Connect Transmitter to Microphone:
- For Dynamic Microphones: Ensure the 48V Voltage Switch on the transmitter is in the 'OFF' position. Plug the transmitter's XLR adapter directly into your dynamic microphone.
- For Condenser Microphones: Turn the 48V Voltage Switch on the transmitter to the 'ON' position. Plug the transmitter's XLR adapter directly into your condenser microphone.
- Connect Receiver to Audio System: Plug the receiver's XLR adapter into the XLR input of your audio mixer, PA system, recorder, or other compatible audio equipment.
- Power On: Turn on the Power Switch for both the transmitter and the receiver.
- Automatic Pairing: The transmitter and receiver are designed to pair automatically. The Working Light (blue indicator) on both units will blink during pairing and turn solid blue once a connection is established. This process typically takes a few seconds.
- Test Connection: Speak into the microphone and check the audio output from your connected audio system to confirm a successful connection and sound transmission.

Operating Instructions
Powering On/Off
To power on or off, simply toggle the Power Switch on both the transmitter and receiver units. Always ensure both units are powered on for operation and powered off when not in use to conserve battery life.
Indicator Lights
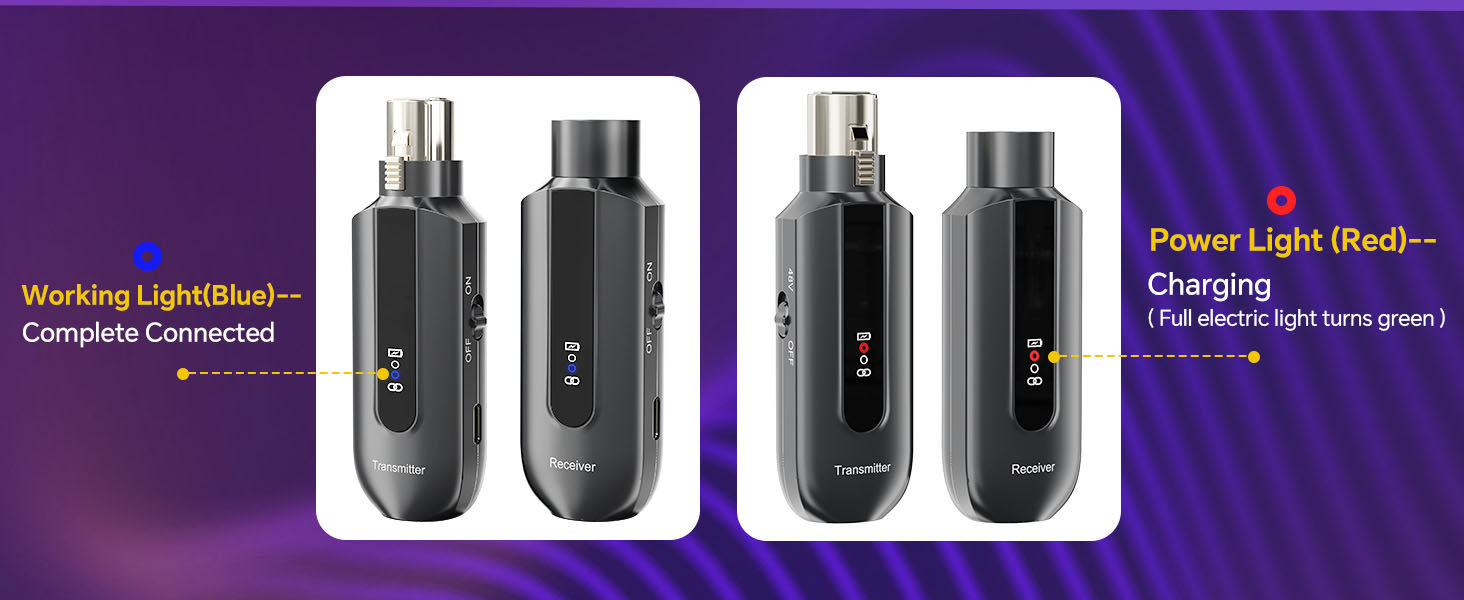
- Working Light (Blue): A solid blue light indicates a successful wireless connection between the transmitter and receiver. A blinking blue light indicates the units are searching for a connection.
- Power Light (Red/Green): A red light indicates the unit is currently charging. A green light indicates the unit is fully charged.
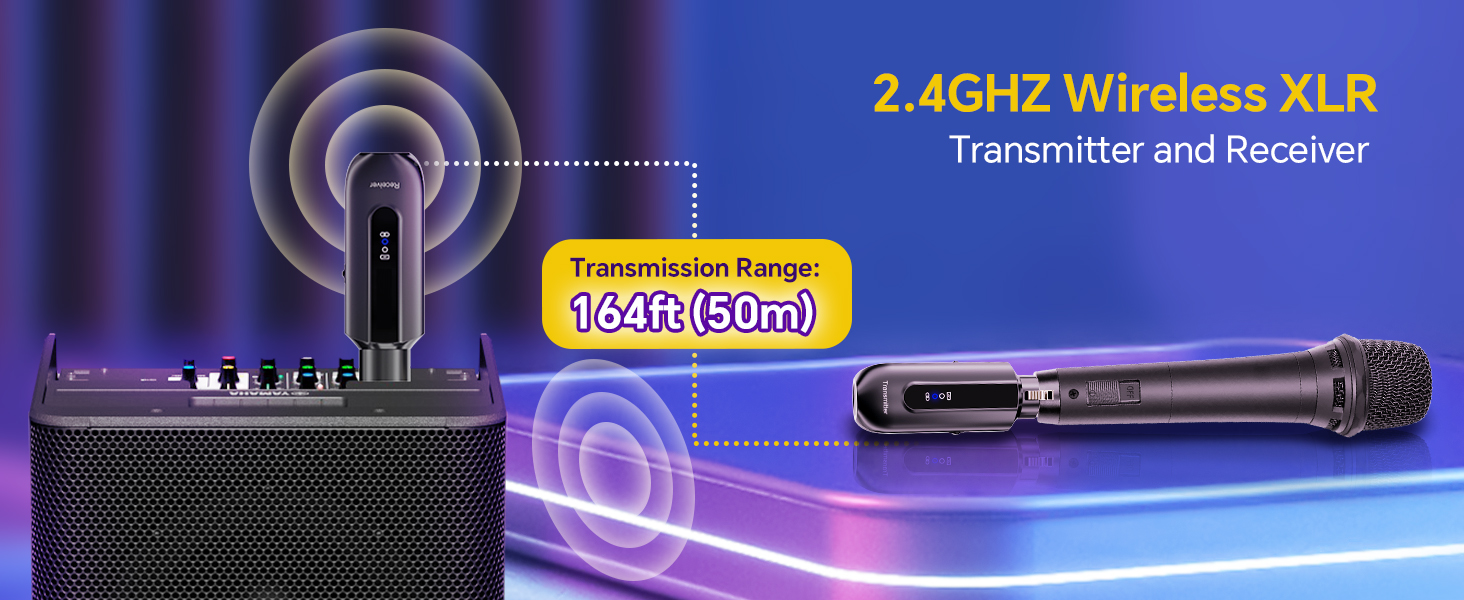
Transmission Range
The system operates on a 2.4GHz frequency band, providing a transmission range of up to 150 feet (50 meters) in open areas. Optimal performance is achieved within this range without significant obstructions.
Multiple Systems
The system supports up to 6 sets operating simultaneously in the same location without interference, making it suitable for events requiring multiple microphones.
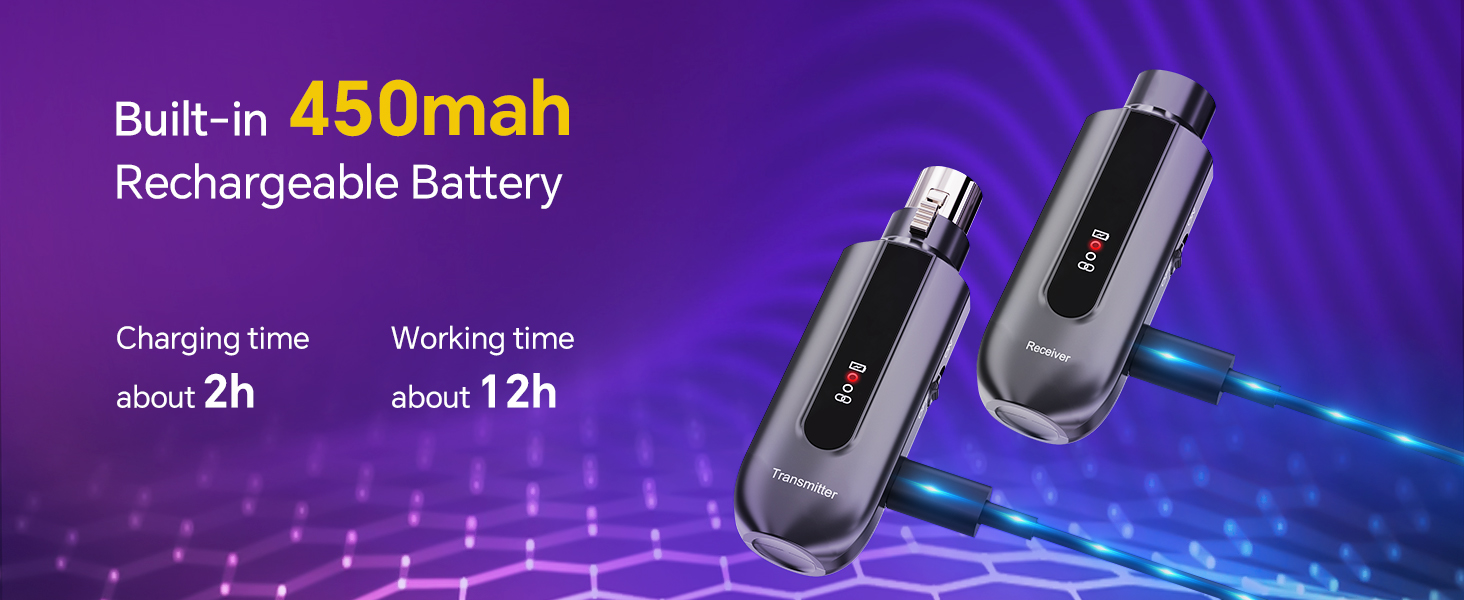
Charging Instructions
The transmitter and receiver units are equipped with built-in rechargeable lithium batteries.
- Connect the provided 2-in-1 USB charging cable to the USB-C charging ports on both the transmitter and receiver.
- Plug the USB-A end of the cable into a standard USB power adapter (not included) or a computer USB port.
- The Power Light on each unit will illuminate red, indicating that charging is in progress.
- Once fully charged, the Power Light will turn green. Disconnect the charging cable.
A full charge takes approximately 2 hours and provides 8-12 hours of working time, depending on usage and microphone power consumption (especially for condenser mics using 48V phantom power).
Maintenance
- Cleaning: Use a soft, dry cloth to clean the exterior of the units. Do not use liquid cleaners or solvents.
- Storage: Store the units in a cool, dry place away from direct sunlight and extreme temperatures when not in use.
- Battery Care: For optimal battery life, avoid fully discharging the units frequently. If storing for an extended period, charge the batteries to about 50% every few months.
- XLR Connections: Ensure XLR connections are clean and free of debris to maintain good signal integrity. The locking design of the XLR plug helps prevent accidental disconnections.
Troubleshooting
| Problem | Possible Cause | Solution |
|---|---|---|
| No sound output | Units not powered on; Units not paired; Low battery; Incorrect 48V switch setting; Incorrect connection. | Ensure both transmitter and receiver are ON. Check if Working Light is solid blue. Charge units if Power Light is off or red. Verify 48V switch setting matches microphone type. Ensure secure XLR connections. |
| Intermittent signal or static | Out of range; Obstructions; Interference from other 2.4GHz devices; Low battery. | Reduce distance between transmitter and receiver. Minimize obstructions. Avoid using near other strong 2.4GHz wireless devices (e.g., Wi-Fi routers). Charge units. |
| Units not pairing | Units too far apart; Interference; Power issue. | Bring units closer together. Power cycle both units (turn off, then on again). Ensure both units are charged. |
| Short battery life | Condenser microphone using 48V phantom power; Old battery; Frequent use. | Note that condenser microphones consume more power. Ensure units are fully charged before use. Consider replacing units if battery degradation is significant over time. |
| Slight audio delay | Inherent latency of wireless systems. | The system has a latency of less than 5ms, which is generally imperceptible. If noticeable, ensure no other processing or effects are adding further delay in your audio chain. |
Specifications
| Feature | Specification |
|---|---|
| Connectivity Technology | XLR, 2.4GHz Wireless |
| Transmission Range | Up to 150ft (50m) in open areas |
| Audio Delay (Latency) | Less than 5ms |
| Sampling Rate | 24-bit/48KHz |
| Phantom Power | 48V (switchable on transmitter) |
| Battery Type | Lithium Polymer (included) |
| Battery Capacity | 450mAh (approximate) |
| Charging Time | Approximately 2 hours |
| Working Time | 8-12 hours (depending on usage) |
| Product Dimensions | 1.38 x 4.45 x 4.8 inches |
| Item Weight | 4.2 ounces |
| Color | Black |
Warranty and Support
Lococo products are designed for reliability and performance. For any questions, technical support, or warranty claims, please contact Lococo customer service through the retailer where the product was purchased or visit the official Lococo website for contact information.
Please retain your proof of purchase for warranty purposes.