1. Introduction
This user manual provides detailed instructions for the installation, operation, and maintenance of your Topyond SW900 LCD Display. Designed for universal compatibility with 24V, 36V, 48V, and 60V electric bikes and scooters, this display enhances your riding experience by providing essential information and control functions.
2. Product Overview
The Topyond SW900 LCD Display is a versatile and user-friendly control panel for electric bicycles and scooters. It offers a comprehensive interface to monitor your bike's performance and manage various functions. Crafted from high-quality ABS material, it is designed for durability and reliability in outdoor conditions.
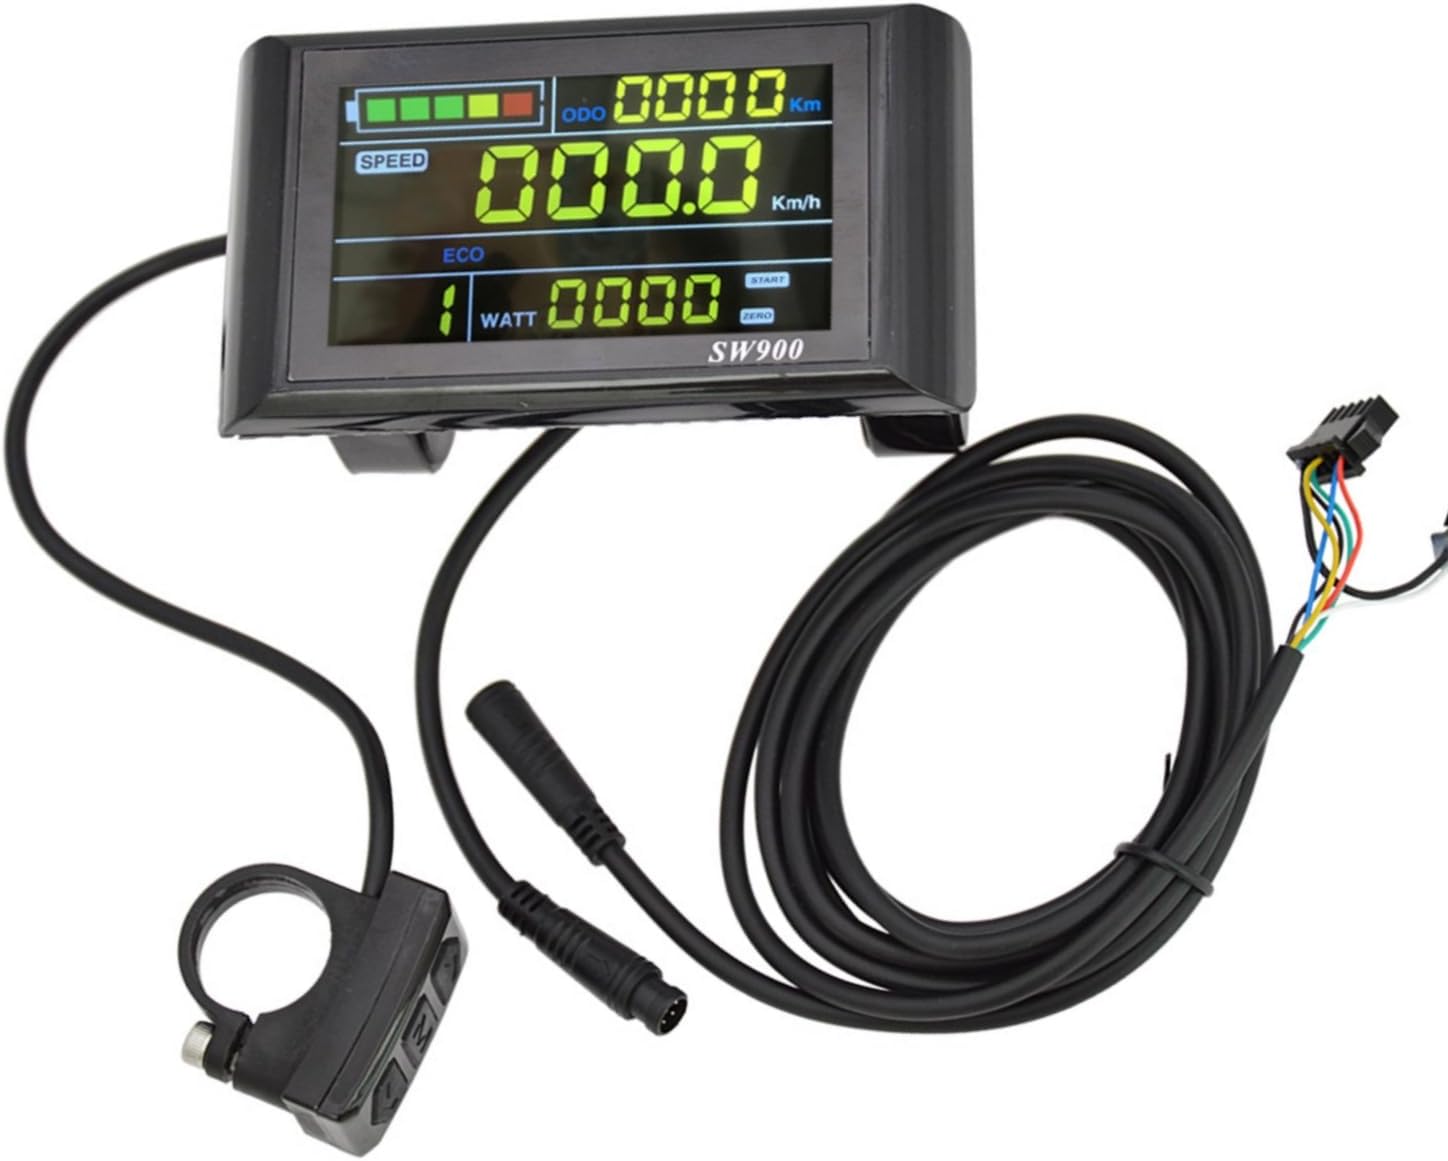
Figure 2.1: Topyond SW900 LCD Display and Control Panel components.
Key features include switch buttons, light controls, battery power display, speed tracking, assist gear adjustment, power indication, and fault prompts. Its compact design ensures minimal space consumption, making it an ideal accessory for various electric vehicles.
3. Features
- Versatile and User-friendly: Provides switch buttons, light controls, battery power display, and other essential information for convenient riding.
- Durable and Reliable: Constructed from high-quality ABS material for toughness and protection of internal circuits, ensuring long-lasting performance.
- Enhanced Display Functions: Features speed display, assist gear display, power indicator, fault prompt, total mileage, and single mileage.
- Compact and Portable: Sleek design minimizes space, making it easy to carry and store for electric bikes, scooters, and similar vehicles.
- Wide Application: Standardized 22.2mm installation diameter ensures seamless integration with a broad range of electric bikes and scooters. Compatible with 24V, 36V, 48V, and 60V systems.

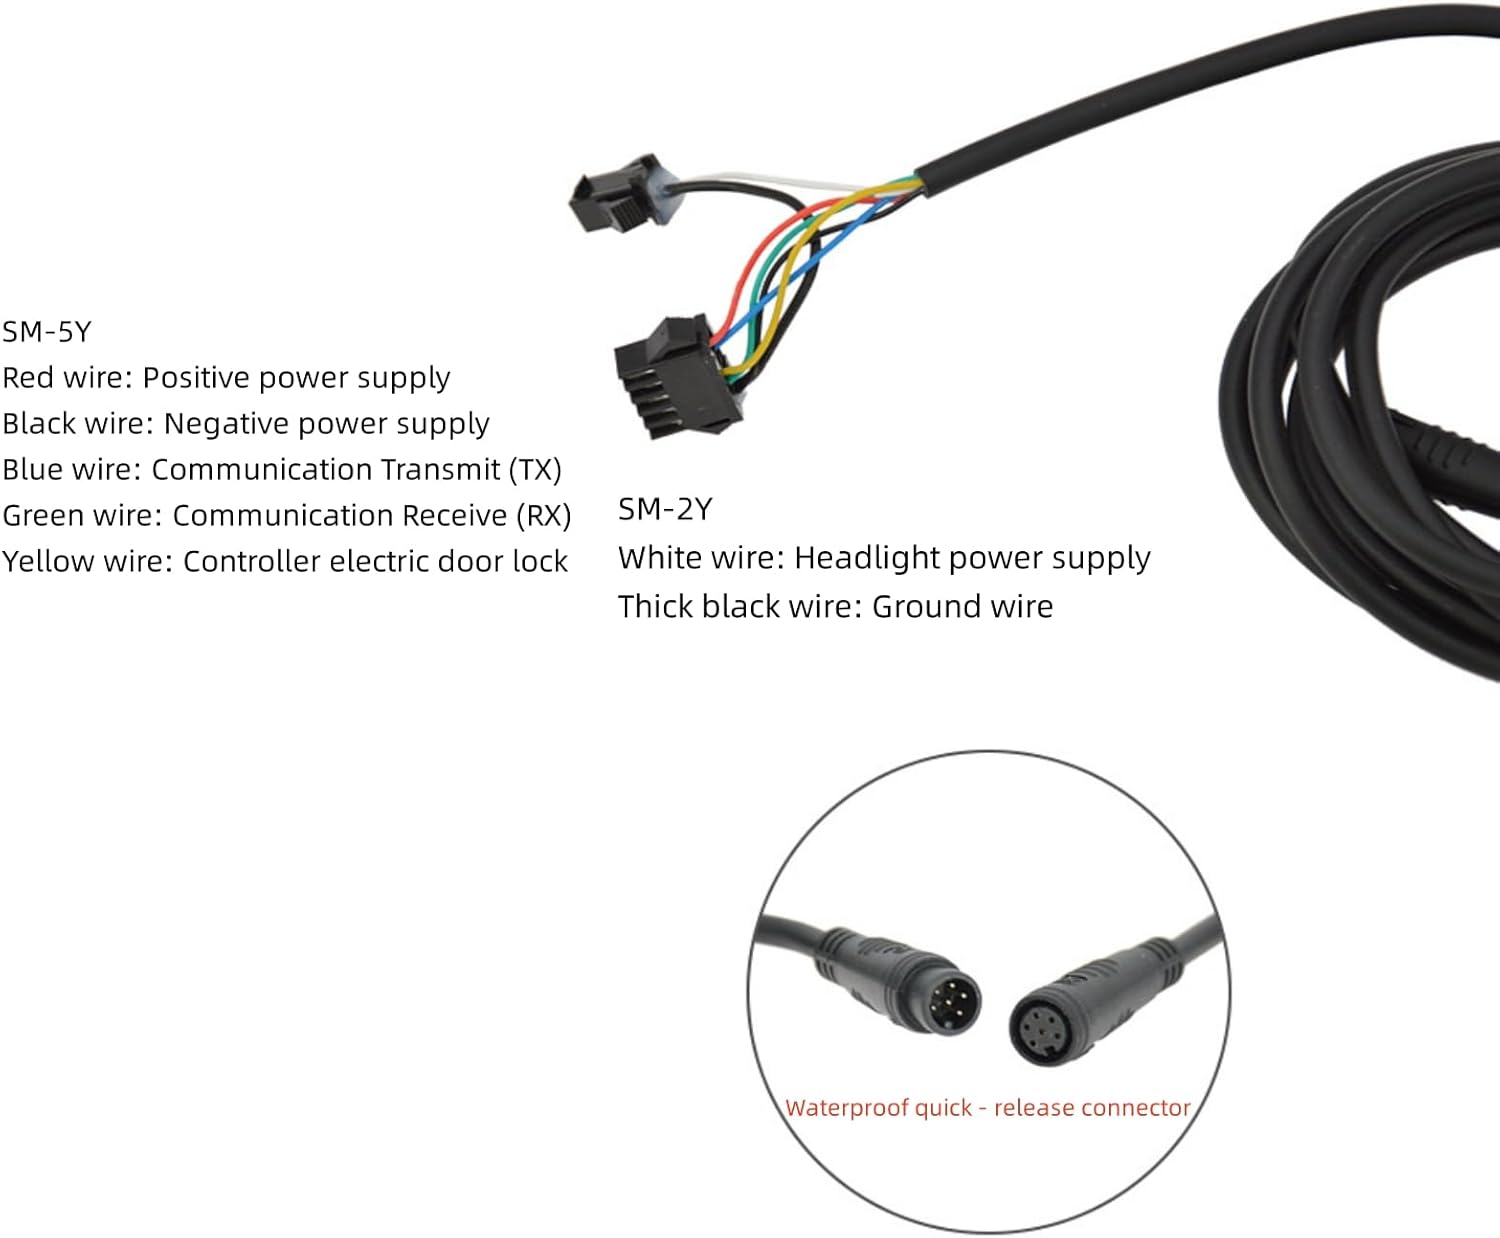
Figure 3.1: The SW900 LCD Display integrated with an electric scooter and an electric bicycle, demonstrating its compact size and wide application.
4. Specifications
| Attribute | Value |
|---|---|
| Brand Name | Topyond |
| Model Number | Topyondmk5ab4yn86 (SW900) |
| Item Package Dimensions L x W x H | 5.2 x 3.46 x 3.31 inches |
| Item Weight | 0.26 Kilograms |
| Package Weight | 0.27 Kilograms |
| Included Components | Sensor, Mounting Base |
| Installation Diameter | 22.2mm (Standard) |
| Voltage Compatibility | 24V, 36V, 48V, 60V Universal |
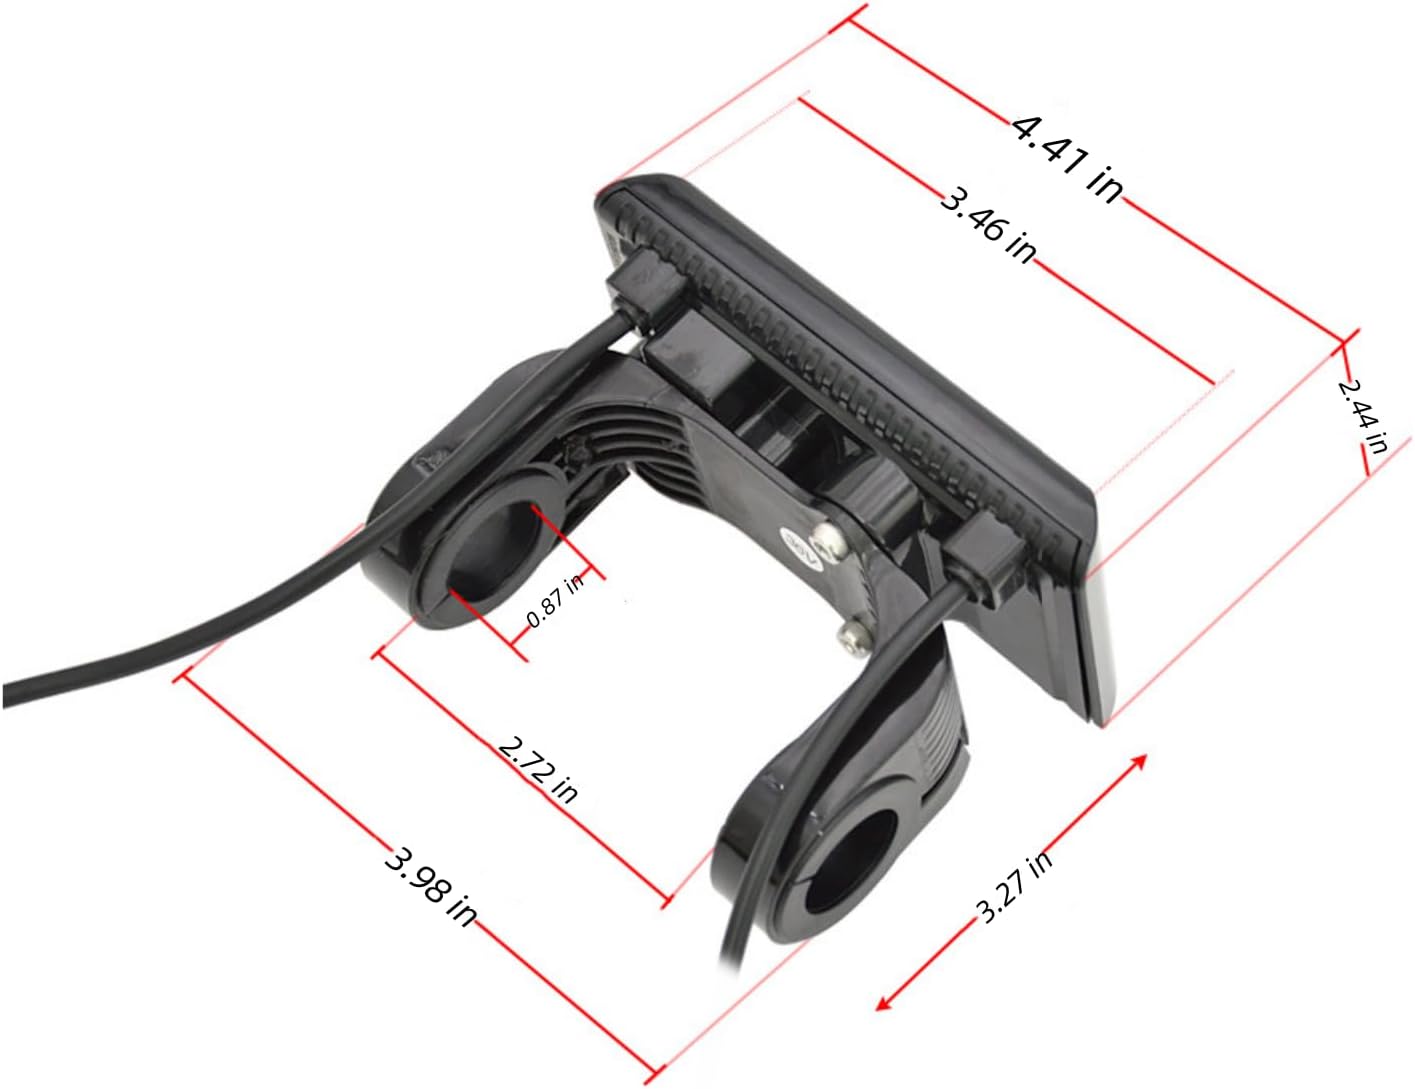
Figure 4.1: Detailed dimensions of the SW900 LCD Display for installation planning.
5. Setup and Installation
The SW900 LCD Display is designed for straightforward installation with a standard 22.2mm handlebar diameter. Follow these steps for proper setup:
- Mounting: Securely attach the display and control panel to your electric bike or scooter's handlebar using the provided mounting base. Ensure it is positioned for easy viewing and access to buttons.
- Wiring Connection: Connect the display's wiring harness to your e-bike's controller. Refer to the wiring diagram below for correct pin assignments. Ensure all connections are secure and waterproof.
- Power On: Once connected, turn on your e-bike's power. The display should illuminate and show initial readings.
Wiring Diagram
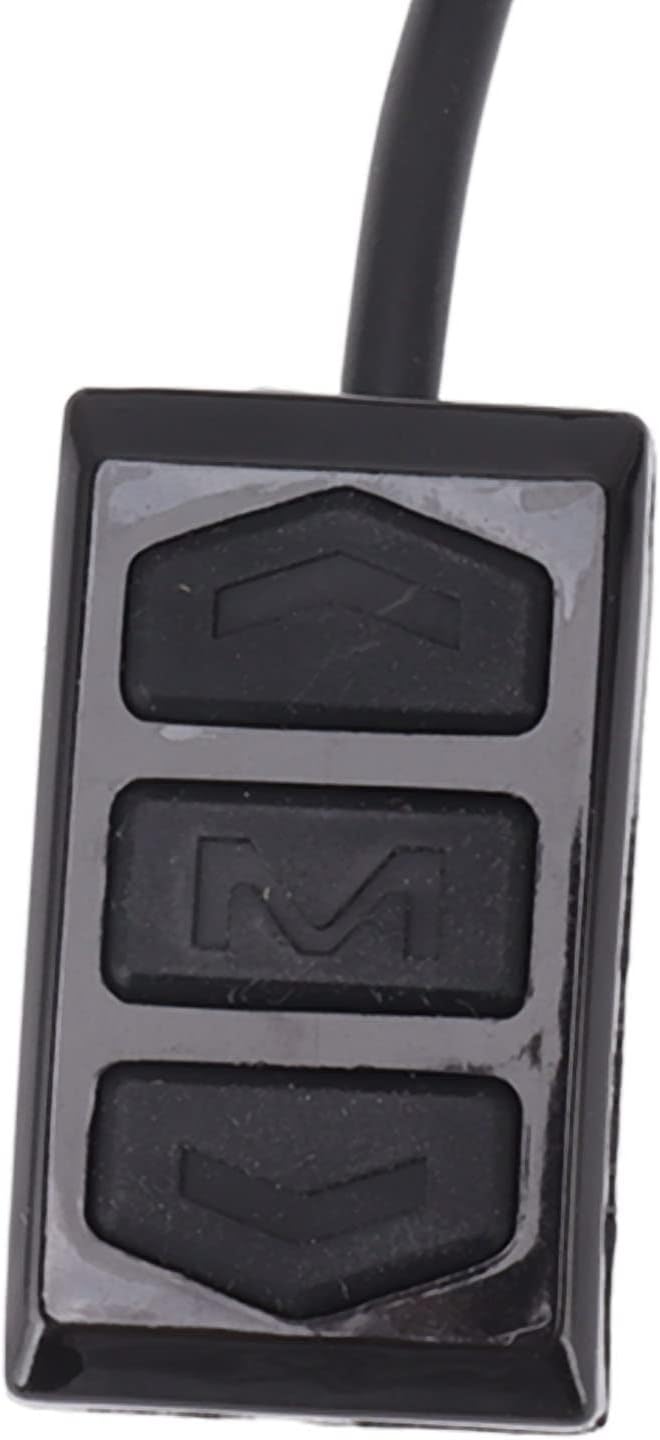
Figure 5.1: Wiring connections for the SW900 LCD Display. Ensure correct polarity and pin matching.
- SM-5Y Connector:
- Red wire: Positive power supply
- Black wire: Negative power supply
- Blue wire: Communication Transmit (TX)
- Green wire: Communication Receive (RX)
- Yellow wire: Controller electric door lock
- SM-2Y Connector:
- White wire: Headlight power supply
- Thick black wire: Ground wire
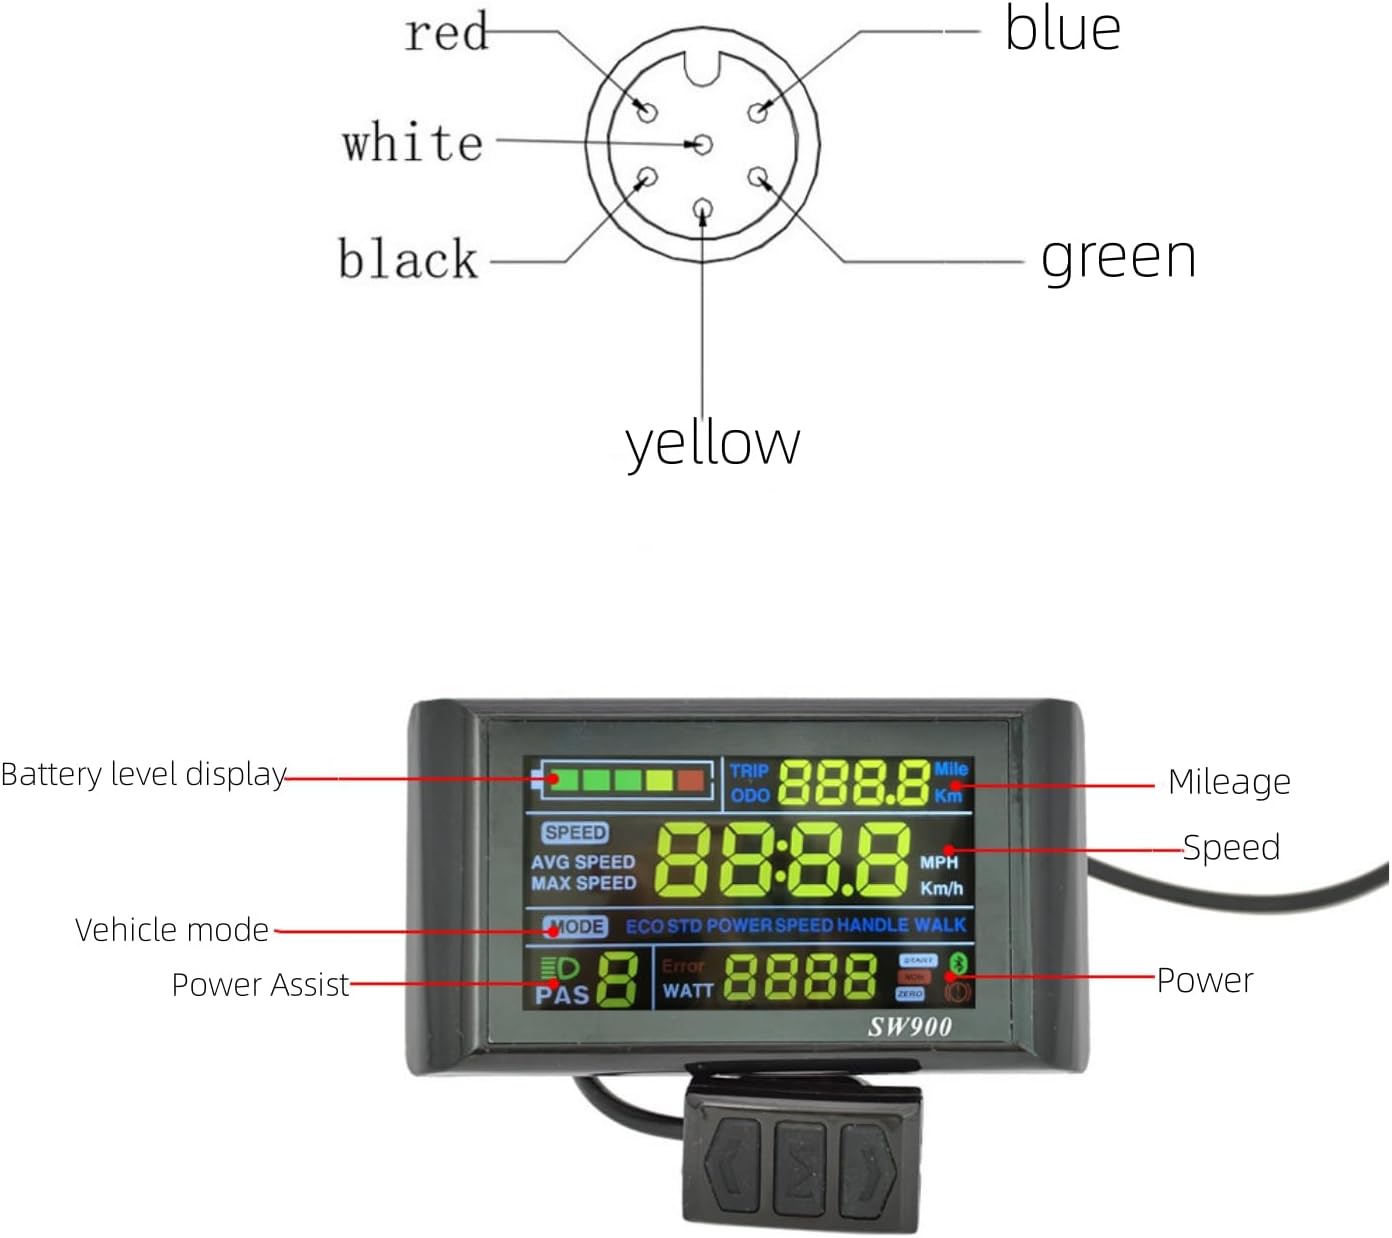
Figure 5.2: Visual representation of the 5-pin connector pinout.
6. Operating Instructions
The SW900 LCD Display provides intuitive control over your e-bike's functions. Familiarize yourself with the display layout and button operations.

Figure 6.1: SW900 LCD Display with key functions labeled: Battery level, Speed, Mileage (TRIP/ODO), Vehicle mode, Power Assist (PAS), and Power (WATT).
Button Functions
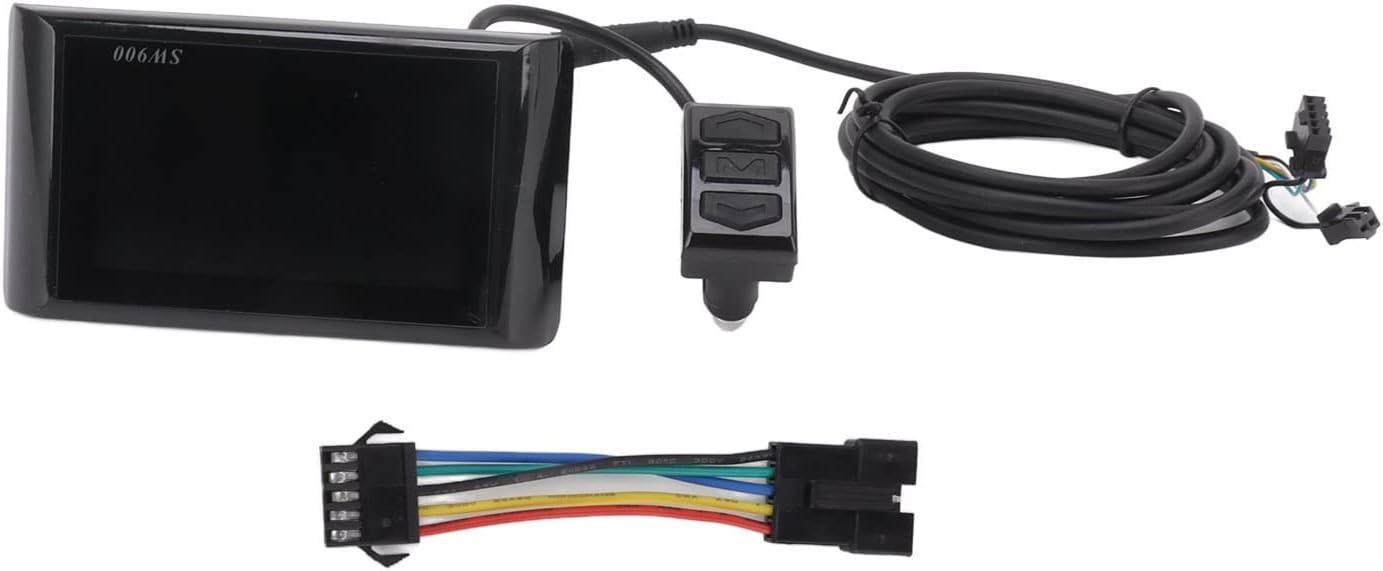
Figure 6.2: The control buttons: Up, Mode (M), and Down.
- Power On/Off: Press and hold the Mode (M) button to turn the display on or off.
- Change Display Mode: Briefly press the Mode (M) button to cycle through different display modes (e.g., ODO, TRIP).
- Adjust Assist Level: Use the Up and Down buttons to increase or decrease the pedal assist level (PAS).
- Access Settings: To enter the parameter settings menu, press and hold the Up and Down buttons simultaneously.
Parameter Settings (P-Codes)
Within the settings menu, you can adjust various parameters. Use the Up and Down buttons to change values and the Mode (M) button to confirm and move to the next parameter.
| Parameter Code | Description | Typical Range/Notes |
|---|---|---|
| P01 | Backlight Brightness | 1 (dimmest) to 3 (brightest) |
| P02 | Mileage Unit | 0: Kilometers (Km), 1: Miles (MPH) |
| P03 | Voltage Level | 24V, 36V, 48V, 60V (Set to match your battery) |
| P04 | Sleep Time | 0: No sleep, 1-60: Minutes until auto-off |
| P05 | PAS Level Setting | 0: 3 levels, 1: 5 levels, 2: 9 levels |
| P06 | Wheel Diameter | Set in inches (e.g., 26.0, 29.0) |
| P07 | Speed Magnet Number | Number of magnets in motor (e.g., 46) |
| P08 | Speed Limit | Set maximum speed (e.g., 25 km/h or 15.5 mph) |
| P09 | Zero/Non-Zero Start | 0: Zero start, 1: Non-zero start |
| P10 | Drive Mode Setting | 0: Pedal Assist only, 1: Throttle only, 2: Both |
| P11 | PAS Sensitivity | 1-24 (Higher value = more sensitive) |
| P12 | PAS Start Strength | 0-5 (Higher value = stronger initial assist) |
| P13 | PAS Magnet Number | 5, 8, 12 (Number of magnets in PAS sensor) |
| P14 | Current Limit | Set controller current limit (e.g., 12A) |
| P15 | Under-voltage Protection Value | Set battery low voltage cut-off |
| P16 | ODO Reset | Press and hold Up button for 5 seconds to reset ODO |
| P17 | Cruise Control | 0: Off, 1: On |
| P18 | Speed Ratio Display | Adjust speed display accuracy |
| P19 | 0-Start Mode | 0: No, 1: Yes (for specific controllers) |
| P20 | Communication Protocol | 0: Protocol 1, 1: Protocol 2, 2: Protocol 3 (Default: 2) |
Important: Incorrect parameter settings can affect performance or cause errors. If unsure, consult a professional or refer to your e-bike's controller manual.
Demonstration Video: Display Operation and Settings
Video 6.1: A demonstration of how to power on the SW900 LCD Display, navigate through its various display modes, and access and adjust the parameter settings (P-codes) using the control buttons. This video also shows how to remove the protective film from the screen.
7. Maintenance
Proper maintenance ensures the longevity and optimal performance of your SW900 LCD Display.
- Cleaning: Regularly wipe the display screen with a soft, damp cloth. Avoid using abrasive cleaners or solvents that could damage the screen or casing.
- Protection: While the display is durable, avoid direct impacts or excessive force. Ensure the protective film (if present) is removed carefully after installation for clear visibility.
- Connections: Periodically check all wiring connections to ensure they are secure and free from corrosion or damage.
- Storage: If storing your e-bike for an extended period, ensure the display is clean and stored in a dry environment.
8. Troubleshooting
If you encounter issues with your SW900 LCD Display, refer to the common problems and solutions below. The display's fault prompt feature can also indicate specific errors.
| Problem | Possible Cause | Solution |
|---|---|---|
| Display does not power on. | No power from battery, loose connection, faulty wiring. | Check battery charge. Verify all wiring connections are secure and correct according to the diagram. Ensure the e-bike's main power is on. |
| Speed reading is incorrect or zero. | Incorrect wheel diameter (P06) or speed magnet number (P07) setting. Faulty speed sensor. | Verify P06 and P07 settings match your e-bike's specifications. Check the speed sensor and its connection for damage or misalignment. |
| Assist levels not working or stuck. | Incorrect PAS level setting (P05). PAS sensor issue. | Check P05 setting. Inspect the PAS sensor for damage or proper installation. |
| Display shows "ER" (Error Code). | Indicates a system error. Specific error codes (e.g., ER01, ER02) correspond to different issues. | Consult your e-bike controller's manual for specific error code meanings. Common errors relate to motor, controller, or battery communication. Check all connections. |
| Buttons are unresponsive. | Loose connection to control panel, internal fault. | Check the connection of the control panel to the display. If the issue persists, contact support. |
If troubleshooting steps do not resolve the issue, it is recommended to contact Topyond customer support or a qualified e-bike technician.
9. Warranty and Support
For warranty information, product support, or technical assistance, please refer to the documentation provided with your purchase or contact Topyond customer service directly. Keep your purchase receipt as proof of purchase for any warranty claims.
While this product may be offered with optional protection plans, specific warranty terms and conditions are provided by the manufacturer at the time of purchase.