NQEUEPN 33208
NQEUEPN Drawer Guide Kit Instruction Manual
Model: 33208
1. Product Overview
The NQEUEPN 5 Sets Drawer Guide Kit provides a comprehensive solution for repairing and reinforcing most furniture drawers, including cabinets, bookcases, wardrobes, and vanities. This kit is designed for undermount drawer systems and is compatible with various brands such as Kenlin Rite-Trak II, Vaughan Bassett, Legacy, and Pulaski.
Each set includes essential components for a complete drawer guide replacement, ensuring smooth and reliable drawer operation.
2. Package Contents
Upon opening the package, verify that all components listed below are present and undamaged. This kit provides 5 complete sets of drawer guide components.
- 5 x Brown Plastic Track Box Rails (the larger, curved piece)
- 5 x Track Rails (the smaller, flat piece with a roller)
- 15 x Mounting Screws (sufficient for all 5 sets)
- 1 x Screwdriver (for installation)

Figure 2.1: All components included in the NQEUEPN 5 Sets Drawer Guide Kit.
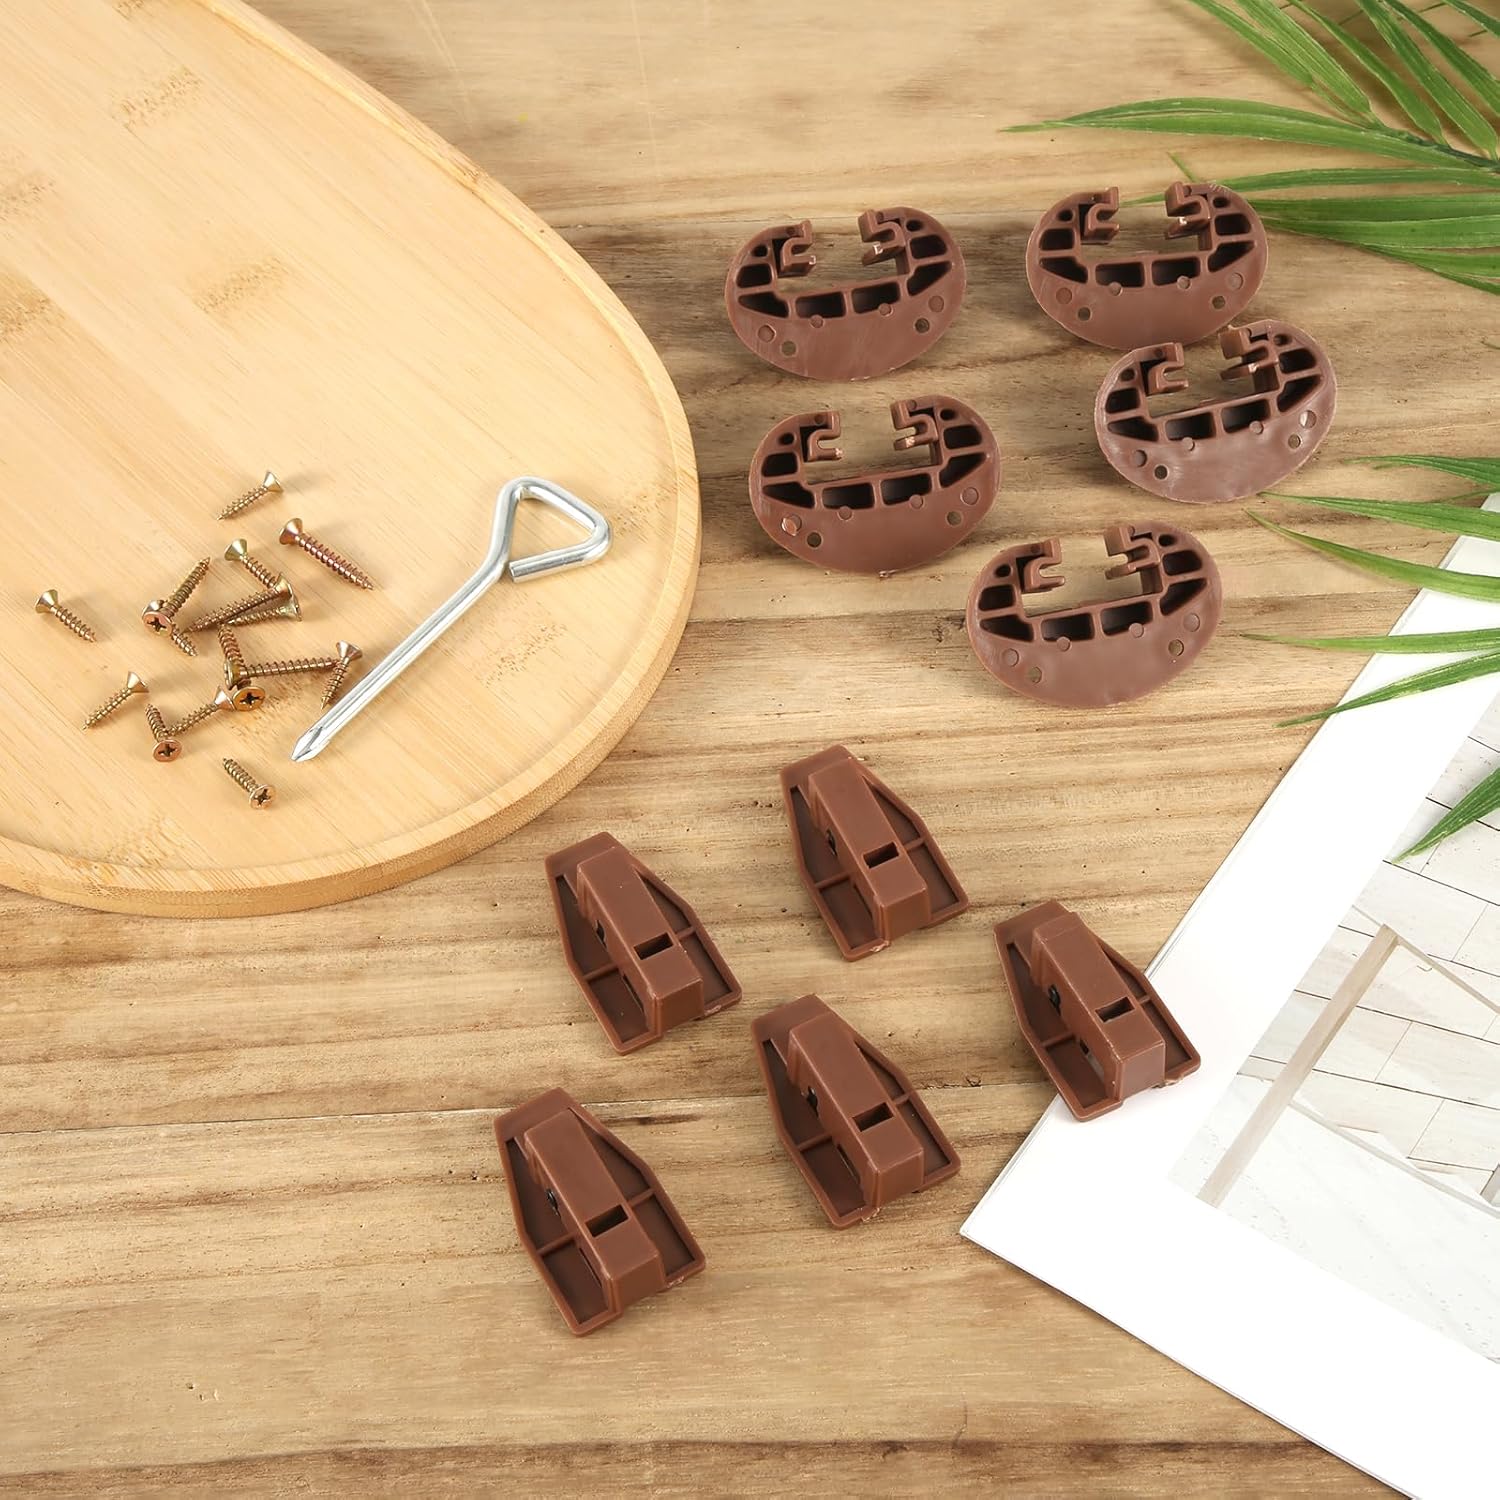
Figure 2.2: A closer view of the kit components arranged on a surface.
3. Specifications
| Attribute | Detail |
|---|---|
| Model Number | 33208 |
| Material | High-Quality Brown Plastic |
| Drawer Type Compatibility | Undermount Slide Systems |
| Product Dimensions (approx.) | 7.87 x 5.51 x 1.57 inches (overall package) |
| Individual Component Dimensions | Refer to Figure 3.1 for detailed measurements of individual parts. |
| Item Weight | Approximately 3.53 ounces (per set) |
| Color | Brown |

Figure 3.1: Detailed product dimensions for individual components.
4. Setup and Installation
These drawer replacement parts are designed for quick and easy installation. The included screwdriver facilitates the process. Ensure you have adequate lighting and a stable surface to work on.
4.1. Preparation
- Identify the Damaged Parts: Carefully remove the drawer from the furniture. Inspect the existing drawer guides to determine which components need replacement. The kit is designed to replace both the track box rail (mounted to the furniture frame) and the track rail with roller (mounted to the drawer).
- Remove Old Components: Use the provided screwdriver or an appropriate tool to remove the old, broken drawer guide components. Keep any existing screws that are still in good condition, though new screws are provided.
- Clean the Area: Clear any debris, dust, or old adhesive from the mounting areas on both the furniture frame and the drawer.
4.2. Assembly and Installation Steps
- Connect the Guide Pieces: The kit consists of two main plastic pieces for each guide: the track box rail and the track rail with roller. These two pieces are designed to interlock. Align the smaller track rail (with the roller) with the larger track box rail and gently push them together until they click into place.

Figure 4.1: Connecting the two drawer guide components.
- Mount the Track Box Rail to the Furniture: Position the assembled track box rail onto the furniture frame where the old guide was located. Ensure it is correctly oriented and aligned with the existing screw holes, if applicable. Use the provided mounting screws and screwdriver to securely fasten the track box rail to the furniture. If new holes are needed, ensure they are pre-drilled to prevent splitting the wood.
- Mount the Track Rail with Roller to the Drawer: Attach the track rail with roller to the bottom of the drawer. This piece typically slides into a groove or attaches to a specific point on the drawer's underside. Use the provided screws to secure it firmly. Ensure the roller is facing the correct direction to engage with the track box rail on the furniture.
- Insert the Drawer: Carefully slide the drawer back into the furniture. Ensure the rollers on the drawer's track rails engage smoothly with the track box rails mounted on the furniture frame. You may need to apply a firm, steady push to get the drawer past any initial stops or alignment points.

Figure 4.2: Re-inserting the drawer after guide installation.
- Test Operation: Gently pull the drawer out and push it back in several times to ensure smooth operation. Check for any sticking, wobbling, or misalignment. Adjust screw tightness if necessary.
Note: This product is a universal drawer slide. Use the screwdriver to replace the old drawer slide of the same size. For best results, replace both parts of a single drawer guide simultaneously.
5. Operating the Drawer Guides
Once properly installed, the NQEUEPN drawer guides facilitate smooth and stable movement of your drawers. The roller mechanism within the track rail allows the drawer to glide effortlessly along the track box rail, preventing sticking and ensuring full extension and retraction.
The design includes a stopper feature to prevent the drawer from accidentally falling out when fully extended, enhancing safety and usability.
6. Maintenance
The NQEUEPN drawer guide kit is made from durable plastic designed for long-lasting performance with minimal maintenance.
- Cleaning: Periodically inspect the drawer guides for accumulated dust or debris. Use a dry cloth or a soft brush to clean the tracks and rollers. Avoid using harsh chemicals or abrasive cleaners, as these may damage the plastic.
- Lubrication: Under normal household use, these plastic guides typically do not require lubrication. If you notice any friction or squeaking, a small amount of silicone-based lubricant (avoid oil-based lubricants which can attract dust) can be applied to the roller and track surfaces.
- Inspection: Regularly check the mounting screws for tightness. Over time, screws can loosen, leading to wobbly drawers. Tighten any loose screws to maintain stability.
7. Troubleshooting
| Problem | Possible Cause | Solution |
|---|---|---|
| Drawer sticks or is difficult to open/close. | Misalignment of guides, loose screws, debris in tracks, or drawer overloaded. |
|
| Drawer wobbles when extended. | Loose mounting screws or damaged guide components. |
|
| Drawer falls out when pulled. | Stopper mechanism not engaging or damaged. |
|
8. Application and Compatibility
These drawer replacement parts are versatile and suitable for a wide range of furniture types requiring undermount drawer slides. They are ideal for reinforcement and repair of:
- Cabinets
- Bookcases
- Wardrobes
- Vanities
- Dressers
- And other furniture with similar drawer systems.
The kit is compatible with various existing drawer systems, including but not limited to:
- Kenlin Rite-Trak II (Model #KRT2-168)
- Vaughan Bassett
- Legacy
- Pulaski
Disclaimer: Our products are not sponsored, endorsed, or affiliated with the brands mentioned above (Kenlin, Vaughan Bassett, Legacy, Pulaski). Compatibility is based on matching specifications and design.

Figure 8.1: Examples of furniture types compatible with the drawer guide kit.
9. Important Notes
- Due to manual measurement, the size and weight of components may have a slight error.
- Due to differences between monitors, there may be a slight color difference in product appearance.
- Always ensure the replacement parts match the size and type of your original drawer slides for optimal performance.
Related Documents - 33208
 |
Vadania Drawer Slides: Comprehensive Product Catalog and Specifications Vadania offers a wide range of high-quality drawer slides for home, industrial, and commercial applications. This brochure details product specifications, dimensions, load capacities, installation, and maintenance for models including heavy-duty, soft-close, and push-to-open series. |
 |
SHUHANG Soft-Close Undermount Drawer Slide Installation Guide Detailed installation guide for SHUHANG soft-close undermount drawer slides. Includes mounting specifications, step-by-step instructions, and package contents for 9-24 inch sizes. |
 |
Wooden Pilaster System Drawer Box Width Calculation Guide | Hardware Resources A technical guide from Hardware Resources detailing how to calculate drawer box width for wooden pilaster systems, including deductions for face frame or frameless cabinets, various pilaster kits, and different types of drawer slides. |
 |
Vadania VA2053 Heavy Duty Drawer Slides: Specifications and Installation Guide Comprehensive guide to Vadania VA2053 heavy duty drawer slides, covering product specifications, features, dimensions, load capacity, and step-by-step installation instructions. |
 |
Vadania VD2576 Heavy Duty Drawer Slides: Installation and Specifications Manual Comprehensive guide for Vadania VD2576 heavy duty drawer slides, covering features, specifications, installation instructions, and size selection. Includes load capacity, dimensions, material details, and application scope. |
 |
PHWALK Heavy Duty Drawer Slides: Features, Installation Guide, and Precautions Comprehensive guide for PHWALK heavy-duty drawer slides, detailing features, size selection, installation requirements, step-by-step instructions, and critical precautions to ensure proper functionality and warranty validity. |
Ask a question about this manual
Ask about setup, troubleshooting, compatibility, parts, safety, or missing instructions. Manuals+ will review the question and use this page’s manual context to help answer it.