Kyglaring 21344-rc
Kyglaring LED Light Kit for Lego Orient Express 21344 - RC Version User Manual
Model: 21344-rc
Introduction
This user manual provides comprehensive instructions for the installation, operation, and maintenance of your Kyglaring LED Light Kit, specifically designed for the Lego Orient Express 21344 building set. This kit enhances your Lego model with realistic lighting effects and remote control functionality, bringing your creation to life.
Important Note: The Lego Orient Express 21344 building set is not included with this LED light kit. This product is an accessory designed to be integrated with your existing Lego model.
Safety Information
- Keep small parts away from children under 3 years of age to prevent choking hazards.
- Do not expose the LED components to excessive force, moisture, or extreme temperatures.
- Ensure all connections are secure before powering on the lights.
- Use only the recommended power source (battery box or USB power) to avoid damage.
- If any component is damaged, discontinue use and contact customer support.
Package Contents
Please verify that all components listed below are present in your package:
- LED Light Strips and Individual LEDs
- Connecting Cables
- Expansion Boards
- Battery Box (or USB Power Cable)
- Remote Control
- Adhesive Squares (for securing lights/wires)
- Instruction Manual (this document)

Image: Overview of the Kyglaring LED Light Kit components, typically packaged in sealed bags.
Setup and Installation
Follow these steps carefully to integrate the LED light kit into your Lego Orient Express 21344 model. It is recommended to have your Lego model fully assembled before beginning the light installation.
- Prepare Your Lego Model: Ensure your Lego Orient Express 21344 set is fully built and stable. Identify the areas where lights will be installed, such as headlights, interior compartments, and the chimney.
- Identify Light Components: Refer to the included diagrams (if any, or use the product images as a guide) to match each LED light strip or individual LED to its intended location on the Lego model.
- Install Headlights: Carefully place the designated LED lights into the headlight positions on the locomotive. Route the wires discreetly along the existing Lego structure.
- Install Interior Lights: For the passenger cars, install the interior LED strips. These often fit within the roof or along the side walls. Ensure wires are hidden to maintain the aesthetic.
- Chimney Light (RC Version): For the RC version, install the special LED for the chimney to simulate smoke. This typically involves placing the LED inside the chimney and potentially adding the provided cotton material for effect.
- Connect to Expansion Boards: Connect the wires from each installed LED to the appropriate ports on the expansion boards. Pay attention to the polarity if indicated.
- Connect Power Source: Connect the expansion boards to the battery box or USB power cable. Ensure batteries are correctly inserted into the battery box if using that option.
- Secure Wires: Use the provided adhesive squares or other methods to neatly secure any loose wires, preventing them from being visible or interfering with the model's movement.
- Test Functionality: Before final assembly, connect the power and test all lights using the remote control to ensure they are working correctly.
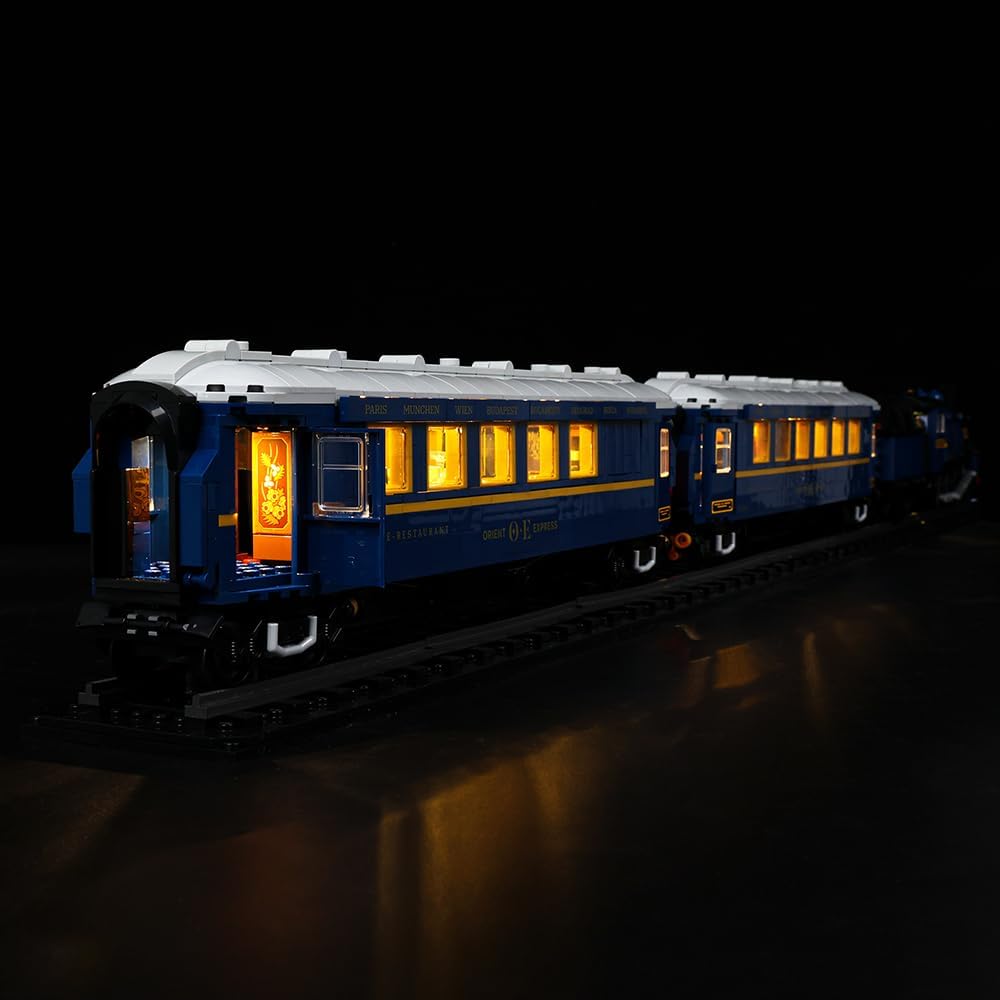
Image: Conceptual diagram illustrating the integration of the LED light kit with your existing Lego model.

Image: Detailed view of the illuminated Lego Orient Express, highlighting the effect of the installed LED lights on the locomotive's front and interior.

Image: Multiple perspectives of the Lego Orient Express with the LED lights installed, showcasing the overall illumination and specific details like the illuminated interior.
Operating Instructions
Your Kyglaring LED Light Kit comes with a remote control for convenient operation of the lighting effects.

Image: The illuminated Lego Orient Express model with a hand demonstrating the use of the remote control.
- Power On/Off: Press the Power button on the remote control to turn the lights on or off.
- Brightness Adjustment: Use the Brightness Up (+) and Brightness Down (-) buttons to adjust the intensity of the lights.
- Mode Selection: The remote may include buttons for different lighting modes (e.g., steady on, flashing, pulsing). Refer to the remote's specific button layout for these functions.
- Remote Control Range: Ensure the remote control is pointed towards the receiver on the light kit for optimal performance.
Maintenance
- Cleaning: Gently wipe the LED components and wires with a dry, soft cloth to remove dust. Do not use liquid cleaners.
- Battery Replacement: If using a battery box, replace batteries when lights dim or stop working. Ensure correct polarity.
- Storage: When not in use for extended periods, disconnect the power source. Store the model in a cool, dry place away from direct sunlight.
Troubleshooting
| Problem | Possible Cause | Solution |
|---|---|---|
| Lights do not turn on. | No power, loose connection, dead batteries. | Check power source (USB or batteries). Ensure all cables are securely connected to the expansion board and LEDs. Replace batteries if necessary. |
| Some lights are not working. | Loose connection to specific LED, damaged LED. | Inspect the connections for the non-working lights. Gently re-seat the connectors. If still not working, the LED may be faulty; contact support. |
| Remote control not responding. | Remote battery low/dead, obstruction, out of range. | Replace the remote control battery. Ensure no obstructions between the remote and the receiver. Move closer to the model. |
| Lights are flickering. | Unstable power supply, loose connection. | Ensure power source is stable. Check all connections for looseness. |
Specifications
- Model Number: 21344-rc
- Material Type: Plastic
- Product Dimensions: 11.07 x 18.59 x 3.38 cm (packaging/kit dimensions)
- Item Weight: 208.65 g
- Batteries Required: Yes
- Batteries Included: Yes (for remote control, main power source may vary)
- Special Features: Lighting with remote control
- Educational Objective: Creative Thinking, Problem Solving Skills
- Compatibility: Designed for Lego Orient Express 21344
Warranty and Support
Kyglaring products are manufactured with high-quality standards. If you encounter any issues or have questions regarding your LED light kit, please contact Kyglaring customer support through the retailer's platform or the official Kyglaring website. Please retain your proof of purchase for warranty claims.
For further assistance, visit: www.kyglaring.com (Note: This is a placeholder URL, please refer to actual product documentation for official support channels).
Ask a question about this manual
Ask about setup, troubleshooting, compatibility, parts, safety, or missing instructions. Manuals+ will review the question and use this page’s manual context to help answer it.