1. Introduction
This manual provides comprehensive instructions for the setup, operation, maintenance, and troubleshooting of your ApoloSign Neon Light Digital Picture Frame (Model DPF141). Please read this manual thoroughly before using the device to ensure optimal performance and longevity.
2. Product Overview
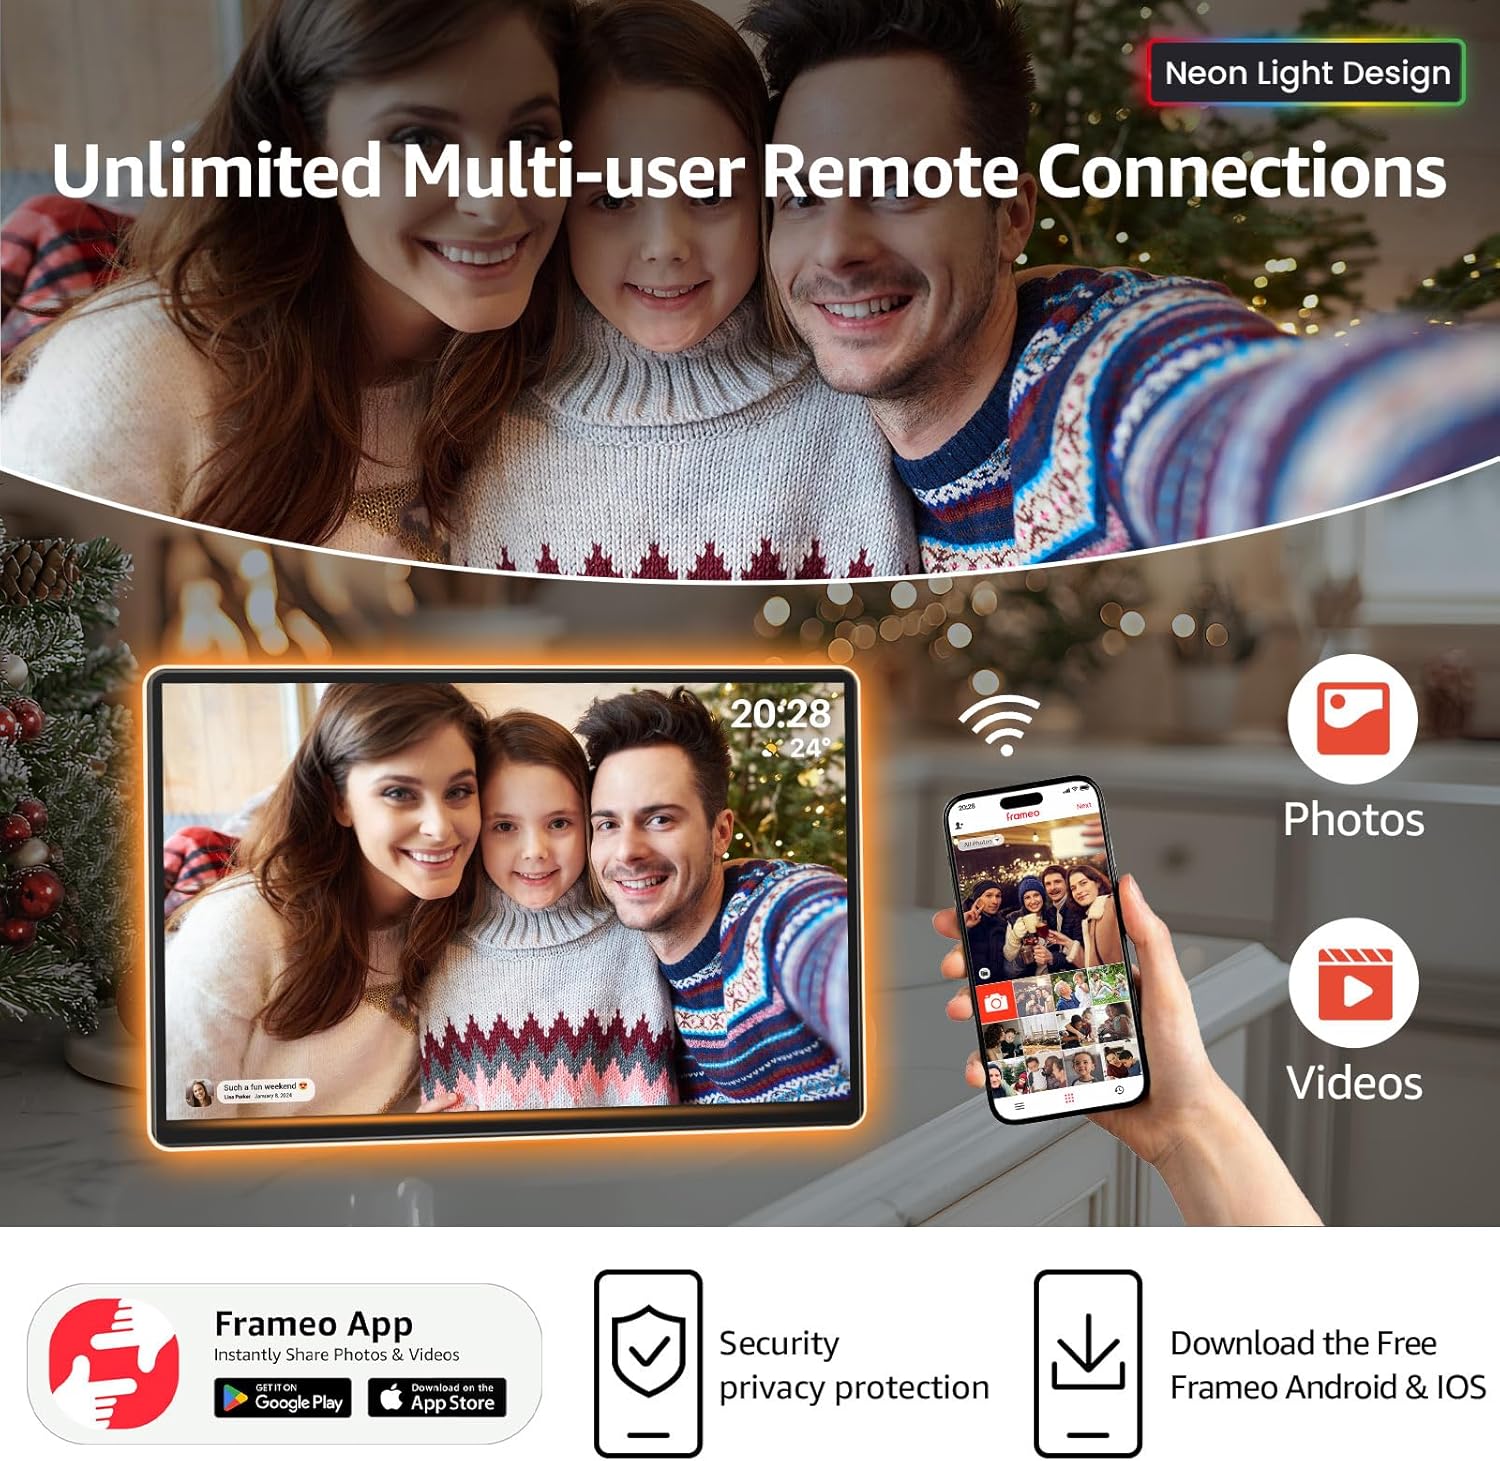
The ApoloSign Neon Light Digital Picture Frame features a 14.1-inch 2K FHD display with AI Color-Changing LED strip. It is designed for displaying photos and videos, offering seamless sharing capabilities via the Frameo app and versatile connectivity options.
Key Features:
- 14.1-inch 2K FHD Display: 1920x1200 resolution with a 16:10 aspect ratio and 2.5D glass touch screen for clear visuals.
- AI Color-Changing LED Strip: Automatically adjusts ambient lighting based on photo color tones.
- Frameo App Integration: Enables instant sharing of photos and videos with connected frames globally via Wi-Fi.
- Versatile Functionality: Includes built-in alarm clock, weather updates, and "Do Not Disturb" mode.
- Storage: 32GB internal storage, expandable up to 32GB via TF Card.
- Flexible Placement: Supports both landscape and portrait orientation with auto-rotate functionality.

The frame is designed for ease of use and integration into various home or office environments, providing a dynamic way to display cherished memories.
3. Package Contents
Verify that all items are present in the package:
- ApoloSign Neon Light Digital Picture Frame (14.1 inch)
- Power Adapter
- User Manual
- Stand (pre-attached or separate, depending on model)

4. Setup Guide
4.1 Initial Power-On
- Connect the power adapter to the frame's DC port and then to a power outlet.
- The frame will automatically power on. Follow the on-screen instructions to select your language and connect to a Wi-Fi network.
4.2 Installing the Frameo App
The Frameo app is essential for sharing photos and videos to your ApoloSign Digital Picture Frame.
- Download the "Frameo" app from the App Store (iOS) or Google Play Store (Android).
- Create an account or log in if you already have one.
- On your ApoloSign frame, tap "Add friend" and note the unique code displayed.
- In the Frameo app on your smartphone, enter this code to connect your device to the frame.

Once connected, you can invite family and friends to send photos directly to your frame using their own Frameo apps.
4.3 Physical Placement
The frame can be placed in either portrait or landscape orientation. The display will automatically adjust.
- Tabletop: Use the included stand for stable placement on any flat surface.
- Wall Mount: The frame includes mounting holes for vertical or horizontal wall installation (mounting hardware not included).
5. Operating Instructions
5.1 Sending Photos and Videos
- Via Frameo App: Open the Frameo app, select the photos/videos you wish to send, choose your frame as the recipient, and tap send. You can add captions to your media.
- Via USB Drive/SD Card: Insert a USB drive or SD card (up to 32GB) containing your media into the respective ports on the frame. Navigate to the gallery or settings to import the media.

5.2 Navigating the Touchscreen Interface
The ApoloSign frame features a responsive touchscreen for direct interaction.
- Swipe: Swipe left or right to browse through photos and videos.
- Tap: Tap on a photo to reveal options such as favoriting, hiding, or accessing settings.
- Settings: Access the main settings menu to adjust display mode, shuffle, volume, brightness, and other preferences.

5.3 AI Color-Changing LED Feature
The integrated LED strip automatically adjusts its color to complement the tones of the displayed photo, enhancing the visual experience.

5.4 Smart Features
- Alarm Clock & Weather: Configure these features through the frame's settings menu to display current time, weather, and set alarms.
- Do Not Disturb Mode: Schedule specific times for the frame to automatically turn off or enter a low-power state for uninterrupted relaxation.
- Timed Sleep & Wake Mode: Set daily schedules for the frame to power on and off automatically.

6. Maintenance
- Cleaning: Use a soft, dry, lint-free cloth to clean the screen and frame. Avoid abrasive cleaners or sprays directly on the screen.
- Software Updates: Ensure your frame's software is up-to-date for optimal performance and new features. Updates are typically managed through the Frameo app or the frame's settings.
- Storage Management: Regularly review and delete unwanted photos/videos to manage the 32GB internal storage. Consider using an SD card for additional storage.
7. Troubleshooting
| Problem | Possible Cause | Solution |
|---|---|---|
| Frame not powering on | Power adapter not connected or faulty. | Ensure the power adapter is securely connected to both the frame and a working power outlet. Try a different outlet. |
| Cannot connect to Wi-Fi | Incorrect Wi-Fi password, weak signal, or network issue. | Verify the Wi-Fi password. Move the frame closer to the router. Restart your router. |
| Photos not appearing on frame | Frameo app not connected, incorrect frame code, or network issue. | Check Frameo app connection status. Re-enter the frame code. Ensure both phone and frame are connected to the internet. |
| AI LED strip not changing colors | Feature disabled in settings or temporary software glitch. | Check the frame's settings to ensure the AI LED feature is enabled. Restart the frame. |
8. Specifications
| Feature | Detail |
|---|---|
| Model Number | DPF141 |
| Screen Size | 14.1 Inches |
| Resolution | 1920x1200 (2K FHD) |
| Aspect Ratio | 16:10 |
| Display Type | IPS Touchscreen with 2.5D Glass |
| Internal Storage | 32GB |
| Expandable Storage | TF Card (up to 32GB) |
| Connectivity | Wi-Fi, USB, SD Card |
| Product Dimensions | 9.84 x 14.17 x 0.99 inches |
| Item Weight | 4.2 pounds |
| Power Source | A batteries required (likely refers to power adapter, not actual batteries) |
9. Warranty and Support
ApoloSign offers a Lifetime Warranty and 24/7 Fast Support for its products. For any issues or inquiries, please contact ApoloSign customer service.
Additional support and resources may be available through the Frameo app's help center or the ApoloSign official website.

10. Product Videos
Below are official product videos demonstrating features and usage:
ApoloSign Neon Light Digital Picture Frame Overview
This video provides an overview of the ApoloSign Neon Light Digital Picture Frame, showcasing its design and key functionalities.