Introduction
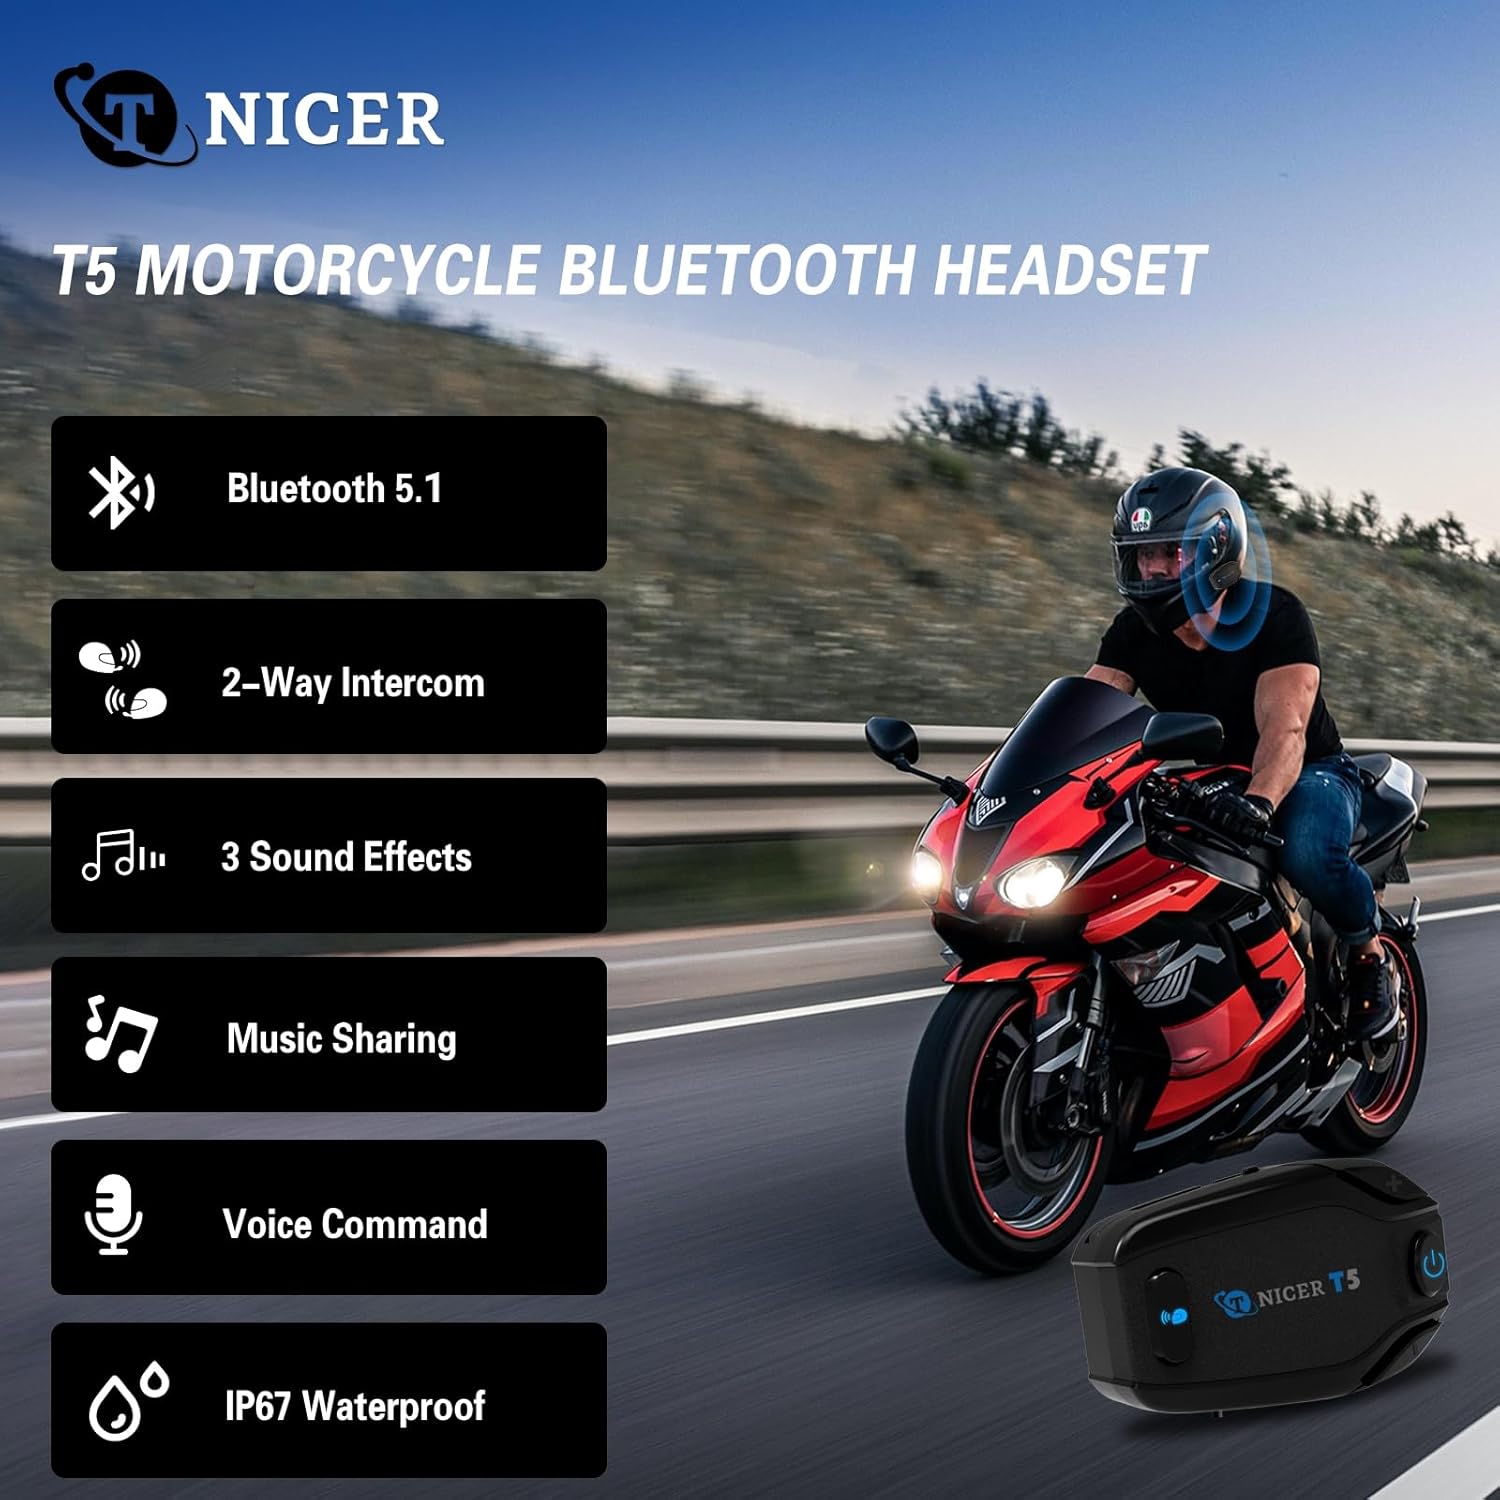
Thank you for choosing the TNICER T5 Motorcycle Bluetooth Headset. This manual provides detailed instructions on how to set up, operate, and maintain your device. The T5 headset is designed to enhance your riding experience with clear communication, music playback, and robust features. Please read this manual thoroughly before use to ensure optimal performance and safety.

Image: Two TNICER T5 Motorcycle Bluetooth Headsets, showing the main unit with power button, volume controls, and indicator light.
What's in the Box
Verify that all items are present in your package:
- TNICER T5 Intercom Unit (x2)
- Hi-Fi Speaker with Boom Mic (x2)
- Soft Tube Microphone (x2)
- Type-C USB Cable (x2)
- 3M Double Sided Silicone Pad (x2)
- 3M Single Sided Silicone Pad (x2)
- Big Square Velcro (x2)
- Round Velcro (x4)
- Sponge Stickers for Speakers (x4)
- Metal Clip (x2)
- User Manual (x1)

Image: A visual representation of all components included in the TNICER T5 package, laid out neatly.
Product Features
Bluetooth 5.1 & 2-Way Intercom
Equipped with an optimized Qualcomm Bluetooth 5.1 chip for stable and low-energy consumption. Supports real-time 2-rider intercom with a maximum effective communication distance of approximately 500 meters in open areas.

Extended Intercom Range
Experience clear communication with a 500-meter intercom range, allowing two riders to stay connected in real-time without obstacles.

Switchable 3 Kinds of Sound Effects & Music Sharing
Customize your audio experience with three EQ sound modes: Bass Boost, Midrange Boost, and Treble Boost. Share your favorite music with a passenger within 30 meters for a shared riding soundtrack.

Upgraded HD Stereo Speakers
Equipped with upgraded HD stereo speakers that provide higher volume, a wider sound range, and clear sound quality, designed for comfortable wear within the helmet.

Excellent Noise Reduction & Hi-Fi Stereo Sound Quality
Built-in CSR's CVC technology, high-power, and high-definition headphones, along with a pro wind-noise-proof microphone, ensure high-quality sound even at speeds below 100km/h.

IP67 Waterproof and Dustproof
The T5 headset is designed to be waterproof and dustproof, allowing for carefree riding in various weather conditions, including rain and snow.

Longer Battery Life and Universal Connection
Features a 600mAh Li-Polymer battery, providing up to 30 hours of music playback, 25 hours of intercom time, and 500 hours of standby time. Universal pairing ensures compatibility with most helmet makes and models.
Setup Guide
1. Installation
Follow these steps to properly install the T5 headset in your helmet:
- Choose Mounting Location: Select a flat surface on the left side of your helmet for the main unit.
- Attach Mounting Clip/Pad:
- Metal Clip: Slide the metal clip between the helmet shell and the inner padding. Ensure it is securely fastened.
- Adhesive Pad: For helmets where the clip cannot be used, clean the chosen surface thoroughly. Peel off the protective film from the 3M adhesive pad and firmly press it onto the helmet for at least 30 seconds.
- Mount the Headset: Slide the T5 main unit onto the mounted clip or adhesive pad until it clicks into place.
- Speaker Placement:
- Locate the ear pockets inside your helmet.
- Attach the Velcro pads (round Velcro) to the back of the speakers.
- Place the speakers inside the ear pockets, ensuring they are aligned with your ears for optimal sound. Use sponge stickers for speakers if needed for better fit or comfort.
- Microphone Installation:
- Boom Mic: Ideal for open-face or modular helmets. Attach the boom mic to the inside of the helmet, positioning it close to your mouth.
- Soft Tube Mic: Suitable for full-face helmets. Route the soft tube mic along the helmet's interior, positioning the microphone capsule near your mouth.
- Cable Management: Route all cables neatly under the helmet padding to avoid interference and ensure comfort. Connect the speaker/microphone cable to the appropriate port on the T5 main unit.

Image: Detail of the TNICER T5 unit highlighting the speaker and microphone connection point.
2. Charging the Device
Before first use, fully charge the T5 headset. Use the provided Type-C USB cable.
- Connect the Type-C USB cable to the charging port on the T5 unit.
- Connect the other end of the cable to a USB power adapter (e.g., phone charger, computer USB port).
- The LED indicator will show charging status (refer to the specific light pattern in your quick guide for details).
- A full charge typically takes 2-3 hours.

Image: Illustration of the T5 headset's high-capacity battery, emphasizing its long-lasting power.
Operating Instructions
Power On/Off
- Power On: Press and hold the Power Button (⏻) for approximately 3 seconds until you hear a voice prompt and the indicator light flashes.
- Power Off: Press and hold the Power Button (⏻) for approximately 3 seconds until you hear a voice prompt and the indicator light turns off.
Bluetooth Pairing (Phone)
Pair your T5 headset with your mobile phone for calls and music.
- Ensure the T5 headset is powered off.
- Press and hold the Power Button (⏻) for about 5-7 seconds until the indicator light flashes red and blue alternately, indicating pairing mode.
- On your phone, enable Bluetooth and search for "TNICER T5".
- Select "TNICER T5" from the list of available devices to connect.
- Once paired, the indicator light will flash blue slowly.
Intercom Pairing (2 Riders)
To establish a 2-way intercom connection between two T5 headsets:
- Ensure both T5 headsets are powered off.
- On both units, press and hold the Power Button (⏻) for approximately 5-7 seconds until both units enter pairing mode (red and blue lights flashing alternately).
- Briefly press the Power Button (⏻) on one of the units. The units will automatically search and connect to each other.
- Once connected, the indicator lights on both units will flash blue slowly, and you will hear a voice confirmation.
Music Playback
- Play/Pause: Briefly press the Power Button (⏻).
- Next Track: Briefly press the "+" button.
- Previous Track: Briefly press the "-" button.
- Volume Up: Press and hold the "+" button.
- Volume Down: Press and hold the "-" button.
Call Management
- Answer Call: Briefly press the Power Button (⏻) when an incoming call rings.
- End Call: Briefly press the Power Button (⏻) during a call.
- Reject Call: Press and hold the Power Button (⏻) for 2 seconds when an incoming call rings.
- Redial Last Number: Double-press the Power Button (⏻) in standby mode.
EQ Sound Effects
Cycle through the three sound effects (Bass Boost, Midrange Boost, Treble Boost) during music playback.
- Change EQ: While music is playing, briefly press the "M" button (if available, or refer to specific button for EQ in quick guide, assuming a dedicated button or combination).
(Please refer to your quick start guide for the exact button combination to switch EQ modes, as this functionality is typically assigned to a specific button or a combination press not detailed in the provided data.)
Maintenance
Proper maintenance ensures the longevity and optimal performance of your TNICER T5 headset.
- Cleaning: Use a soft, damp cloth to wipe the exterior of the unit. Do not use harsh chemicals or abrasive cleaners. Ensure all ports are dry before charging or use.
- Storage: When not in use for extended periods, store the headset in a cool, dry place away from direct sunlight and extreme temperatures.
- Battery Care: To preserve battery life, charge the headset at least once every three months if not used regularly. Avoid fully discharging the battery frequently.
- Water Exposure: While IP67 waterproof, avoid submerging the unit in water for prolonged periods. Ensure the charging port cover is securely closed before exposure to water.
Troubleshooting
If you encounter issues with your T5 headset, refer to the following common problems and solutions:
| Problem | Possible Cause | Solution |
|---|---|---|
| Cannot Power On | Low battery. | Charge the headset for at least 30 minutes. |
| No Sound from Speakers | Speakers not connected properly; Volume too low; Headset not paired. | Check speaker connection; Increase volume; Re-pair with phone/intercom. |
| Intercom Disconnects Frequently | Out of range; Obstacles between units; Interference. | Move closer to the other unit; Ensure clear line of sight; Avoid areas with strong electromagnetic interference. |
| Poor Audio Quality / Noise | Microphone not positioned correctly; High wind noise; Speakers not aligned. | Adjust microphone closer to mouth; Ensure wind-noise-proof mic is used; Reposition speakers for better fit. |
| Cannot Pair with Phone | Headset not in pairing mode; Phone Bluetooth off; Already connected to another device. | Ensure headset is in red/blue flashing pairing mode; Turn on phone Bluetooth; Disconnect from other devices. |
Specifications
| Feature | Detail |
|---|---|
| Model Name | T5 |
| Connectivity Technology | Bluetooth |
| Bluetooth Version | 5.1 |
| Intercom Range | Up to 500 meters (2 riders) |
| Battery Capacity | 600mAh Li-Polymer |
| Music Playback Time | Up to 30 hours |
| Intercom Time | Up to 25 hours |
| Standby Time | Up to 500 hours |
| Charging Time | 2-3 hours |
| Water Resistance Level | IP67 Waterproof and Dustproof |
| Noise Control | Active Noise Cancellation (CVC Technology) |
| Included Components | Headset units, Speakers, Microphones, USB cables, Mounting accessories, User Manual |
| Item Weight | 1.23 pounds (for the pack) |
Warranty and Support
TNICER products are manufactured to the highest quality standards. For warranty information and technical support, please refer to the contact details provided on the product packaging or visit the official TNICER website. Keep your purchase receipt as proof of purchase for warranty claims.