
1. Introduction
This manual provides detailed instructions for the installation, operation, and maintenance of the Sloan 111 Water Closet Flushometer and the Sloan RESS-C Retrofit Infrared Sensor. These products are designed for commercial restroom applications, offering reliable and hygienic flushing solutions. Please read this manual thoroughly before installation and use to ensure proper function and longevity of the unit.
2. Safety Information
Observe the following safety precautions during installation and maintenance:
- Installation should be performed by a qualified plumber or technician.
- Always shut off the main water supply before beginning any installation or maintenance.
- Wear appropriate personal protective equipment, including eye protection, during installation.
- Ensure all connections are secure and watertight to prevent leaks.
- Do not use abrasive cleaners or tools that could damage the finish or internal components.
3. Package Contents
Verify that all components are present before beginning installation:
- Sloan 111 Water Closet Flushometer (Chrome finish)
- Sloan RESS-C Retrofit Infrared Sensor Module
- 1" I.P.S. Screwdriver Bak-Chek Angle Stop
- Vacuum Breaker Flush Connection
- Mounting Hardware and Gaskets
- Instruction Manual
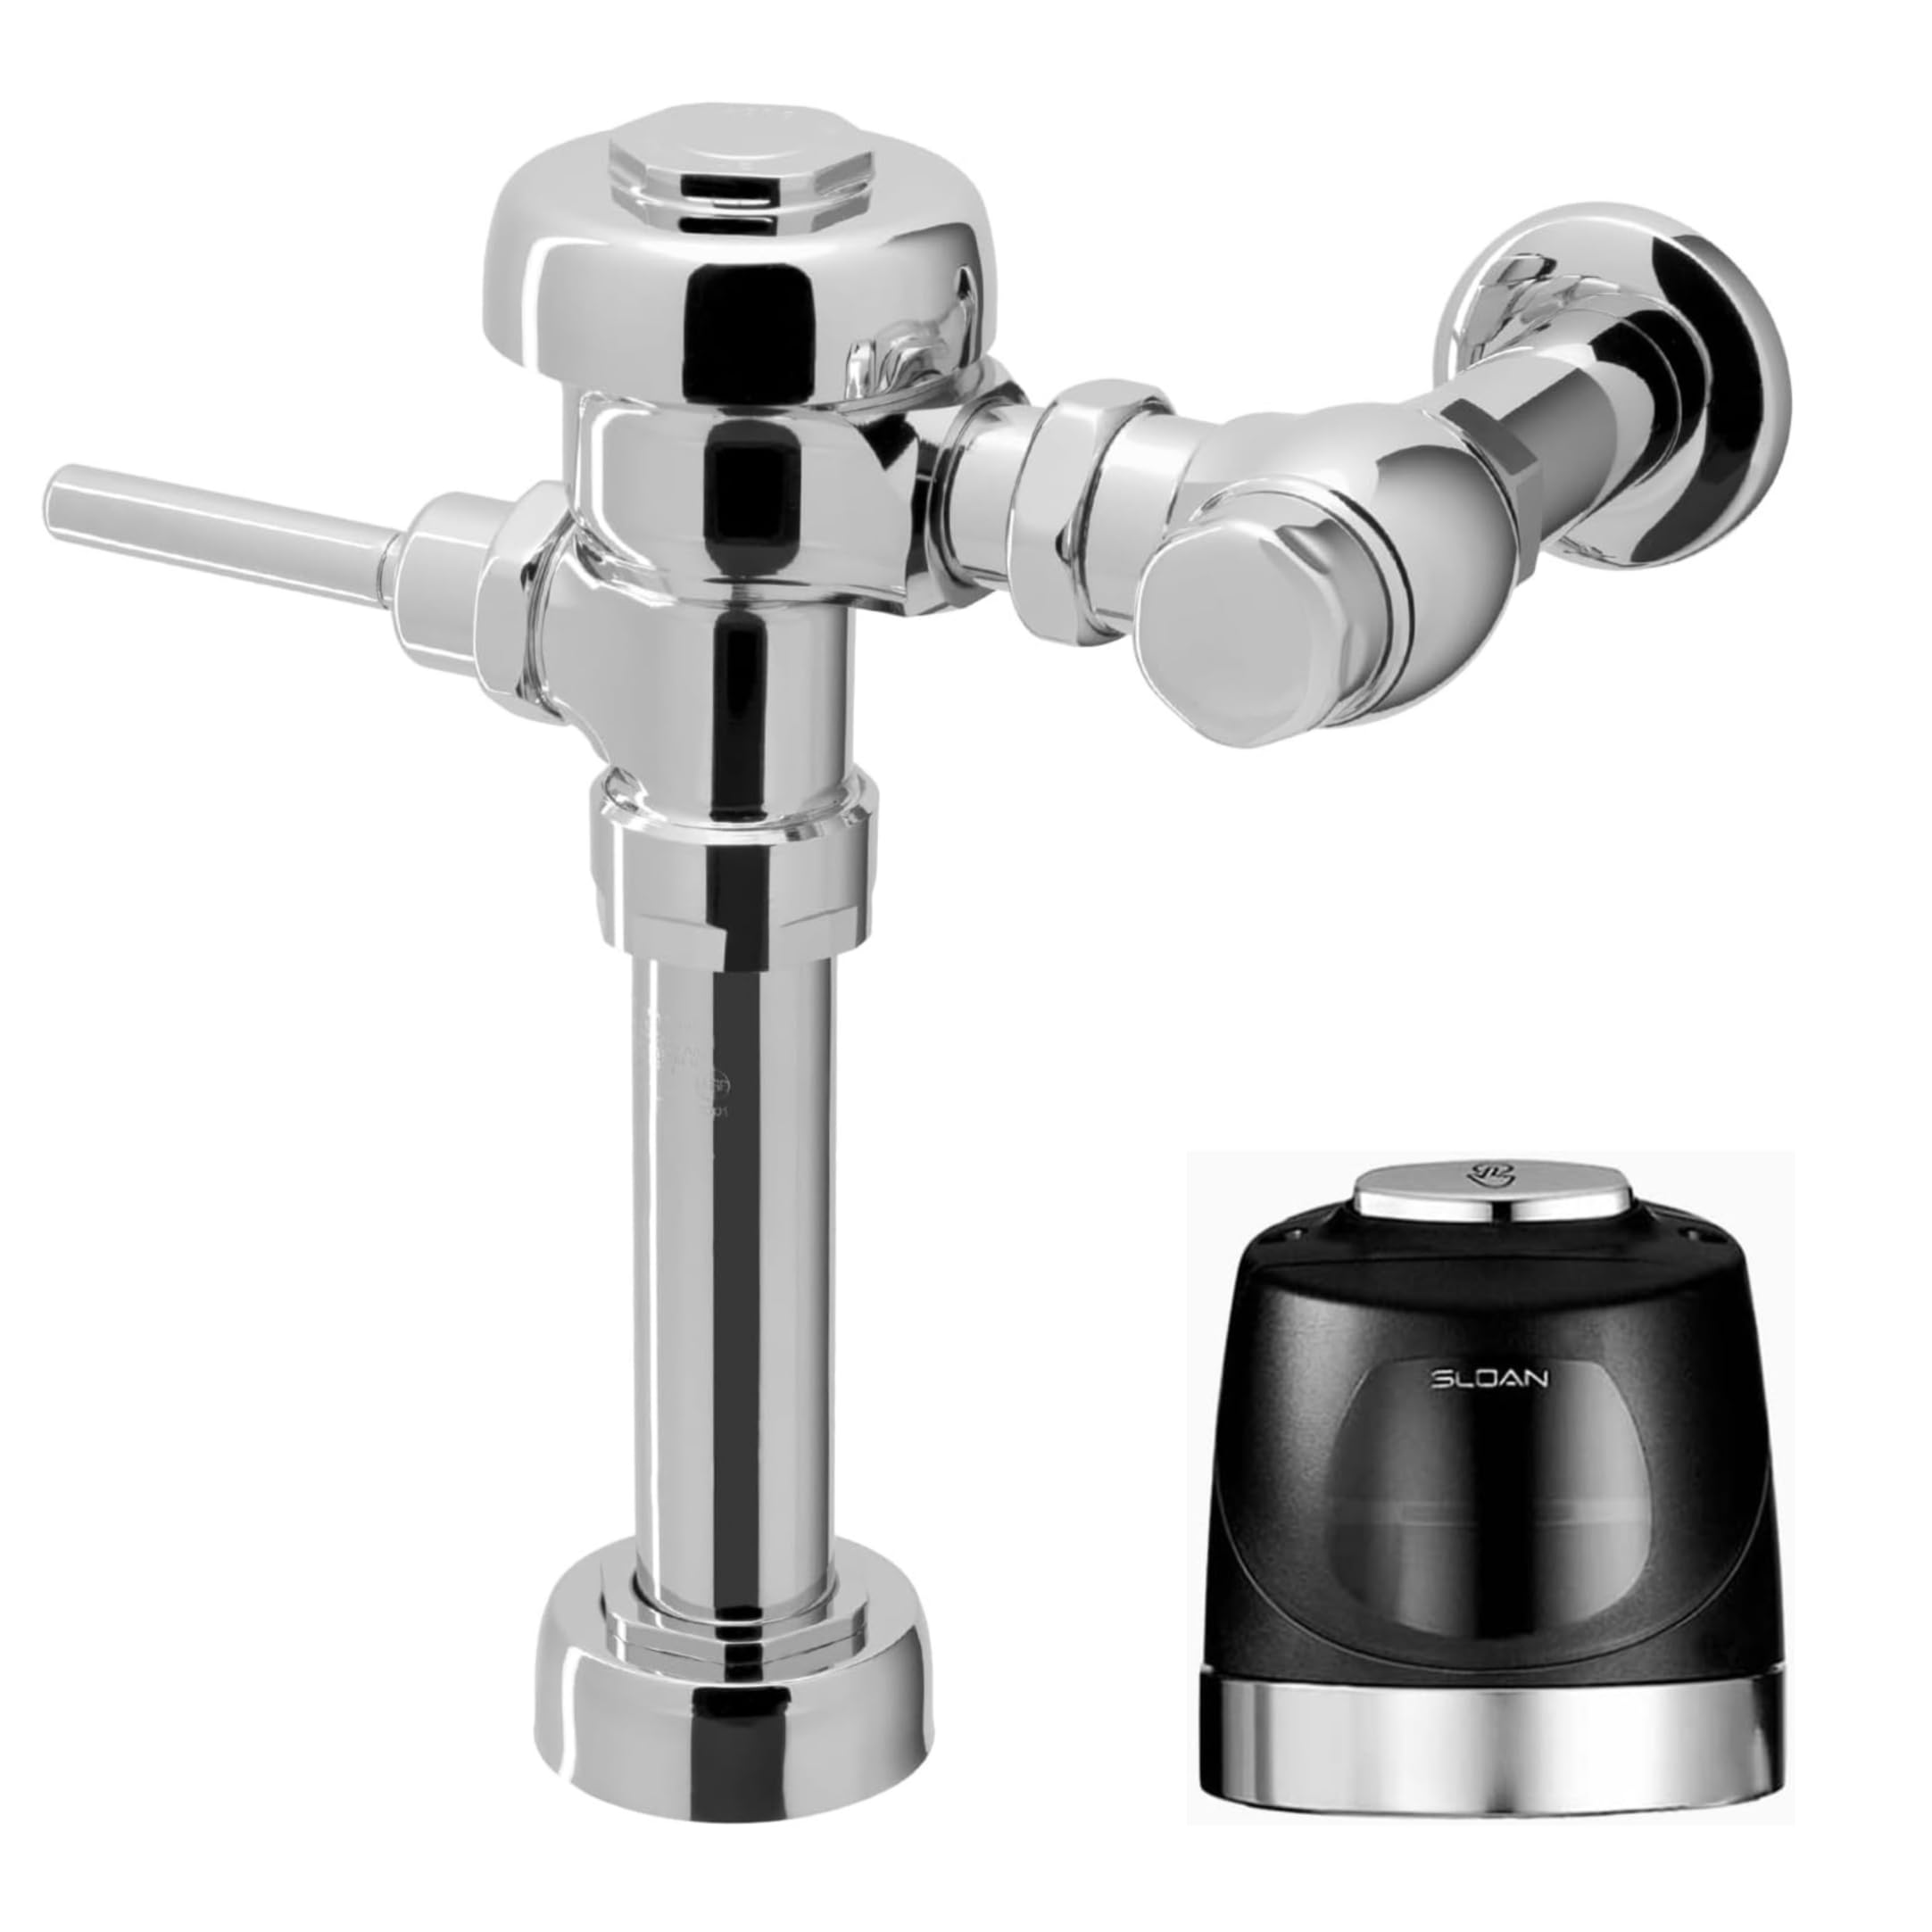
Image 1: The Sloan 111 Water Closet Flushometer with the RESS-C Retrofit Sensor installed.
4. Setup and Installation
4.1. Pre-Installation Checklist
- Confirm that the water supply line is 1" I.P.S. and compatible with the angle stop.
- Ensure the water closet has a top spud connection.
- Gather necessary tools: pipe wrench, screwdriver, tape measure, level, sealant tape.
- Verify adequate space for the flushometer and sensor installation.
4.2. Installation Steps for Sloan 111 Flushometer
- Shut Off Water Supply: Locate and turn off the main water supply to the restroom. Flush the toilet to relieve pressure.
- Remove Old Unit (if applicable): Carefully disconnect and remove any existing flushometer or manual valve. Clean the area around the water supply and spud connections.
- Install Bak-Chek Angle Stop: Apply sealant tape to the threads of the 1" I.P.S. water supply pipe. Thread the Bak-Chek angle stop onto the supply pipe and tighten securely with a pipe wrench. Ensure the stop cap is accessible for future adjustments.
- Assemble Flushometer Body: Attach the vacuum breaker flush connection to the water closet's top spud. Connect the flushometer main body to the angle stop and the vacuum breaker. Ensure all gaskets are properly seated and connections are hand-tight.
- Align and Tighten: Align the flushometer body horizontally and vertically. Use a level to ensure proper alignment. Once aligned, securely tighten all connections with a pipe wrench. Avoid over-tightening.

Image 2: Sloan 111 Flushometer showing the manual handle and angle stop connection.
4.3. Installation Steps for RESS-C Retrofit Sensor
The RESS-C Retrofit Sensor converts your manual flushometer to touch-free operation.
- Remove Manual Handle: Carefully remove the existing manual handle assembly from the Sloan 111 Flushometer. This typically involves unscrewing a cap and removing the handle mechanism.
- Install Sensor Module: Place the RESS-C sensor module onto the flushometer body where the manual handle was removed. Ensure proper orientation as per the sensor's markings.
- Secure Sensor: Fasten the sensor module using the provided screws or locking ring. Ensure it is securely attached and sealed to prevent water ingress.
- Connect Battery: Connect the battery pack to the sensor module. The RESS-C is designed for a 6-year battery life.
- Restore Water Supply: Slowly turn on the main water supply. Check all connections for leaks.
- Test Sensor: Allow a few minutes for the sensor to calibrate. Wave your hand in front of the sensor to test its detection and flushing capabilities.

Image 3: Close-up of the Sloan RESS-C Retrofit Infrared Sensor module.
5. Operation
5.1. Manual Operation (Sloan 111 Flushometer Only)
If the RESS-C sensor is not installed, the Sloan 111 Flushometer operates manually. To flush, simply push down the metal oscillating non-hold-open handle. The handle is designed to return to its original position automatically after each flush, preventing water waste.
5.2. Sensor Operation (with RESS-C Retrofit)
With the RESS-C Retrofit Sensor installed, the flushometer operates automatically. The multi-focused infrared sensor detects the user and initiates a flush cycle after the user departs. The sensor is designed to detect both high and low targets, ensuring reliable activation. No physical contact is required for flushing, promoting hygiene.
6. Maintenance
6.1. Routine Cleaning
Clean the exterior of the flushometer and sensor regularly with a soft cloth and mild, non-abrasive cleaner. Avoid harsh chemicals or abrasive pads, as these can damage the chrome finish and sensor lens. For the sensor, gently wipe the lens to ensure clear detection.
6.2. Battery Replacement (RESS-C Retrofit)
The RESS-C Retrofit Sensor is equipped with a battery designed for approximately 6 years of life. When the battery is low, the sensor may indicate this with a flashing light or reduced responsiveness. To replace the battery:
- Shut Off Water: Turn off the water supply at the angle stop.
- Access Battery Compartment: Refer to the RESS-C specific instructions for accessing the battery compartment, usually located on the top or side of the sensor module.
- Replace Battery: Disconnect the old battery pack and replace it with a new, compatible battery pack. Ensure correct polarity.
- Secure Compartment: Close and secure the battery compartment.
- Restore Water and Test: Turn the water supply back on and test the sensor operation.
6.3. Water Flow Adjustment
The 1" I.P.S. screwdriver Bak-Chek angle stop allows for precise control over water flow. To adjust the flow:
- Locate Angle Stop: Identify the screwdriver slot on the Bak-Chek angle stop.
- Adjust Flow: Use a screwdriver to turn the adjustment screw. Turning clockwise will decrease water flow, and counter-clockwise will increase it. Adjust until the desired flush volume is achieved (1.6 GPF for this model).
- Test Flush: Test the flushometer after each adjustment to ensure proper operation and water efficiency.
7. Troubleshooting
| Problem | Possible Cause | Solution |
|---|---|---|
| No Flush (Sensor) | Low or dead battery; sensor lens obstructed; water supply off. | Replace battery; clean sensor lens; check angle stop and main water supply. |
| No Flush (Manual) | Water supply off; internal diaphragm issue. | Check angle stop and main water supply; inspect/replace diaphragm assembly. |
| Continuous Flush | Debris in diaphragm; worn diaphragm; handle stuck. | Clean or replace diaphragm; ensure handle moves freely. |
| Weak Flush | Insufficient water pressure; angle stop not fully open; partially clogged vacuum breaker. | Check building water pressure; fully open angle stop; clean vacuum breaker. |
| Sensor Not Responding | Sensor lens dirty; ambient light interference; incorrect sensor calibration. | Clean sensor lens; reduce direct light if possible; allow sensor to recalibrate (power cycle if needed). |
8. Specifications
- Product Type: Water Closet Flushometer with Sensor Retrofit
- Flush Volume: 1.6 Gallons Per Flush (GPF)
- Fixture Connection: Top Spud
- Material: Metal (Chrome finish)
- Angle Stop: 1" I.P.S. Screwdriver Bak-Chek Angle Stop
- Sensor Type: Multi-focused Infrared Sensor
- Battery Life (RESS-C): Approximately 6 years
- ADA Compliance: Yes (Manual handle is ADA compliant)
9. Warranty Information
Sloan products are manufactured under strict quality standards and are backed by a manufacturer's warranty. For specific warranty terms and conditions, please refer to the warranty card included with your product or visit the official Sloan website. Keep your proof of purchase for warranty claims.
10. Support
For technical assistance, replacement parts, or further inquiries, please contact Sloan Customer Service. You can find contact information and additional resources on the official Sloan website:


