1. Product Overview
The Tassuowell Wireless Picture Light (Model 7115) is a rechargeable, battery-operated LED light designed to illuminate artwork, paintings, and displays. It features adjustable color temperature, dimmable brightness, and a rotatable design for optimal lighting. The light is controlled via an included remote control and offers wireless installation.
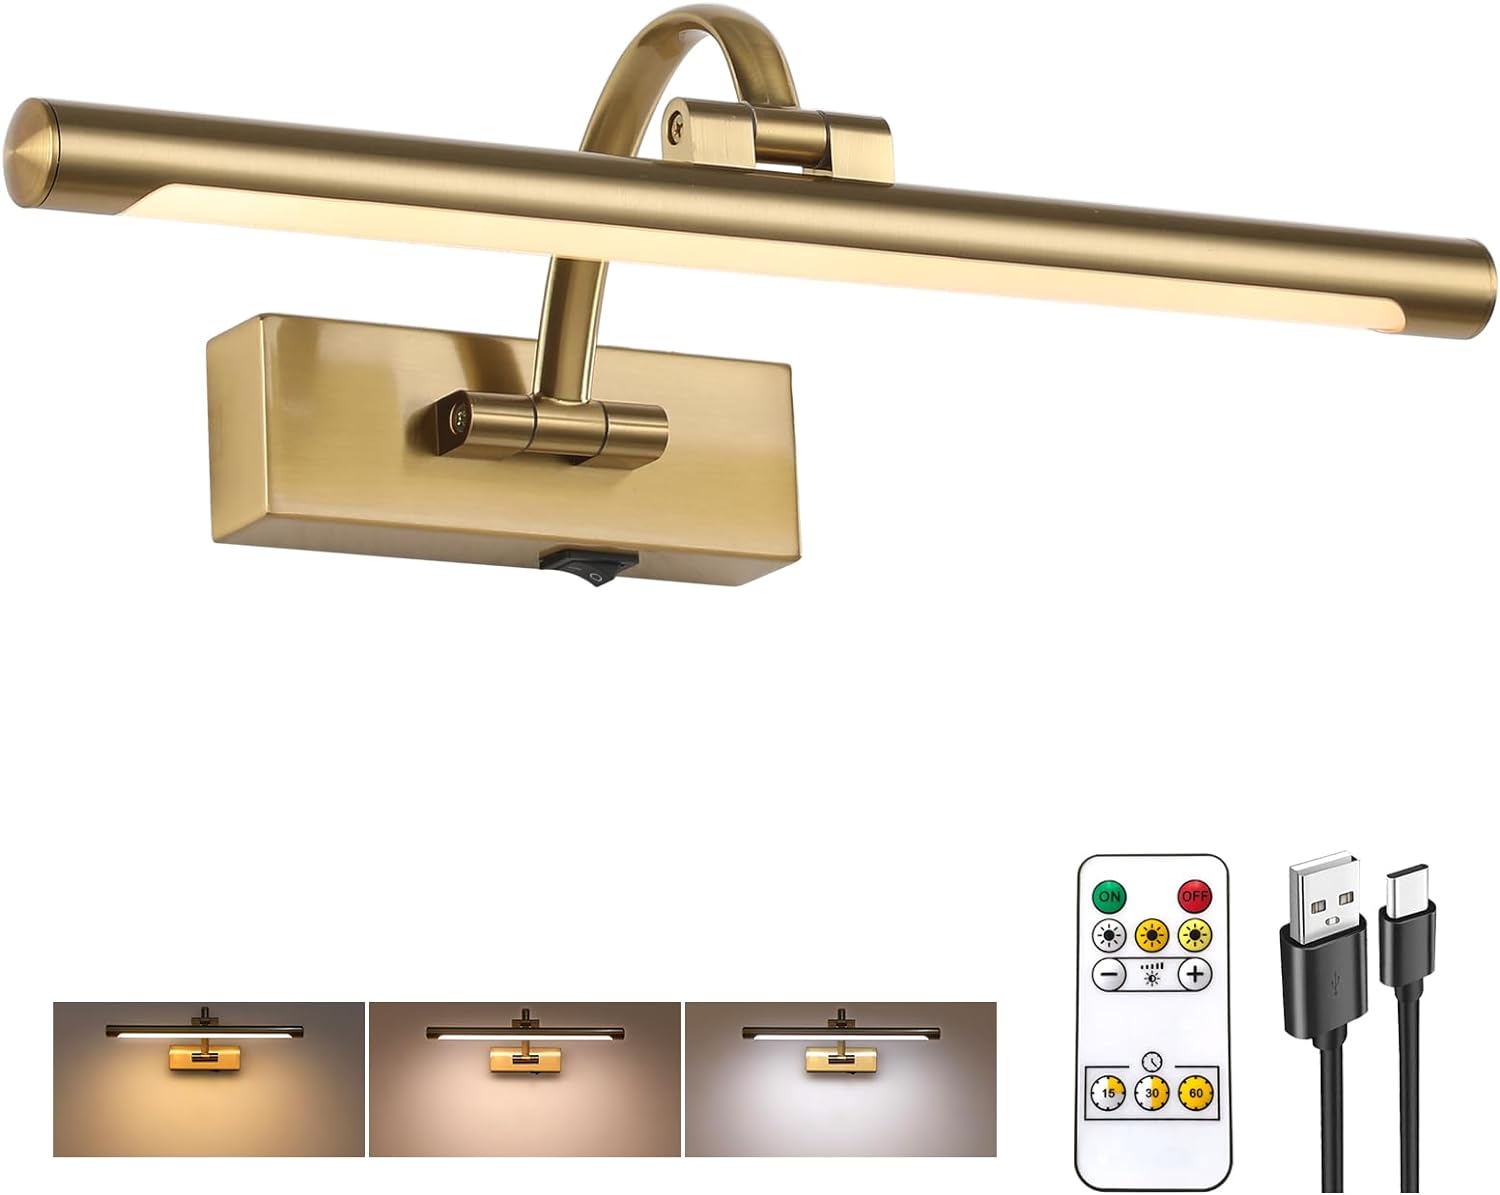
Image: Tassuowell Wireless Picture Light, displaying the main unit, remote, and charging cable.
2. Package Contents
Verify that all items are present in the package:
- 1 x Tassuowell Wireless Picture Light (Model 7115)
- 1 x Remote Control
- 1 x USB-C Charging Cable
- Mounting Hardware (screws, wall anchors)
- Instruction Manual (this document)
3. Setup and Installation
The Tassuowell Wireless Picture Light is designed for effortless wireless installation, requiring no complex wiring.
3.1 Initial Charging
- Locate the USB-C charging port on the picture light.
- Connect the provided USB-C charging cable to the light and to a compatible USB power source (e.g., computer, power bank, USB wall adapter).
- The charging indicator light will be red during charging.
- Once fully charged (approximately 4 hours), the indicator light will turn green.

Image: Charging options for the picture light, showing the USB-C port and indicator lights.
3.2 Wall Mounting
- Choose a suitable location on the wall for mounting the picture light. Ensure the surface is clean and dry.
- Separate the mounting bracket from the light fixture if necessary.
- Hold the mounting bracket against the wall at the desired height and mark the screw hole positions with a pencil.
- Drill pilot holes at the marked positions. If mounting into drywall, insert the provided wall anchors.
- Secure the mounting bracket to the wall using the provided screws.
- Align the picture light with the mounted bracket and slide it into place until it is securely attached.

Image: Product dimensions and key features for installation reference.
3.3 Remote Control Preparation
Before first use, remove the plastic insulator tab from the battery compartment of the remote control.
4. Operating Instructions
The picture light can be operated using the manual ON/OFF switch on the fixture or the included remote control.
4.1 Manual Operation
Use the toggle switch located on the base of the light fixture to manually turn the light ON or OFF.
4.2 Remote Control Operation
The remote control provides comprehensive control over the light's functions:

Image: Remote control layout and functions.
- ON/OFF: Press the ON button to turn the light on, and the OFF button to turn it off.
- Brightness Adjustment: Use the '+' and '-' buttons to adjust brightness from 10% to 100%.
- Color Temperature: Select from three color temperatures: 2700K (Warm Light), 4000K (Natural Light), or 6000K (White Light) using the dedicated buttons.
- Timer Function: Set the light to automatically turn off after 15, 30, or 60 minutes using the timer buttons.
- Memory Function: The light will remember the last brightness and color temperature setting used when turned back on.

Image: Visual representation of color temperature and dimming capabilities.
4.3 Adjusting Lighting Angle
The picture light features an adjustable design to direct light precisely where needed:
- Swing Arm: The arm connecting the light bar to the base can be adjusted 180° up and down.
- Rotatable Lamp Tube: The light bar itself can be rotated 270° to fine-tune the light direction.

Image: Adjustable lighting angle features.
5. Maintenance
5.1 Cleaning
To clean the picture light, gently wipe the surface with a soft, dry cloth. Avoid using abrasive cleaners or solvents, as these may damage the finish or acrylic lampshade.
5.2 Battery Life and Recharging
The built-in 5000mAh rechargeable battery provides approximately 7 hours of illumination at the highest brightness setting and up to 30 hours at the lowest brightness setting. Recharge the light when the brightness diminishes or the charging indicator light signals low battery.
For optimal battery longevity, avoid completely draining the battery frequently. Recharge as described in Section 3.1.
6. Troubleshooting
If you encounter issues with your Tassuowell Wireless Picture Light, refer to the following troubleshooting guide:
- Light does not turn on:
- Ensure the manual ON/OFF switch on the fixture is in the 'ON' position.
- Check if the battery is charged. Connect the light to the USB-C charging cable and observe the charging indicator.
- Remote control is not working:
- Verify that the plastic insulator tab has been removed from the remote's battery compartment.
- Ensure the remote control battery is functional. Replace if necessary (battery type not specified, typically a coin cell battery).
- Ensure there are no obstructions between the remote and the light fixture.
- Light is dim or battery life is short:
- The battery may require recharging. Refer to Section 3.1 for charging instructions.
- Battery performance can decrease over time with repeated charge cycles.
7. Specifications
| Feature | Specification |
|---|---|
| Model Number | 7115 |
| Dimensions (L x W x H) | 15.7" x 3.94" x 6.8" |
| Weight | 1.96 pounds |
| Material | Metal, Acrylic |
| Finish | Brass |
| Power Source | Battery Powered (5000mAh Lithium Ion) |
| Charging Port | USB-C |
| Charging Time | Approx. 4 hours |
| Battery Life | 7-30 hours (depending on brightness) |
| Light Source | LED |
| Brightness | 10%-100% Dimmable (up to 600 Lumens) |
| Color Temperatures | 2700K (Warm), 4000K (Natural), 6000K (White) |
| Control Method | Remote Control, Push Button (Manual ON/OFF) |
| Special Features | Adjustable Color Temperature, Adjustable Lighting Angle, Dimmable, Timer, Memory Function |
| Installation Type | Wireless Wall Mount |
| Indoor/Outdoor Usage | Indoor |
8. Warranty and Support
8.1 Warranty Information
The Tassuowell Wireless Picture Light comes with a 2-year after-sales service warranty. This warranty covers performance issues or defects that may arise with the product within this period.
8.2 Customer Support
For any questions, concerns, or warranty claims, please contact the Tassuowell support team. Refer to the product packaging or purchase documentation for specific contact details.