1. Introduction
This manual provides detailed instructions for the Spirit Of Gamer SOG-BTGPS1 Gaming Controller. Please read this manual carefully before using the product to ensure proper operation and to maximize your gaming experience. Keep this manual for future reference.
2. Product Overview
The Spirit Of Gamer SOG-BTGPS1 is a versatile gaming controller designed for multi-platform compatibility, offering an immersive gaming experience with advanced features.
2.1. Key Features
- Multi-platform compatibility: Nintendo Switch, PC, Android, and iOS devices.
- Three adjustable Turbo modes for rapid, repetitive actions.
- Rechargeable Lithium-ion battery with up to 20 hours of playtime.
- Four levels of adjustable vibration for enhanced immersion.
- Integrated 6-axis gyroscopic sensor for precise motion control.
- Two programmable M1/M2 buttons for custom macros.
- Dynamic RGB lighting with 4 effects and 6 colors, offering 10 unique backlight modes.
2.2. Controller Layout
Familiarize yourself with the buttons and components of your SOG-BTGPS1 controller.

Image 1: Front view of the Spirit Of Gamer SOG-BTGPS1 Gaming Controller, showcasing its transparent design with internal components and blue/cyan LED lighting. The controller features two analog sticks, a D-pad, A/B/X/Y buttons, Start/Select buttons, and shoulder/trigger buttons.
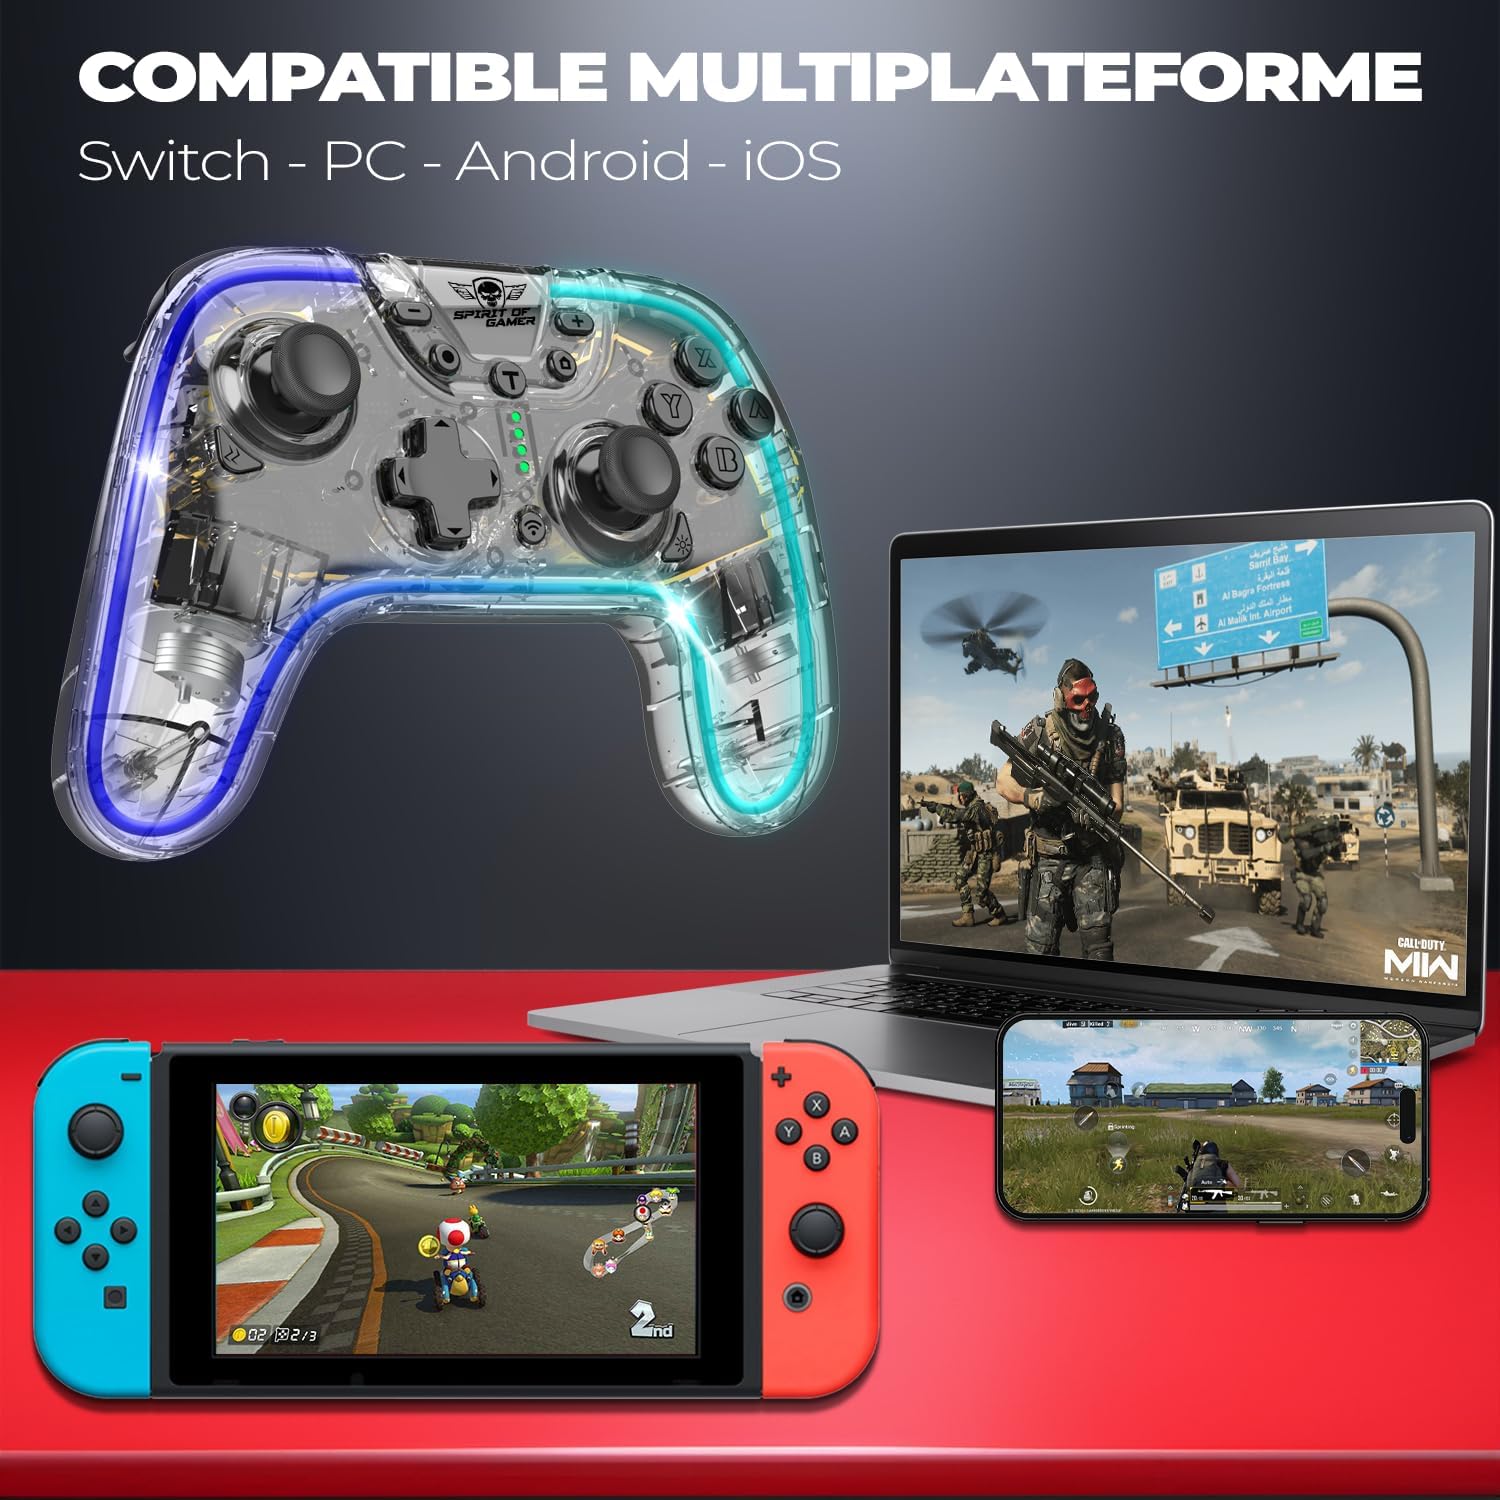
Image 2: The SOG-BTGPS1 controller displayed alongside a Nintendo Switch, a laptop (PC), and a smartphone (Android/iOS), illustrating its multi-platform compatibility.
3. Setup
3.1. Charging the Controller
The SOG-BTGPS1 controller is equipped with a built-in Lithium-ion battery. Before first use, fully charge the controller.
- Connect the provided USB charging cable to the controller's charging port.
- Connect the other end of the USB cable to a powered USB port (e.g., computer, USB wall adapter).
- The LED indicators on the controller will show the charging status. Refer to the controller's specific LED behavior for charging indication.
- A full charge typically takes approximately 3 hours and provides up to 20 hours of playtime.

Image 3: Visual representation of the controller's battery specifications: 20 hours playtime, 800 mAh capacity, and 3 hours charging time.
3.2. Connecting to Devices
The SOG-BTGPS1 controller supports wireless connection to various platforms.
3.2.1. Nintendo Switch
- On your Nintendo Switch, go to the HOME Menu.
- Select "Controllers" > "Change Grip/Order".
- Press and hold the pairing button on the SOG-BTGPS1 controller until the indicator lights begin to flash rapidly.
- Once connected, the indicator light(s) will remain solid.
3.2.2. PC (Windows)
- Ensure your PC has Bluetooth enabled.
- Go to "Settings" > "Devices" > "Bluetooth & other devices".
- Select "Add Bluetooth or other device" > "Bluetooth".
- Press and hold the pairing button on the SOG-BTGPS1 controller until the indicator lights begin to flash rapidly.
- Select "SOG-BTGPS1" from the list of available devices.
- Once connected, the indicator light(s) will remain solid.
3.2.3. Android / iOS Devices
- Enable Bluetooth on your Android or iOS device.
- Go to Bluetooth settings.
- Press and hold the pairing button on the SOG-BTGPS1 controller until the indicator lights begin to flash rapidly.
- Select "SOG-BTGPS1" from the list of available devices.
- Once connected, the indicator light(s) will remain solid.
4. Operating Instructions
4.1. Basic Controls
The SOG-BTGPS1 controller features standard gaming controls:
- Analog Sticks: For precise movement and camera control.
- D-Pad: For directional input, often used in menus or for specific game actions.
- A/B/X/Y Buttons: Action buttons, typically used for jumping, attacking, interacting, etc.
- L/R/ZL/ZR Buttons: Shoulder and trigger buttons for various in-game functions.
- Start/Select Buttons: For pausing games, opening menus, or other system functions.
4.2. Turbo Function
The Turbo function allows for rapid, repeated input of a button press by holding it down. The SOG-BTGPS1 offers three adjustable Turbo speeds.

Image 4: Illustration of the three Turbo modes available on the SOG-BTGPS1 controller, indicating different shot-per-second rates (e.g., 5, 12, 20 shots/s).
To activate and adjust Turbo mode:
- Press and hold the Turbo button (often marked 'T').
- While holding the Turbo button, press the desired action button (e.g., A, B, X, Y, L, R, ZL, ZR) to assign Turbo functionality to it.
- To cycle through Turbo speeds, hold the Turbo button and move the Right Analog Stick Up or Down. The controller may vibrate or flash LEDs to indicate the speed change.
- To deactivate Turbo for a specific button, repeat the activation steps. To clear all Turbo settings, hold the Turbo button for 5 seconds.
4.3. Adjustable Vibrations
The controller features haptic feedback with four adjustable vibration levels to enhance immersion in games.

Image 5: Depiction of the four adjustable vibration levels, ranging from off to strong, providing a customizable haptic experience.
To adjust vibration intensity:
- Consult the controller's specific button combination for vibration adjustment, typically involving a function button and the D-pad or an analog stick.
- Cycle through the four levels (Off, Low, Medium, High) until your preferred intensity is reached.
4.4. 6-Axis Gyroscopic Sensor
The integrated 6-axis gyroscopic sensor detects motion and tilt, providing precise control for games that support motion sensing.

Image 6: A visual representation of the 6-axis gyroscopic sensor within the controller, highlighting its ability to detect movements and inclinations for precise gameplay.
This feature is automatically active when connected to compatible platforms and games that utilize motion controls.
4.5. Programmable Buttons (M1/M2)
The SOG-BTGPS1 includes two programmable buttons (M1 and M2) on the back, allowing you to assign custom macros or single button functions for optimal gameplay.
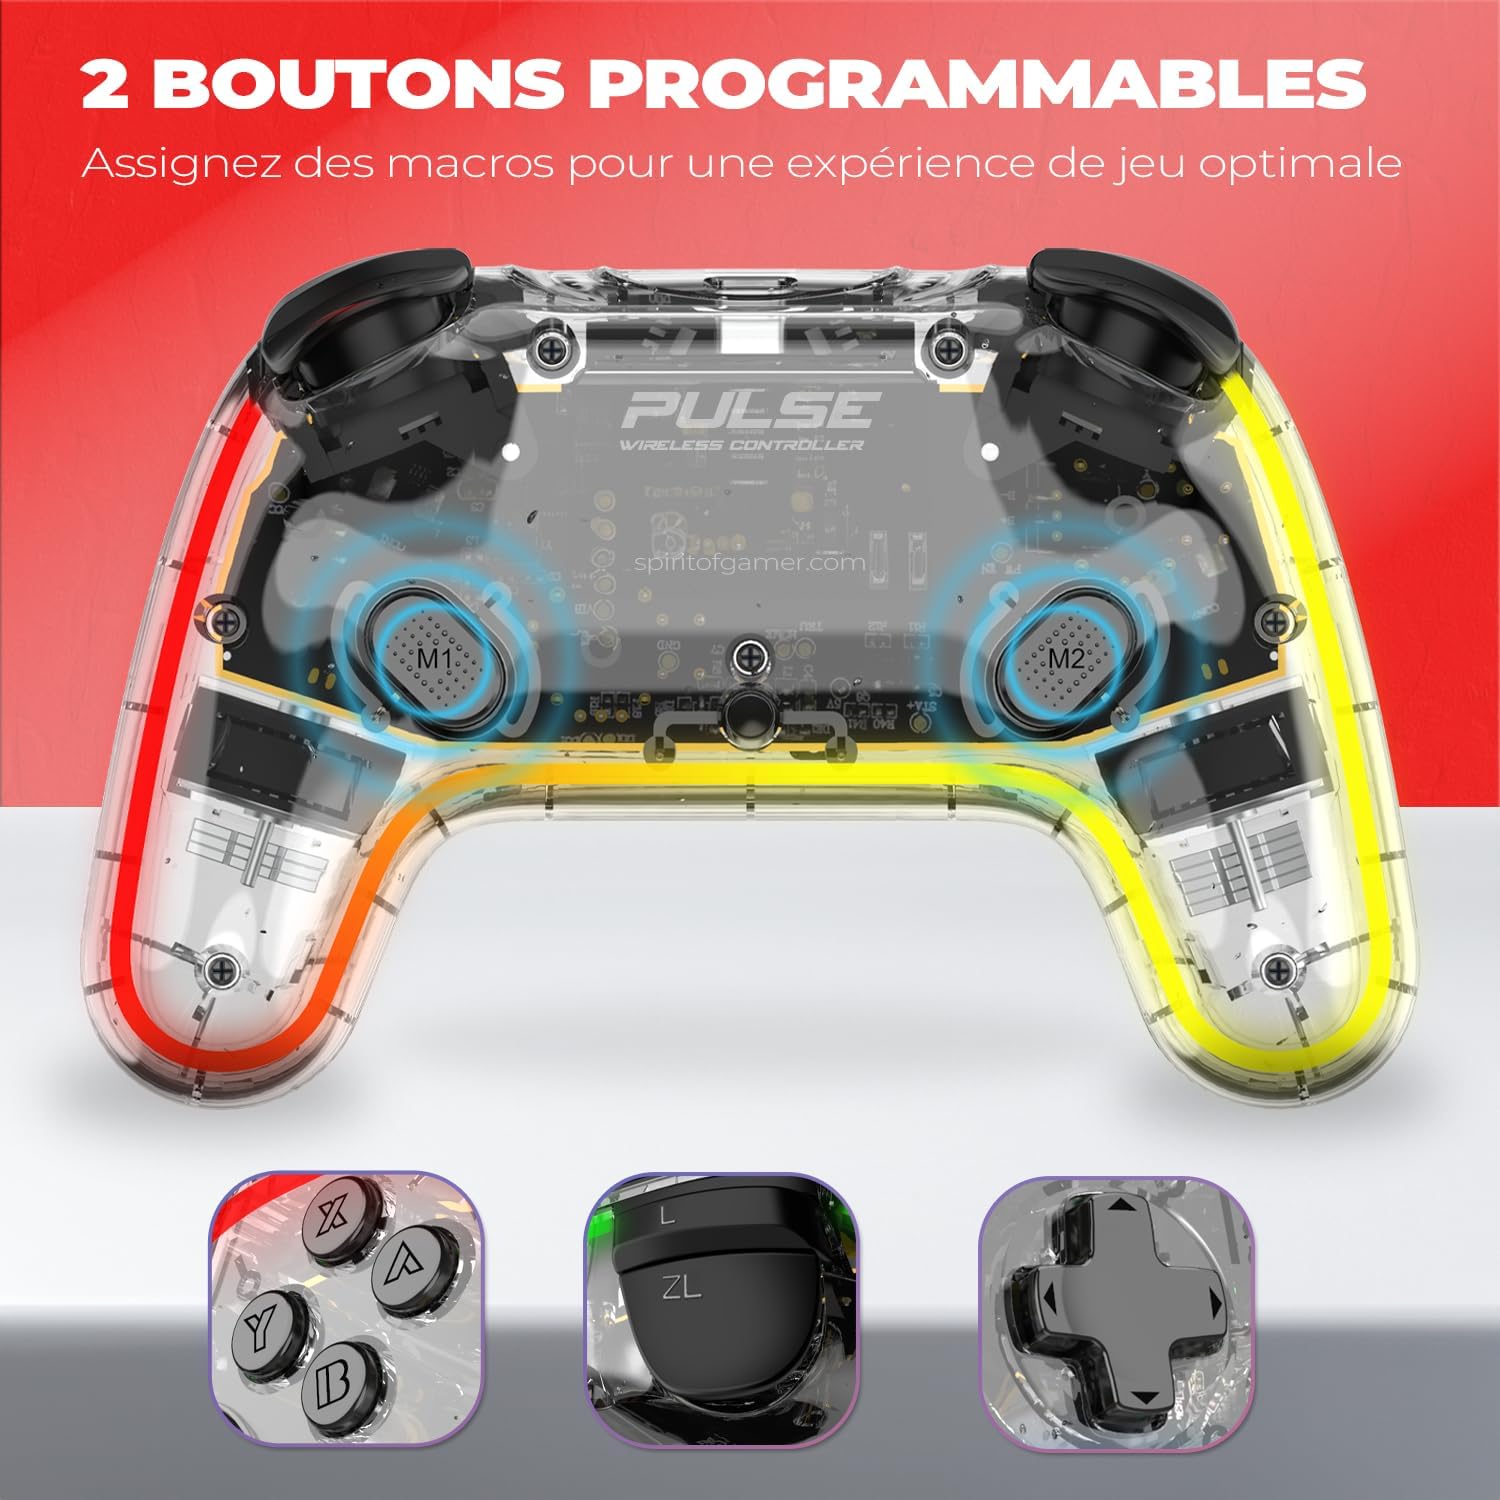
Image 7: Close-up view of the back of the controller, showing the M1 and M2 programmable buttons. Also shown are examples of buttons that can be mapped, such as A/B/X/Y, ZL/ZR, and D-pad directions.
To program M1 or M2:
- Press and hold the Program button (refer to your controller's specific layout for its location, often a small button on the back or bottom).
- While holding the Program button, press the M1 or M2 button you wish to program. The indicator light may flash to confirm entry into programming mode.
- Input the sequence of buttons you want to assign (e.g., A, B, X, Y, D-pad directions, L, R, ZL, ZR).
- Press the Program button again to save the macro and exit programming mode. The indicator light will stop flashing.
- To clear a programmed button, repeat the programming steps but do not input any sequence before pressing the Program button to save.
4.6. RGB Lighting Effects
Customize your controller's appearance with 4 RGB lighting effects and 6 distinct colors, offering 10 unique backlight modes.

Image 8: An illustration showcasing the various RGB lighting options, including red, yellow, green, turquoise, blue, and purple, highlighting the controller's customizable aesthetic features.
To change RGB lighting modes:
- Locate the LED/Light button on your controller (refer to the controller layout).
- Press the LED/Light button repeatedly to cycle through the available lighting effects and colors.
- Hold the LED/Light button to turn the lighting on or off.
5. Maintenance
- Cleaning: Use a soft, dry cloth to clean the controller. Do not use harsh chemicals or abrasive materials.
- Storage: Store the controller in a cool, dry place away from direct sunlight and extreme temperatures.
- Battery Care: To prolong battery life, avoid fully discharging the controller frequently. Charge it regularly, even if not in use for extended periods.
- Avoid Drops: Protect the controller from drops and impacts, which can damage internal components.
6. Troubleshooting
6.1. Controller Does Not Turn On
- Ensure the controller is fully charged. Connect it to a power source and allow it to charge for at least 30 minutes before attempting to turn it on again.
- Verify the charging cable is securely connected to both the controller and the power source.
6.2. Unable to Connect to Device
- Ensure the controller is in pairing mode (indicator lights flashing rapidly).
- Check that Bluetooth is enabled on your target device (Switch, PC, Android, iOS).
- Move the controller closer to the device to ensure it is within Bluetooth range.
- Remove any previous pairings of the controller from your device's Bluetooth settings and attempt to pair again.
- Restart both the controller and the device, then try pairing again.
6.3. Buttons or Analog Sticks Not Responding
- Ensure the controller is properly connected to your device.
- Test the controller in a different game or application to determine if the issue is game-specific.
- Restart the controller and the connected device.
- Check for any physical obstructions or debris around the buttons or analog sticks.
6.4. Turbo/Programmable Buttons Not Working
- Review the "Operating Instructions" section for correct programming procedures.
- Ensure you have correctly assigned the Turbo function or macro to the desired button.
- Try clearing and re-programming the buttons.
7. Specifications
| Brand | Spirit Of Gamer |
| Model Name | SOG-BTGPS1 |
| Model Number | S0240552 |
| Connectivity | Wireless (Bluetooth) |
| Compatibility | Nintendo Switch, PC, Android, iOS |
| Battery Type | Lithium-ion |
| Battery Capacity | 800 mAh |
| Playtime | Up to 20 hours |
| Charging Time | Approximately 3 hours |
| Dimensions (L x W x H) | 16 x 11 x 6 cm |
| Special Features | Turbo Function, Adjustable Vibration, 6-Axis Gyroscope, 2 Programmable Buttons, RGB Lighting |
8. Warranty and Support
Information regarding product warranty is not available in the provided data. For warranty claims or technical support, please refer to the documentation included with your purchase or contact Spirit Of Gamer customer service directly through their official website or authorized retailers.
Please retain your proof of purchase for any warranty-related inquiries.