1. Introduction
This manual provides essential instructions for the assembly, operation, and maintenance of your Outsunny PE Garden Greenhouse. Designed for cultivating vegetables, plants, and flowers, this greenhouse offers a protected environment for optimal growth. Please read all instructions carefully before assembly and use to ensure safe and efficient operation.

Figure 1: Outsunny PE Garden Greenhouse (100x80x150 cm)
2. Safety Information
- Assembly: It is recommended that 1 to 2 people install the greenhouse to ensure safety and ease of assembly.
- Handling: Exercise caution when handling all components, especially the steel frame parts, to prevent injury.
- Stability: Ensure the greenhouse is securely anchored to the ground. Burying the extended edge of the cover is crucial for stability and to prevent wind damage.
- Weather Conditions: Do not use or assemble the greenhouse during strong winds, heavy rain, or snow. Disassemble or secure the greenhouse adequately in anticipation of severe weather.
- Ventilation: Maintain proper ventilation to prevent overheating and excessive humidity, which can harm plants.
- Children and Pets: Keep children and pets away from the assembly area and supervise them around the greenhouse during use.
3. Package Contents
Before beginning assembly, verify that all parts are present and undamaged. If any parts are missing or damaged, contact customer service.
- Steel Alloy Frame Components (poles, connectors)
- Reinforced PE Cover (135 g/m²)
- Zippered Roll-up Doors (2 units)
- Assembly Manual
4. Setup and Assembly
Follow these steps to assemble your Outsunny PE Garden Greenhouse:
- Prepare the Site: Choose a level, sheltered location for your greenhouse. Clear any debris or sharp objects from the area.
- Assemble the Frame: Connect the steel alloy poles using the provided connectors according to the assembly manual. Ensure all connections are secure.
- Install the Cover: Carefully drape the reinforced PE cover over the assembled frame. Ensure the cover is centered and evenly distributed.
- Secure the Cover: Fasten the cover to the frame using any integrated ties or fasteners. Ensure the cover is taut to prevent water pooling.
- Anchor the Greenhouse: For optimal stability and sealing, bury the extended 10 cm edge of the PE cover deeply and firmly into the soil. This also helps prevent small animals from entering.

Figure 2: Reinforced PE Cover and UV Resistance
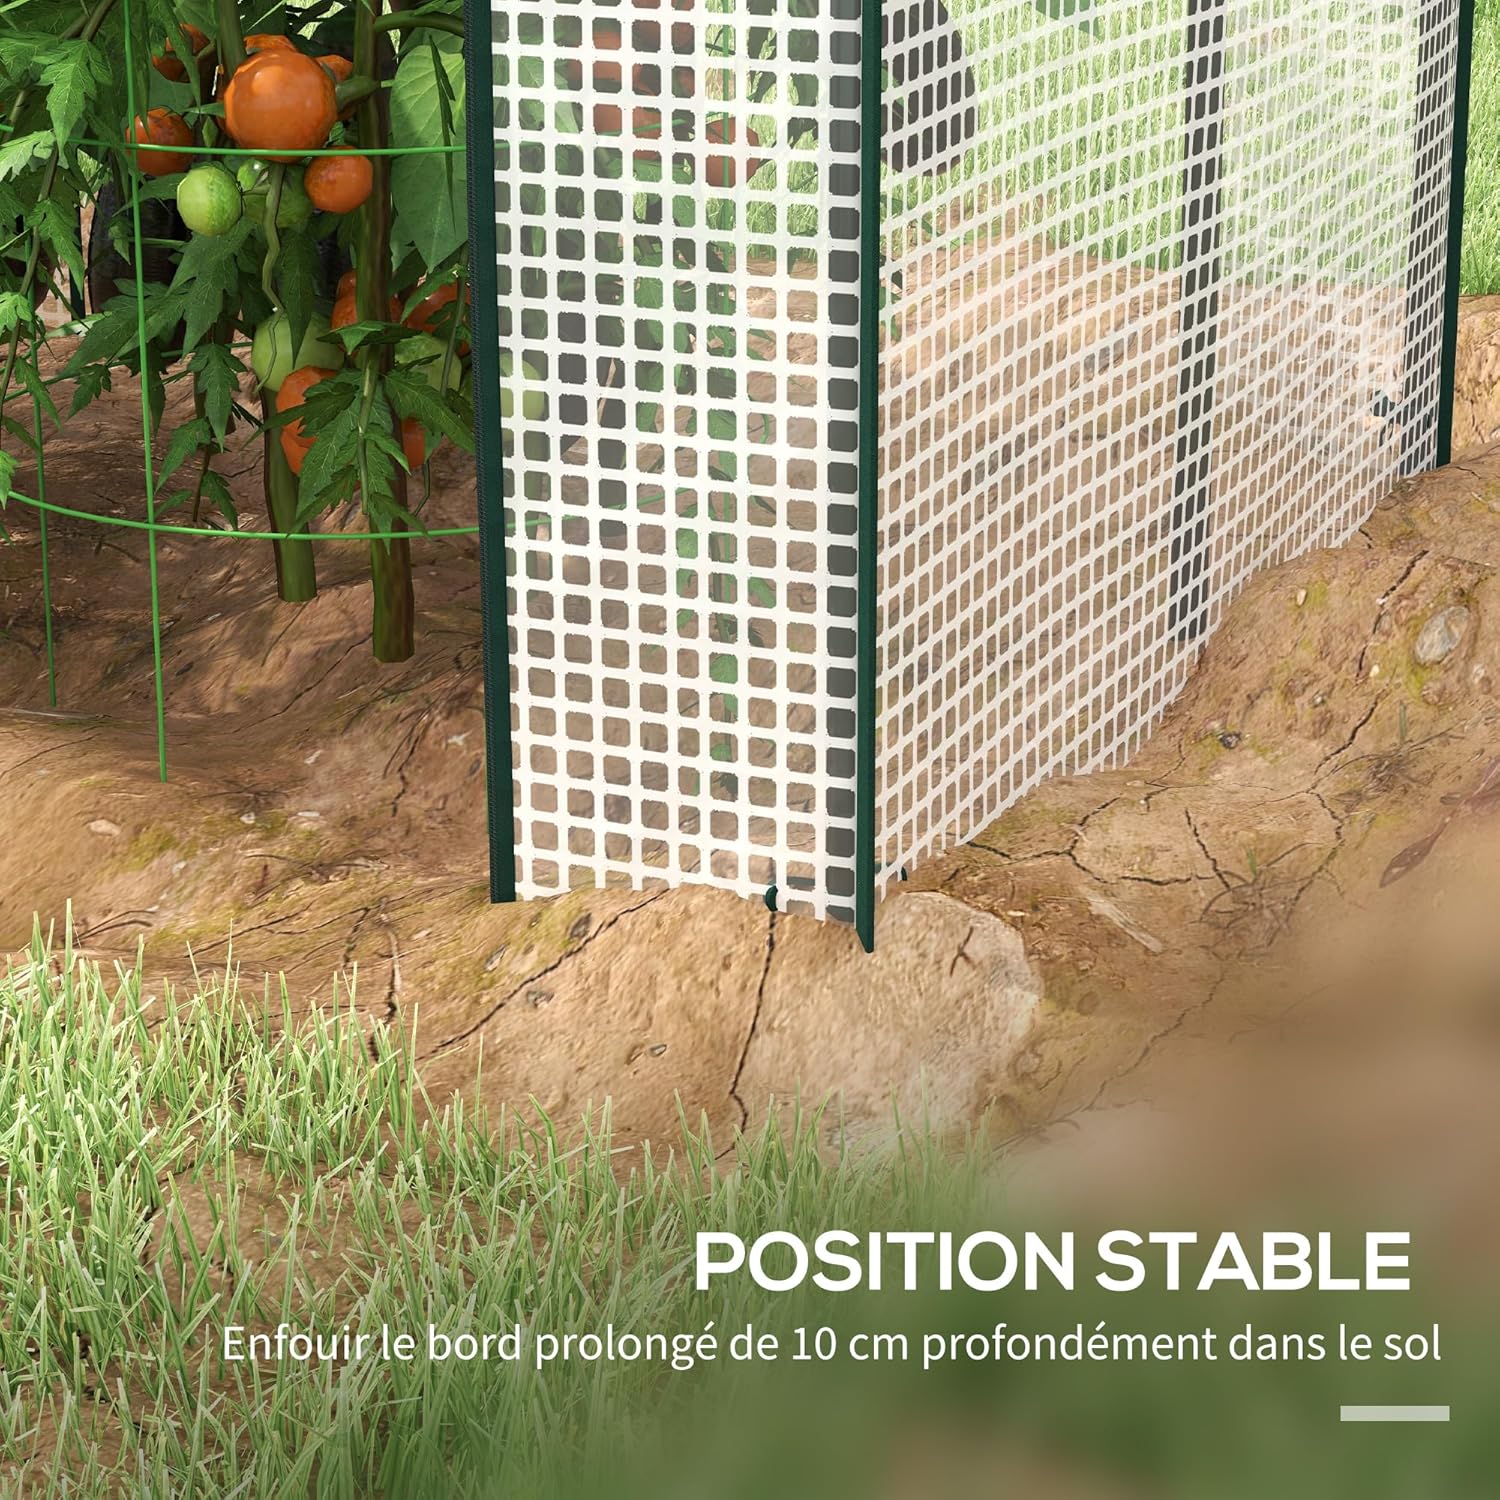
Figure 3: Burying the Extended Edge for Stability
5. Operating Instructions
To maximize the benefits of your greenhouse:
- Access and Zone Management: The greenhouse features two zippered roll-up doors, allowing easy access to different sections. This design is practical for managing distinct plant varieties or creating two separate growing zones.
- Ventilation: Utilize the four ventilation holes (two on each side) to control the internal temperature and humidity. Open them as needed to provide cross-ventilation and prevent excessive heat buildup.
- Light Transmission: The reinforced PE cover is designed to allow approximately 85% of nutrient-rich sunlight to pass through, promoting healthy plant growth while protecting against harmful UV rays.

Figure 4: Two-Zone Design and Roll-Up Doors
Figure 5: Ventilation Holes for Temperature and Humidity Control

Figure 6: Detail of Roll-Up Zippered Door
6. Maintenance
Regular maintenance will extend the lifespan of your greenhouse:
- Cleaning the Cover: Periodically clean the PE cover with mild soap and water to remove dirt, dust, and algae. This ensures maximum light transmission. Rinse thoroughly with clean water.
- Frame Inspection: Regularly inspect the steel alloy frame for any signs of rust, damage, or loose connections. Tighten any loose bolts or replace damaged parts as necessary.
- Anchoring Check: After strong winds or heavy rain, check the ground anchoring to ensure the extended edge of the cover remains securely buried and the greenhouse is stable. Re-bury or reinforce if needed.
- Zipper Care: Keep the zippers clean and lubricated to ensure smooth operation. Avoid forcing stuck zippers.
7. Troubleshooting
| Problem | Possible Cause | Solution |
|---|---|---|
| Greenhouse instability / Wind damage | Insufficient anchoring; strong winds. | Ensure the extended edge of the cover is buried deeply in the soil. Add additional weights or ground anchors if necessary. Disassemble in severe weather. |
| Water pooling on roof | Cover not taut; insufficient roof pitch. | Ensure the cover is stretched tightly over the frame during assembly. Consider adding internal supports if heavy rain is common in your area. |
| Poor plant growth | Lack of ventilation; insufficient light; improper temperature/humidity. | Utilize ventilation holes to regulate temperature and humidity. Ensure the cover is clean for maximum light transmission. Adjust watering and plant care as needed. |
| Zipper difficulty | Dirt/debris in zipper; lack of lubrication. | Clean the zipper teeth with a brush. Apply a silicone-based lubricant to the zipper. |
8. Specifications
| Feature | Detail |
|---|---|
| Dimensions (L x W x H) | 100 cm x 80 cm x 150 cm |
| Cover Material | Reinforced Polyethylene (PE) 135 g/m² |
| Frame Material | Alloy Steel |
| Number of Doors | 2 (Zippered, Roll-up) |
| Number of Vents | 4 |
| Product Weight | 3.35 kg |
| UV Resistance | Yes (85% light transmission) |
| Intended Use | Outdoor |
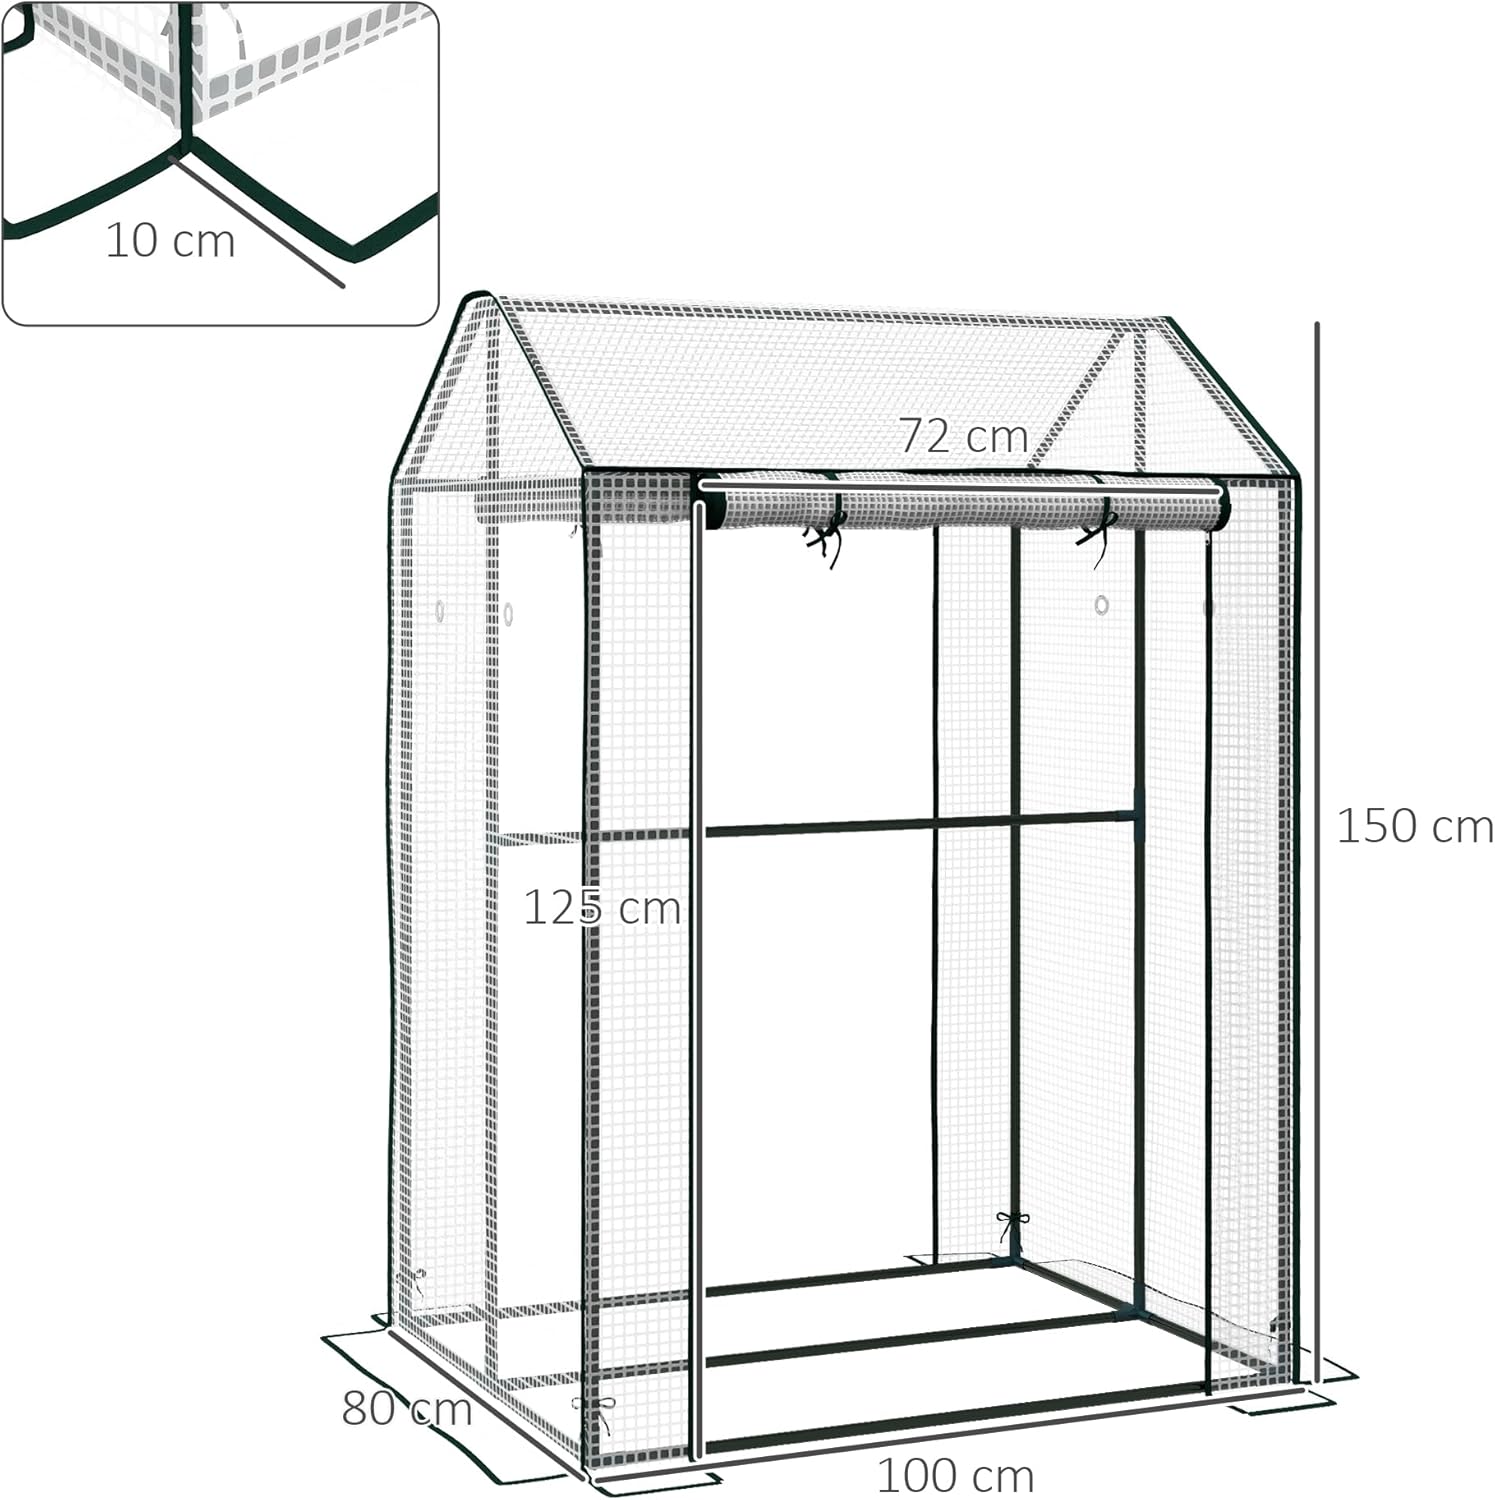
Figure 7: Product Dimensions
9. Warranty and Support
For warranty information, product support, or to inquire about replacement parts, please refer to your purchase documentation or contact Outsunny customer service directly. Keep your proof of purchase for any warranty claims.


