1. Introduction
This manual provides detailed instructions for the safe and efficient operation, maintenance, and troubleshooting of your Deepwave 6L Cool and Warm Mist Humidifier. Please read this manual thoroughly before use and retain it for future reference.
Key Features:
- Large Capacity: 6-liter water tank for extended operation.
- Wide Coverage: Suitable for rooms up to 500 square feet.
- Dual Mist Options: Produces both cool and warm mist.
- Smart Humidity Control: Maintains pre-set humidity levels and displays real-time humidity.
- Adjustable Mist Levels: Three distinct mist output settings.
- Integrated Timer: Allows for scheduled humidification.
- Aromatherapy Function: Built-in tray for essential oils.
- Sleep Mode: Operates quietly with display off for undisturbed rest.
- Top-Fill Design: Convenient and easy water refilling.
- Auto Shut-Off: Automatically powers off when water level is low for safety.
2. Important Safety Instructions
READ ALL INSTRUCTIONS BEFORE USE.
- Always place the humidifier on a firm, flat, waterproof surface at least 12 inches (30 cm) away from walls and appliances.
- Do not place the humidifier directly on carpet, wood floors, or surfaces that may be damaged by water or moisture.
- Unplug the humidifier from the power outlet before filling, cleaning, or moving it.
- Do not immerse the base unit in water or other liquids.
- Keep the humidifier out of reach of children and pets.
- Use only clean, cool tap water. Do not add essential oils directly into the water tank; use the designated aromatherapy tray.
- Do not block the mist outlet.
- If the humidifier emits an unusual smell or sound, turn it off immediately and unplug it.
- The appliance has an automatic shut-off feature when the water tank is empty.
3. Package Contents
Upon unpacking, please ensure all items are present and in good condition:
- Deepwave 6L Humidifier Unit (Base and Water Tank)
- User Manual
4. Product Components
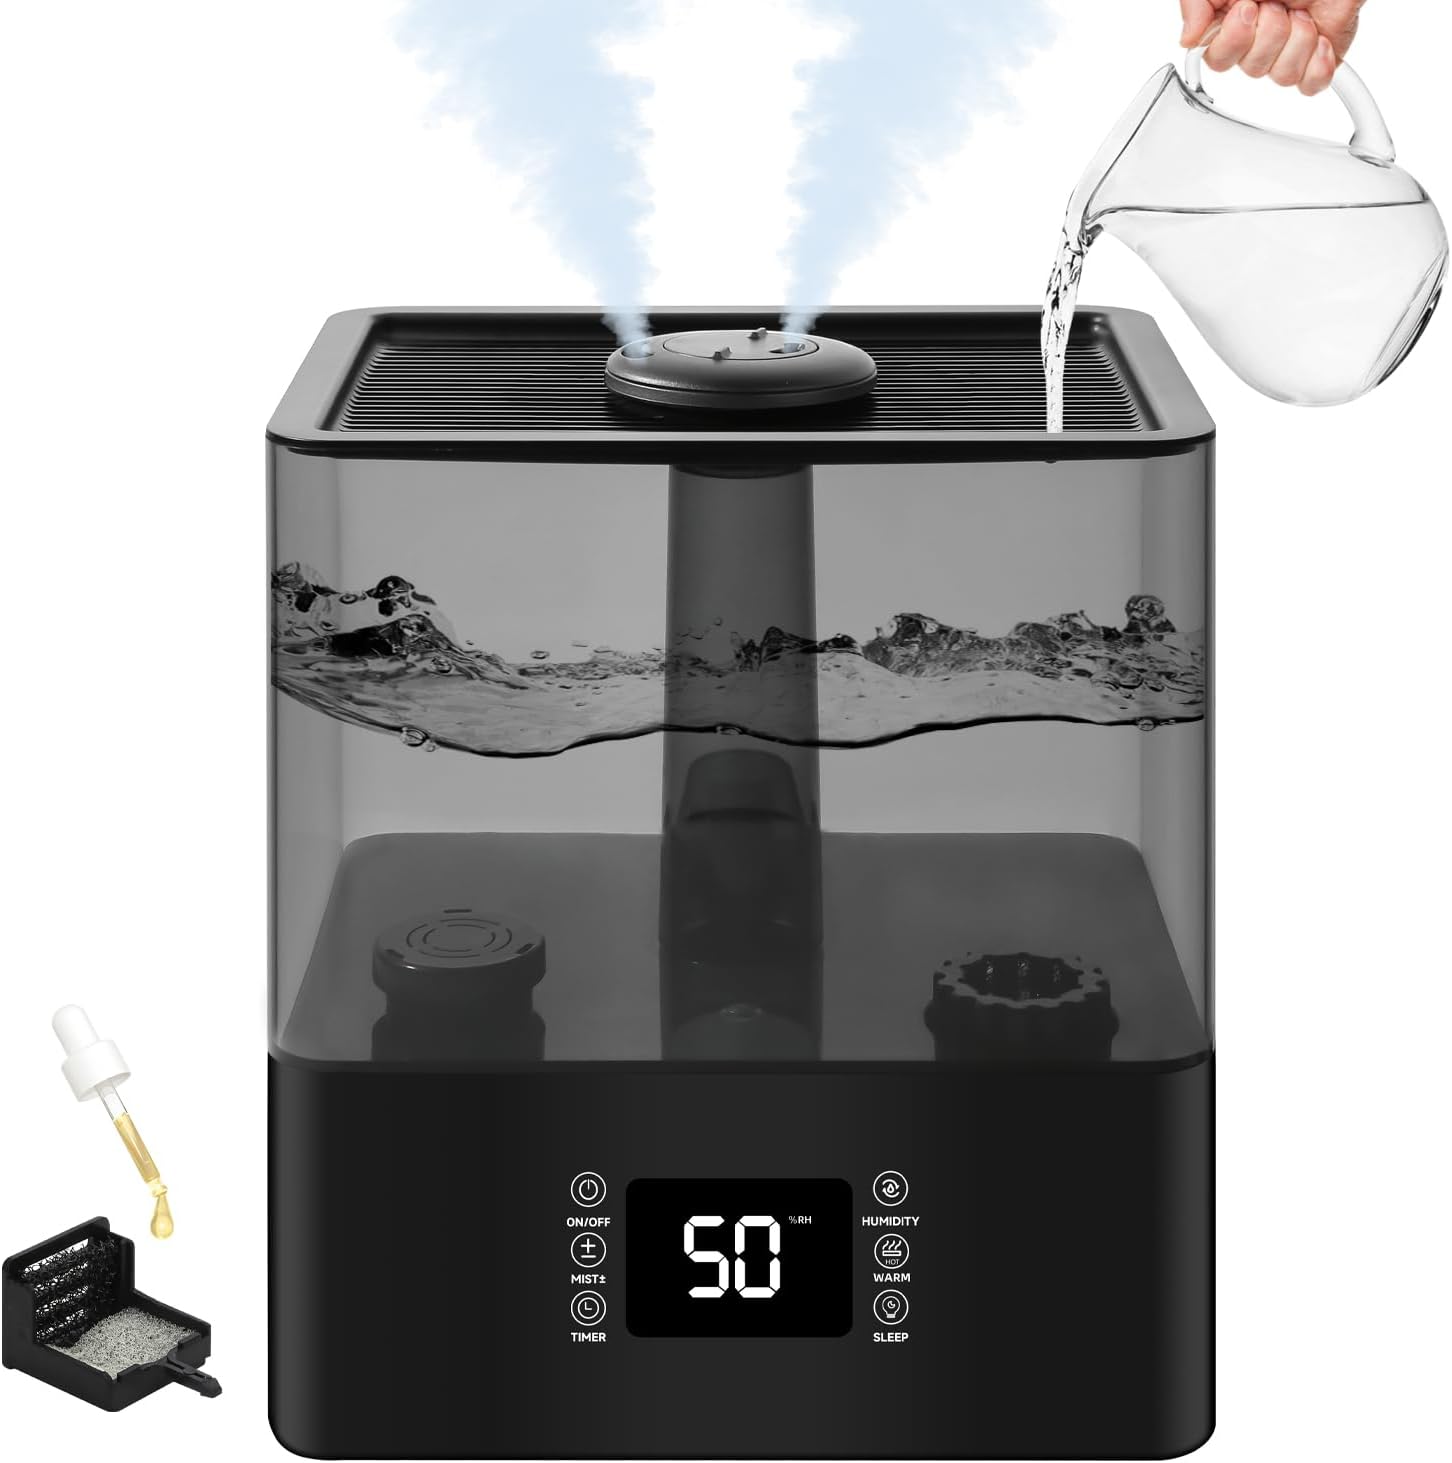
Figure 4.1: Overall view of the Deepwave 6L Humidifier, showing the top-fill design and essential oil tray.
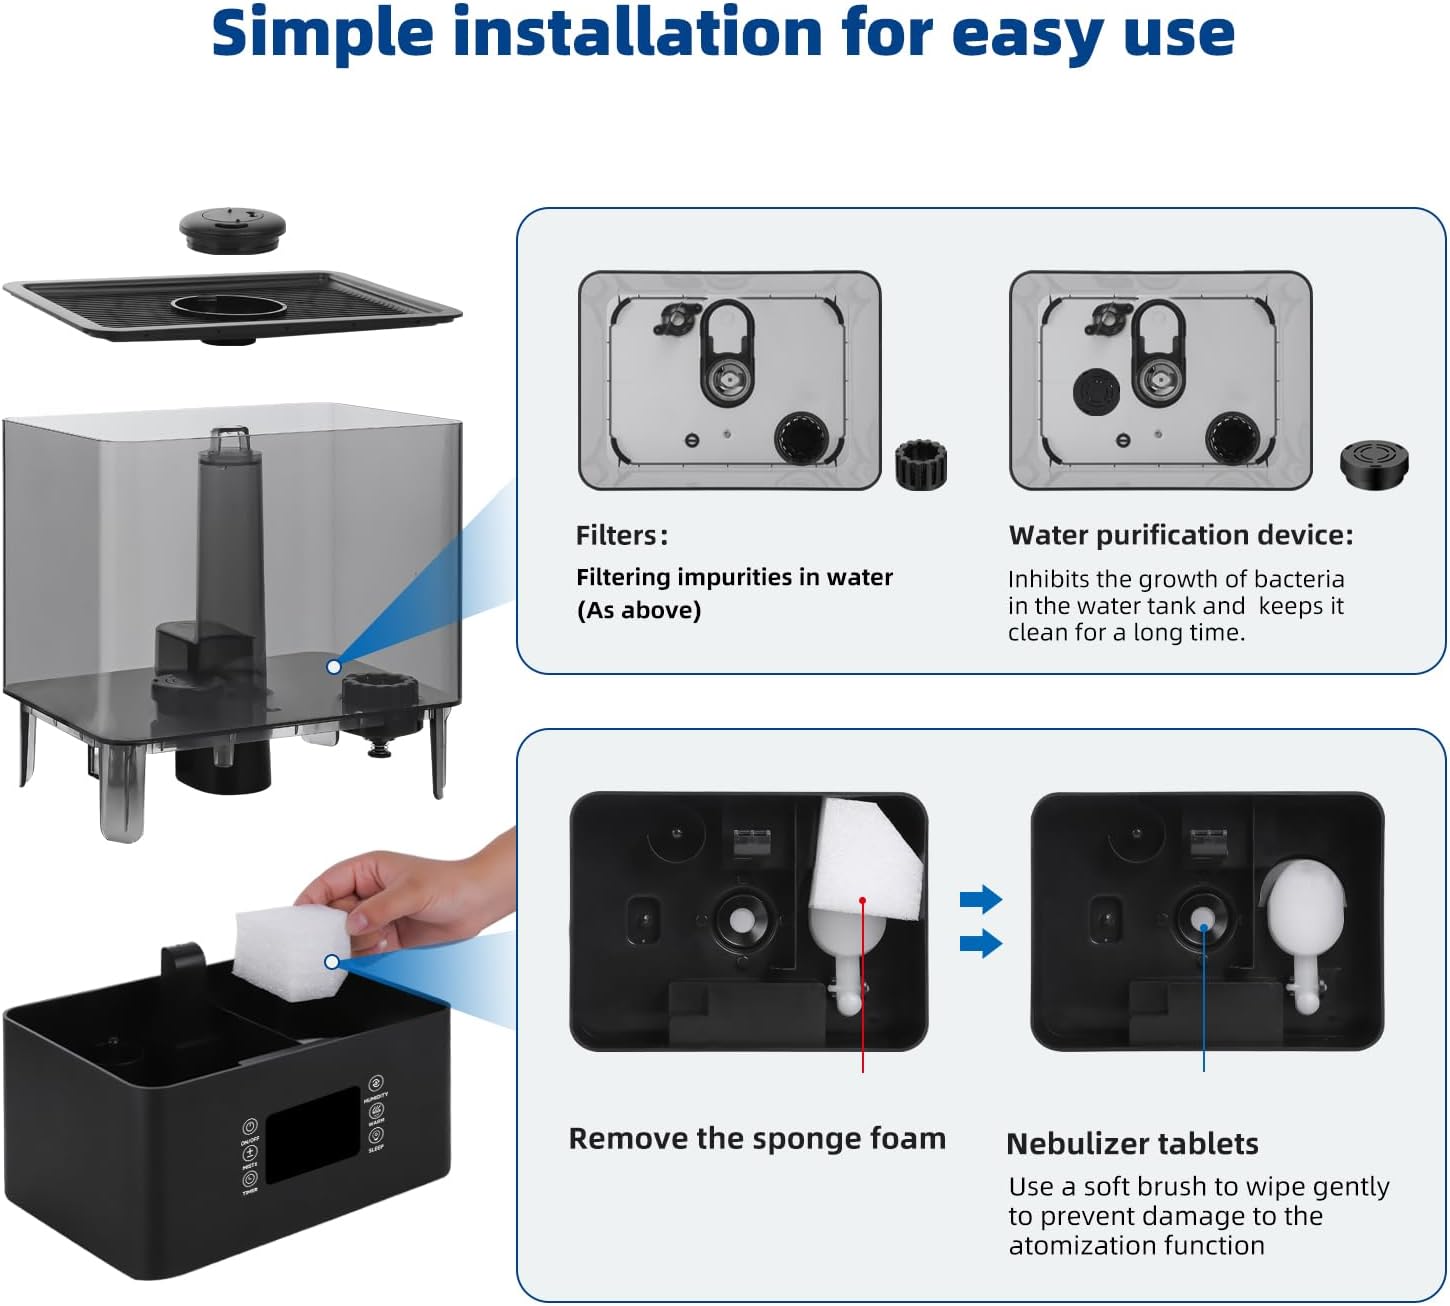
Figure 4.2: Exploded view of humidifier components, illustrating the water tank, base, filters, water purification device, sponge foam, and nebulizer tablets.
Component Descriptions:
- Water Tank: The transparent reservoir for holding up to 6 liters of water.
- Base Unit: Contains the electronic controls, ultrasonic atomizer, and fan.
- Mist Nozzle: Rotatable 360° nozzle for directing mist output.
- Control Panel: Touch-sensitive display for operating functions (Power, Mist Level, Timer, Humidity, Warm Mist, Sleep Mode).
- Aromatherapy Tray: A small compartment for adding essential oils.
- Filters: Internal filters designed to remove impurities from the water.
- Water Purification Device: Inhibits bacterial growth in the water tank.
- Sponge Foam: Located in the base, used for cleaning and maintenance.
- Nebulizer Tablets: The ultrasonic components responsible for mist generation.
5. Setup
5.1 Initial Placement
- Place the humidifier on a flat, stable, and waterproof surface.
- Ensure there is at least 12 inches (30 cm) of space around the humidifier for proper mist dispersion.
- Keep the unit away from direct sunlight, heat sources, and air vents.
5.2 Filling the Water Tank
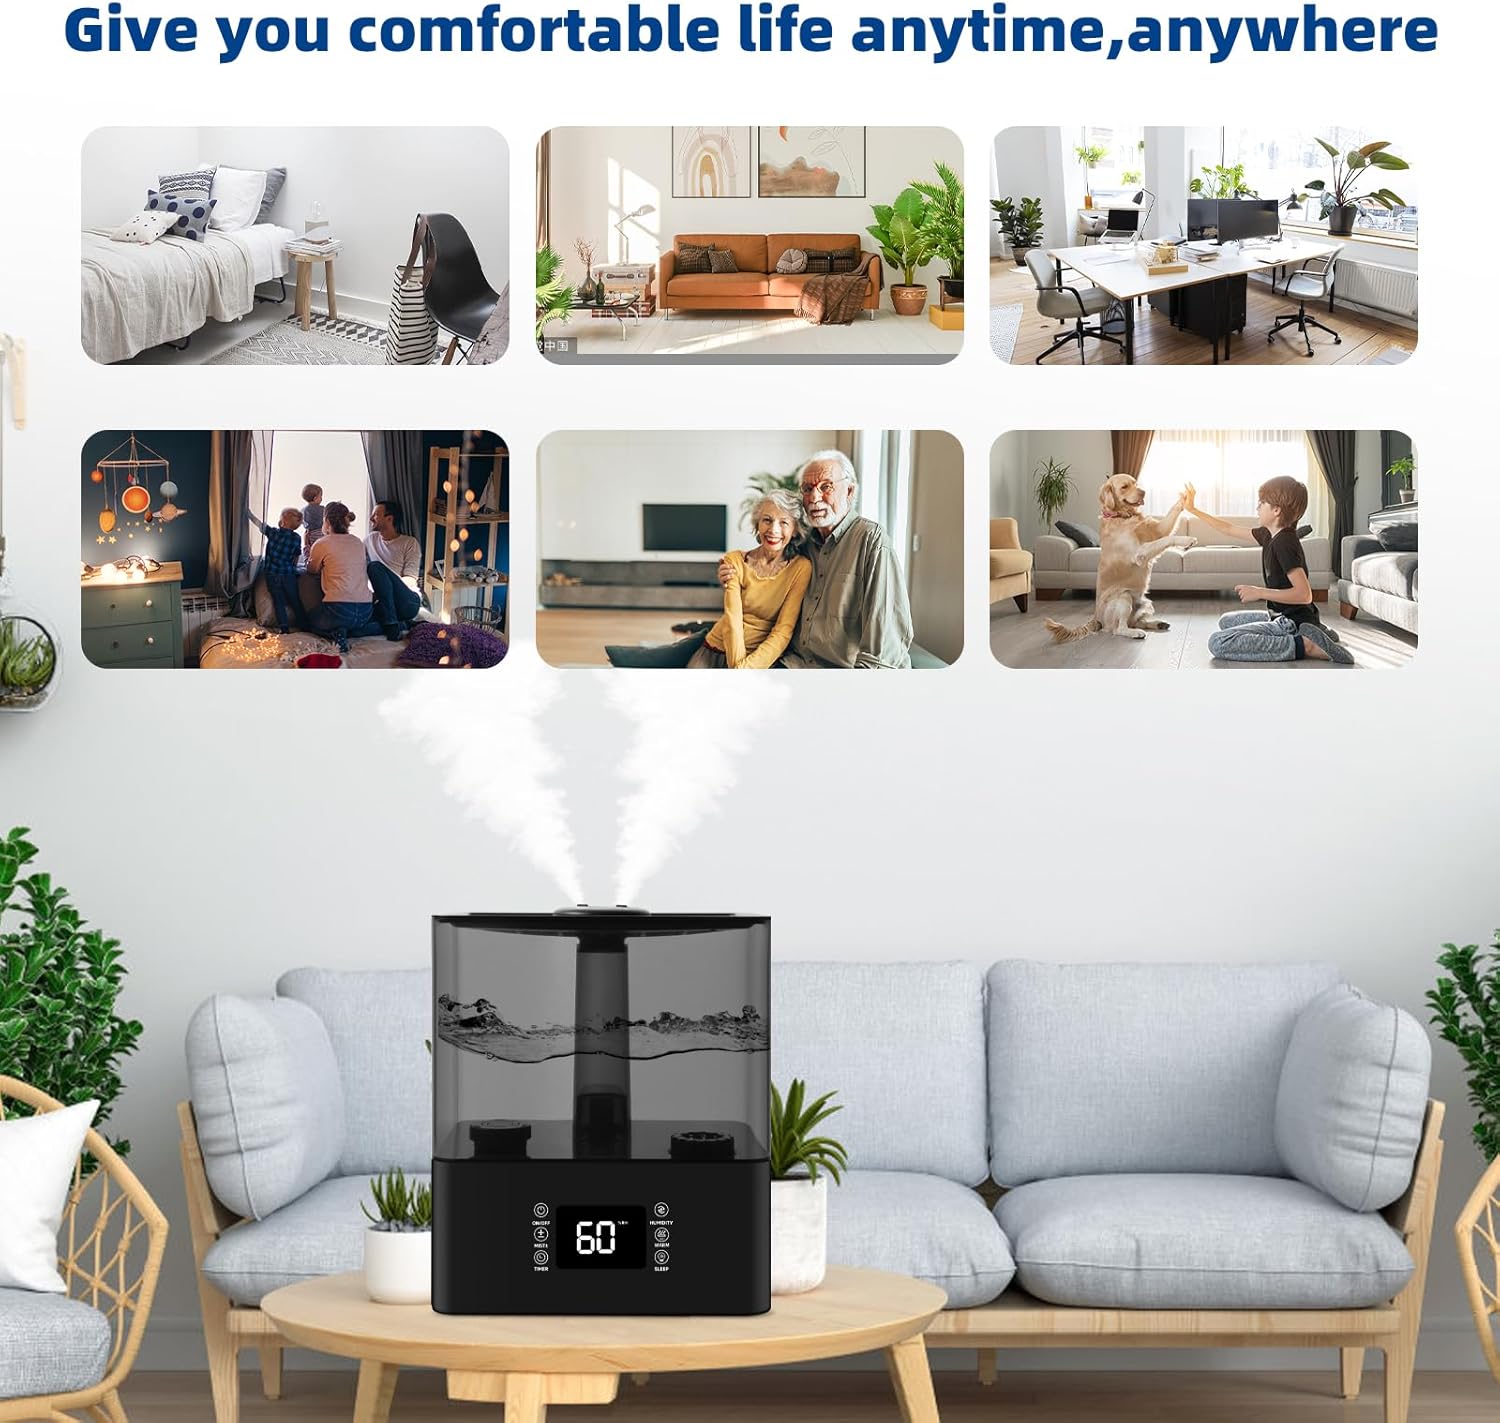
Figure 5.1: Water can be poured directly into the top opening of the humidifier.
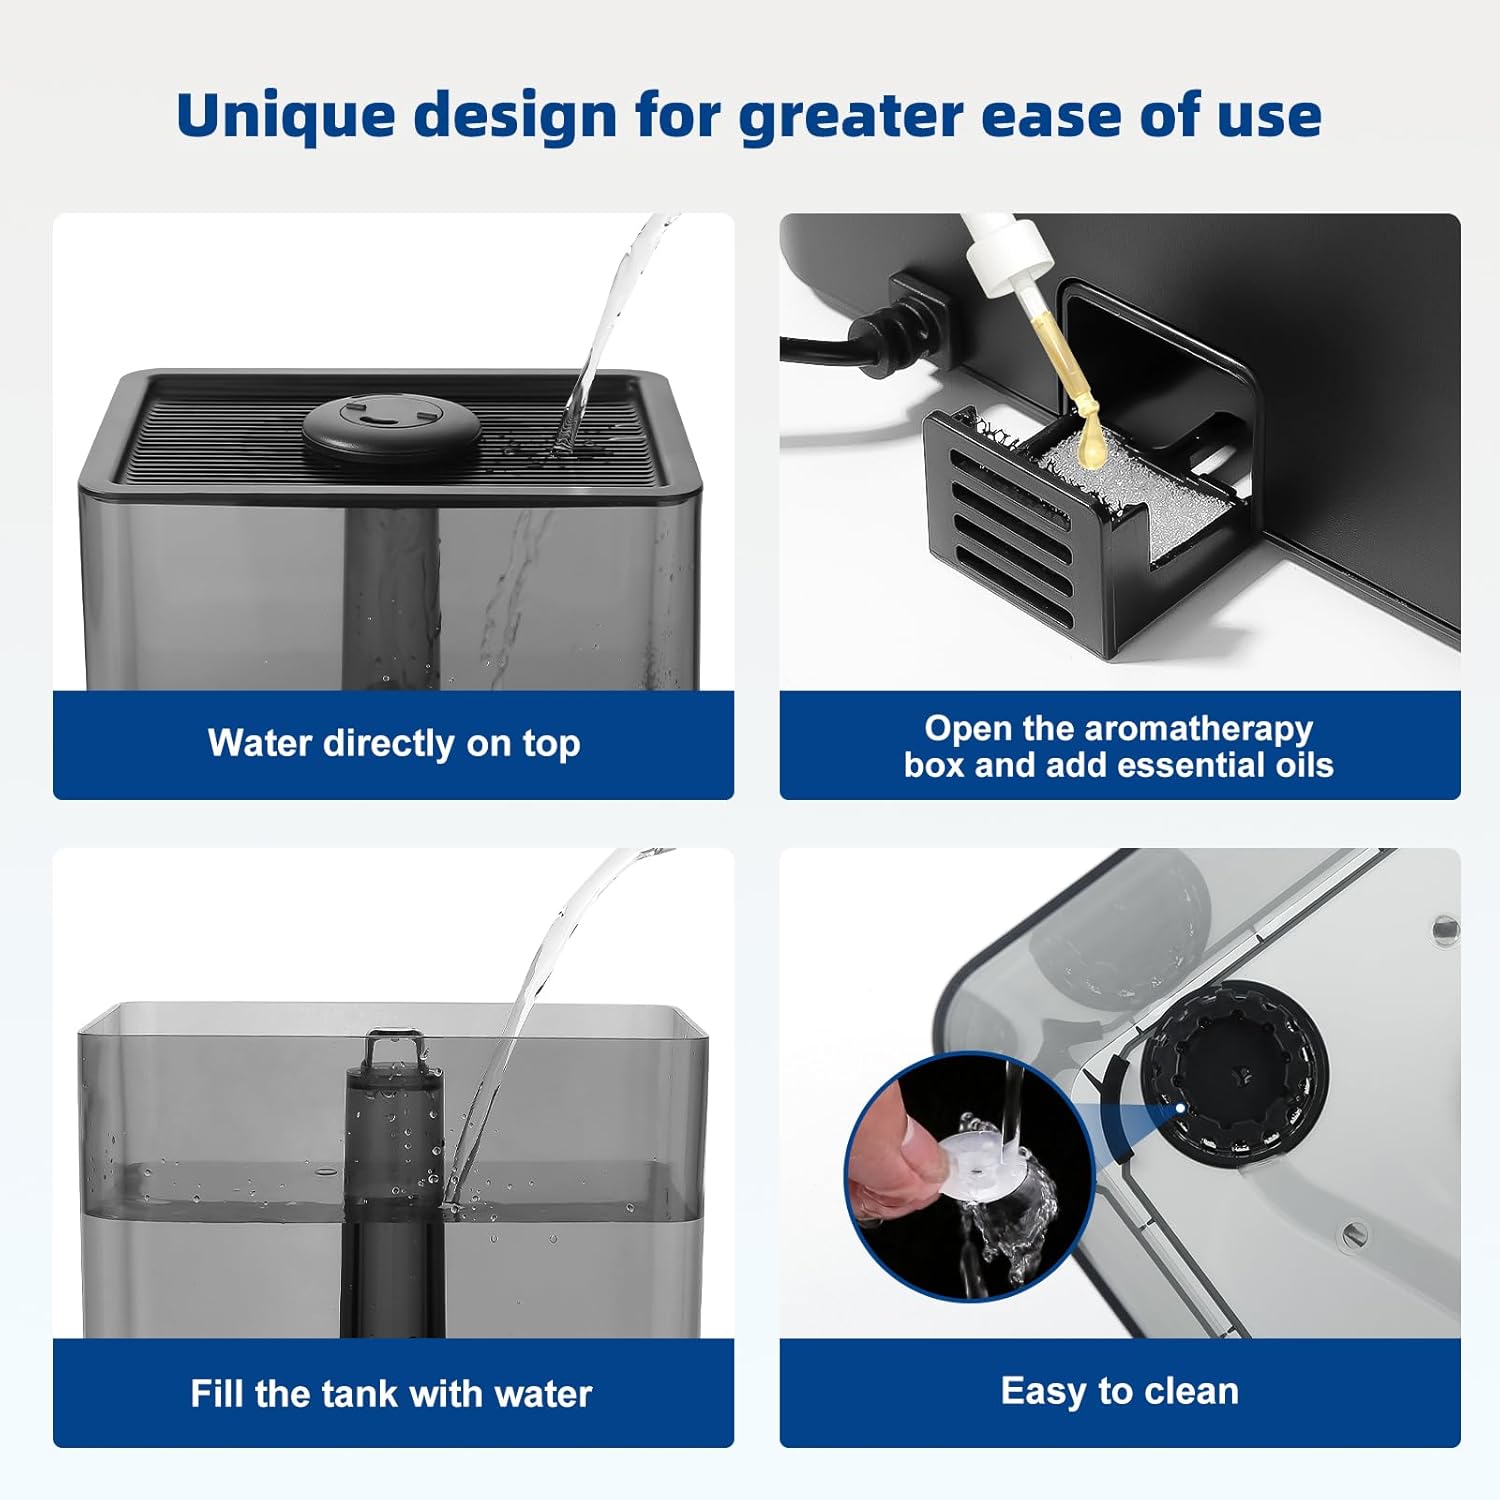
Figure 5.2: Detailed view of the top-fill process, showing water entering the tank.
- Ensure the humidifier is unplugged from the power outlet.
- Remove the top cover of the humidifier.
- Pour clean, cool tap water directly into the water tank through the top opening. Do not exceed the maximum fill line.
- Replace the top cover securely.
- Plug the power cord into a suitable electrical outlet.
6. Operating Instructions
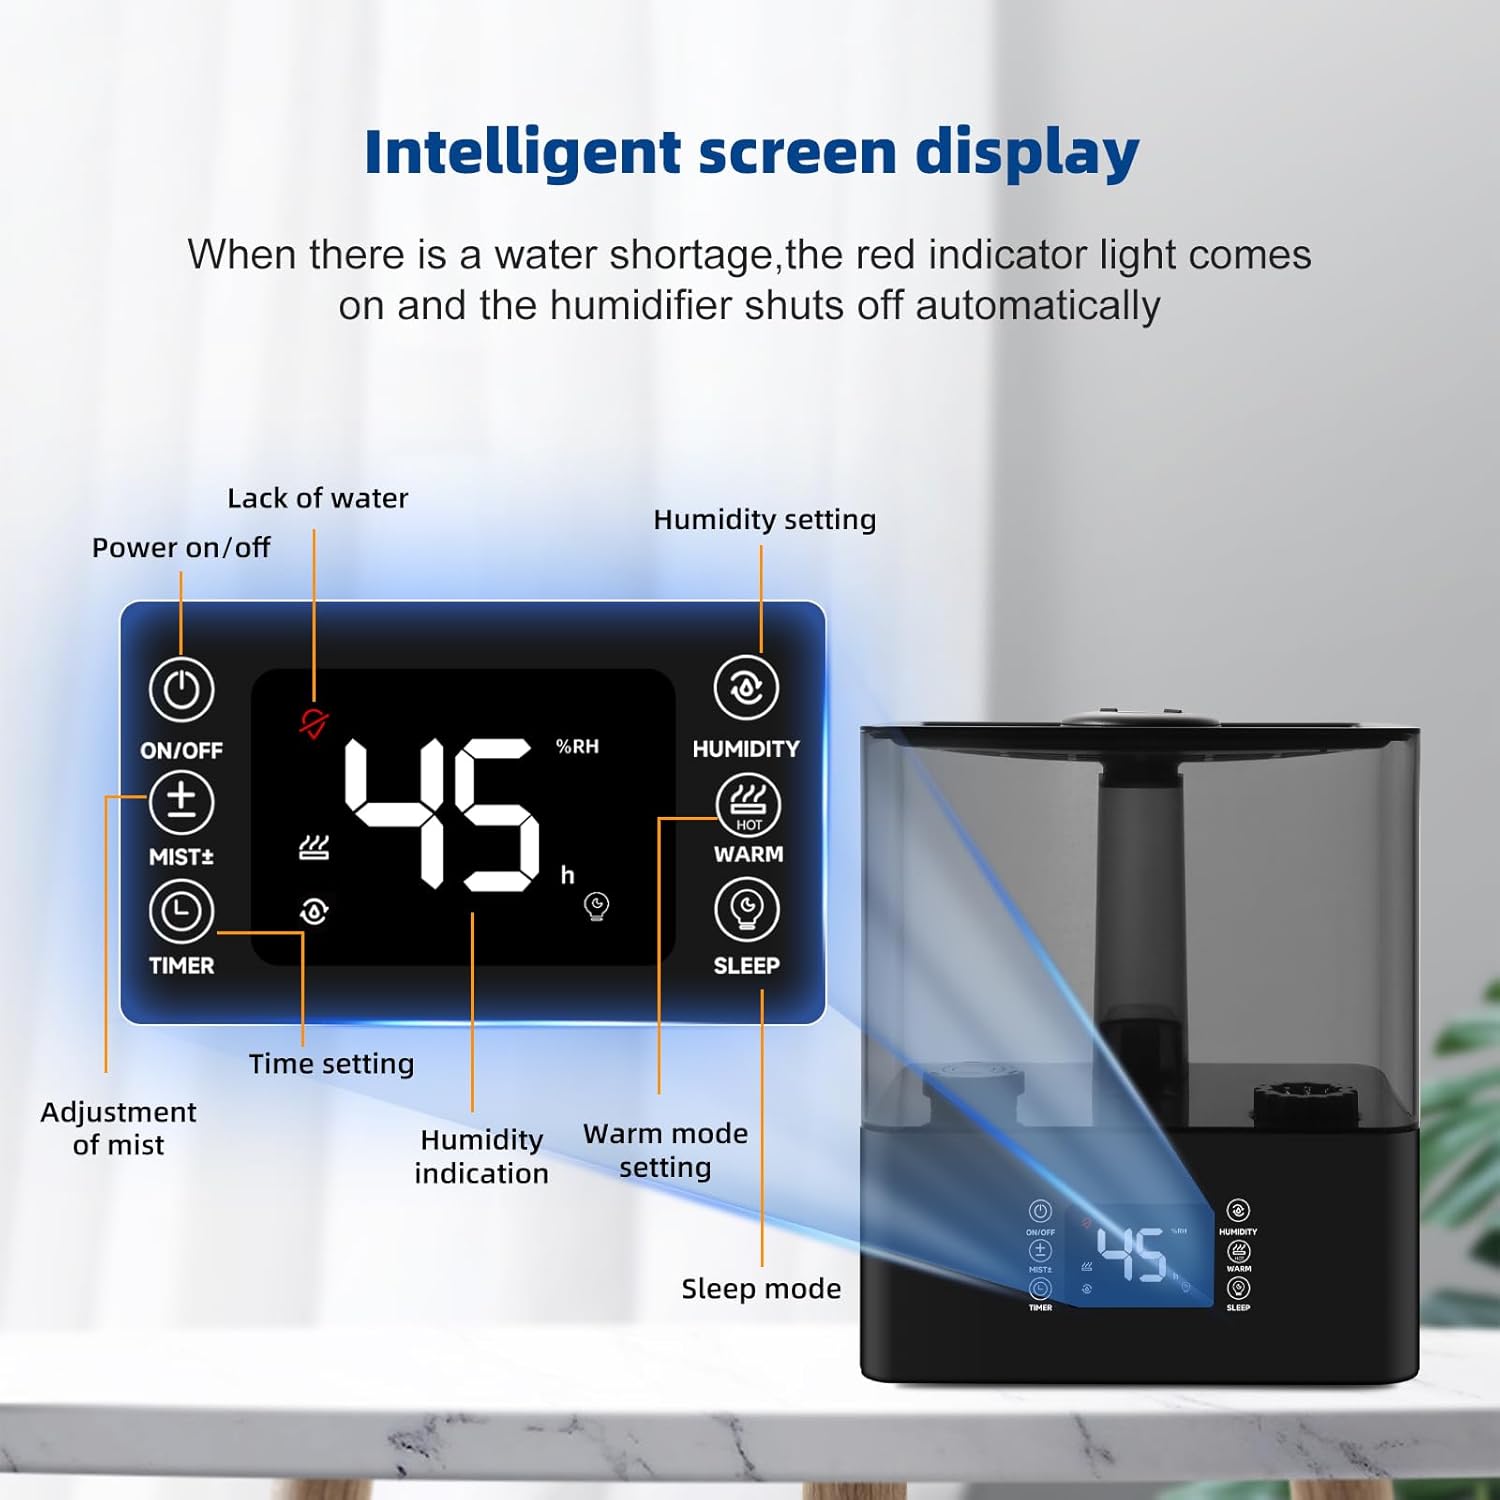
Figure 6.1: Intelligent screen display and control panel layout.
6.1 Power On/Off
- Press the Power On/Off button (⑂) to turn the humidifier on or off.
- The display will illuminate when the unit is on.
6.2 Mist Level Adjustment
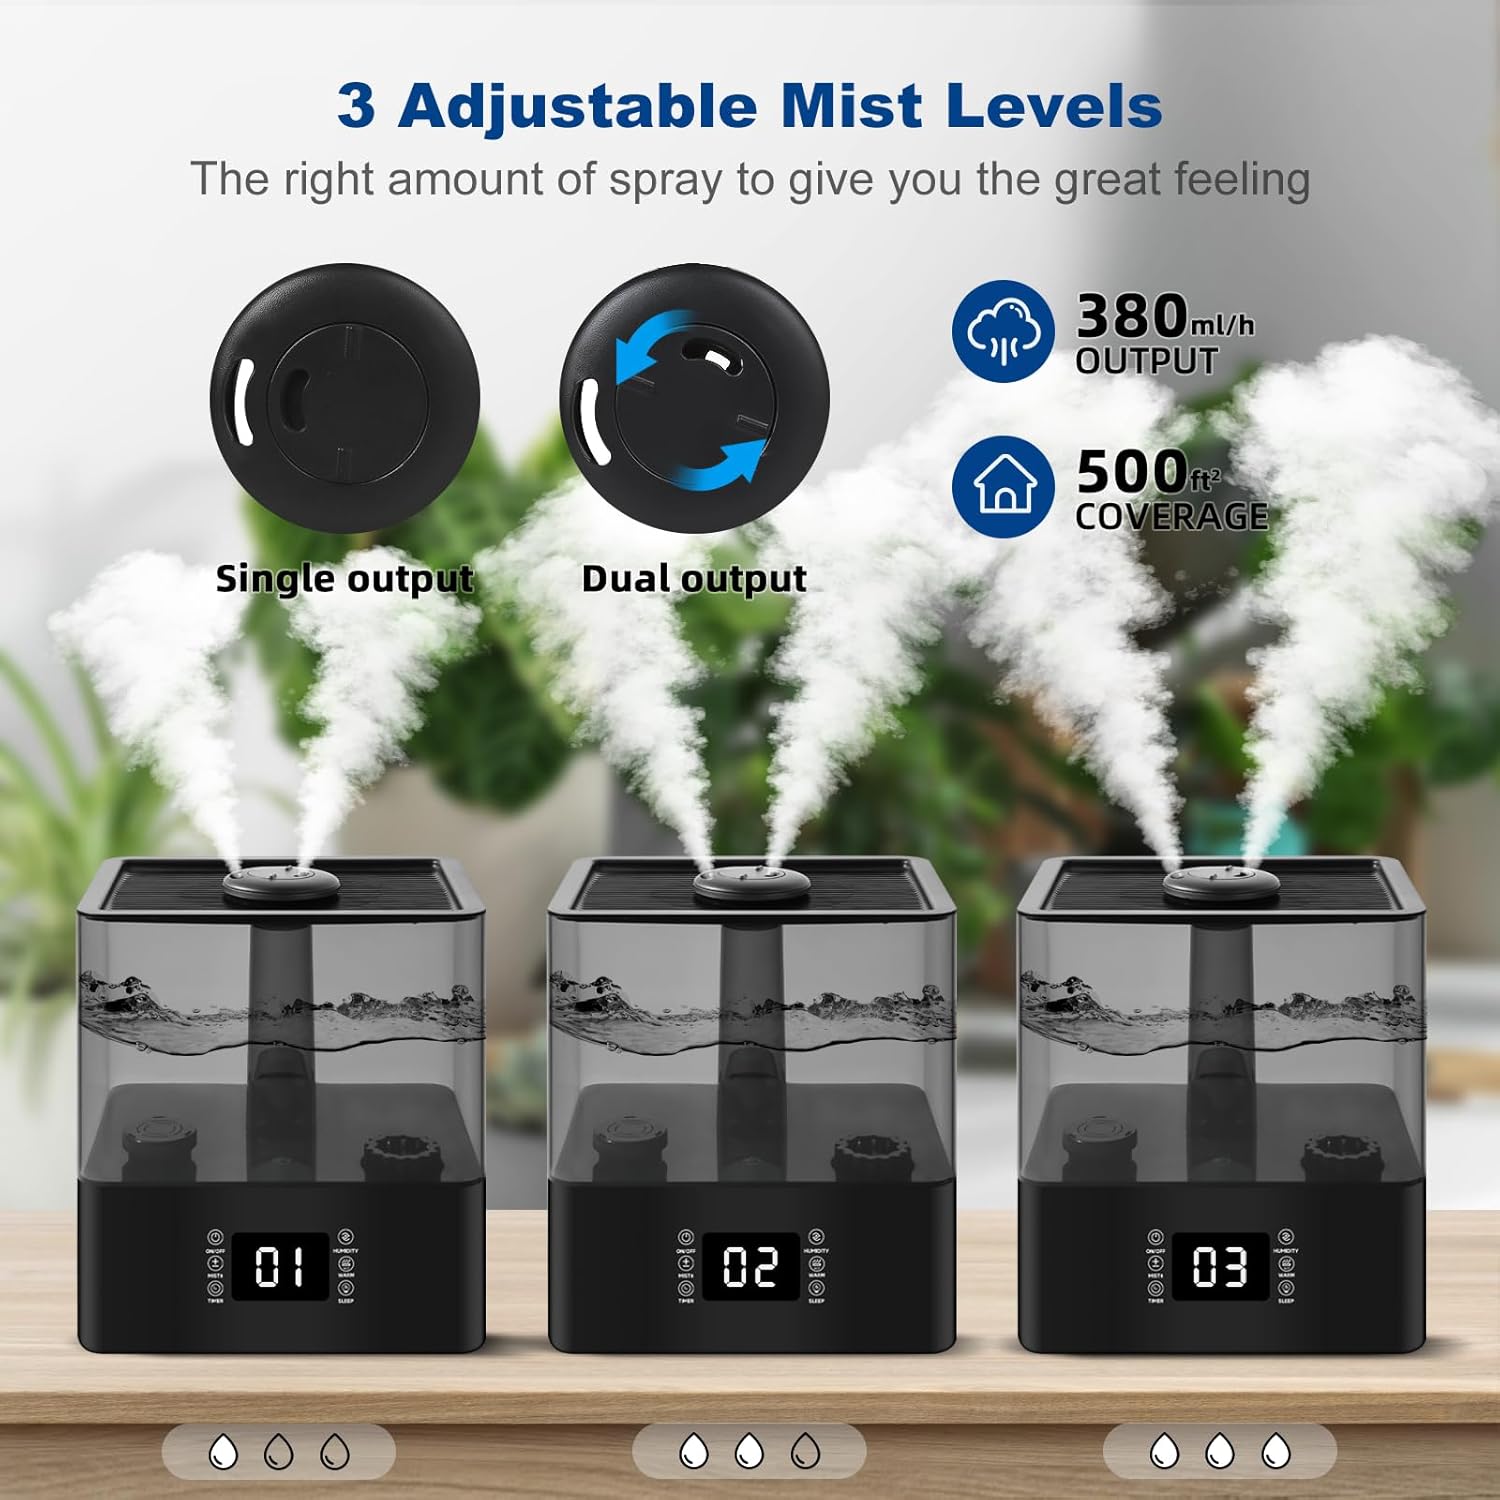
Figure 6.2: Illustration of the three adjustable mist levels, from single output to maximum output.
- Press the Mist +/- button to cycle through three mist output levels (1, 2, 3).
- Level 1 is the lowest output, and Level 3 is the highest.
- The screen will display the current mist level.
6.3 Humidity Setting
- Press the Humidity button to set your desired humidity level.
- The humidifier will automatically adjust its mist output to maintain the set humidity.
- The display shows the real-time humidity level.
6.4 Timer Function
- Press the Timer button to set an operating duration.
- The timer can be set for specific hours, after which the humidifier will automatically turn off.
6.5 Warm Mist Function
- Press the Warm button to activate the warm mist function.
- Press it again to turn off warm mist.
6.6 Sleep Mode
- Press the Sleep button to enter sleep mode.
- In sleep mode, the display lights will turn off, and the humidifier will operate at a low noise level for undisturbed sleep.
- Press any button to exit sleep mode.
6.7 Aromatherapy
- Locate the aromatherapy tray, typically a small drawer or compartment on the side or back of the base unit.
- Add a few drops of your preferred essential oil onto the aroma pad inside the tray.
- Close the tray. The mist will diffuse the aroma into the air.
- Do not add essential oils directly into the water tank.
7. Maintenance
Regular cleaning is essential for optimal performance and hygiene.
7.1 Daily Maintenance
- Unplug the humidifier before cleaning.
- Empty any remaining water from the tank and base.
- Wipe the tank and base dry with a clean cloth.
7.2 Weekly Cleaning
Figure 7.1: Illustration of the modular design, facilitating easy removal of components for cleaning.
- Unplug the humidifier.
- Remove the water tank and empty it.
- Cleaning the Water Tank: Rinse the tank with clean water. For thorough cleaning, use a soft brush or cloth with a mild detergent. Rinse thoroughly to remove all soap residue.
- Cleaning the Base Unit: Gently wipe the inside of the base with a soft cloth. Use a soft brush to wipe the nebulizer tablets gently to prevent damage to the atomization function. Do not use abrasive cleaners.
- Cleaning Filters and Water Purification Device: Refer to Figure 4.2. Remove the filters and water purification device. Rinse them under running water. For stubborn mineral deposits, soak them in a 1:1 solution of white vinegar and water for 30 minutes, then rinse thoroughly.
- Cleaning Sponge Foam: Remove the sponge foam from its compartment. Rinse it under water and gently squeeze to clean.
- Allow all parts to air dry completely before reassembling.
7.3 Storage
- Before storing, ensure the humidifier is completely clean and dry.
- Store the unit in a cool, dry place, away from direct sunlight.
8. Troubleshooting
If you encounter issues, please refer to the following common problems and solutions:
| Problem | Possible Cause | Solution |
|---|---|---|
| No mist or low mist output |
|
|
| Red indicator light is on | Lack of water | Refill the water tank. The humidifier will automatically resume operation. |
| Unusual noise |
|
|
| Water leakage |
|
|
| Odor from mist |
|
|
9. Specifications
| Feature | Detail |
|---|---|
| Brand | Deepwave |
| Model Number | BK-888-1 |
| Capacity | 6 Liters |
| Coverage Area | Up to 500 Square Feet |
| Mist Type | Cool and Warm Mist |
| Special Features | Aroma Diffuser, Auto Shut Off, Smart Humidity Control, Timer, Sleep Mode |
| Operation Mode | Automatic |
| Control Method | Touch |
| Product Dimensions | 9"D x 11"W x 7"H |
| Item Weight | 4.16 pounds |
| Color | Black |
10. Warranty and Customer Support
Deepwave is committed to providing quality products. If you experience any issues with your humidifier, please contact our customer support team for assistance.
For defective products or any questions regarding operation, maintenance, or troubleshooting not covered in this manual, please reach out to our support channels. Specific warranty details may vary; please refer to your purchase documentation or contact customer service for more information.